Leaderboard


Popular Content
Showing content with the highest reputation since 04/10/2024 in all areas
-
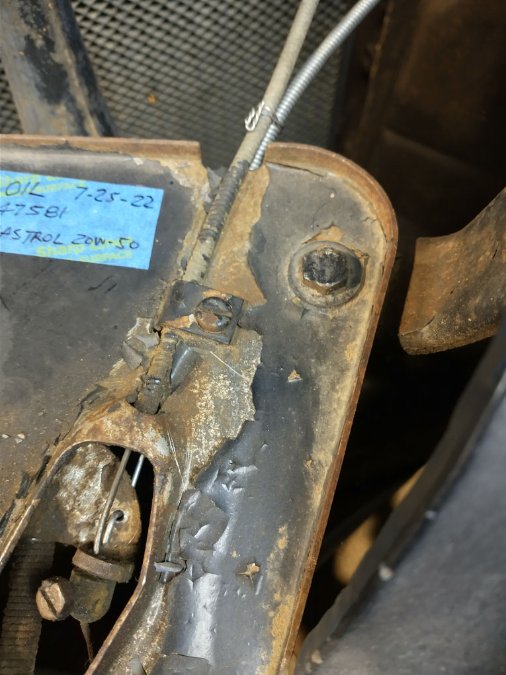
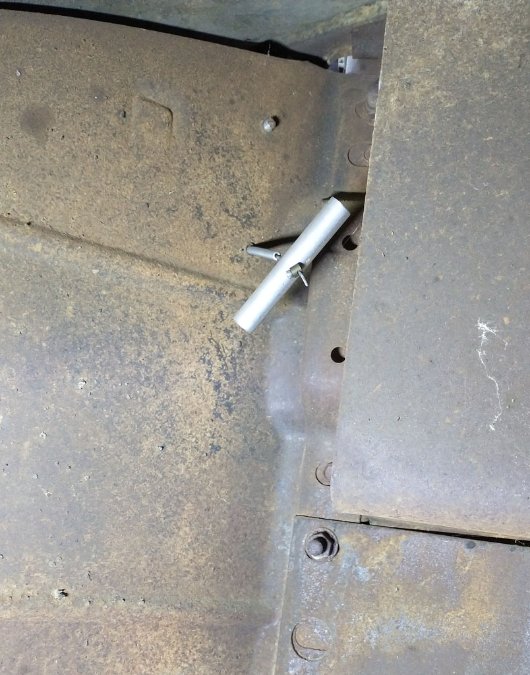
Okay, all it needed was a longer magnet with a DIY self-straightening WD-40 spray can rod. It was at the very far end of the cylinder 😱😅
 11 points
 -
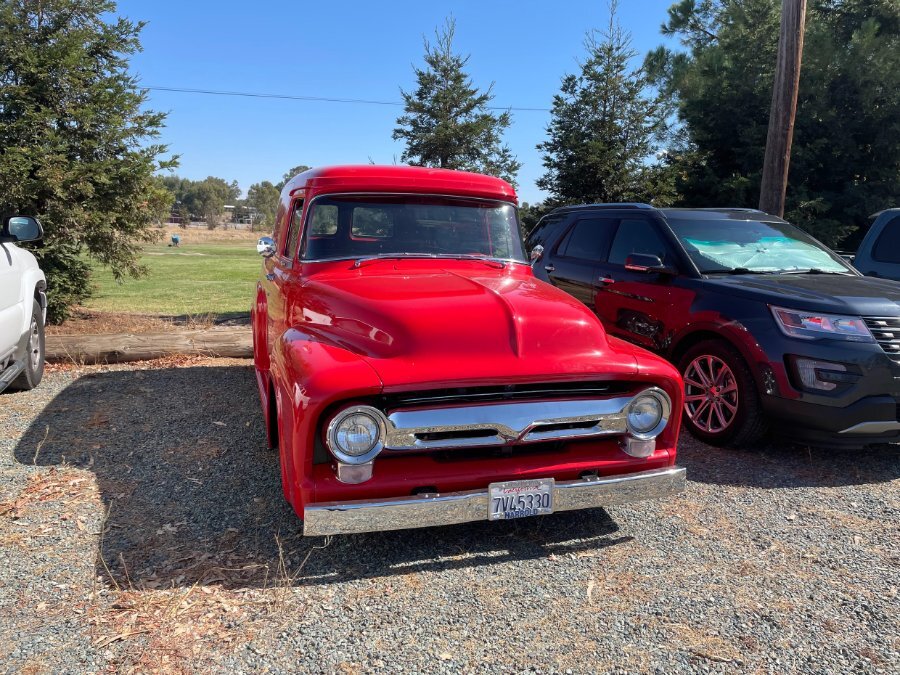
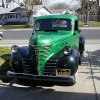
Just installed a Red Crown Gasoline light in our carport to go with the truck. I am pretty happy with the results.
 10 points
 -
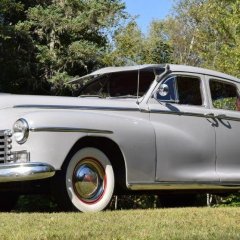
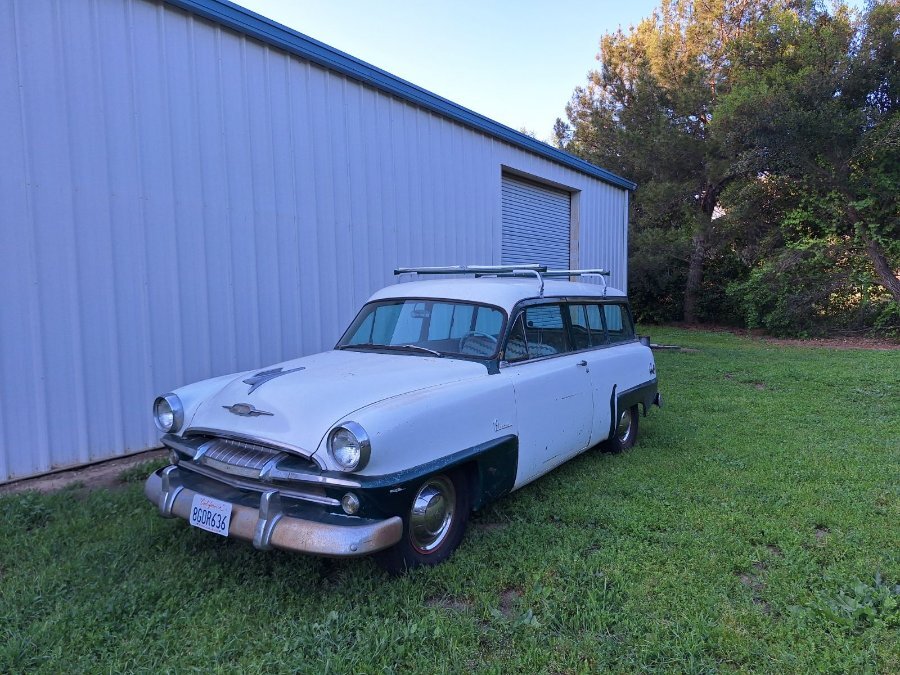
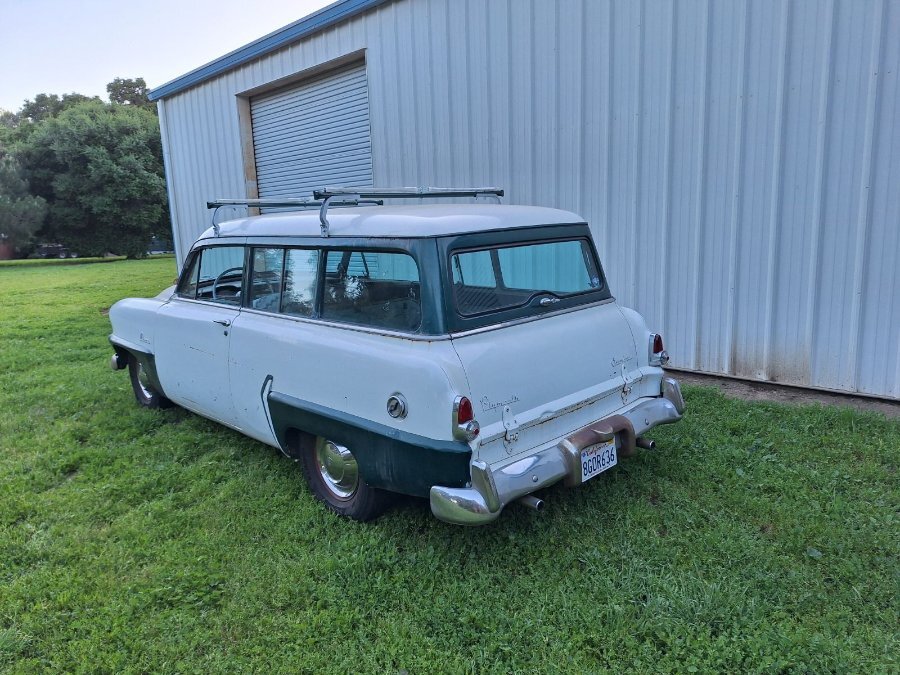
Got the wagon done and have been putting some miles on it. The wagon is a fun old ride and gets more attention than my 50.
 7 points
 -
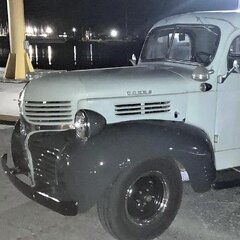
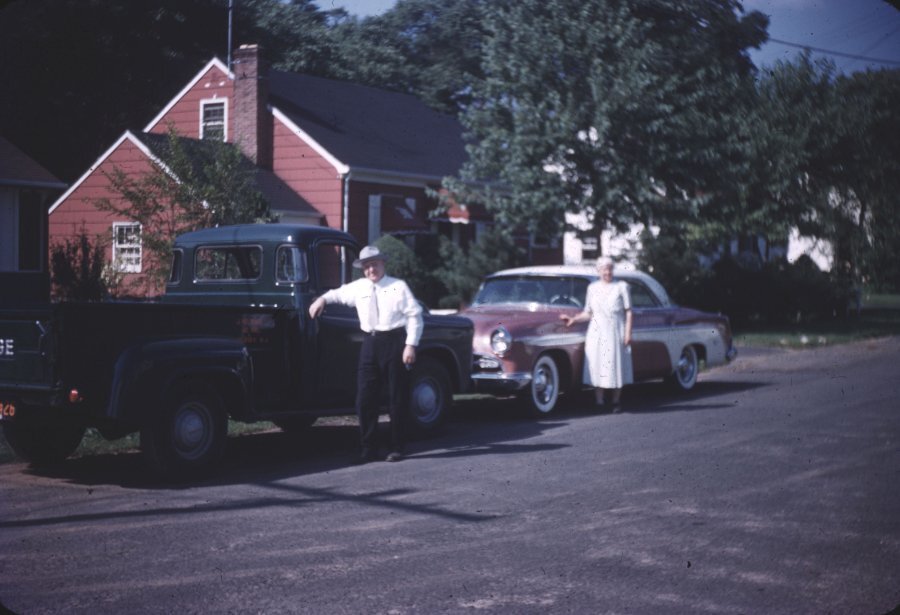
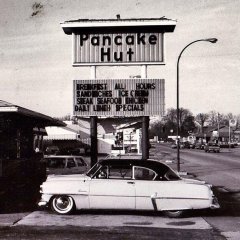
My Great Grandfather, and guessing my Great Grandmother with the '55 Dodge (I'll be inheriting this summer) and what I believe is a '55 DeSoto. The truck was my Great Grandfather's then my Uncle's, and then my Parent's, and soon to be mine. My Dad just told me that he is getting too old to work on too many toys, and he is giving it to me. It is in a little worse shape than here, but pretty much original. I'll post pictures of it's current state, in the correct area, when I get it out of the barn, but from what I recall it definitely will need a gas tank and fuel pump, amongst other things.
 6 points
 -
A legendary attribute of early Rolls-Royce Motorcars was the ability to balance a coin on the radiator whilst the engine was purring quietly. While there is neither a R-R or 5-shilling coin in this video, here is friend Jerry's 1950 Plymouth with a Canadian Loonie riding the fresh air vent, radiator and cylinder head!4 points
-
Passing along some research info. I looked at various bolts to replace the oe cylinder head bolts, all seem to use a smaller hex head. I wanted some with the stock size head 11/16, necked down like the original style. I've found an option for the cylinder head bolts that have 11/16 hex size. Original application was for an olds 350 v8. Dorman part number 675-060, sold in sets of ten per package - about $20 at Summit. Slightly longer than original, but work perfect even with a .070 milled head. Only a minor mod needed for the three bolts that go into the intake ports, grind to shorten them or use a hardened washer. Hope this is useful to others.4 points
-
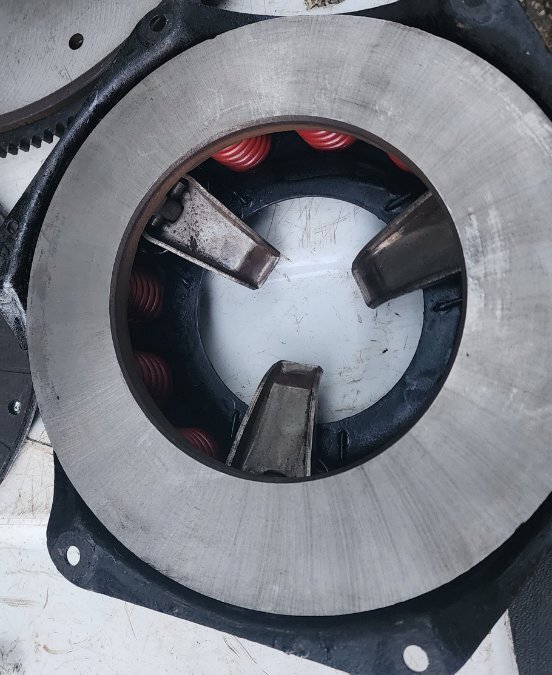
Also had them flip the flywheel starter ring.
 4 points
 -
hopefully any time I see Stick and Mud associated with house building, it will be the last names of the contractors. 👷♂️3 points
-
My love of old cars started with the Model T. I have a 27 Roadster and a few others. The Model T driving experience is not one I’d offer to just anyone however! I sold a 27 tudor to a guy and gave him the whole driving lesson. A week later I got an email describing how he pressed down on the low pedal thinking it was the brake, drove into another car then took his foot off the pedal. I am glad he didn’t send me a photo. My philosophy of old cars is we are stewards of them for the time we have with them. They can certainly out live us if we are careful with them or we can destroy them in a split second. When you consider the history of the world since your 26 was made it is remarkable that it is still here, let alone the human race. When someone goes on about how they want to put their Plymouth body on an S10 chassis, I cringe. That ole Plymouth could live on for decades and still be a nice car. Once someone “modernizes” it, it has taken a big step to the scrap yard. Consider the car magazines of the 1950s. Where are all those “Customized” cars that graced the magazine covers now? Survivor cars got that way because of the stewardship of a chain of owners. In some cases it was just benign neglect that contributed. Cherish your old car and it may out live you!3 points
-
It's amazing what Rustoleum paint can look like when sprayed with hardener and urethane clear to give the UV protection
 3 points
 -
I've used Rustoleum and Tractor Supply's implement paint for rust "proofing" on many projects over the years. No paint will kill rust that isn't addressed but it can inhibit surface corrosion on clean surfaces. Two VW Beetle floor pans (inside and out) and running gear received the Rustoleum satin and gloss finishes and both have held up well for over twenty years. I usually use a brush because the paint can be applied thicker and the cost and mess is much less than spray cans. I've also bought quarts, thinned with mineral spirits and shot it with a spray gun when that was the best option.3 points
-
I have an admittedly tight focus on the KT Keller cars, so that's what I research and play with. It's all about having fun after all and those are the ones I like. I am a huge fan of Overdrive transmissions because they don't really change the charm of the cars and actually add to it. When you put one in your car your speedo will be off at all speeds because the speedometer pinion gear was selected for a 4.1 ring and pinion. The good news is you can swap out the pinion from your old three speed to the O.D. and all will be back to normal ( assuming your speedometer doesn't need service ). But what if you changed the rear end ratio or the tire size? I don't advocate changing rear axles because I don't see much to be gained there. You can easily change the differential carrier ( aka 3rd member ) in a Plymouth if you want another ratio. Where I live there's lots of open road with highway speeds of 55 to 70 so optional ratios, tires and O.D. go well with my Plymouth. My P17 Coupe came with 6.40-15 tires ( modern equivalent 195/75/15 ) and a 3.73 final drive ratio so the speedometer pinion would be a 17 tooth gear ( p/n 652-848 ) for an example. Chrysler designed the pinions to use the same 6 tooth gear on the output shaft so you only need to change one gear to correct the speedometer. One thing you find out right away is selecting speedo gears is not an exact science. You can get close and you might hit it right on the button but you more likely will be over or under by 2 or 3 mph. That's why the Highway Patrol has an enforcement tolerance. So let's look at tires first 6.40 15 = 195/75/15 standard tire for a P17 6.70 15 = 205/75/15 standard tire for a P18 7.60 15 = 225/75/15 an optional size tire Final drive ratios 3.90 very common on long wheelbase cars 3.73 standard ratio on many optional on all 3.54 optional Chart of ratios & tires vs speedometer pinions 3.90 6.70 15 17 tooth pinion 3.73 6.40 15 17 tooth pinion 3.73 6.70 15 16 tooth pinion 3.54 6.70 15 16 tooth pinion All 7.60 15 16 tooth pinion So you can see you're not going to get an exact reading but you can get close enough to avoid a ticket. The part number for the 16 tooth pinion is 652-846. I have found that if you have the number for an obscure part the parts house will look to find it in their inventory but they are likely to blow you off if you just say "I need a 16 tooth speedometer gear." Happy hunting!3 points
-
Yup, between 65 and 70. When I had earplugs in, I tended to go faster, haha....3 points
-
Thanks sniper and DJK for digging up info. And here's my two cents about electric pumps. First off, I love 'em! And here's why: When one of my vehicles has been sitting for a long time, I don't have to waste precious battery capacity cranking the motor to get fuel up to and in the carb. I also put a electric switch in the supply line to the pump so that, in Autumn when I'm putting cars to sleep, I can turn off the switch and keep running the motor until it dies. This does a good job of draining the carb, reducing varnish build-up. Yes, I could use a gas additive (and I often do), but with lots of cars and equipment, and full gas tanks in each, that's lots of Stabil! And, in regards to leaving the mechanical pump in the line, I've done that numerous times, but one thing to consider is this: if you do that and the rubber diaphram of the mechanical pump fails, you'll get raw gas going into your crankcase and diluting your oil... and not know it!3 points
-
It's clear that the authors of that article know doodlysquat. Chrysler was building Hemis for the war effort, long before Duntov made his setup. I present to you the Chrysler IV-2220 https://en.wikipedia.org/wiki/Chrysler_IV-22202 points
-
ROAD TRIP: You've been on quite the tour of northern TX in search of Dodge trucks... !2 points
-
A beautiful example of a Special Deluxe! You notice the only reason the coin fell over was the torque of the engine when it was revved up.2 points
-
In my mad mind there is only one way to operate an Overdrive, that is as the factory intended. The thing is called Automatic Overdrive for a reason. It works so well without drama when installed properly I just don't understand why anyone would jury rig one, except ignorance of how to wire one properly. I've never stopped looking for easier cheaper cleaner ways to do it right. Throttle switches are way over priced from suppliers who think they have you over a barrel. At $125 I think that is obscene. I found a seller on eBay who had hundreds of military surplus bus door switches that do exactly the same thing as the reproductions and even looks the same for $6.50 ( I bought 10 for gifts to friends ) The reproductions are really floor switches for Ford products anyway. The MoPar switch is smaller and fits on the carburetor. Those can be had from the Studebaker guys for around $35 but you need to make a simple bracket and rig a lever on the carburetor throttle ( or find an Overdrive ready carburetor ). My latest and greatest find is a small switch with a pull cable from a Nash/AMC for $21. I really like this one as it is so clean and simple. Since you connect it to the lever that comes from the foot pedal its action is really smooth and effortless. You can change carburetors and manifolds without re-engineering how you trigger the switch. Then there's the relay, another obscenely priced item at $125. If you have changed to 12 volts one of the little Bosch style cube relays will work nicely for about $2.50. I like my 6 volt cars and found the same thing made in Germany for 6 volt for $18, but I am told the 12 volt version will work with 6 volts if you get the high amp version. The last thing is how to wire it. If you have a shop manual there's a description which also has the color the wires should be in there. Seems to me the only valid reason for not having a shop manual is illiteracy ( trust me I am not joking on this. Literacy is still a major problem especially in auto repair ) I have found that sometimes the Plymouth manual is short on an explanation and photos so I have all the MoPar manuals for the era of my Plymouth. But then I love shop manuals. I am the person your Mom told you about who reads technical manuals for entertainment. lol Anyway that's my two cents. If it works as intended you are not dependent on "Driver technique" and you can let anyone drive your car ( but why would you let anyone drive your car? )2 points
-
Some history on the oilite bearing developed by Chrysler and Carl Breer the designer of the airflow: Below id the correct way to install a pilot bushing in our old MoPar's. There isa a special tool used to install and to burnish the bearing. Note that it aso states not to ream the bearing. I have this tool and several of my Mopar friends have use the tool. You can sometimes fined this tool on Ebay. Another great engineering product from the Chrylser Motor Division and everyone thinks GM/FORD are the best, Think again you FURD and Chebby owners. Rich Hartung Desoto1939@aol.com


 2 points
 -
Really nice truck! I dunno, I think a good soaking with PB Blaster will free her up!2 points
-
I've been round and round on this topic, not that I think Plymouth brakes are bad or inadequate. They work when in good repair. I don't believe in scrapping what the car came with just to be modern. In my years of experience I know that disc brakes CAN be better but seldom are. I have gone to the trouble of swapping the Plymouth 10 inch drum brakes for Chrysler Windsor 12 inch brakes. This is something I've seen several old timers do and I find it appealing as the car is still all MoPar and period correct. The idea being that I want a car that a dealer mechanic of the time would have built for himself using the best of the MoPar parts bins. An article in the Cascade Pacific Plymouth Club April 2024 news letter caught my eye headlined, "Consider brake booster instead of disk conversion?" by Robin Will. "A young man just across the aisle from us at Portland Swap Meet told me something I didn't know and its worth passing on. He was selling add-on brake booster units. He said that drum brakes themselves are not usually problematic in old cars; the problem was more often with the pressure that could be delivered to them with original equipment hydraulics. Getting a booster on the system can bring old brakes up to current standards without the expense of a disc brake conversion for folks who love to drive their cars every day." What was not mentioned in the article that I know from my experience is that bigger brakes do not lower the pedal pressure required to stop a car. In fact disc brakes don't stop any better than drums because to reach their full potential they require a brake booster. I know I'll get some heat on that statement but I have examples of cars that evolved over time and had drum brakes one year, front disc brakes another year and finally disc brakes with a booster later on. The boosted brakes certainly were better, while the front disc only brakes weren't noticeably better. Bigger drum brakes will have better heat rejection capability and thus less fade. Great for mountain driving or towing or racing but not a dramatic improvement every day. To reach their full potential they need to be boosted as well. Back to what would a period dealer mechanic have on his car? Well Chrysler used a "Remote" Brake Booster on some models. The brakes were all the same except they added this remote booster. The first time I saw such a thing was on a 1968 Volvo P1800 which had one for each brake circuit. I can tell you that car had brakes that worked very nicely indeed. Finding a vintage Chrysler remote brake booster might be an expensive challenge ( not saying it would be impossible but... ) However the aftermarket has substitutes remarkably CHEAP. When you google "Remote Brake Booster" they pop up all over the page for as low as $65 from Walmart of all places! They are imported of course for that price ( China perhaps ) Units that swap out the original master cylinder for an integrated booster/master cylinder are like $500 to $1,100 and I can't imagine they provide as much bang for the buck ( Perhaps "Bang" is not the right word to use when talking about brakes. lol ) If you dive deeper into the suggested usage for these devices they seem to work for similar weight cars like a Plymouth. Since they are small they will fit in the same place as the old Chrysler booster on the left frame rail behind the master cylinder. So there's an idea for discussion.2 points
-
Oilite is a sintered bronze material that is self lubricating. Chrysler has used to for 70+ years, I'd pass on the steel one. You can punch in the mopar part number, 53298, into NAPA's website and they sell the bushing for under $5. Autozone wants $25, pass, lol. Dorman Bearing 690-005 works too2 points
-
Here is something you might consider. Having the cable break and not being able to release the hood latch would be a major irritation. I applied the same remedy I put on my TR6 which has hinges on the leading edge of the hood. If that cable breaks you really have a problem! I added a second cable for emergency release and it has a handle in the left front fender well. I can reach up in the fender and release the latch with little effort.
 2 points
 -
Try polerizing the generator first . It is easy and fast and costs nothing .2 points
-
Might be the voltage regulator. Simple test, start the car and use the hand throrrle to up idle to 800 or so. Use a jumper wire to ground the field terminal. The field terminal is the smaller diameter generator terminals. The ammeter should peg to full charge. If it does the generator is working, and the fault is in the regulator and or it's wiring. If the regulator cover will come off, remove the cover and clean all these points. Retest. If still no charge, check the regulator wires and connections.2 points
-
I would purchase the spare carb for that price and then have a machine shop pull the old brass rod and then install a new rod and then have a spare throttle body. $20 is cheap for a carb and then youcan play with th eold carb and get some education on how it all works. Just my $20 worth of input. Rich hartung Desoto1939@aol.com2 points
-
A little temperature increase when you stop is normal. At idle there is less coolant circulating and less air flow because the fan is spinning slower. This causes a bit of heat soak and your temp gauge will go up some. It should stabilize and go down again once you have more RPM and air flow.2 points
-
I have improved my valve set when using the cold method. Yet I prefer the hot method. A gauntlet glove on one hand/forearm is helpful to prevent burns. I shut off the hot engine. Make my adjustments. Then run it and test. I like the positive feedback when a running engine pulls the feeler gauge in, just right. Then I know its right and brings a smile. The wheel and inner fender window removal is great. After a good hot valve set, I come out from the car with a black sheen. Looking like I’ve been in an underground coal mine. Good times. I do enjoy a good hot flathead valve set. It’s rewarding and takes me back to 1950. Romanticizing a valve set…What have I become? Lol.2 points
-
I had my bumper off completely and cleaned and painted the brackets and I do not recall the well being in the way to the point I could not do the task. The well does not just slip out of the trunk pan. Welded in place....2 points
-
My son was able to assist today, so with further assistance from a U-Haul trailer and my tractor to do the pushing and pulling, we got it loaded and hauled to the house. Of course, I took an awkward fall on my back, hurt like hell, so my son did everything but run the tractor.
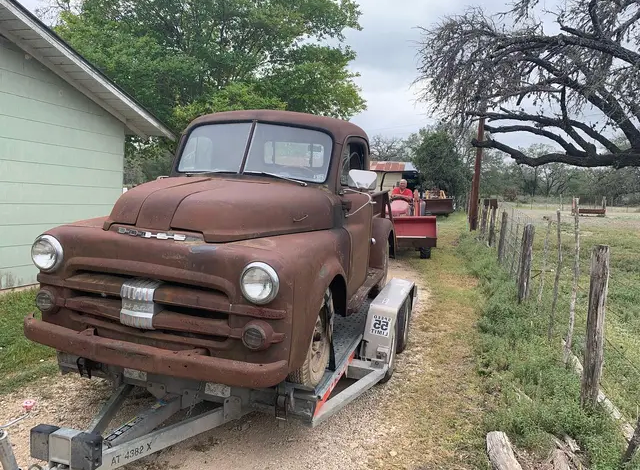 2 points
 -
Two hours after arriving from the shelter.
 2 points
 -
Could it be exhaust heat riser flapping around? Wire it in open (rotated fully clock wise) and wire it there temporarily. Might also be the flapper shaft leaking. Remember if you decide to remove the manifold assembly, there are 13 fasteners holding it together. When reinstalling, leave the four bolts holding the manifolds together just snugged. They can then get a final tighten when finished tightening the 13 manifold nuts. Another consideration when putting the manifolds on, tighten the fasteners in a spiral pattern starting in the middle and working outward to the ends. Do not over tighten. Snug them then add quarter turn, start and run the engine to operating temp. When it has coold enough to work on, snug and quarter again from the center out. Then check the 4 on the heat riser. These assemblies heat and cool at different rates, they need to be able to move as they do so. Over tightening prevents this and leads to cracking. Remember the magic number is 13 plus 4(heat riser) When I did mine, I took an old Taiwan box end wrench took out a section of the box like a tubing wrench, and ground it thinner to make it easier to get the nuts that are partially obscured behind the exhaust casting. Good luck.2 points
-
I speculate that pre ww2 bolts were more likely to be cut but with the advancements in the military equipment, i.e. planes, etc, stronger threaded fasteners were needed. Just a thought. dan...2 points
-
The dimmer switch might have corrosion on the contact points. Press the dimmer switch several times to clean the contacts. Check the fuse for the light switch might be blown. Go to the headlight junction block and use a test lamp to see if you have current flowing to the connection block. If you have power to this section then your lights might be toast. Pull a headlight bulb disconnect the wire connecter then test with a 6 volt battery charger to see if they light up. If they light up then check each connecter at the base of the bulb to see if you have current flowing to the socket. Also could be a grounding issue or maybe the bulbs are bad. Just basic diagnostic procedures. Rich hartung desoto1939@aol.com2 points
-
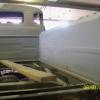
The filter is far from the headers. The pipe that it is close to is an intake runner, and when the engine is running those runners stay very cold. That's why I built it like that. Cold air is denser and allows more power to be made. The long runners introduce a ram effect on the intake charge and produce more power. This was a question about installing the windshield and rear window.2 points
-
I like aluminum paint, it dries without any buildup. Check the inside of the tires for any tags, that could eventually rub a pin hole in the tube. I wiped the inside of the tires and the tubes with corn starch with a cloth. It doesn’t need a lot. I paint the bead of tire with rubber lube, so the bead slides easily on the wheel as it sets, you can put the lube on the wheel seat to ensure a soft seating of the bead. The flap doesn’t need any lube. Set the opening of the lock ring opposite the valve stem. I have a special hammer/mallet with a duck bill on the other side. I use the rubber part to tap the lock ring into place as I fill the tire slowly by adjusting the pressure on my regulator. This assumes that your rings are clean and no cracks, they have been painted and the notch in the wheel where they lock is perfectly clean. I’ve trashed wheels and rings that had been beaten with metal hammers. The lock ring ends should be almost touching when done correctly. Any questions, ask, it is a risky job even if you’ve done it before. These are 16” wheels, but the same design as the 20” wheels that I have. Once the bead is set and the lock ring is secured properly, I let the air out and refill with the valve core installed to eliminate any tube wrinkles. After you get it to pressure, you can bend the valve stem for access when the wheels are on the truck. If there is anything you don’t understand, ask. Rick D.

 2 points
 -
preformed and then curve and bent to fit a box for shipping, you better off making your own tailor fit set.......2 points
-
By turning the ignition on and then off you did the same thing the points do when opening and closing, letting the coil fire a plug, and if a gas mixture is in that cylinder when it fires it'll rock the engine. That's my guess.2 points
-
Likely not a "factory" accesory, more likely a mass produced catalog or dealer option, these aren't listed in the Accesories section of the manuals.2 points
-
Just use a torch to get the plug red hot....that oughta bust the rust loose................. 😲 🤣2 points
-
Mark does an excellent job explaining the inner working of the doors. Check it out. 1941 Plymouth Restoration (#13) The other videos in his series are also very well done. You can tell he was an educator.2 points
-
you may be onto something Sniper, I am going to say a rolling wheel gathers no red paint.....2 points
-
I use the in my opinion a lot because most of my unsolicited comments are just that, an opinion and in no manner saying good bad or indifferent....but just as I see it. The fact I will then state the whys and wherefores of my opinion is to say that it is not just a whim or silly notion and give some background, color and size ratio etc...technically I could care less one way or the other what anyone chooses to do as it is not my car no more than if a person likes or dislikes what I do with mine. Big hobby folks, I will admit at one time it would rankle me see what some folks may do...but hard lesson to learn is JUST NOT MY BUSINESS....the red wheels, there is NO WAIVER here......lol2 points
-
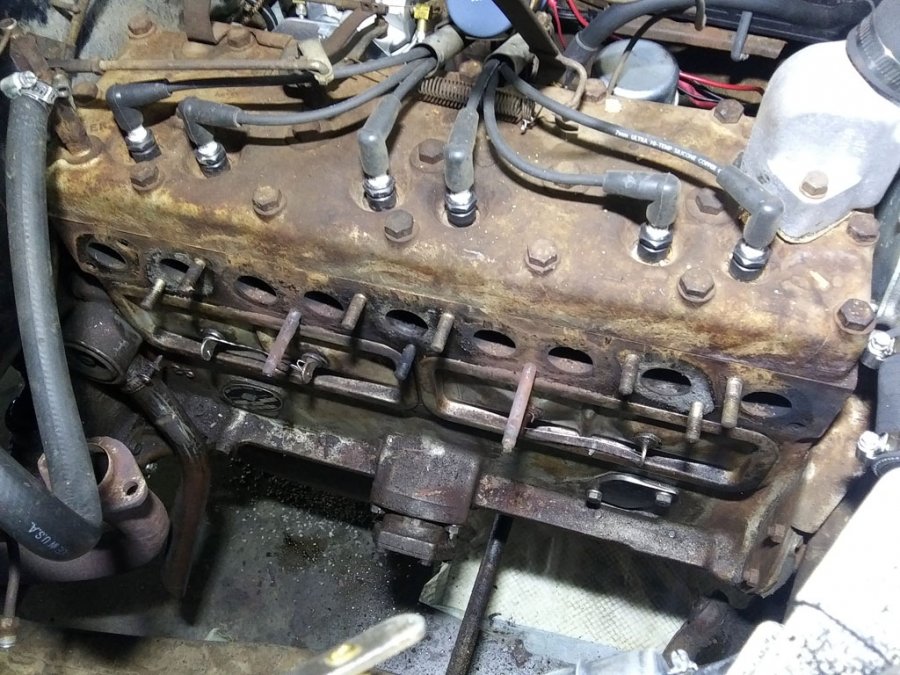
•pinched tube on intake manifold appears to be the vacuum source for the vacuum windshield wiper motor •intake manifold appears to have a partial PCV setup •spark plug wires appear a little on the long side...universal sets with 90° boots can be sourced2 points
-
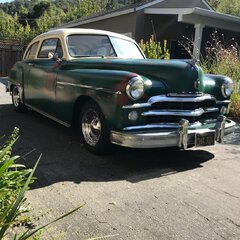
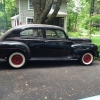
Rmon...........Can I throw a curved ball into the ring...........lol............in 1973 I installed a 318 Poly V8 in my 1940 Oz Dodge.............at the time there were no instructions available nor did I have much in the way of outside help but I could weld and use a tape measure so I had a go.........I was 19 and basically did a few things more than once but I still have the car & its Poly V8.........now you have a 1954 Plymouth.......did you know that in 1957 Chrysler here in Australia introduced what they called a Chrysler Royal..........it was based on the 1953/54 Plymouth body and chassis with 1955/56 front & rear fenders attached.............the interesting thing that you need to be aware of is that the Chrysler Royal for the 6 yrs of its use in Australia from 1957 to 1962 had a 313( essentially the same as the 318) Poly V8 which is basically the same block as the 1966 onwards 318/340 & 360 V8's that mopar used and in fact these later engines are in fact not as wide nor as heavy as the earlier 313/318 poly and also use a much lighter transmission............your best bet would be to get as late an LA series Mopar V8 & trans that you can, also a later rear axle from either a mopar or something else that fits & a disc brake conversion for the front and have at it ..........I've attached 3 pics of the Oz Chrysler Royals showing that 1953/54 Body shell....each in these cars was available with a 313(318) Poly V8 and cast Iron Torqueflite push button trans.......also a couple of pics of my 1940 Dodge 4dr Sedan & the 313/318 Poly V8 thats lived there for 51yrs now........regards from Australia.......Andy Douglas

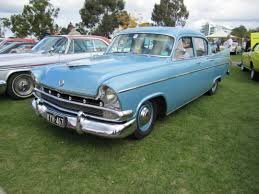


.jpg.2ad4c606e3fa10cf0f255b4a0154bfb9.jpg) 2 points
2 points -
The decline of the Champion Spark Plug and the death of a company. The Champion electrode was made from mainly tungsten powder at a company called Fansteel in North Chicago. They mixed, pressed, sintered, burnished and then brazed it to the copper sparkplug core before shipping them out to Champion for assembly. The company also made many other items like the Lynx golf club casting, High end tungsten darts (Black Widows & Diamond Backs) as well as supporting WW1 & WW2 military needs, they downsized in the late 80s and were dismantled early in the 90s along with VR Wesson a sister company that made carbide cutting tools. Fansteel Inc.docx2 points
-
Second that thought. Never saw a plug blow apart on a flathead till I had three Champion plugs do it over two days. Switched to AC and never had another issue, same with the NGK which I also use in all my small engines, ATVs and motorcycle.2 points
-
I looked at the license plate mount this afternoon, and tried to get the old plate off to be able to get a decent picture. It isn't quite as I remembered. The center (vertical) bracket hooks under the bumper, and the center bumper bolt passes through it, securing it to the bumper. Then there is a horizontal c channel bracket fixed to it (welded?), with long slots, to accommodate various mounting points for the different shapes of license tags used during that era. This is the best I could do, as the tag mounting bolts are rusted fast, and just turn on the back side. (I could have broken the tag off, but didn't want to ruin such a perfect license plate.... )
 2 points
 -
I don't know the specific number but the carb on my '48 P15 is perfectly happy with the pump with no need for a regulator or return line. The Carter pump is the full-time pump on my car, here is the mechanical pump: 😁
 2 points
 -
Ach, I'll admit I'm the a-hole driver...in many other drivers' eyes. Speed limit, turn signals, obey traffic laws, "usually courteous" (nobody's perfect), etc. But I don't do it out of a sense of virtue, it's more like...spite! I know it annoys the heck out of bad drivers to no end.2 points


.thumb.jpeg.28cb36506a6b17cd30e7d4a22504384d.jpeg)