Veemoney
-
Posts
458 -
Joined
-
Last visited
-
Days Won
2
Recent Profile Visitors
2,775 profile views


-
How can I identify which engine is in my truck?
Veemoney replied to b923's topic in Mopar Flathead Truck Forum
Poly engine 1955 or newer since it has the water jacket in the front of each head. Locate the engine number stamped on the block as PA said it should be on the block rail in front of the oil fill tube. I attached a link to help once you have the numbers. EarlyHemi and related Poly Engine ID codes – Quality Engineered Components -
Last year redid the wood bed of my truck. Some of the carriage bolts and nuts I was able to reuse by just a quick brush and repainted them (the heads only) with the POR15 Black Glossy Paint. I used it on my bed strips as well and all these parts were steel. I looked online for hardware, E-bay, Ace, Grainger to name a few after taking inventory on what I needed that was not salvageable for hardware. I found the best prices for what I needed at Menards online. Based on prices everywhere I decided to go with hot zinc dipped hardware and added the sizes for carriage bolts, washers and nuts to my online cart. Menards will pull your order and have it waiting for you at the pick-up counter but they charge extra for that, so I printed my online cart list and went down and grabbed them myself.
-
The decline of the Champion Spark Plug and the death of a company. The Champion electrode was made from mainly tungsten powder at a company called Fansteel in North Chicago. They mixed, pressed, sintered, burnished and then brazed it to the copper sparkplug core before shipping them out to Champion for assembly. The company also made many other items like the Lynx golf club casting, High end tungsten darts (Black Widows & Diamond Backs) as well as supporting WW1 & WW2 military needs, they downsized in the late 80s and were dismantled early in the 90s along with VR Wesson a sister company that made carbide cutting tools. Fansteel Inc.docx
-
1954 Plymouth Belvedere engine and transmission swap help
Veemoney replied to rmon746's topic in P15-D24 Forum
Rmon, Welcome to the site. Sometimes you will get information directly answering your question and sometimes fodder ( I'm guilty of both) but stay and learn. I have not swapped out an L-head motor for any other type motor but I did use the search function on this site to pull up topics for you using the phrase " Engine Swaps" in the advanced search function on the site and came up with what should be some good reading and information regarding your question using the link here Showing results for '"engine swap"' in topics. - P15-D24.com and Pilot-house.com. Here is a file to using the search feature on this site. How I Search PD15-24 (1).pdf -
Looks nice, amazing how much a bit of prep and paint can make in overall appearance.
-
Hello all, I’ll be adding a 47 WD21 to the forum
Veemoney replied to Eric WD21's topic in Mopar Flathead Truck Forum
That does look nice. -
ANSWERED Getting the truck ready to drag home
Veemoney replied to Bobacuda's topic in Mopar Flathead Truck Forum
Below is a Pic showing the starting position and the adjustment arrows for moving the pads out and concentric. You want to go opposite of the directions the arrows show to loosen the pads. Don't pay attention to the straight arrows on the anchor bolts just the clockwise and counter-clockwise arrows. Hope this helps it is also located with many other tech docs on this site under the download tab.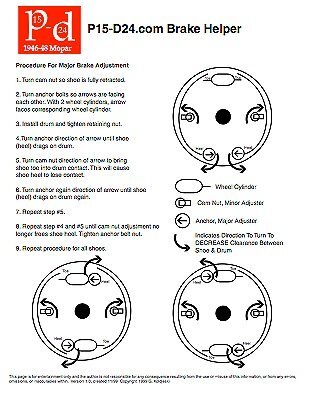
-
All true and even in the mid 50s when cars switched to 12v we still were seeing the jump-starting masses well into the 70s on frigid mornings. Cars didn't have idiot lights back in the 50s like they do now. Also had just a few folks that subscribed to the failure mode then fix it mentality (I'll call this FM) and just say for some idiot lights don't help. I believe the following were key developments that improved reliability and reduced frigid start issue Failure Modes: Electronic ignitions reduced point maintenance (FM= Improper point gap) and provided hotter sparks (FM= fouled plugs). Fuel injection optimized mixture settings for current conditions (FM= Improper choke setting for cold starting). On board computers sense and adjust all systems for starting, (FM= Flooding/lean fuel mixture, Running down battery due to incorrect settings during starting attempt). 6V and 12V batteries both had the same issue before sealed batteries came out. (FM= clean connections, correct size cable and properly filled) They say 12v was chosen in the mid 50s to support the larger higher compression engines like the hemi motors in 1955 and moving forward. My thought is the reduction in copper wiring size required for 12v cars reduced costs and was a driving factor in the decision to move to 12v. To Sniper's point once Detroit made the choice and moved to 12v, technology followed 12v and left 6v in the dark ages of the 50s. Ken's deduction for what he seen back in the 50s as cars not being as reliable is true but maybe not so much the fault of the 6v system but I would push some blame to human performance since after the switch to 12v the same issues were present in the later part of the 50s forward until the technology to eliminate the failure modes above provided noticeable improvements. If Detroit had stuck with 6v and the same technology advances were made cars would surely have become more reliable with 6v but heavier with copper and more expensive. In 2023 Tesla started deliveries of their Cybertruck that uses a 48-volt electrical system, reducing 70% of the wiring in the vehicle. For those in need NAPA sells a 975cca 6v wet acid battery for $150 which should be enough to start a big V8 or any L6. Standard width and height just a bit longer case. Just my rambling on a rainy day
-
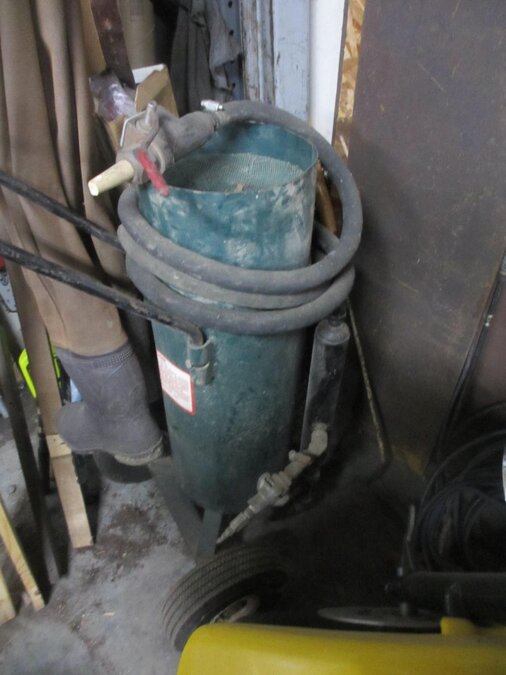
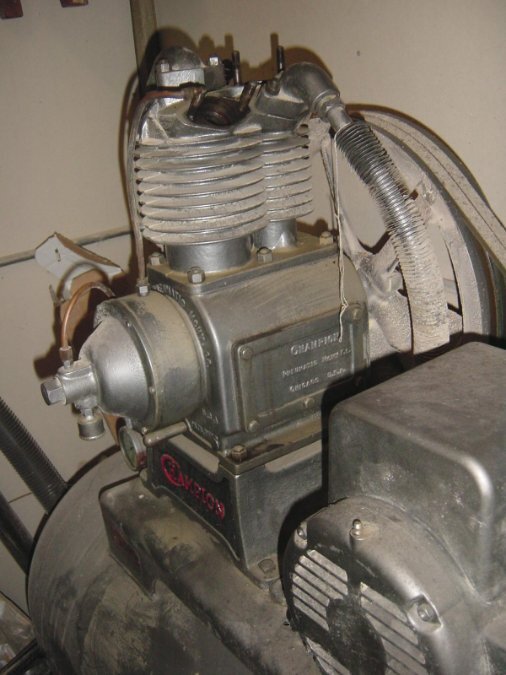
Not sure of the brand on this one but Northern Tool sells a similar unit. This holds 100-125lbs of sand and has interchangeable tips. I used it on a few cars and other projects with no issues feeding blast material in humid Midwest summers. I used older (1920s or 30s) small 2 stage compressors with 60-80 gallon tanks. With that volume of tank air I could get through the 100lb pot of material and by the time I swept it up and reloaded the pot the compressor was ready to go again. Pictured also is the old Champion compressor I rebuilt with 5hp 220v motor and used prior to getting my current vertical compressor with similar cfm pump and tank size.
-
Below are listed for measurements of the 241.5 Chrysler motor as found online. Bore : 3.4 in | 86 mm. ; Stroke : 4.5 in | 114 mm. ; Compression : 7.2:1.
-
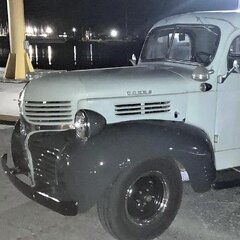
The C28 was used for Chryslers below. It looks like from the picture the head is off. If so you can measure the stroke the piston moves from top to bottom and confirm the bore size for it's current configuration. Below is what I pulled up. C28 Chrysler Car Chrysler Royal 6 and Windsor 6 1941 A total of 6,846 Royal Six Business Coupes left the factory in 1941, weighing in at 3,170 pounds, with a base price of $945.00. All were powered by Chrysler's 241.5-cubic inch inline six, producing 112 horsepower when mated to the Fluid Drive transmission, as this car is equipped.
-
Rich you did good and I appreciate all the backstory on the lights you purchased. They shined up nicely.
-
I recently purchased a quart of DOT 5 from O'Reilly Auto parts about 2 weeks ago. Motor Medic brand and price was best deal I found at the time, $32.99 plus tax if anyone is looking. 2 years ago I picked up some from Napa when they had a 50% off deal. Always good to go online and check for the best prices.
-
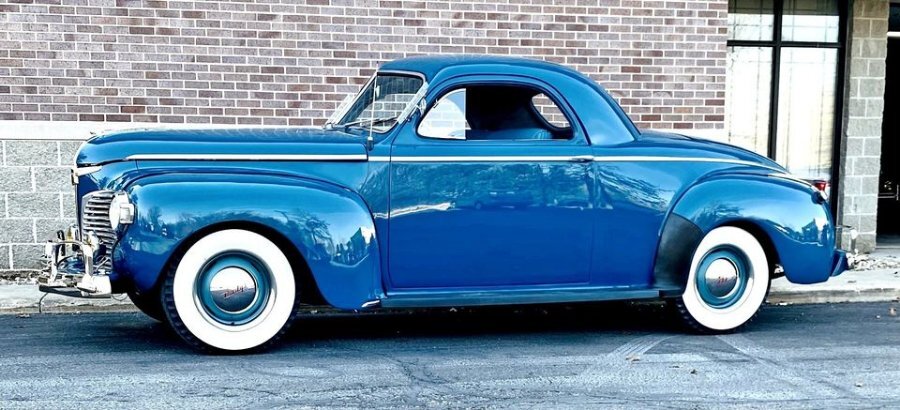
Ivan, I don't believe it was a body off restoration to factory specifications either and there is plenty I could pick apart on it as well. People can ask whatever price they want hoping to get well over what something is worth to you or me. I just enjoyed it for the opportunity to view all the pictures, liked the color, the interior and body lines on the 41 body of the 3-window coupe, and it shows them nicely IMO. It was free to look at with no crowds or admission fee so I posted it up for the pictures and nothing more. 🙂
-
While looking for parts I came across this 41 for sale and although the price is hefty it is sure to provide a smile if you review all the pictures. Located in Madison, Wis. https://www.facebook.com/marketplace/item/1089643392246974/?ref=search&referral_code=null&referral_story_type=post&tracking=browse_serp%3Ae30f4c01-468e-423f-b7d2-f45c964fa81e