Leaderboard


Popular Content
Showing content with the highest reputation on 07/23/2018 in all areas
-
Every year when I head down to Chrysler @ Carlisle, I make it a point to visit Fertigs PA, 'The Mopar Flathead Capitol of the World'. I found 86 year old George Jr. and his two sons, George III and Rob, all well and VERY busy on many vintage Chrysler L-head and electrical projects. This year there was an additional bonus, of a well know visitor from Germany - blogger "Captain Fred" of 'Das Boot' '40 Plymouth fame! We had a lot of fun discussing our various 265 projects. Pictured below are Fred Bertrand, George Asche Jr., and yours truly, Walt Redmond.
 3 points
 -
This be the stuff.
 3 points
 -
So to answer your question, the factory used a stencil set up remarkably similar to the screen printing that they use for printing t-shirt designs nowadays. When the hubcaps came off their final assembly, they were automatically oriented correctly for paint application. As the equipment got older and more worn, the quality diminished a bit. I have D24 hubcaps that run the gamut from sharp and clear, to barely making out the stamped background lines through the design. How to do it yourself is covered in several Forum threads. But...I always enjoy when an "old" topic is brought up again to see if there are any new ideas out there.2 points
-
Make sure you replace ALL the brake lines,both rubber with new rubber lines and the old steel brake lines with the new nickel/copper brake lines. The copper/nickel lines will never rust inside or out. It is also a good idea to use a dual-outlet master cylinder. You can save money by not going with power brakes. With the right setup,you don't really need them. The dual outlet master cylinder is for safety purposes. Buy the bracket assembly and the master cylinder from the same supplier. Sometimes it can be a nightmare trying to get one company's custom setup to play well with parts from another company.2 points
-
NPT, I'm very impressed with you, and your parents! You should join the Detroit Region of the Plymouth Owners Club. This group is hosting the 2018 Grand National Meet this coming weekend (July 24-28) at the Four Points Hotel in Novi MI. This is right in your neighborhood! Walt2 points
-
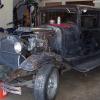
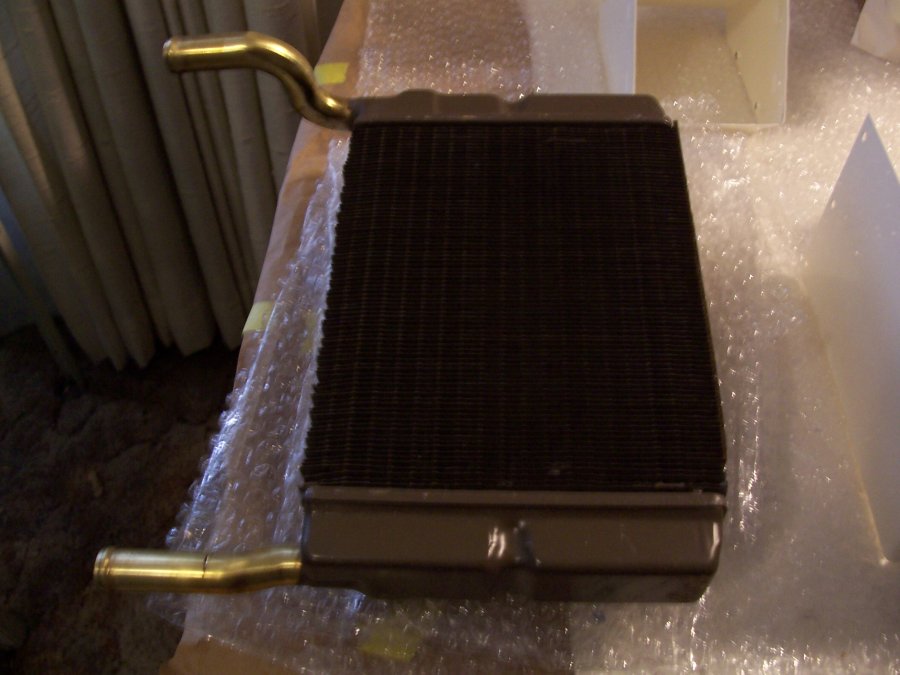
Built our new wiring harness and have it coming through the firewall laying in the floor of the cab. Figured I better get the fresh air box back in place, and all the switches and gauges mounted up before I selected my harness route and started making 2nd end wire cuts and crimps. I've got more hours than I probably should have put into this fresh air box/heater assembly, originally mine was spot welded together in places and screwed together in others. I drilled pilot holes and used steel rivets where the parts were originally spot welded...(which allowed me to paint 100% of each part prior to assembly). I guess this method has offered up some success, but the way this all sandwiches together, it's a bit dis-heartening to watch your paint get knocked off as many of the parts are too tight a fit due to the paint being there....anyway - pound to fit and then paint to match with your touch up brush ( I used high temp rattle can engine enamel on this, and I've found when I need touch up, if I'll spray some in a cup and let it sit for a bit, to let the carrier solvent evaporate away, you can then brush it on to touch up - with better results and coverage.) Wanted to ask you guys with the experience out there,....about my blower motors. This old P15 club coupe had the dual heater cores and blower setup in it....(I've come to believe since working on the car that someone added the second blower.duct/etc....I don't believe it came from the factory this way),....anyway - my plan has been to leave it the way it was and go back with the dual heaters.. My original fresh air box was badly eaten up, so I purchased a spare dual assembly I found on ebay and had lots of parts to work with...took the cleanest of whatever and started working to go back with it. Ended up with 2 heater cores that don't leak and are way cleaner than what I took out of our car, and now have a total of 6ea blower motors. Not too long ago, someone shared with me, (and it makes sense if you think about it), in the dual heater assembly setup, you have a blower motor that turns left hand and a blower motor that turns right hand. Out of these 6 motors, 4ea are RH and 2ea are LH, and the corresponding fan cages also have the slots pointing in opposing directions when you compare a LH to a RH...However when you look at the offset allen screw that attaches the cage to the shaft, it appears that the same squirrel cage is used for both, it's just turned 180 degrees one way or the other when installed....THAT LEADS ME TO MY QUESTION I WAS HOPING TO FURTHER MY EDUCATION ON HERE ON THE FORUM,....So far I've only been able to get one of these squirrel cages off without destroying it, and on that one I took a pair of pliers and held the shaft near the motor, grabbed the cage with my free hand and slowly began twisting it,...magic !! it came right off (course I'd already removed the allen screw),...tried it again on motor #2, and no dice,....even pulled the gorilla tape off my channel lock pliers to get a bit more bite on the shaft and still no luck,....at that point, since I had six of these cages, I cut the cage off the motor shaft. A bit easier said than done, actually I used by hand grinder and a thin cut off disc and slowly ground the wheel hub off. I used my fingers on the motor shaft as a heat sink and thermometer to tell me when to stop grinding as when I would feel any increase in temp on the shaft at my fingers I would stop and wait a few minutes to let the shaft cool back down, and go again, etc, etc...until I got the hub off the shaft... Anyone out there got any tricks on how to get these squirrel cages off the motor shafts without botching things up ? Also, (and this is something is respect to what I just learned from Plymouthy Adams here a few weeks back),...since these heater blower motors appear to be built with field coils, the internal wiring leads should be able to be reversed, changing the rotation direction of the motor, which would allow a RH motor to become a LH fairly easily... So if I could get these cages off the motor shafts, then go through the motors, and select the best two motors, revers the leads if necessary to make one LH rotation, and then install the squirrel cages clocked either for a LH or a RH rotation,...I should be good to go ?? I THINK Actually, I'd like to get all these motors in as good a shape as possible for future use for me or someone. I'm finding 6v motors out there, but there all for Chevy or Ford. There may be other differences as well, but just at a glance I can see that the shafts don't look near long enough for our mopar stuff. All these motors spin. I tested them today using a 6v lantern battery. Some better than others. I took the bottom cap off two and had quite a bit of fun figuring out how to get the brushes back in place and the caps back on, but finally I managed to accomplish it..once I got the cage off a motor and I had the end cap off as well, I would have though that I could push the armateur out the bottom of the motor but it would not come out. I was hoping I could get to the top bearing, anyone out there know ? do you have to drill those little rivets out to get it to separate ? I wish the parts book showed something on the heater assembly, the shop manual has an overview but nothing detailed..


 1 point
 -
https://www.geotab.com/evolution-of-interstate/ Enjoyed looking at this.1 point
-
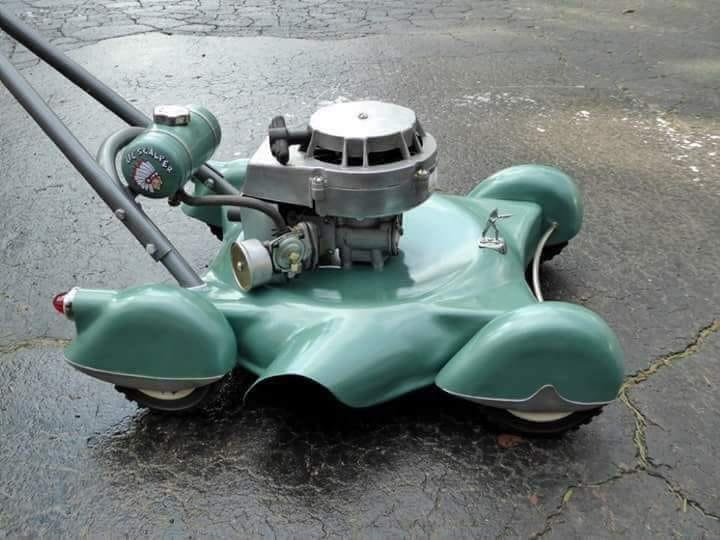
Not quite the worlds fastest but an INDIAN just the same. Tail lights but no head lights.
 1 point
 -
AHH a real car lover---loving the style of 50s/60s over the jelly beans of today.. My 2 cents: Dual Master cylinder, SEAT BELTS, LED brake lights...and good tires. I put Disc brakes on my car for safety, but I was living in the hills and mountains of the pacific NW---on the midwest flatlands I expect the drums are adequate. My car originally had the 4.1 rear end and it ran all day at 60 with no issues but was a bit noisey1 point
-
The model 36 was the first level optional heater for P15s. Then you moved up to the fresh air system with either 1 or 2 cores. Steve I believe you will find your motors aren't reversible just be swapping leads. To get those cages off use plenty of your favorite rust breaking oil and patience.1 point
-
Since this is your baptism into auto mechanics you might do as I did. Just remove, clean, and repair as needed and you will have a fantastic education into the mechanical wonders of the engineers decades ago. Exception being disc brake kit up front, often less expensive than repairing the old style and a safety issue, do a thorough check on the king pins, they are the foundation of the total fron suspension , radial tires, and possibly a 3:73 differential. That coupe is a winner Car. Go for it, and ask questions, many very wise, and practical informants on this forum.1 point
-
I love those flathead t-shirts. Very cool photo.1 point
-
Welcome NPT. It's great that you love the old ones. Does your school have an auto shop? They will fix cars for cost just to have something to work on. If your school doesn't maybe a tech school or collage nearby. Cheaper and way easier to switch to disc brakes. The transmission will do fine on the highway. You will need to find out what gear ratio your differential has. But most any of them will do 55 pretty easy.1 point
-
That ladder has been hanging there at least 8 years.1 point
-
Buy a classic edition of Hollander interchange book 1946-1956. Like this cheapest I found with a quick EBay search. https://www.ebay.com/itm/1946-1956-Hollander-US-Parts-Interchange-Manual/263797721398?epid=22006523244&hash=item3d6b91c936%3Ag%3AeKsAAOSwnwVanwm1&_sacat=0&_nkw=hollander+classic+interchange+1949-1956&_from=R40&rt=nc&_trksid=m570.l1313 There are many car-mopar third member that with fit in your trucks rear axle housing, but it gets very confusing as to which work easily and it is to complicated just for me to post it here. Buy the book and if you have problems uderstanding how to check the info PM me with your phone and I will walk the pages with you! ? DJ1 point
-
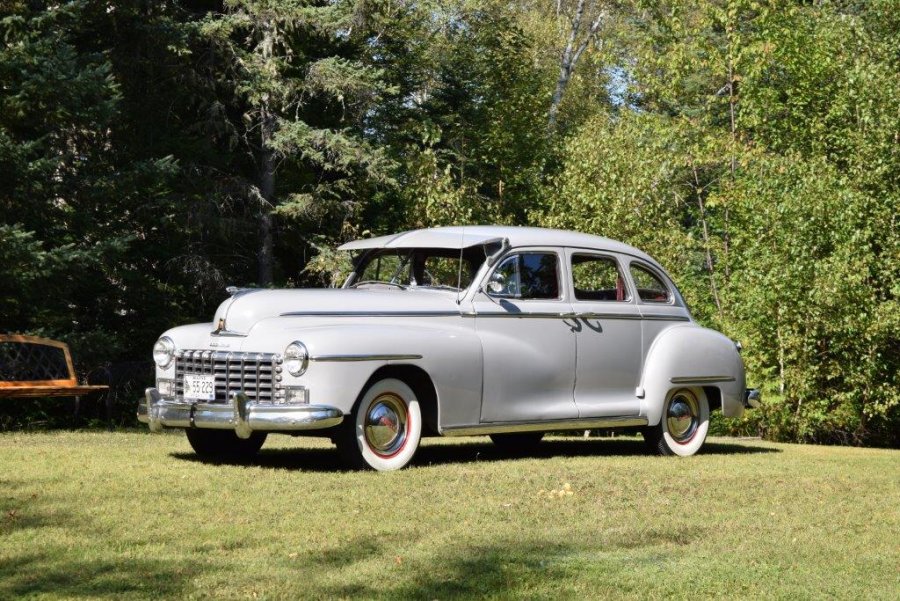
My 13 month old Great-nephew meets the 48 Dodge D24 for the first time.1 point
-
Looks be about the same age as my grandson Jace. 14 months old, he loves looking at the pictures of the P 15‘s that are hung in my office. Seen here sitting on what day what will be his car.
 1 point
 -
Problem with the 1949 1st series is that it was created by the marketing people while the lists that do not have a 1949 model year were provided by the Engineering Department, the ones who assign the model codes (eg, P-15). So, for the P-15C Special DeLuxe, Detroit production, as per the Engineering people : 1946 - 11,496,001 to 11,643,103 1947 - 11,643,104 to 11,854,385 1948 - 11,854,386 to 12,116,123 As per the Marketing people, serial numbers are : 1946 - 11,496,001 to 11,643,103 1947 - 11,643,104 to 11,854,385 1948 - 11,854,386 to 12,066,019 1949 - 12,066,020 to 12,116,123 Thus 12,070,743 is a 1948 model by the Engineering people and 1949 by the marketing people. As the Marketing people pushed the 1949 models as 1949 models in 1949, they should be considered 1949 models. If you check the used car guides (Blue Book, Red Book, and NADA) as well as Branham Automotive Reference, they all list the 1949 models, 1st and 2nd series. The 1949 models went into production at the serial numbers listed above on December 1, 1948 and continued until P-15 production ended the last week of January (23-29), 1949 - in the U.S. Production of the 2nd series 1949 Plymouths began the week of February 13-19, 1949. In Canada there was no 1st series as production of the 1948 models ended at the end of December, 1948. And production would not resume until the new 1949 models were ready in late February, 1949. Yes, production at the Windsor, Ontario, car plant for January, 1949 totalled a big, fat ZERO! Sales of the postwar models were starting to sag by December, 1948.1 point
-
The way i painted my caps (which is probably the wrong way) is to "paint" where you don't want the paint to be with Elmer's glue. After that dries, either brush on or spray the color. After your color paint dries (24 hours or so), wipe off dried glue with a rag dampened with water. This does a pretty good job.1 point
-
However I understand Donald Smiths confusion although I am pretty sure I know who is referred to as the perveyor of the poor quality parts but I can't remember his name but the Farmingdale NY address in the ebay advert is the same that this guy was from.......didn't he originally come to fame due to his discussions/arguements regarding whether various Plymouth heads should have had "P" cast into them or something along these lines..............not withstanding libel laws I don't understand why his name isn't mentioned...........he also had or was restoring a 46-48 Plymouth 4dr sedan from memory wasn't he?....................Andy Douglas.1 point
-
Buy a professional puller kit with all the accessories because they are very handy for pulling dents out,as well. If it were me,I would buy any brand made in America. You can never go wrong buying stuff like this from your local NAPA store. The price is usually competitive,and nothing beats the convenience of dropping by a local store to have a broken part replaced for free,or to pick up a part you have lost.1 point
-
If you don't want to replace your radiator with an aluminum one,you should consider pulling your radiator and taking it to a radiator shop to have it rodded out. Or having a new core installed if you hate the look of an aluminum radiator. Or maybe just drive the car to a radiator shop and having them reverse flush the radiator,install a new water distribution tube, freeze plugs,thermostat,and new hoses. Yeah,this is going to cost some money,but on the other hand your frustration level will decrease,and so will the expense of having it towed if it runs hot away from home. Not to mention decrease in the possibility of it running hot and cracking the block and/or cracking/warping the head. Lots of old cars and trucks are loaded with rust inside because it seems a lot of 2nd or 3rd owners were cheap and didn't like buying anti-freeze for a "back up car" they rarely drove,so they would just drain the radiator and block after every use,and add fresh water when they needed to drive the car. A hot engine that is drained and opened to cold air equals rust. If you haven't had to replace the water pump yet,I have bad news for you. Sometimes there just ain't any shortcuts. You just have to spend the money and be done with it. BTW,really nice driver car. Are your plans to preserve it or restore it? If it were mine,I think I would go for cosmetic preservation and then just drive and enjoy it.1 point
-
that could likely be listed as an INFESTATION..!!!!1 point
-
With that much issue with the freeze plugs and the collapsing of the hose, suction from the pump indicates a slow flow radiator starving the pump on return means you getting no real heat exchange and that the water in the block is being over saturated with heat. It appears you should pull all the plugs, clean the inner jackets from sediments, entertain a modern aluminum radiator for over all cost effectiveness and flow/heat transfer. This issue also would point toward the need to remove and clean the distribution tube at the upper end of the block behind the water pump. Do also clean your heater coil in the process....removing the thermostat prior to flushing is recommended. Use a thermostat for your climate. With the salts used in flushing, I would expect to see more an more pinholes showing up as you band-aide this and that. I would at minimum after the use of the slats run a couple cycles of clear water and Cascade dish washing powders to further clean the interior of the block and rad.1 point
-
You're always welcome in Clements brother!....I mean, we let Mark in fur pete's sake. 48D1 point
-
exactly under the "B" on the map. Set up the tent on the edge, great spot for the night1 point
-
Just the heater in these parts...1 point
-
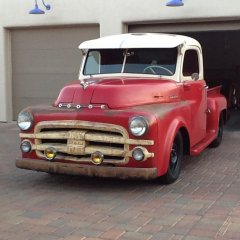
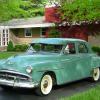
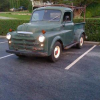
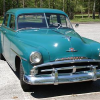
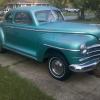
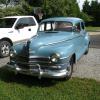
Hey i use to drive as a daily my 41 dodge luxury liner coup, it’s more a 2nd car now but i use it in all weather conditions, all original, engin run like new, 3 on tree no fluid drive and bias ply tires make it a real confortable car and now i just buy a 42 chrysler windsor, this car need to be serviced before taking the road again but body in very good shape paint need to be polished i’m gonna use it like my dodge. both with the original flat 6 engin from factory

 1 point
 -
Drive mine also about 20 - 25 miles a week
 1 point
 -
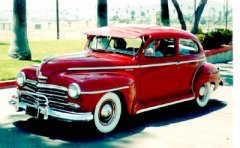
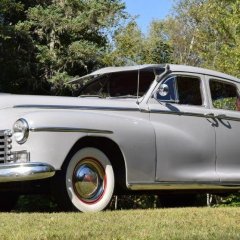
Hello, I just drove my 48 Plymouth to the Glendale Elks Car show last Sunday. It was a 45 Min drive, She worked Great! And after 35yrs of ownership she still gets a award.
 1 point
 -
Mine is a rolling restoration. In other words, I had enough money to get it drivable, but not enough to paint and upholster. That being said, I drive mine at least a couple of times a week around town or to work and back. Joe Lee
 1 point
 -
I pulled a Norm's Coupe. Drove to the end of the driveway and back into the garage. Does that count?1 point
-
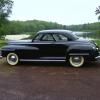
Same car since 1991, fifth State it's been registered in since we've owned it. Put up for the winter right now. Where this photo was taken on our property is currently under 4 feet of snow. Although our antique car insurance has a lay-up discount that applies from December to March, I have to put it away in November, and don't event consider taking it out again until mid to late April when most of the snow is gone, and depending on how much/many "April Showers" we get to wash the salt off the roads. Then I take it to work once a week or so, depending on rain, to the farmer's market whenever we go, and at least one "spin" - as my Grandpa used to call it - just burning gas and enjoying the car and countryside, every month. We drive it more here than in previous places we've lived, but still put only 500 miles or so on it a year. Seriously thinking of replacing the bias-plies with radials, roads around here are just shy of awful and heavily rutted from log trucks. Makes driving it a bit more exiting that it needs to be...
 1 point
 -
I built mine to drive and do at least once a week. I must say there are some fine looking MOPARS in this thread. Jim M Clover,SC
 1 point
 -
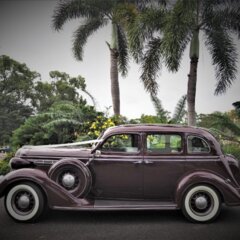
It looks very 'loved' considering how long you have had it for, and how much you have driven it. Its a credit to you Andy.1 point
-
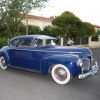
Now that i have moved to snow area, they dont get used year round anymore, but if snows/salt is not on the ground one of them gets used. I have put about 1000 miles on the 40 over 18 months and 67,000 on the 53 since i got it.

 1 point