Leaderboard


Popular Content
Showing content with the highest reputation since 03/13/2025 in Posts
-
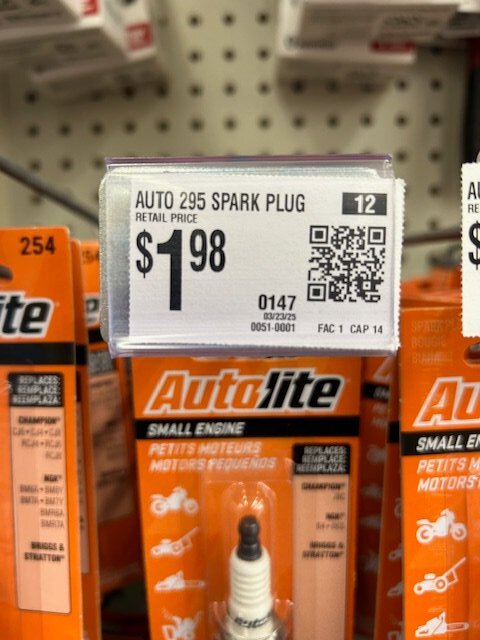
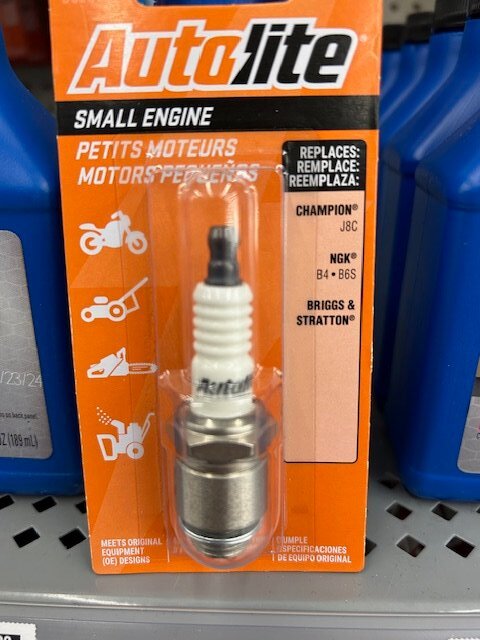
I know alot ow owners ask what plug to purchase for their old MoPar flathead engines. A friend of mine who also owns a 1939 Desoto which is a driver car and not an AACA show car let me know about these plugs. He also uses these in his engine without an issues. Walmart back in the auto section has a rack of various small engine plugs. They only charge $1.98 per plug versus these same plugs that are listed on Ebay and they are selling these same plugs for $8-12 each. You also save on shipping if you purchase at your local walmart. When looking at the package you will also note that they are a replacement plug for Champion J8 plugs that were also used in our MoPars. From some of my early cars catalogs the original Champion plug that was used is the J8C, but the J8 replaced the J8C at some point in time. These Autolite 295 Plugs do not have the black body and do not have the original hash markings, but the body is not chrome plated and give you the BLING look But when you can purchase 6 plugs for a little less than $12 plus tax these are a great buy. I keep six in my tool box in the trunk of my 39 Desoto as spares. Also of note that the older Autolite A9 plugs are getting harder to find, but when at a swap meet look at the end label on the autolite box and look for this number: A00-12405-A these are the A9 14m 3/8 reach. Just passing along information to the members. Refer to the attached pictures. Rich hartung desoto1939@aol.com
 5 points
 -
cold, wind, snow, rain.........this is a family site, enough of the four letter words.😁5 points
-
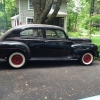
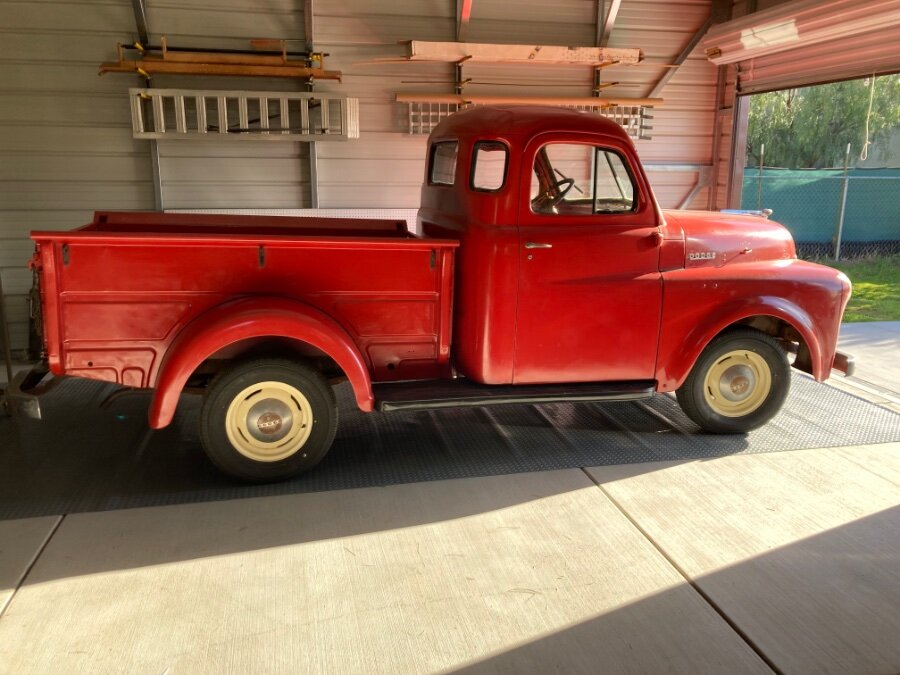
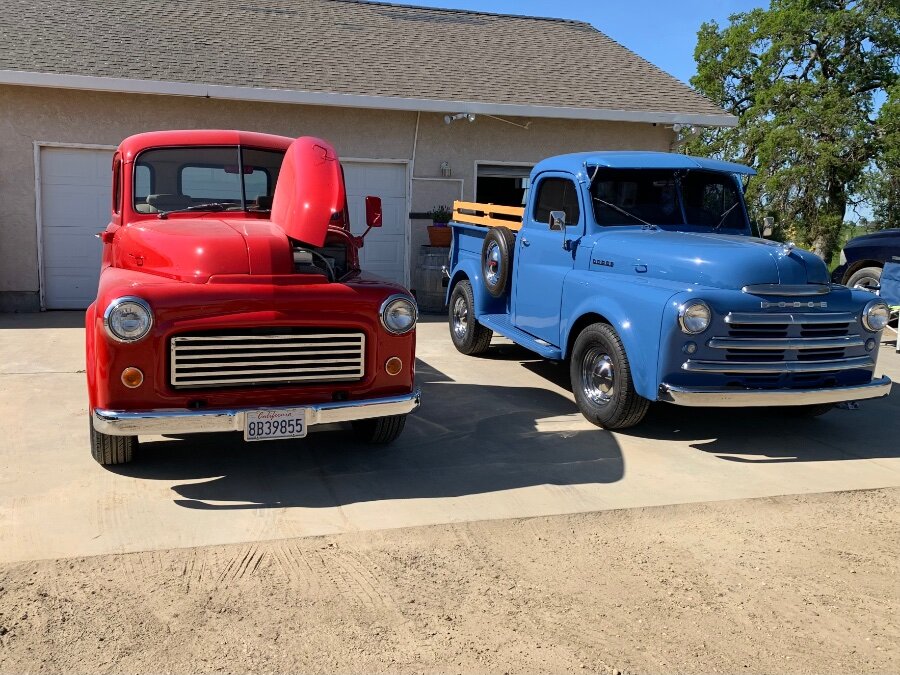
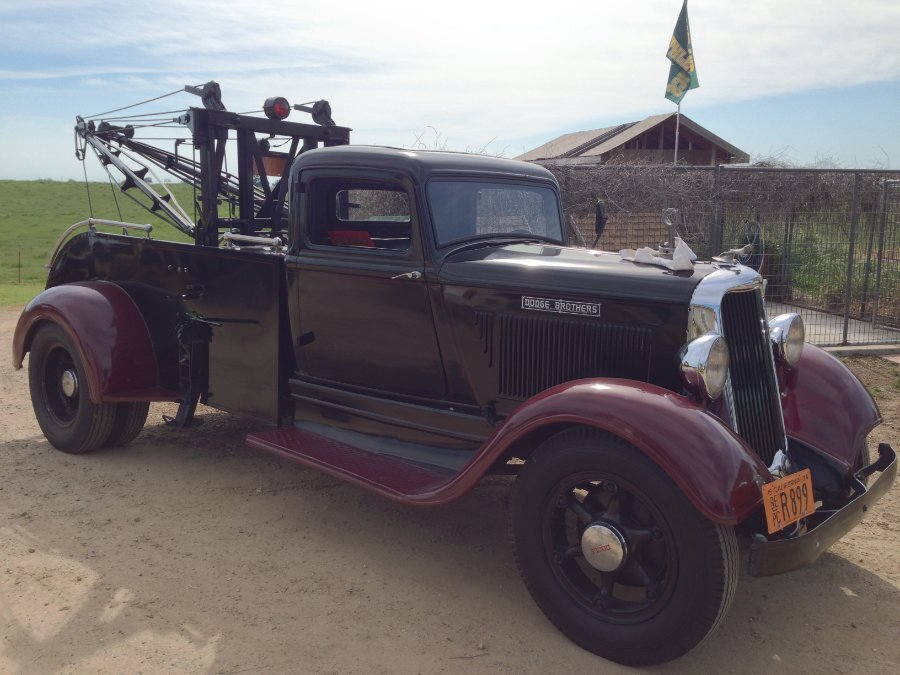
New here, been lurking for some time though.. This was my grandfather’s truck, he bought new in 1950. Truck was sold in Moreno valley, ca. and has never been more then 100 miles from there. It was his farm truck, used for work, real work.. My mother inherited it in the 1990’s, and had it painted, and cleaned up some.. Recently, I stripped the wheels, and had them painted. Rich…
 5 points
 -
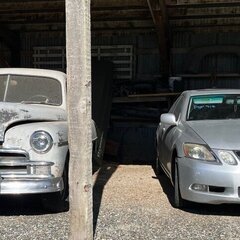
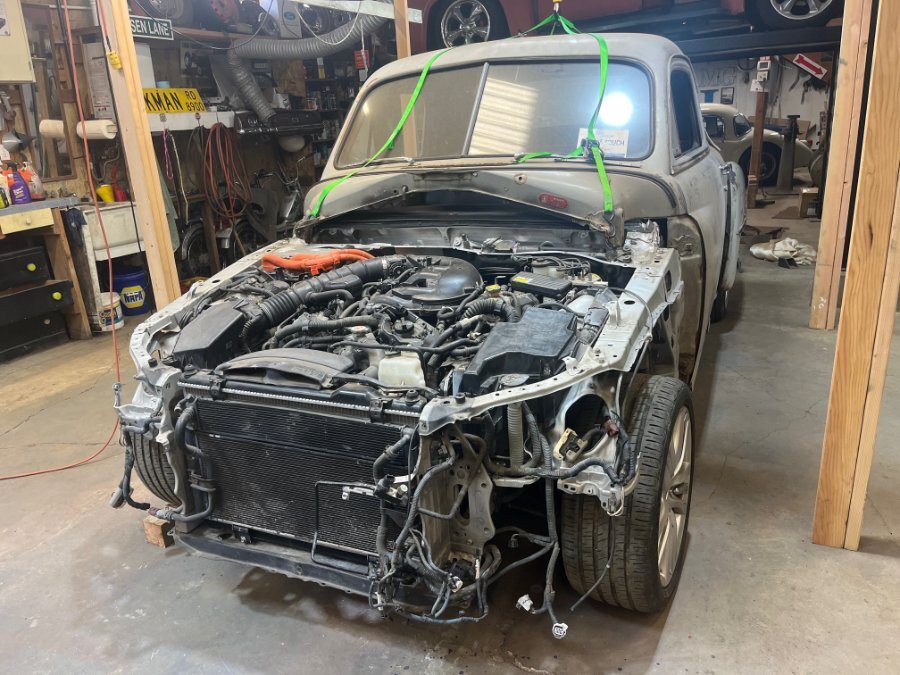
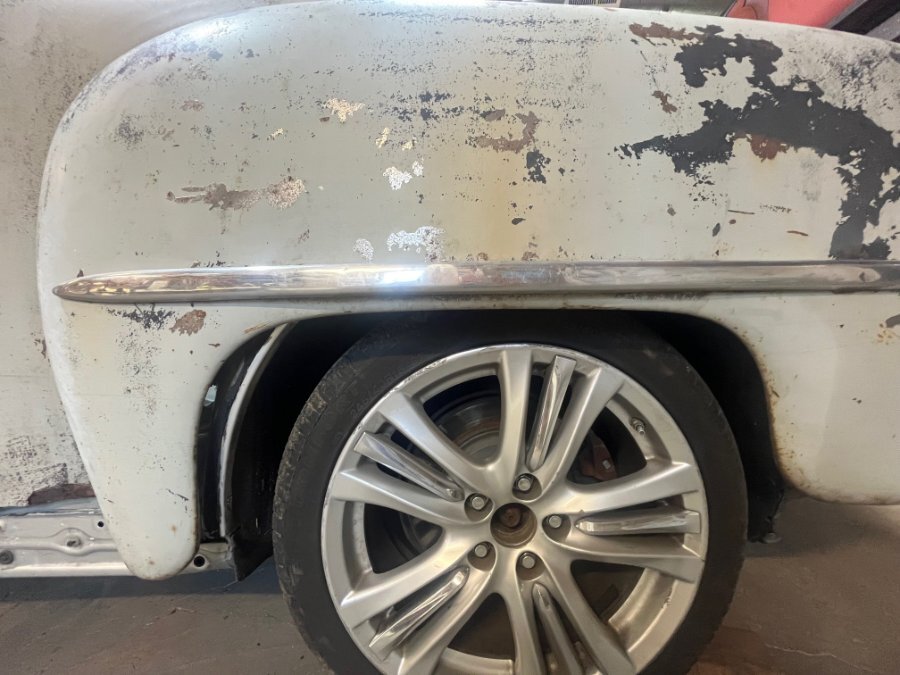
The welds on the front anchor are ugly, I admit, but I wanted to be able to grind them off if it did not line up properly. The good news is that it all lines up. Even better than ever! Once everything was anchored down, the doors are close to adjustment, needing to push forward a bit for clearance and gap. Also when the front fenders got bolted to the A-Pillar, it moved them forward slightly so that I may not have to move the radiator like I had been thinking all along. They still need to pinch together at the front another 1" on each side from what the pic shows. With those critical fit-ups confirmed, I finally removed the lift straps! But they'll be back later, when I determine how to trim/paint the interior. It's looking very possible that the Lexus rear seat will actually fit if I completely remove the trunk bulkhead. That would be cool to have a 5 passenger Business Coupe! You can barely squeeze by the front seats when they are full forward, so may have to reengineer the seat back hinge. The fun stuff! But I am getting ahead of myself!
 4 points
 -
I heard from a past attendee that three vehicles may show up. The 1955 C-series in light blue metallic that made an appearance at the 11th - the gentleman that owned it, known as Boscar (or Bosker) passed away last year, but his son is planning to bring it. Also, his other son(s) are supposedly bringing a '57 truck and a '57 300, both from the Boscar collection.4 points
-
"Our age"? I'll have you know I am 39 years old and born in 1953! (Just don't tell my daughter or grandkids)4 points
-
https://photos.app.goo.gl/Vp9ktJ6y4VZZfcLfA New to me 230 is a runner. New fuel lines, rebuilt fuel pump, 6v prime pump, New wiring harness... The list goes on. This is a work in progress but thank you to the members that are always helping me out with my lack of knowledge issue 😁. Still have many issues to work through but I think Grandpa it smiling down.4 points
-
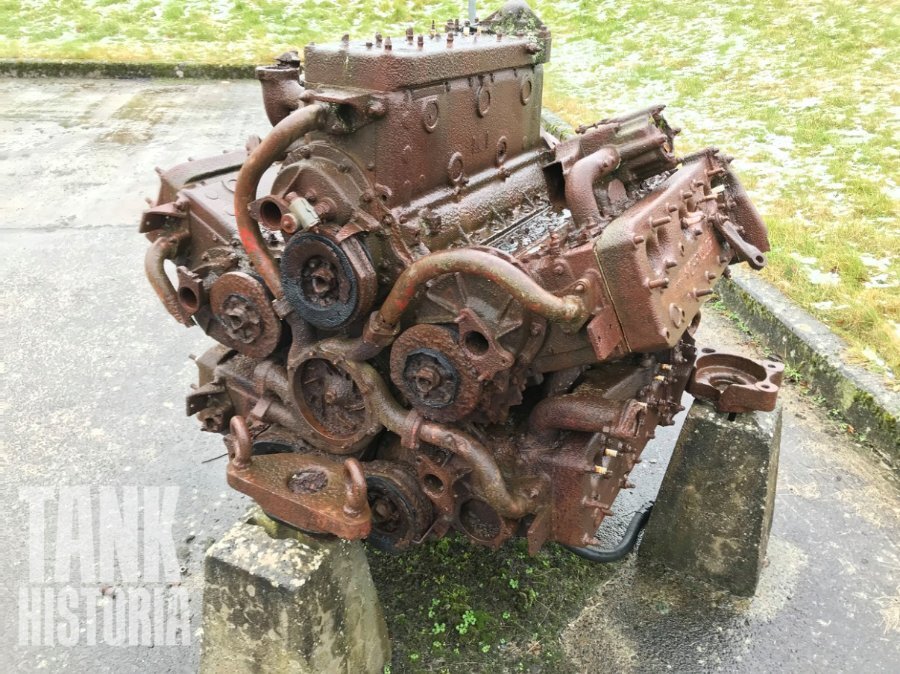
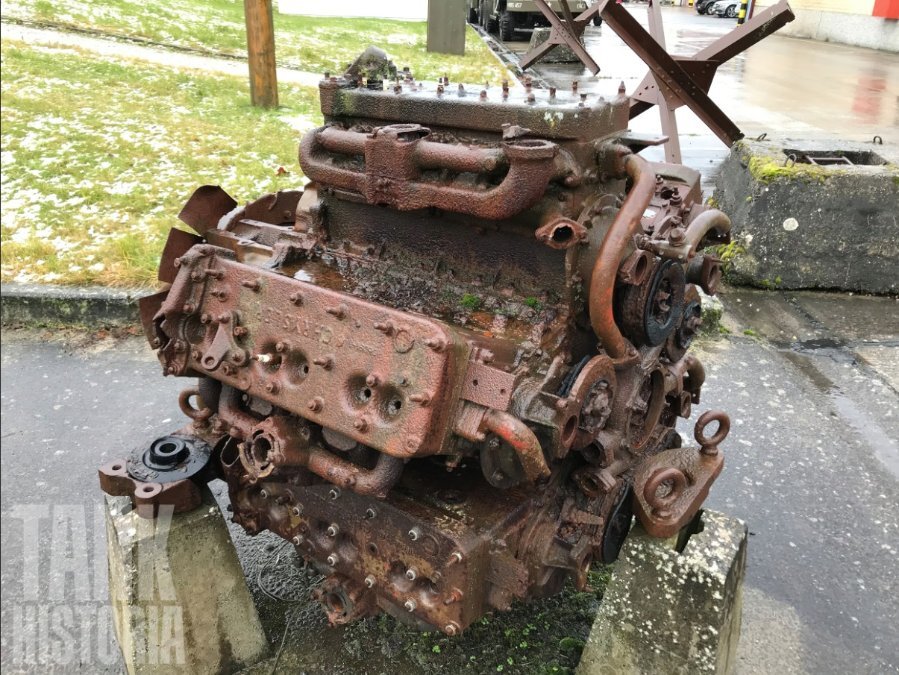
The Chrysler A57 Multibank is a 30-cylinder engine with a displacement of 1,253 cubic inches (20.5 liters), developed in 1941 as the United States entered World War II. This powerplant is composed of five groups of inline-six engines, typically found in civilian automobiles, to achieve the 370 horsepower required to propel the M3 and M4 tanks.
 4 points
 -
4 points
-
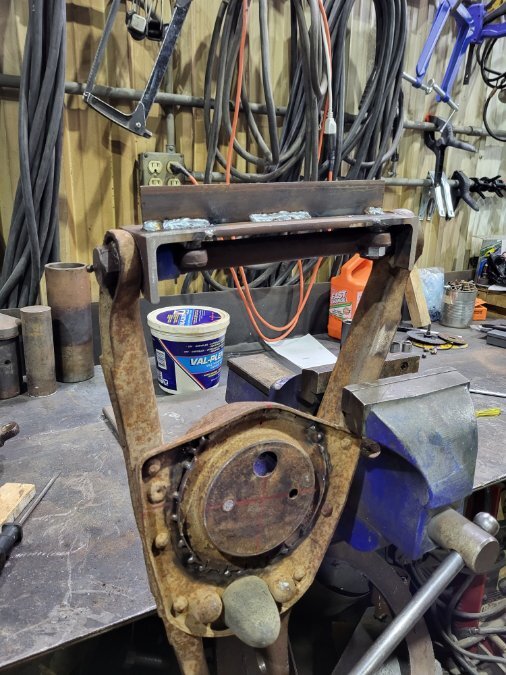
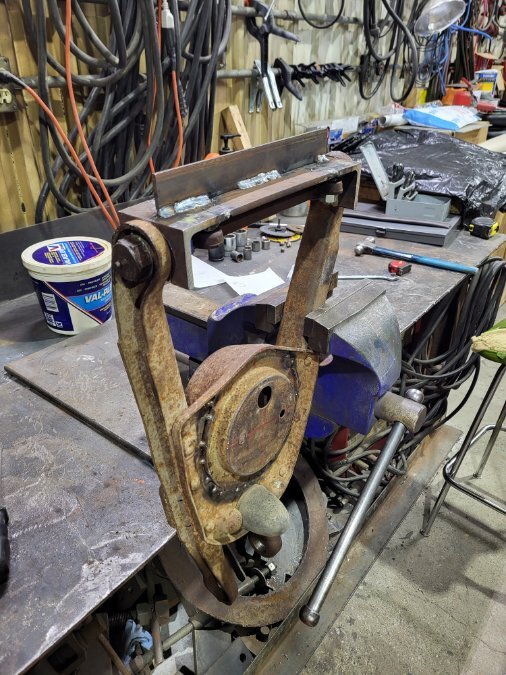
Built a tool yesterday to assemble my lower control arm and torque the lower inner control bar bushings on the 40. Heres what i did. I took a good known front suspension from a 51 desoto. Measured the 51 lower control arms and control arm bar as an assembly. i found the measurements matched exactly from left hand to right hand control arms. I felt it was a safe bet to make a jig from this. Once I transferred my completed jig over to the 40 control arm I found that these old arms had been cranked in without a jig in the past (1/8 - 1/4" approx). I used a floor jack to spread the arms and install the jig. Torqued the control arm bushing to 150ft lbs. Life is good.
 3 points
 -
Couple photos from the day. Great to see everyone and always nice to meet new people hard to believe only a couple of these events left on the books. thanks again 48Dodger!


 3 points
 -
We've set up, we've done the business at hand, and shined the awards. Tonight we sit around the fire pit, tip a glass to those who can't be with us, and enjoy the night before the show! 48D3 points
-
The spec is for an obsolete gear lube GL1. You can use a modern lube such as Redline MTL. The latest specs are for LOW Viscosity lube. Low Viscosity lubes run cooler. NO more 90wt! To clean the crud out of your new Overdrive, I would drain it and refill with ATF. Drive it a week then drain and refill with Redline MTL. ATF has additives that remove the crud and make the inside Razor Clean. For my own Overdrive I use Redline D6 ATF all the time but it's really expensive. There's two filler plugs on the side, fill them both, then recheck. NEVER use anything with Extreme Pressure additives ( EP ) or Hypoid additives. The statements you hear about lubes attacking the metals in the Overdrive are just non-sense. The real reason is the Sprag Clutch ( otherwise known as a One-Way Clutch or Freewheel Clutch ) EP or Hypoid additives will make it slip.3 points
-
Just spent the day walking the swap meet fields at the AUTOFAIR at the Charlotte Speedway. Inner ring was well packed with national vendors and regular guys off-loading thy eir spares. The outer “red and green” fields were maybe 40% full with vendors and there was a ton of empty vending spaces. Managed to find a couple things on the list and saw some familiar faces. Had a nice chat with the inliner guys and the gents that bought out scare bird disc conversions where also present. Photos taken from the inliners tent.
 3 points
 -
no but likely forged from fire ourselves.....3 points
-
More importantly, is the owners cranky old men?3 points
-
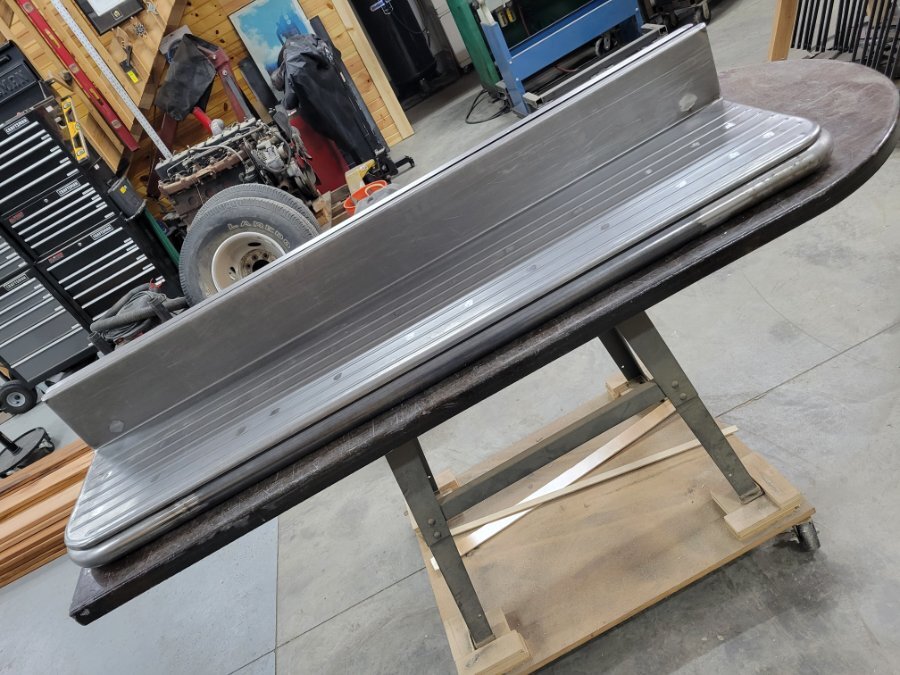
Running boards ready for dry fit. I know I have to notch something for the cab mounts
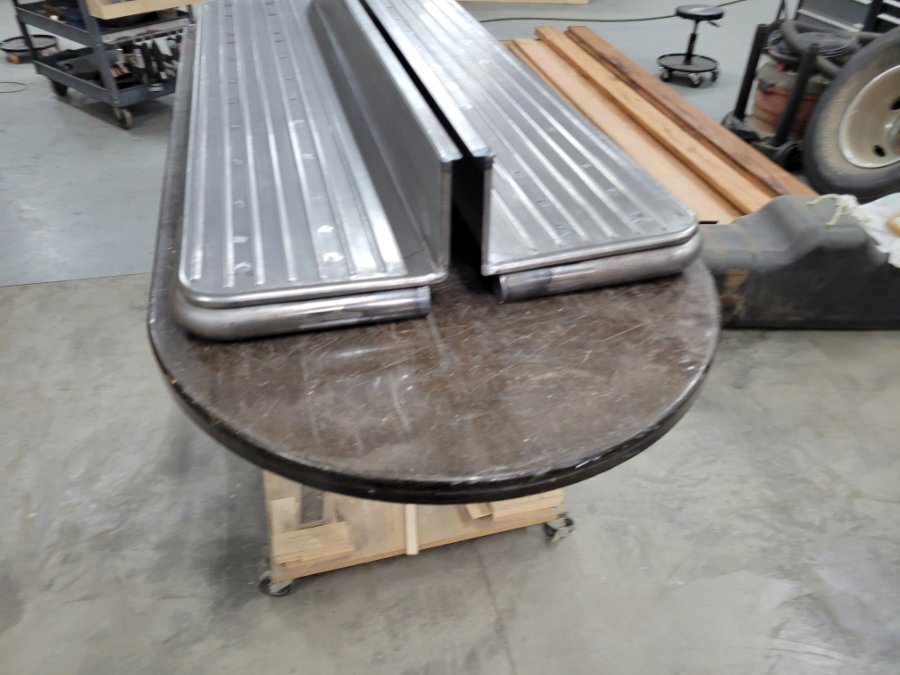
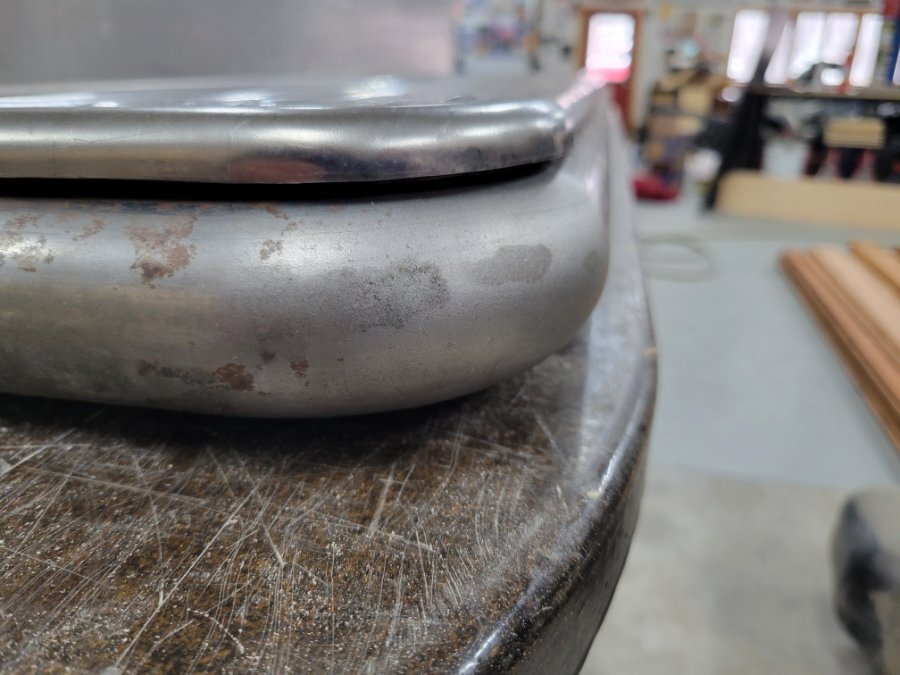 3 points
 -
testing for power old fashion way.....I once accused Don Coatney of being this chap in the photo....he got a good laugh....miss that guy.3 points
-
We have a successful landing! Trim #4 got me close enough to know it is going to work, but still needs to go rearward by 1 inch as seen by the rear wheel well centering. Also I would like to lower it another 1/2 inch in the rear and 1 inch in the front (for starters). All are doable with further trims.

 3 points
 -
Will any motorhomes be attending this year? If so, make sure Dave brings his tow truck again, lol. From the 2016 archives: (...and shyte)
 3 points
 -
only use I can think of for me to use a snow shovel would be in making a pancake Uncle Buck style.3 points
-
Replaced/reworked: Remove/reinstall fluid drive. Multiple times. Replace rear main seal Fresh oil pan gasket Replace clutch disk Replace throwout bearing and sleeve Replace clutch fork retainer spring New leather boot for the clutch fork! Sexy new boot! Clean/regrease clutch torque shaft Replace motor mounts Rebuild/clean oil pump, new gasket to block Replace U-joints on both ends of propeller shaft Replace e-brake band New e-brake cable New speedo cable Replace transmission output seal Replace differential input seal Replace exhaust hangers Replace front sway bar bushings Replace rear sway bar bushings, repaint rear sway bar Change brake system over to DOT5: new hard lines, new master cylinder, new wheel cylinders, new pressure switch Bang the dents out of the downdraft tube, clean, repaint. Writing it down in a list like that, it seems surprising that the car ran and drove as well as it did, but a lot of this fell into the camp of "Well as long as it's up on the jack stands and not going anywhere any time soon, may as well fix that..." It took me most of the day just to clean out the garage well enough to be able to drop it to the ground and back it out. I award myself a well-earned beer.3 points
-
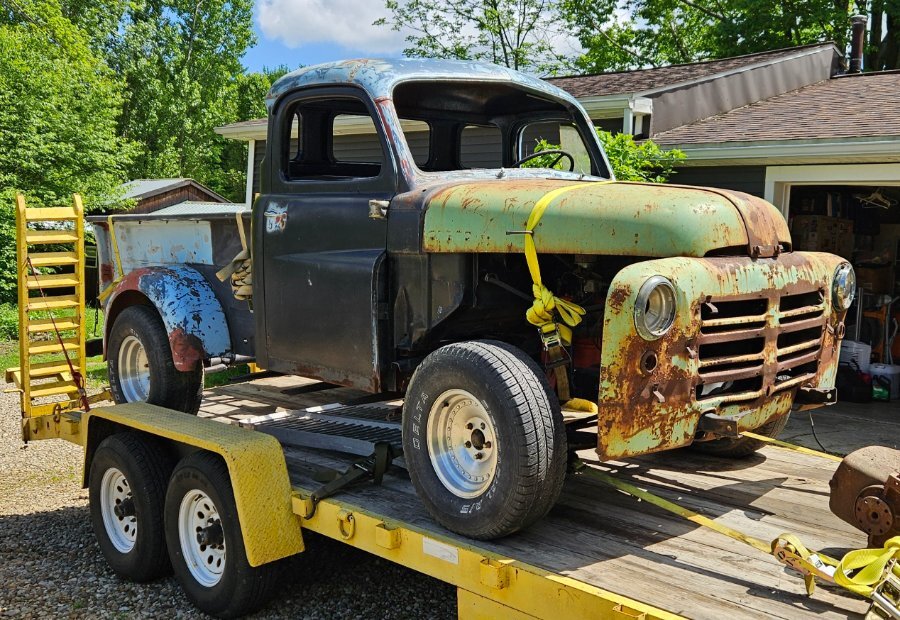
Have been digging through all the good information on here helping with this build but posting little to probably nothing. First flathead 6 build I've done so everyone has been a great help even though they may not know it. Don't have any pictures other than from when I brought the truck home May 2024 and don't think I put these up. Right now it is in many pieces buried out in a pole barn and but 218 will be coming home from the engine shop decked and shaved plus breathing as a 230. Collecting and watching for body parts anywhere near NW PA that aren't rotted is near impossible but that is part of the fun, right? Well most days it is. Thanks again for the great info!
 3 points
 -
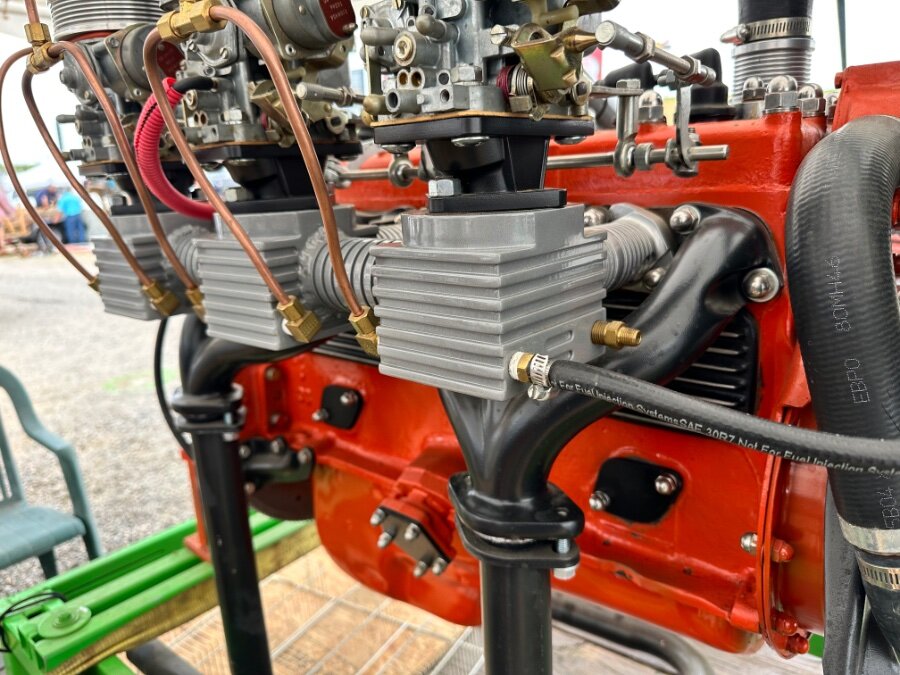
You guys are talking about two different things. Below the carb is the heat riser. Towards the firewall also on the exhaust manifold is the automatic choke for the carb.3 points
-
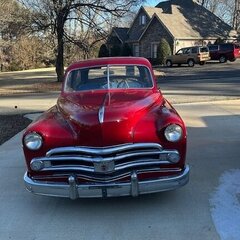
Got her all together yesterday. Took her to town and gave her a bath today. Big stupid grin on my face the whole time and ever since!2 points
-
I read somewhere on a forum a personal observation that to his opinion, all new cars look like electric shavers. I think they shaped like cockroaches. Back in the day, yes many cars were nothing more than the upgraded coach. But as time went on, each maker added a bit of bling and pizazz to their creation that later became an iconic feature of the brand, be it a gunsight grille or dual kidneys....one can at a glance name the beast. Things change....everyone is different in the same ole way.2 points
-
Okay so here’s what I found out. The new mechanical pump has failed already. I bought it from a very reputable vendor. I know they don’t manufacture but seriously I doubt I put 200 miles on it. I’m going to call them and let them know. For now it’s the electric pump. I still have some tweaking to do before I drive it.2 points
-
in a perfect world the Butter-bus would be the winner as it self lubricates. If not whole butter it could not win even if by a margarine.2 points
-
I knew a gal who kept her kitchen like this except the cookware and dishes and utensils all needed a good scrubbing...she did not appreciate me pointing this out whenever I visited...she also had the dustiest Christmas tree up by her front door year-round...on the bright side, she sure could sport a bikini...bless her heart 👀2 points
-
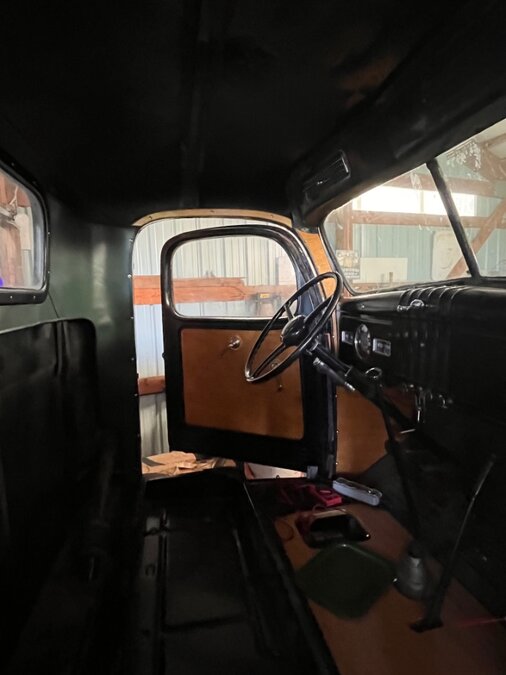
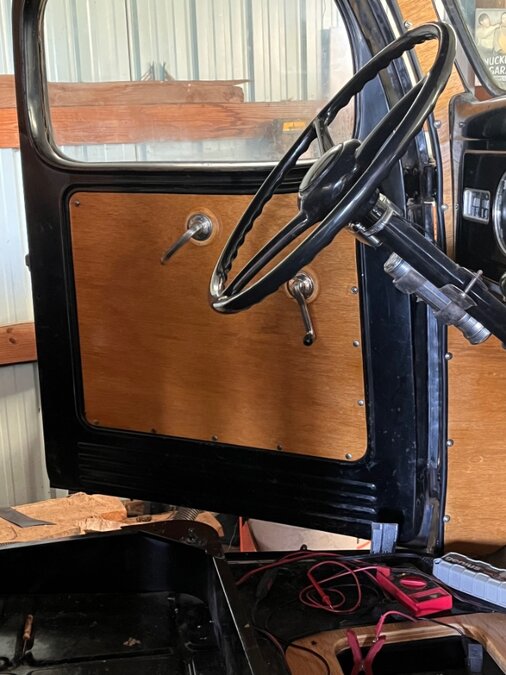
I built a trim piece above the doors and installed my handle trim rings.

 2 points
 -
ANOTHER GREAT DAY WITH TIM AND FAMILY... THANKS MUCH!!!!!!2 points
-
I heard that radio and HVAC knobs are making a comeback by popular demand...the Laramie has a drop-in oil filter element which I kinda chuckled at when I 1st saw it, but I appreciate after years of doing oil changes...of course there's a trick to not making a mess, but it's way easier to swap out than the spin-on filter on the QuadCab; that one marks its territory every time 👈2 points
-
I have found this booklet to be very helpful. You can find it several places, including fifth avenue internet garage 👍
 2 points
 -
it's pothole season...tread carefully2 points
-
hmmm...truck is labeled CITY WET GRINDING CO. 🤔2 points
-
Damn now I gotta pack my banana hammock2 points
-
Ahh, the days of unfit parenting!2 points
-
...with only one of the positions being correct 😁2 points
-
Hand brake works good for stopping up to about 20mph...that's the word on the street 👈2 points
-
I wonder if Tiger Woods used that to build his deck? There's no way he should pass up the opportunity. Roar!2 points
-
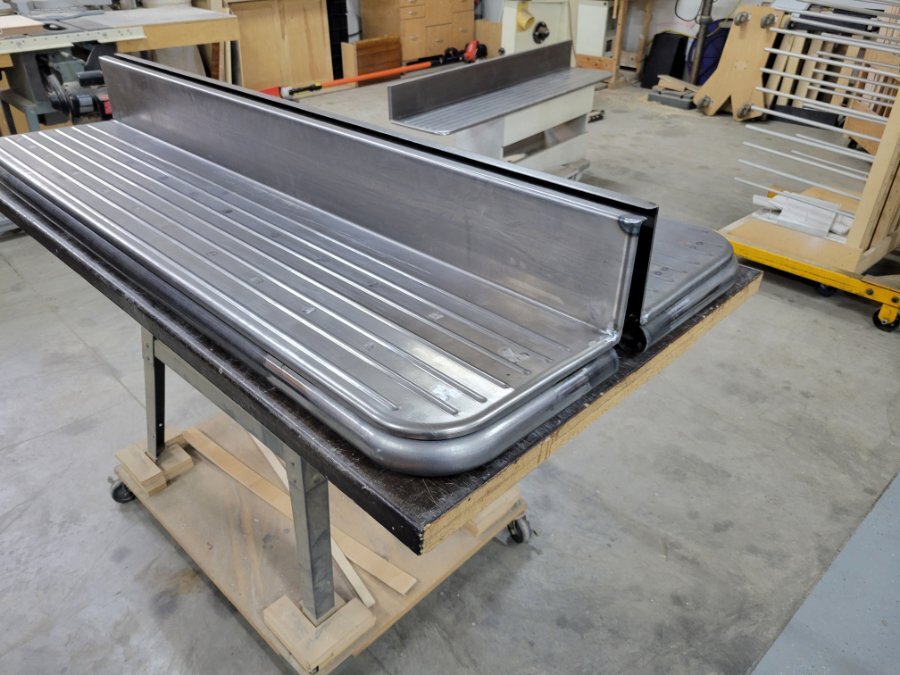
Bed wood showed up today
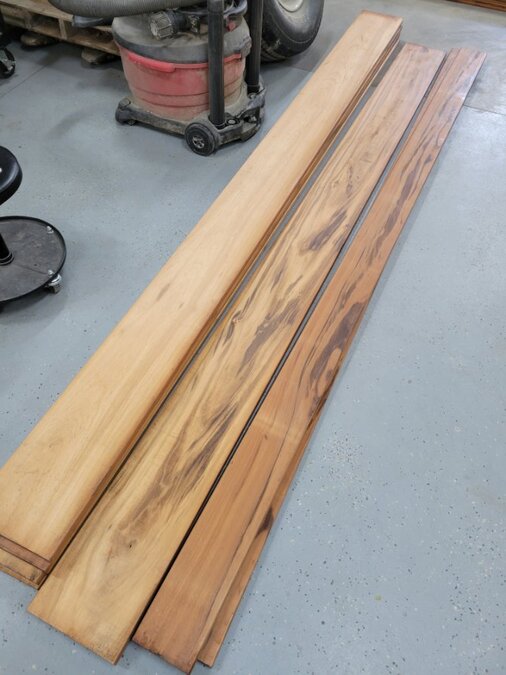 2 points
 -
Sounds like the idle circuit in the carburetor is restricted. Or has water in the gas.2 points
-
$1979?! That was expensive, I've got a used one for $100 if you're interested.2 points
-
Had to go out and look at mine to remember what I did .... If I did it, we know it is not right First of all my generic plug wires are too short. I just ordered 6 universal plug wires the same length from RA. Just something to get the engine started .... never did change them. I cut slots in my mount for the wires .... it is easy to take off and on as needed ... not very often. I have had my coil bracket off several times before finally decided on electronic ignition, and it is in its final form now. If the wires were long enough, I think they would stay where they belong with no problem .... only 3 wires on each side. Or you can install the wires, cut to length and do final assembly in place ... hope you do not need to remove later.
 2 points
 -
Don’t mean to hijack this thread, but I wanted to share something I learned. Since the 50’s I’ve been holding own he clutch to start a cold engine mostly to eliminate the drag of the cold trans lube. After recently going through a complete rebuild of the 251 in my B2JA a very talented elderly machinist advised against that when he watched me start it. He said that running a dry crankshaft thrust collar against a dry thrust bearing causes excessive wear on the bearing and over time the thrust collar too. He said that this was part of the reason that the collar on my crank needed to built up and machined down. Just something to think about.. not trying to start an argument simply sharing another person’s opinion that I respect!2 points
-
There's no rule book, it was a first for me. Lots of measuring and planning. Lots of fit up followed by re measuring/tweaking. Explaining everything could get heavy but here's a quick overall. I used the factory 40 axle in the rear, built a triangulated 4 link using a combination of heim joints and bushings. clearanced the frame rails for the axle just enough so the axle rests on the frame at the desired lowest frame height (it cant go any lower) 8" pacbrake air bags in the rear. Set the rear ride height with the bags at 35 psi. Set the ride height with the front bags at 65 psi. I did my best to determine the overall airbag height at my pre determined psi before I started mounting and building anything Used the factory front suspension. lowered the knuckle supports for a static ride height drop. I had some 7" pacbrake air bags and mounting plates left over from the rear of a toyota pickup i used that in the front to start setting up the bags. Pacbrake air bags are solid and affordable up north here. I'll have to get some photos together. The steering is all factory and connected, swapped steering arms from left to right. Gave one arm a little heat up and bend. Steering may need to be improved and tweaked, time will tell as things progress. I will have to tighten up that loose old steering gear box yet. And on and on and on2 points
-
hub goes on first, next pulley, then damper.2 points
-
If looking at the post above this one and refer to number 13 you will notice that the vibration dampener and the pully can come as a complete unit. refer to number 47 on the grid below. The numbers on my grid are also factory number and come from a Mopar vender Tristate catalog that the Mopar supliers used and is the same as the michell catalog number. When I replace the vibration Dampener and pully is was a single unit that already had the hub on the unit. Rich hartung Desoto1939@aol.com
 2 points
 -
Thanks everyone for your help. Now that I have the proper terminology to use, I can search for further answers and have been reading a bunch on here about this topic already so my apologies for another thread! Please enjoy a photo of my project in the works!
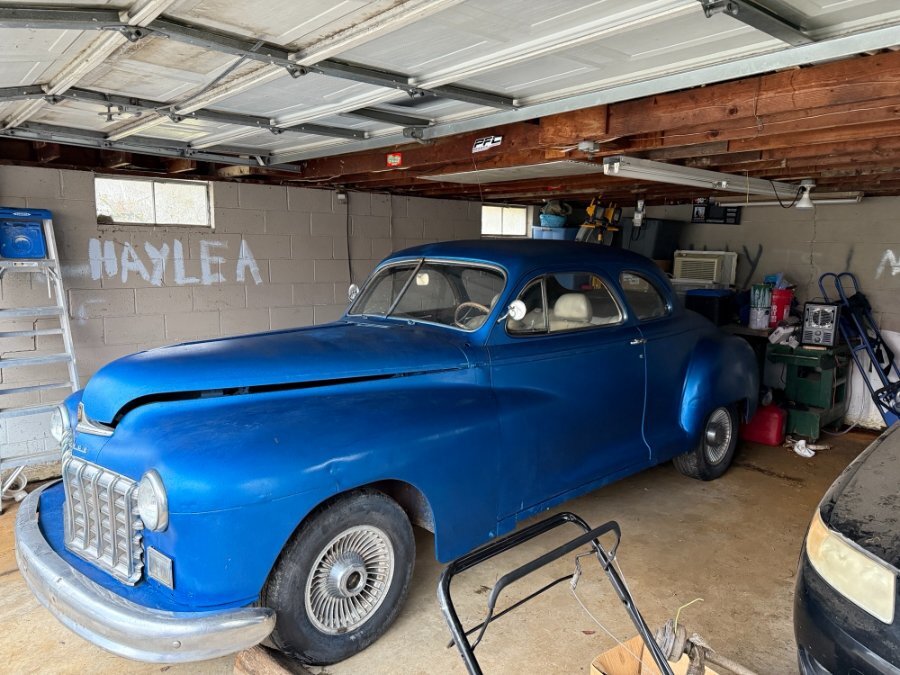 2 points
 -
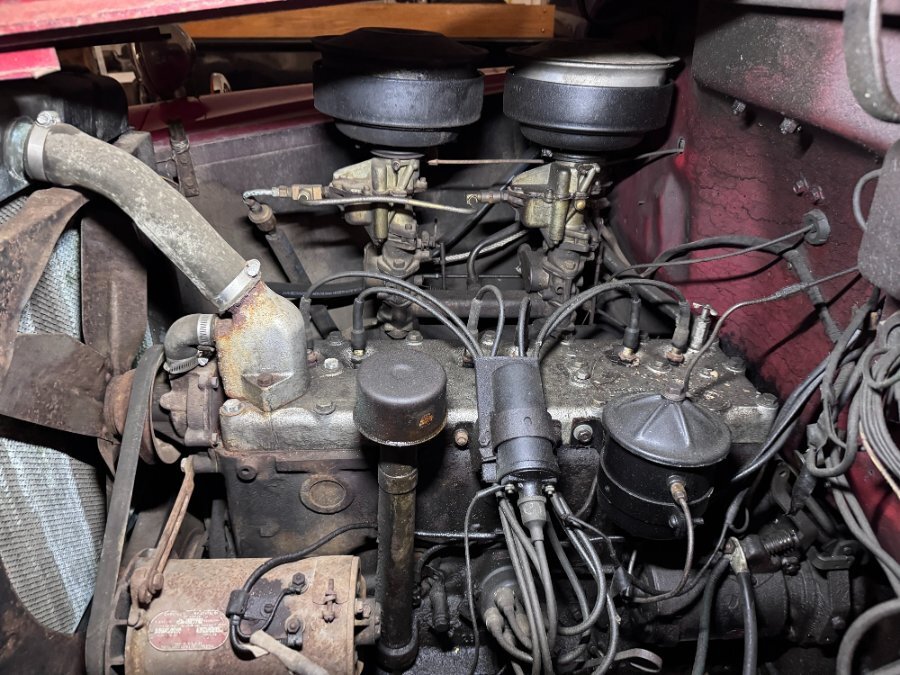
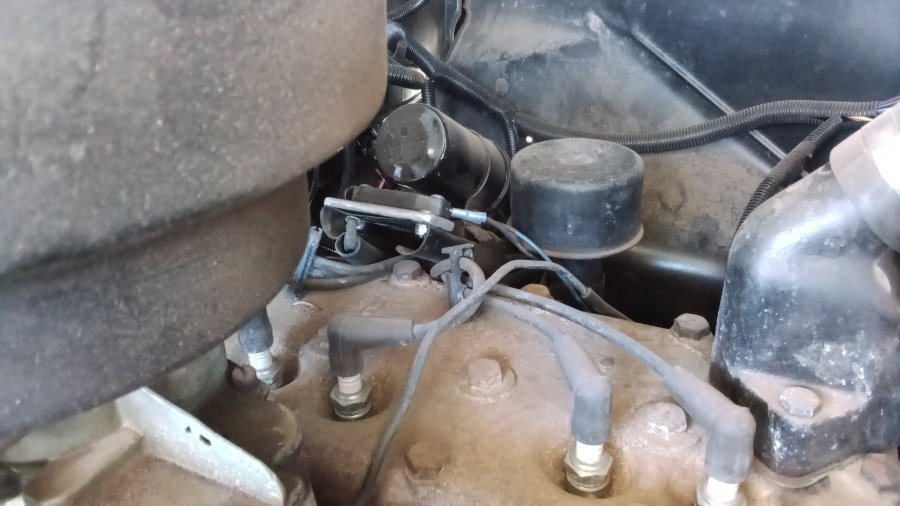
The part in the center of your picture is a Sisson automatic choke. You have a truck or Plymouth carburetor on your car with a manual choke cable. It looks like the outer part of the choke cable isn’t secure, so it is moving, but the choke butterfly is staying in the choke position. The lower device, under the carburetor is the manifold heat control.2 points