Leaderboard


.thumb.jpg.78d6c0802c54e2d4382e1ae232fa93e6.jpg)
Popular Content
Showing content with the highest reputation on 01/17/2021 in all areas
-
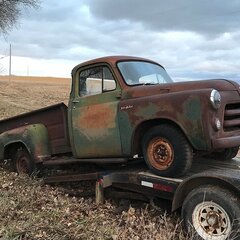
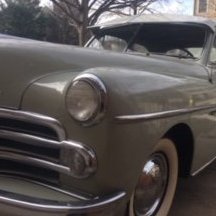
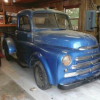
On the road again .

 4 points
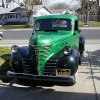
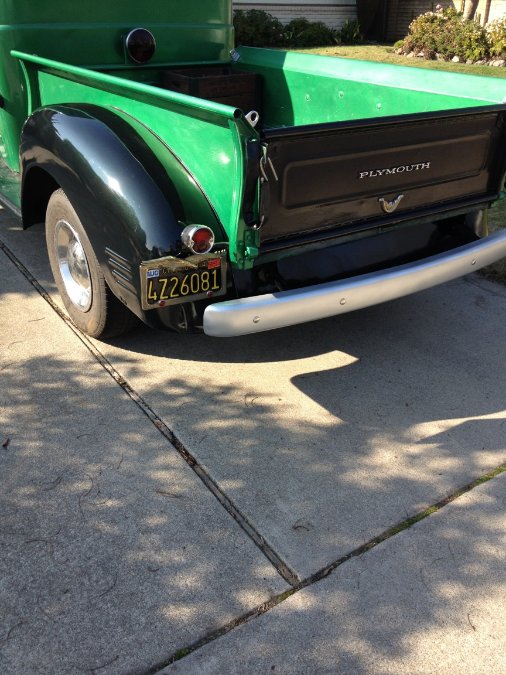
 -
Hey boys! Im Glad my videos got yall talking!! I'm Dave and I run the Parts & Restoration Youtube channel. Disclaimer: I'm NOT a mechanic. These are my videos and i'm happy to answer any questions you may have. Im a professional fireman the city of Philadelphia, PA, and youll be amused to know that I performed my first oil change in my own vehicle about a year ago. This is the second chrysler flathead engine ive rebuilt, the first being professionally machined after I pulled it from my 1958 Dodge Power Wagon W300M. At a machining cost of 3k for the PW engine, i wanted to see if i could get this one running for less. Afterall, I traded my old 98 chevy truck for the 49 plymouth straight up, cash free. I purchased that engine for 200 bucks with a free turning crank and seized valves and just wanted to get it going at low or no cost, replacing what I needed to ONLY when i absolutely needed to. Iv gotten my education primarily from youtube and a few period tech manuals. The basis of this video was to get it going using basic tools and specialized stuff ONLY when necessary. After all, i did this job at home, cleaning most of the parts in my own kitchen sink (im ALREADY divorced, dont worry). When i hit a snag, instead of throwing money at the problem, i tried to adapt, improvise, and overcome, just like any of you would if you were in need to get something going with limited resources. There are lots of these engines out there, for cheap, that, with some confidence gained from seeing somebody ratfuck the engine back to life, will at least give getting them running a shot. Anyway, im thankful for this forum, and for your comments of praise and criticism. Tinkering is my outlet, my opportunity to stimulate my brain and use my hands productively. Im no purist and I have thick skin. I look forward to talking shop in the near future. Regards, Dave Weinman Parts & Restoration PS: Not a mechanic.4 points
-
My 1940 D14 will be tagged for the first time since I've owned it 5 years ago come this spring. I'll be there!3 points
-
Heres all I have to offer, my video catalogue, if you will. Enjoy https://www.youtube.com/channel/UCHh2IAjdU-G9l8N3oc8h2uA/videos3 points
-
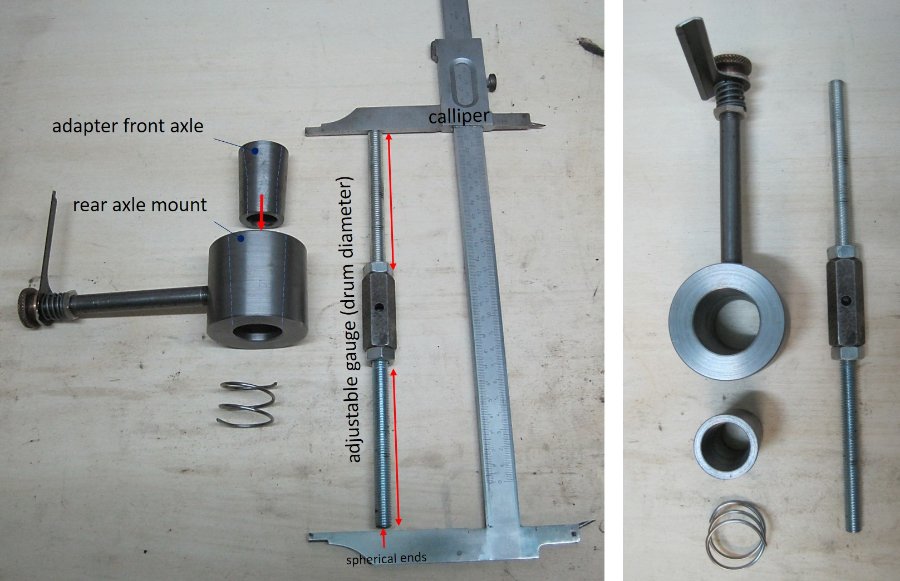
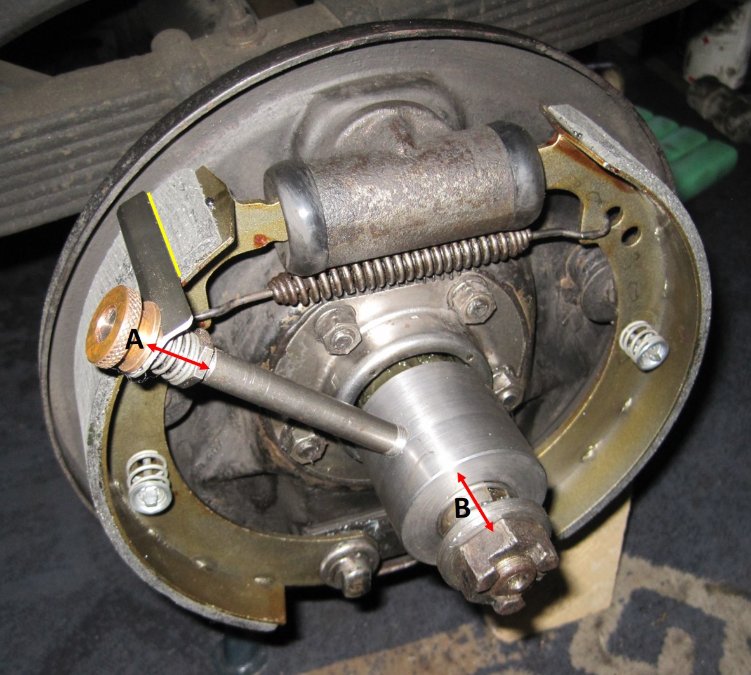
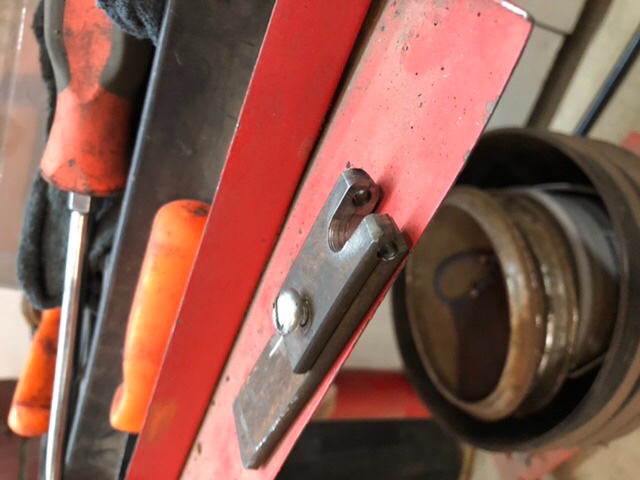
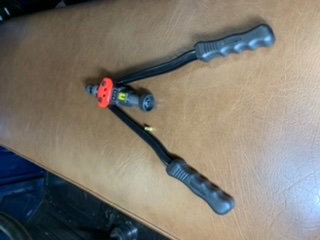
Probably the 254th version of a homemade brake adjustment tool, but since the topic headline is "show your tools", here`s my version ? The main tool body fits on the rear axle, an adapter sleeve fits into the main body to fit on the front axle. Adjustment by the knurled nut (where the A in the picture is - nut fine threaded), so no extra tool / wrench required. Spring A makes it a little easier to adjust the tool`s diameter while checking. Spring B pushes the tool onto the tapered axle. The load is slightly adjustable, just enough pressure that there`s no wiggle, but slight enough to allow easy rotation. The gauge (piece of an old Allen key + threaded rods) is for determining the specific drum diameter. A caliper to take the determined diameter and check the brake shoe diameter (minus clearance). That`s it. brake-adjust-tool.pdf
 3 points
 -
MY best advise,and worth every nickel it cost you is "IF the original engine is still in it and it is rebuidable,rebuild the damn thing and be done with it." Chances are it will cost you more to buy a USED replacement V-8,the adaptors,the new exhaust,new wiring,convert to 12 volt,maybe a new radiator,new driveshaft,etc,etc,etc as it would to do a standard rebuild of the original flat 6,and when you are done you have a modified car that will probably be harder to sell and sell for less if you ever want to get rid of it. Remember,even though it is a antique/old car today,when it was new,it was built to drive at highway speeds on modern highways. It's not like it's a 1931 something. Since it is all original,keep it all original and just enjoy driving the damn thing and showing people how they "used to be made". I suspect you might be surprised at how pleasant they are to drive.2 points
-
If the motor needs rebuilding I know a good video that'll show you how to do it. ?2 points
-
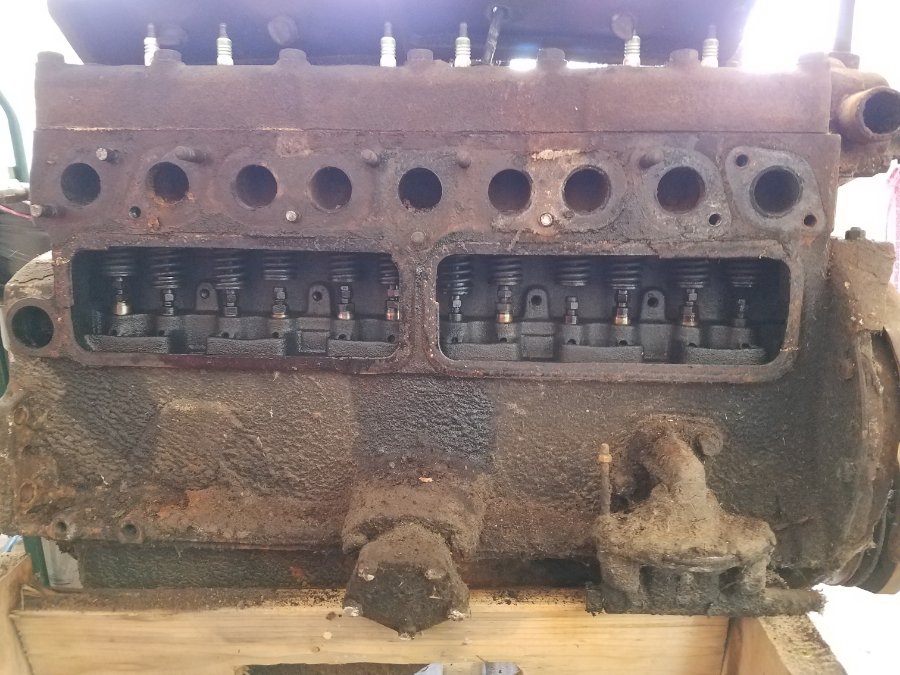
Started the tear down. I was surprised at how clean it was behind the tappet covers. Couple of stuck valves though. My opportunity to show how to loosen them without vice grips or damage to them. Right now I have penetrating oil on them and am letting them sit . I'll resume the tear down next week when my son is back.
 2 points
 -
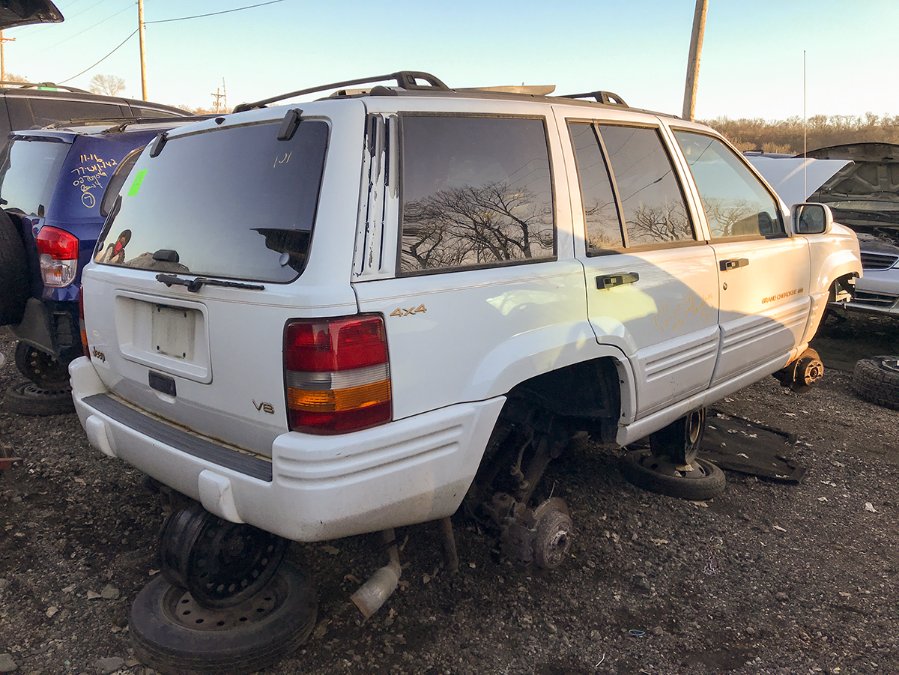
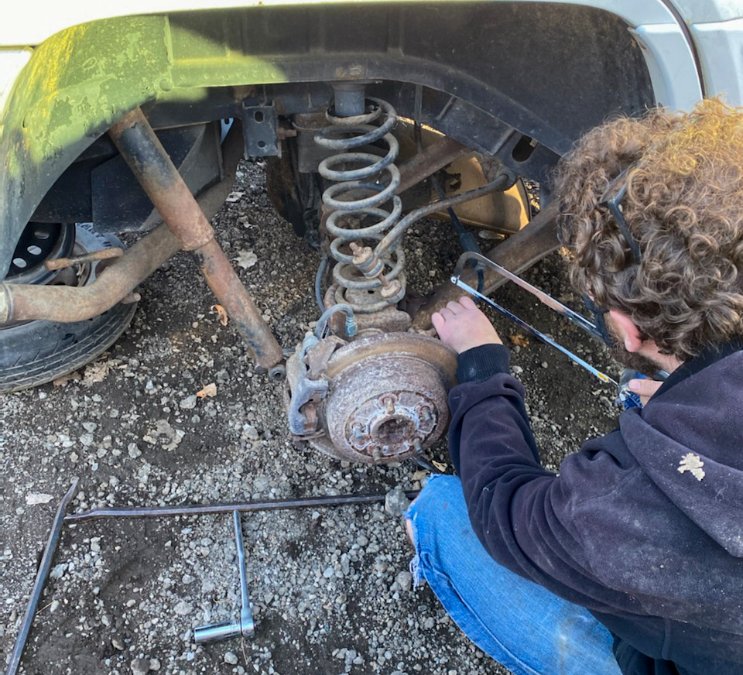
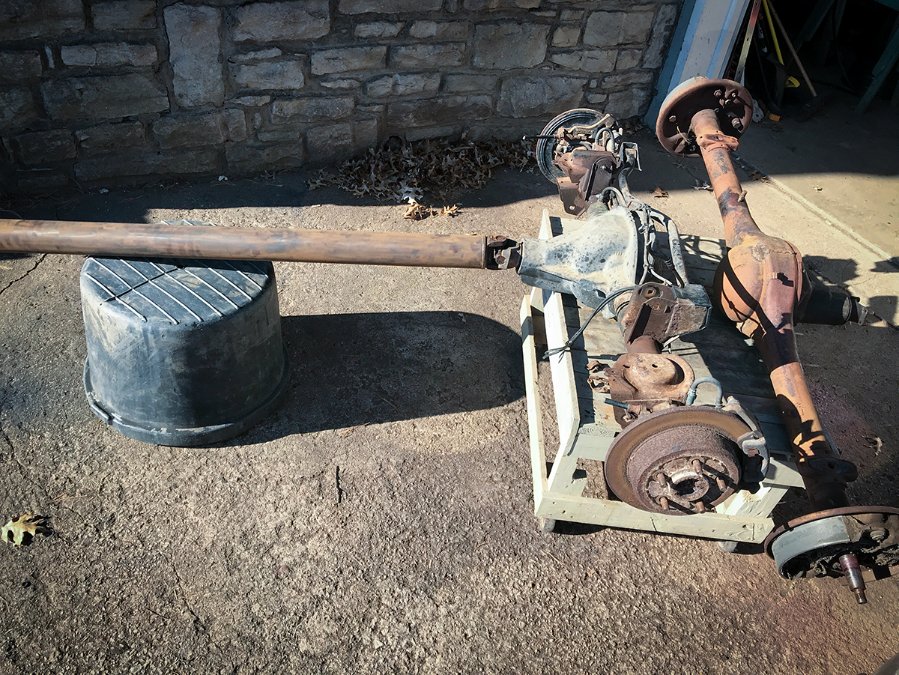
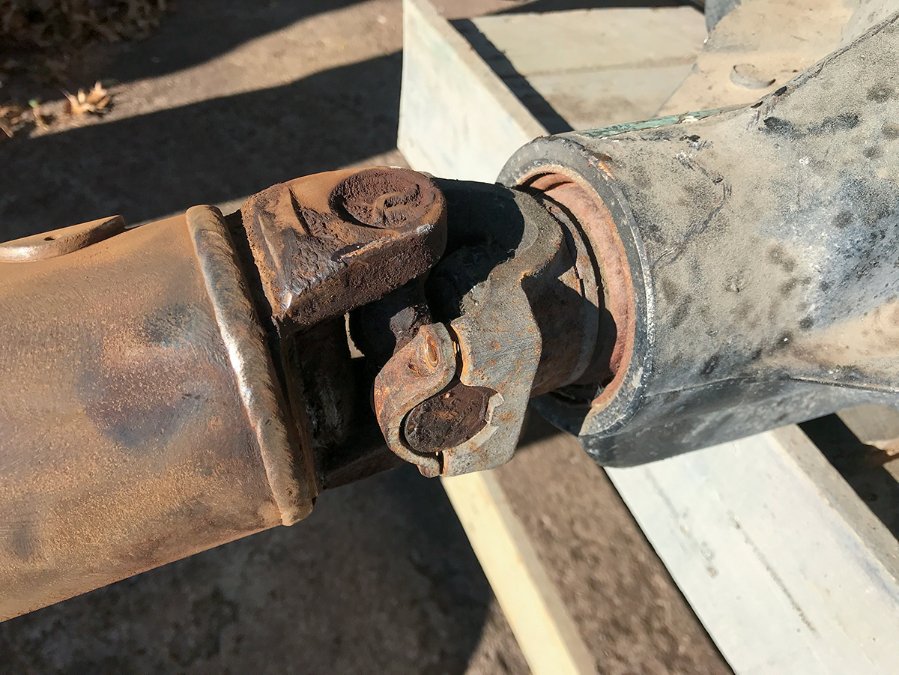
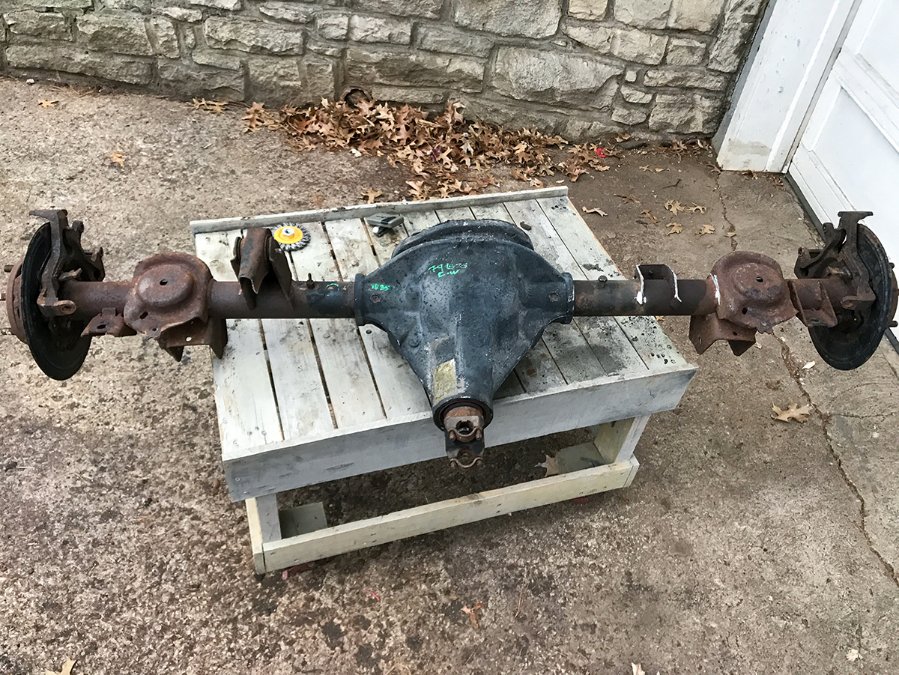
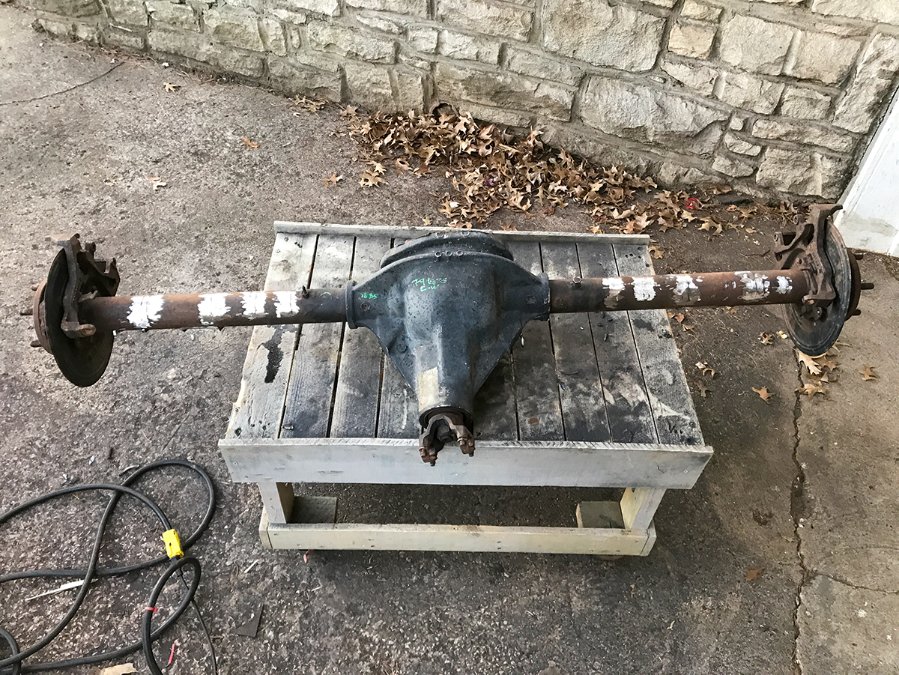
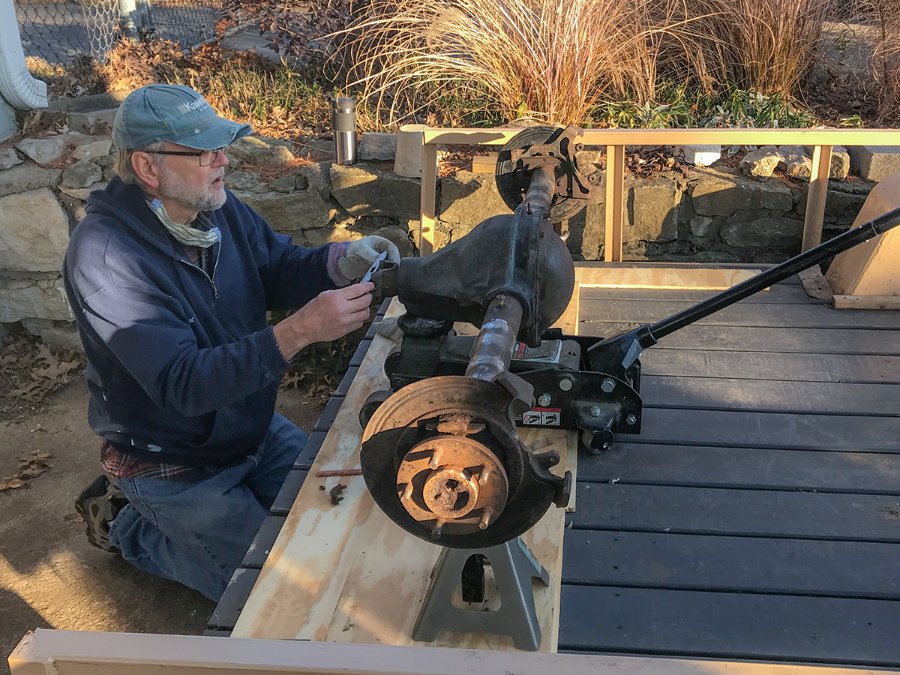
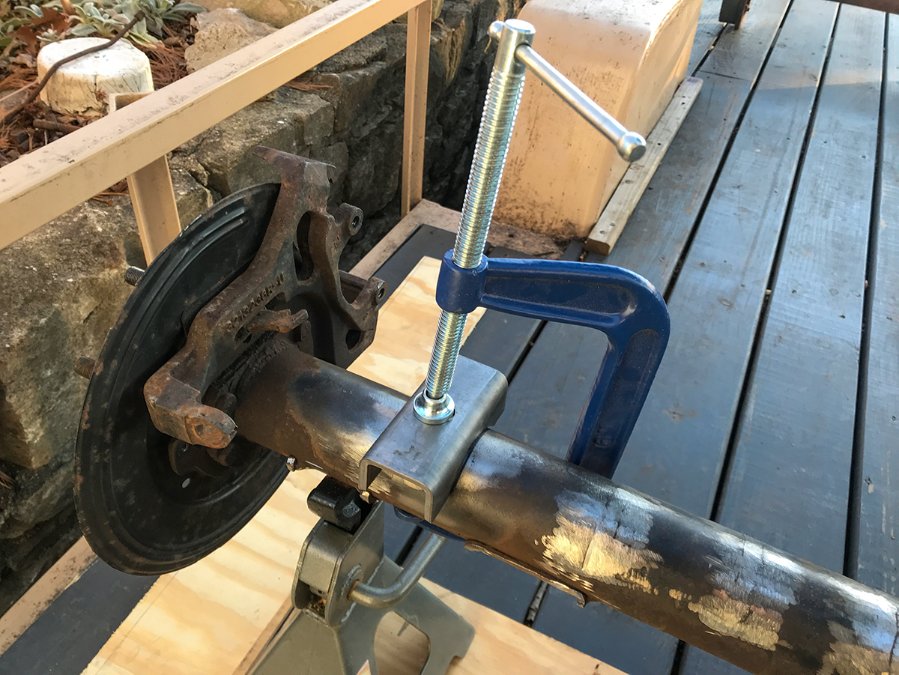
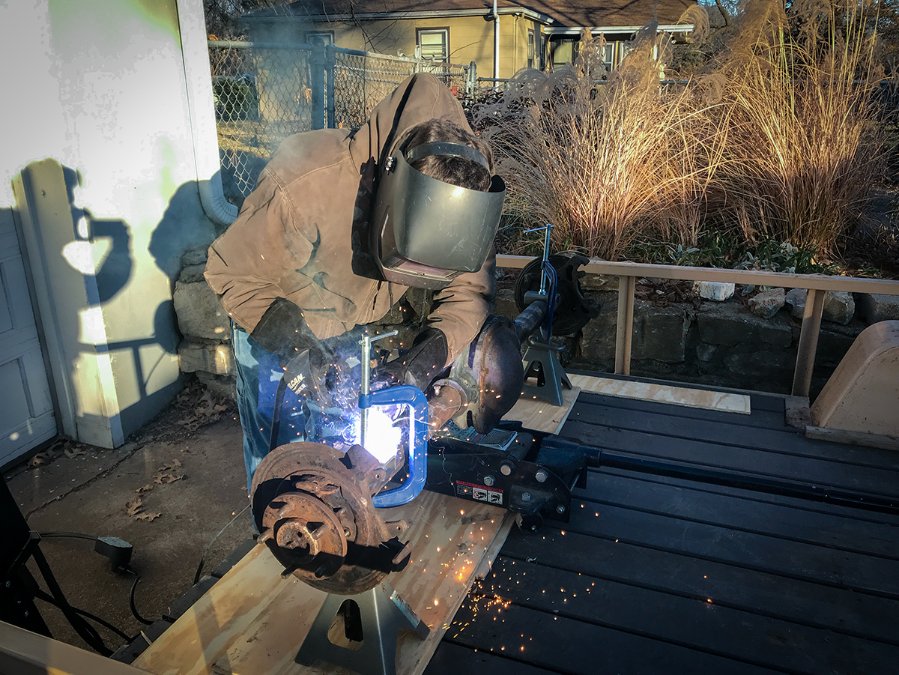
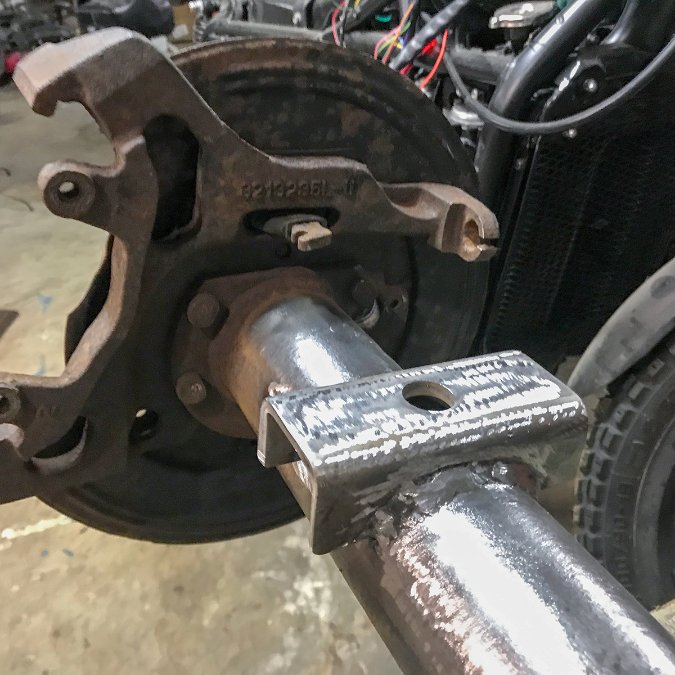
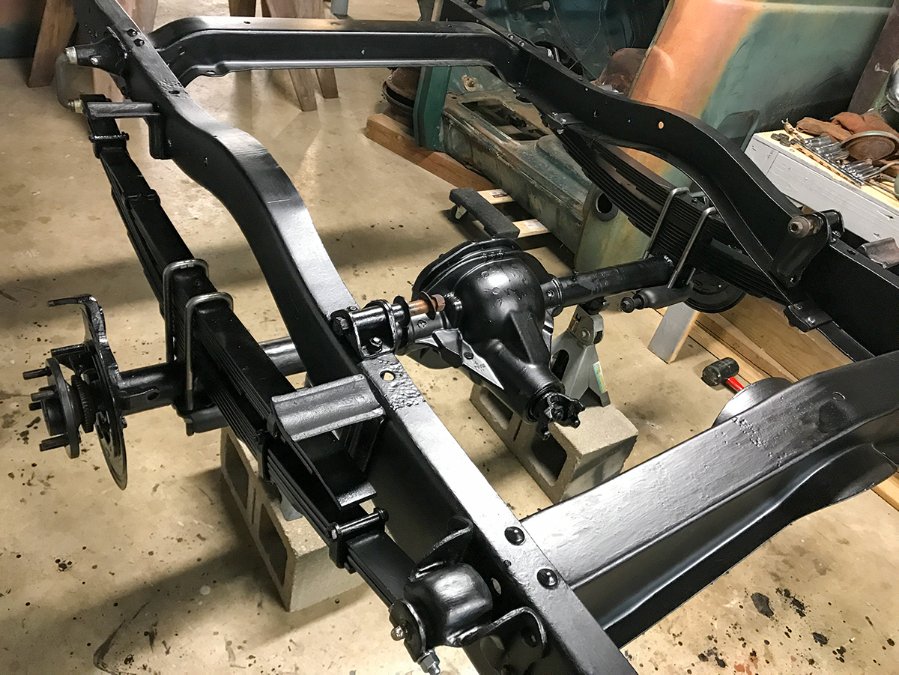
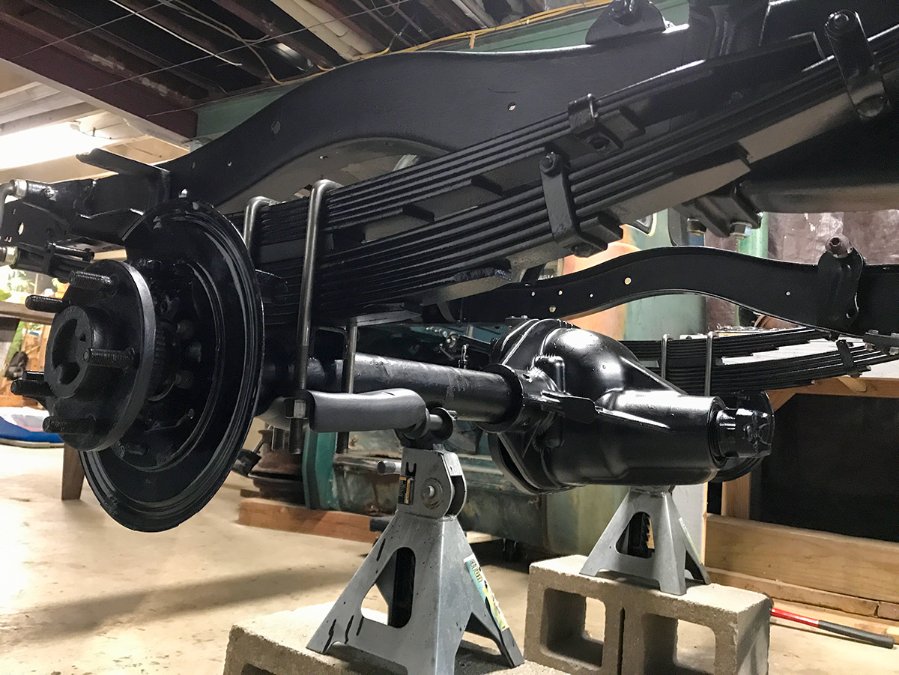
Just wrapped up the rear axle, getting that figured out has taken up most of this winter so far. The original plan was to reuse the stock rear axle and drum brakes, but when we tried to pull off the drums we managed to crack one of them straight through. At that point, getting a newer axle with disc brakes started to make more sense dollar wise than replacing and rebuilding drums. Pick-N-Pull had a few '90s Grand Cherokees, this '96 Laredo had the least amount of rust on it. The number plate is illegible but it would have had a Dana D44A axle, with a 3.73 ratio? Took two trips for us to get it removed. The folks on this site were right, Grand Cherokee rear axle dimensions are more or less spot on with stock and the driveshaft bolts right up. The GC axle is 5 x 4.5 vs the 3/4 ton's stock 5 x 5 bolt pattern, but that's not a big deal for us. My stock wheels are rusted through and unsafe so I'll be looking for different wheels at some point anyway. A half dozen cutting and grinding wheels later and all the stock brackets were gone. My dad is a retired architect, so I brought him in to check us on the perch geometry. We leveled the trailer we were using to work on, put the stock axle on jack stands, raised the front until the perches were level, and got the drop-down measurement from where the driveshaft connects. Then we put the new axle in its place, matched the dropdown, and clamped down the perches level at the right width from center. Tractor Supply's weld-on trailer perches are a good equivalent. My brother knocked out the welding. Doesn't have to be pretty as long as it holds! Then finished cleaning it up and drained the oil. We also took the opportunity to unpin the axle shafts and replace the seals while we were in there. Then painted it with black chassis paint, ordered new U-bolts, and reinstalled everything.


 2 points
 -
Hi all, have just joined this site and am impressed with all the information and knowledge available here. I have purchased a 49 Dodge D32S Special Deluxe and of course have a few questions. Location of a chassis number? It has an alloy tag on the firewall but is there a stamped number somewhere? There was no jack with the car and believe the original is a bumper jack, but figure a small trolley jack will do the job? Keen to find out the differences in the different variants of these cars. Cheers Bill
 1 point
 -
The master uses his googlefu https://www.jalopyjournal.com/forum/threads/48-hemi-plym-mock-up-pics.847329/ https://p15-d24.com/topic/31920-not-for-the-purists/#comments1 point
-
Clay: On the prewar cars like my 39 Desoto which still used the old pre-focused bulbs they would put on a headlight relay especially when they converted from the bulbs over to the sealed beam conversion kits.. The use of the relay was to make the electrical power shorter instead of have all the electrical current run through the headlight switch and then down to the dimmer switch and then out to the headlights. It was a more of a direct power supply to get better lighting on the road. You should already have a starter solenoid on your car which acts as a relay to the starter motor so why would you need an additional relay. The starter solenoid only engages when turning on the ignition switch to make the electrical circuit supply power to the starter motor to turn the flywheel. After the engine has turned over and the car is running there is no more power draw. So why the need for a starter or additional starter relay? Not sure what you are asking or trying to accomplish. Rich Hartung1 point
-
Well, a starter relay was original on my 51.1 point
-
Not much of a tool, but anyone with s shop crane or manual hydraulic press would appreciate this. Images are crooked, but its the thought that counts. I have made a few of these, and it sure takes the aggrivation out of a repetative process using a jack.
 1 point
 -
Cool that you checked in here Dave. Your video certainly did raise lots of interest. I’m interested in learning more about how the engine is running once you start driving the car regularly. You most certainly refreshed the engine at a low cost. Cost per mile going forward interests me.1 point
-
I enjoyed your fun and entertaining video! Other than never liking red silicone sealant your video was 100% awesome? Thanks for posting and let's see more!??1 point
-
This will turn out to be a nice car! You will get a great feeling of accomplishment at every step of the restoration and a big grin once you are driving it! Mine has not faded after 40 years of driving my old car! Welcome to the forum and a big welcome to the hobby! M1 point
-
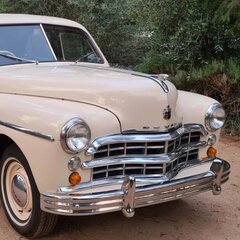
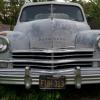
You scored! That car looks straight & complete. Here's hoping it starts right up, too. And, welcome to the forum.1 point
-
Congratulations to you! I am looking forward to seeing your progress along the way. It will be challenging but I am sure it will be rewarding.1 point
-
The king pins are out. I moved a jack stand under the frame directly adjacent to the spindle. Full weight of the front end on the stand. I heated the area for 10 minutes heating each side with my propane torch. I then put a sacrificial 14mm socket on top of the king pin and hit it with a splitting maul. Once the pin moved enough I had to use an deep socket to move it further than the short socket on top of that to finish it off. Thanks everyone one for the help.1 point
-
Weekend of elbow grease and some tinkering will bring it to life. Good luck and have fun!1 point
-
additional information - split die solution1 point
-
as the tube should be hollow...split a nut, weld to pliers...heat the threaded section....align the nut on the threads and squeeze and compress the threads....you may need also to put a filler into the hollow section. Possible you can heat and shrink it slowly back into a shape you can chase the thread...another old trick is to also use the half nut and a hammer to bump it back against a piece of brass.......just don't get in a hurry....odds are you can save this shaft.1 point
-
Nice find! Post some pics once you get it home and cleaned up - really doesn't look too bad under the grime1 point
-
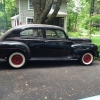
That's a nice looking vehicle. Someone's pride and joy once and soon to be again. Like the package of radio, heater sun visor. Two tone paint looks original option too. Good pictures. Look forward to seeing your progress. ?1 point
-
Congradulations! You had the good sense to find and buy one that seems to have nothing missing. You have no idea yet what an advantage that really is.1 point
-
you got a lot of work ahead of you....at least you discovered what appears to be a complete 2 door......even if in the future you go alternate engine and install AC...save that heater control panel...they beautiful and fully and very easily adapted to that of modern retrofit AC IF you go analog and stay away from digital and or vacuum controllers. Make sure none of them Puukiac tin worms have found their way over to the Dodge....1 point
-
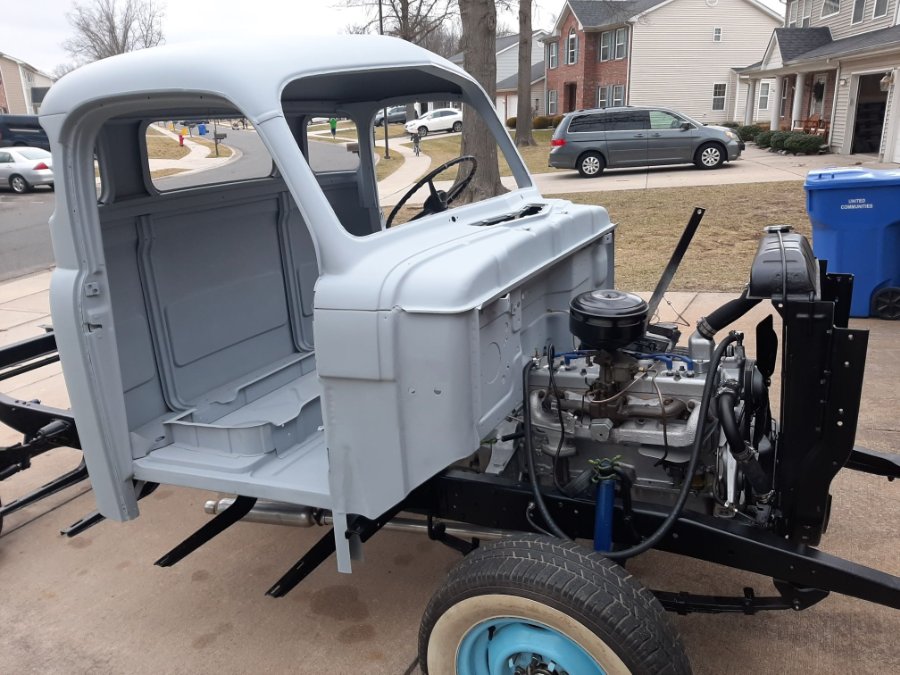
Took advantage of some nicer weather and mounted the cab to the frame. Realized that my "hard" left front mount is toast and needs to be replaced, going to have to find a hockey puck based on recommendations on this site.
 1 point
 -
Did you have to use heat or was the hammer enough? Looks like you have it supported the same way I have it. Did you put something under the spindle when you hit it? Enjoyed the video.1 point
-
I got a free frame today for my 55. The main reason for getting it was the home built power steering setup. Somebody fabbed up a custom bracket and installed a power Saginaw box. Gonna swap this over to my 55 shortly!

 1 point
 -
I finally got interior into Ol Blue. Reg had sent me his pattern and I was going to copy and cover with vinyl... instead I altered it a bit when I found a sheet of 1/8” abs. I made the two door cards and the two piece back for our 5 window rigs, but given that ABS can be heated and bent I tried making top and wing panels out of one piece. Bent it and glued the corners with acetone and abs chunks melted to make a one piece head liner. I cut a small relief at back center to give it right curve in 2 dimensions. I did a small seam at back. I had to install back piece at windows first then top so not as it was from factory but it went together with some choice words. I could use a matching set of window cranks if anyone knows s source. I used rivnuts and 10-24 stainless screws with finish washers to fasten. ABS panel was black so I painted with SEM brown, snagged some arm rests from an 80s Toyota painted and voila... what d ya think?
 1 point
 -
Yes the track will hopefully be part of the program,the old road course is also still there, the six mile loop is driveable and marked with interpretative signage. Trying to arrange group laps behind a pace vehicle. There is a club event at the track that weekend so we are finagling getting a couple laps in during their lunch break.1 point
-
I think they are the original Fenton dual intake ones. I had them re-chromed as the old chrome was falling off. They had the old horsehair filter medium (at least I think that is what it was) that you washed out and re-oiled. Will be looking for a paper filter that will fit. I found the intake, air cleaners and exhaust headers as a package deal on ebay a number of years ago. Cleaned them all up rebuilt the single carburator I had and found a matching one and rebuilt it as well.1 point
-
Here is a photo of the bracket and switch on my 53 Plymouth. Not the best angle but hope this helps. It was all I had in my photo file.
.JPG.fb0f6d24c2eee40d7aac0969ec3a47e0.JPG)
.JPG.bb4bdadd2c635fb42a8761b95380534f.JPG) 1 point
1 point