

.jpg.355dd22c18259538f7e0d984b642d99e.jpg)
kridgleyud
-
Posts
72 -
Joined
-
Last visited
-
Days Won
4


-
Thanks for the pointers. Going to out to car this weekend to take a look at pedal range vs carb fully open and pull the plugs for any signs there. exhaust is dual manifolds into a single 2.5, so larger than original. I'm going to check the vac advance as well and rev in neutral if previous don't show cause.
-
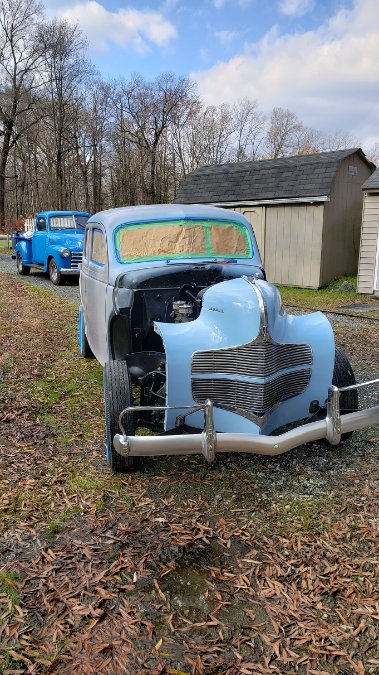
Looking for guidance/help/thoughts. 1940 dodge sedan back on road after resto. Dual carbs, vac advance working, langdons HEI, 12V, mechanical fuel pump, fresh rebuilt motor, 3 speed column shift and ford 3.55 rear. She accelerates through 1st, 2nd and into 3rd fine ... But I find there is not enough throttle left to push past 2,000 rpm in 3rd. Flat roads, tops out at 48-50 mph at 2k per cellphone gps. I feel like she should have some more room left to go past that, but pedal is to the floor. She'll cruise there for miles without issues. Where to look first, directions, tips? I see folks here say they can cruise at least 60 without issues. Not trying to race her around town, but feels dogged.
-
.thumb.jpg.78d6c0802c54e2d4382e1ae232fa93e6.jpg) kridgleyud changed their profile photo
kridgleyud changed their profile photo -
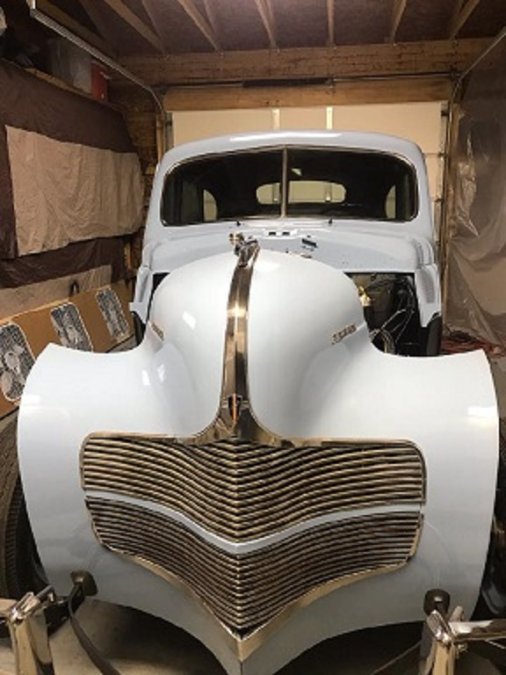
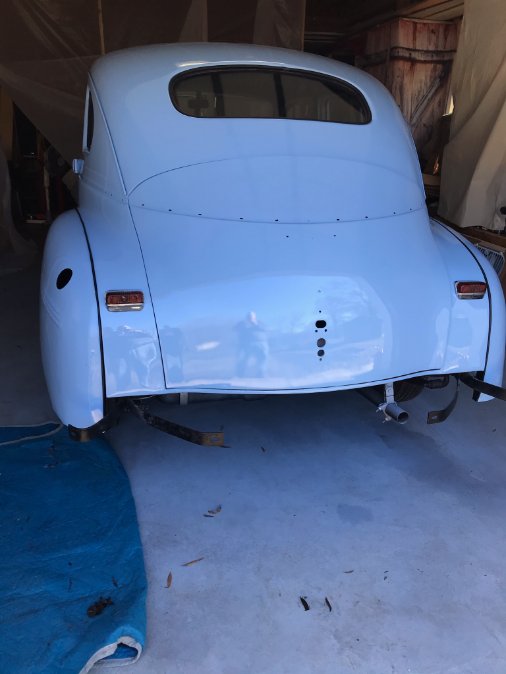
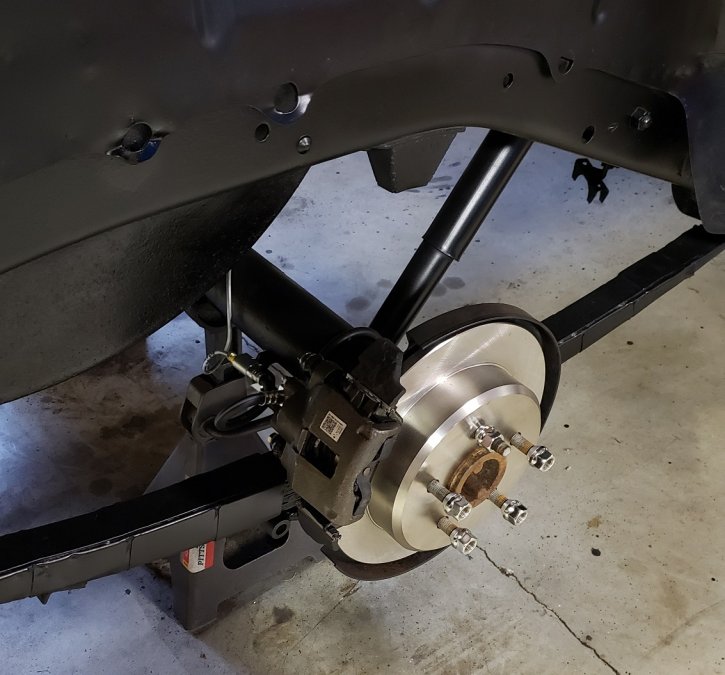
Update for Feb. Last sheet metal installed, carbs rebuilt and balanced, fitted modern light sockets around the car for 12V bulbs. Put wheel spacers on rear wheels to bump them out a bit. Last bits are headlight wiring, tie in fog light (using as turn signals), and wipers. Then head onto motor vehicle inspection for my tags and I'm ready to cruise. Now I'm on the hunt for some odds and ends. Period front tag holder to bumper guard, usable hubcaps, and passenger side front side panel ornaments (just under hood).
.jpg.5668f4d199702ac3220b21685087d051.jpg)
-
For me, I was in the market for a new project. I knew I wanted it to be pre-war and my wife said it needed to be 4 door. So my 1940 D14 fell into my lap and it's been a loving relationship ever since getting it ready for the road. First tags under my ownership coming in the next few weeks.
-
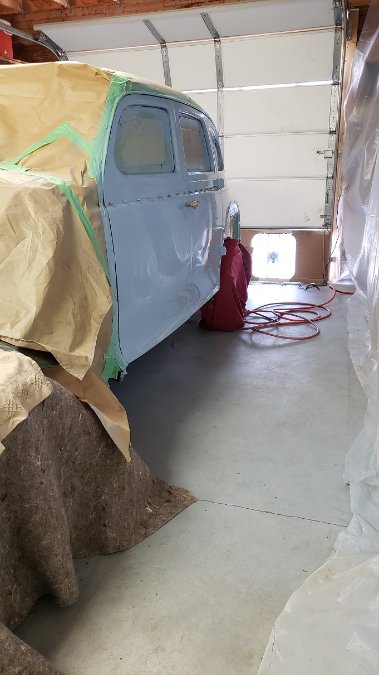
So with COVID, I've been home and that has been wonderful for the old Dodge. Fall/winter has been focused on getting paint laid down. I used the TCP Global single stage acrylic urethane, high gloss with great success, I really like this paint, it lays down really nice and leaves a good shine when cured. Then moved onto wiring, dash, interior (new covered seats), adding seat belts for the kiddos. Can finally say that the test drive went well - now moving onto reassembly of panels and trim work. For the colder portion of the winter I plan to get her ready for tags in the spring and FINALLY be able to cruise and show. Planning to trailer her up to Watkins Glen for a nice family getaway this September.
.jpg.bb6fecc83a13831daf27999a80002a3f.jpg)


-
My 1940 D14 will be tagged for the first time since I've owned it 5 years ago come this spring. I'll be there!
-
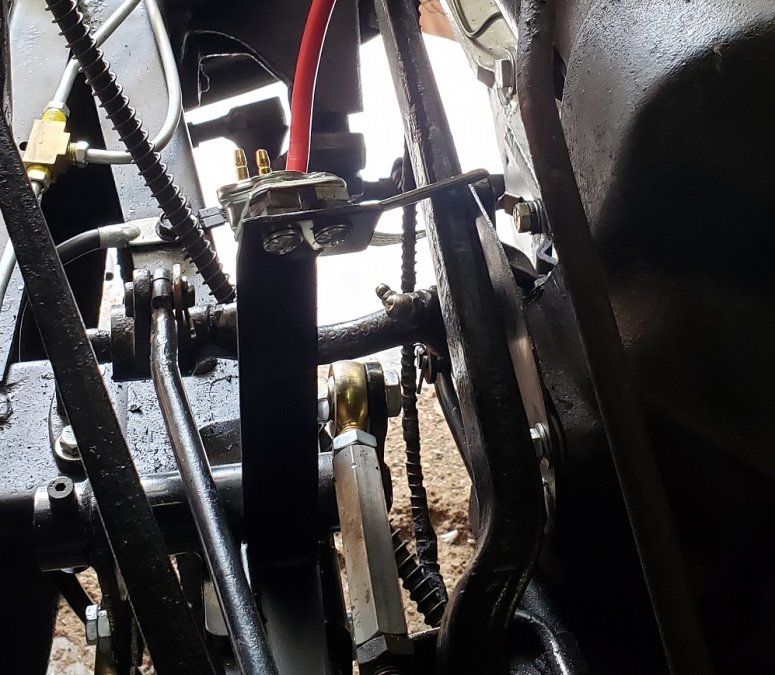
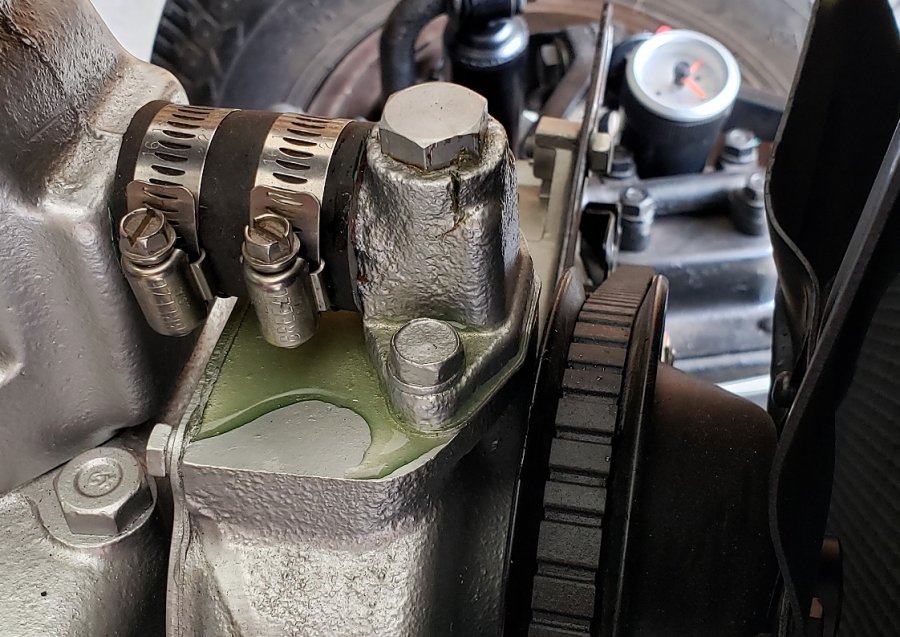
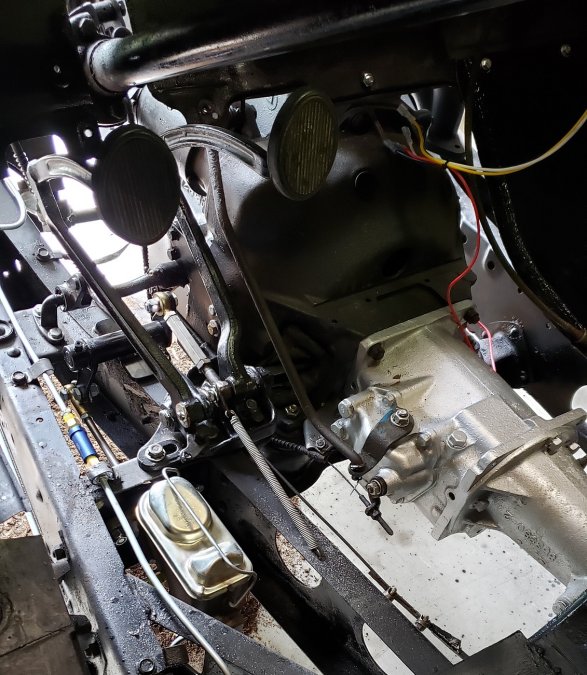
So, another good weekend on the 40. If I can figure out the video posting part of this, I have a video of her running as I checked out gauges, exhaust, gears, etc. As with all steps forward, there are always things that set you back. This time, the water pump bypass was cracked so there's a coolant leak. Very cheap for new, so there's one on the way before running for too long. Tach came, so I test fit this into the area to the left (or right for RHD'ers) of the gauge cluster. Also test fit in the modern radio control. I have no intent on reusing the old mopar 802 since I'm 12V and they're very far gone to rebuild. The amp unit is a small brick that mounts under the dash, piked it up from Woodys Custom Shop and I'll use a bluetooth marine switch to control. This is a little better than a cable from my phone to cable, cleaner. The speaker will be a dual channel 5 inch speaker to mount in original location. For the old radio control knob holes, I plan to drop in LEDs for turn signal indicators. Last bit before closing up the floor was to make a bracket to hold a mechanical brake switch. I'm not a fan of the pressure switched plumbed into the lines as it's one more place to leak and any servicing of the switch will not break the circuit. I mounted this between the clutch and brake linkage on the frame. Next up is the motor break in (once coolant leak is resolved), test drive in and out of garage then onto the painting.


-
Hey andy, love what you did to your 40, seen a lot on this site and advice you gave really helped me out as well. I'm installing a little 52mm tach in that unused area of the dash between wheel and door. Once it's in and radio is set up, I'll post an update.
-
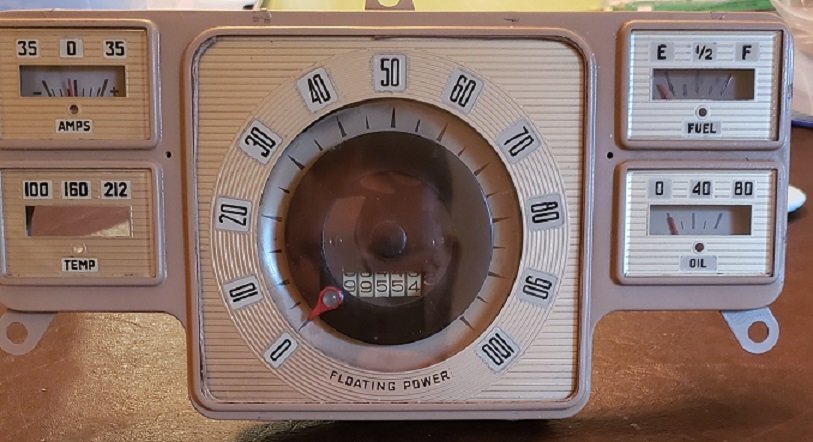
Update, over the last week or so I was able to make up the exhaust. For this, I just ran of the headers into a single pipe back, through a glasspack and out the original location at the rear. I reinstalled the dash to work through the shifting linkage and that's adjusted good now. For the first fire-up and drive out of the garage, I also reinstalled the gauges after refurbishing the cluster. Original glass had almost no lettering left so it was stripped, painted, sanded and I used my wifes vinyl cutter for the background. The original speedo was also very bad off, so I picked up a 30 speedo with really good shape color filter and face and adapted that onto the 40 body. Came out pretty good I think. When reinstalling the gauges, I learned about the unique (to me at least) fitting for the oil pressure gauge, so that's the last thing stopping the start up and low speed test out of the garage. I have that now, so hopefully this weekend I can milestone this build thread with a nice video for you all, we'll see. Throttle pedal rod was also installed, finally got that right and spring locations worked out. I also started working out the radio and decided to add a small tach into the dash. I'm going to use the original radio knob locations for turn signal indicator lights and where the actual radio was, put in a bluetooth radio remote (small control panel with like 4 buttons to work hidden radio) and mount the hideaway radio under the dash wired to a 2 channel speaker in the original location. Floor closed up, upholstery fellow quoted work, new tires ordered and then paint coming up next. Once she's painted we'll get cracking on wiring, interior and glass, and alignment before inspection. She's getting close. I have a goal to get out to the later summer/fall cruises with her and enjoy it as I address the more cosmetic stuff.
-
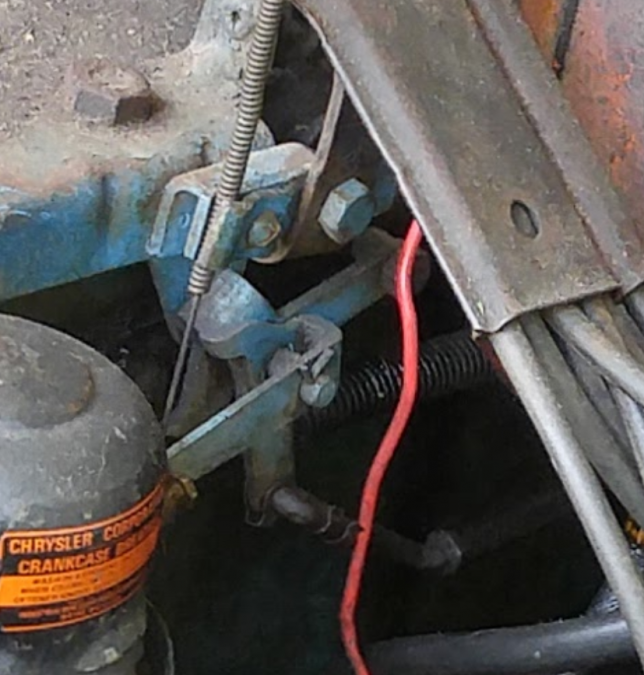
@Los_Control Thanks for the photo ... the trucks ran the linkage to the pass side of the block, the cars ran it to the driver side and across the head. I've seen on later model cars where there its a hinge or pivot on the firewall. Mine looks as is there is a rod that connects the bell crank on the left side of the motor to the pedal. I have a rod that looks the part, I'm just not sure how it goes into the firewall area. There is a tab bolted onto it with no indication of fasteners. Here is what I can tell, looking through all the tear down photos, you can see the rod headed toward the firewall.
-
Hello all. It has been a long road and the project took the back burner for a while. But, here is an update on where the build is now: - Rear replaced with a 98 ford 8.8 with disc brakes - Engine buttoned up, repainted silver - All the body rust repaired and sealed, fuel tank repaired and installed - Front disc brake conversion (Scarebird) finished and pedal assembly reinstalled - Trans reinstalled, clutch linkage and shift linkage reconnected - Front and rear brakes plumbed, bled and tested - New wiper motor installed from Newport (great kit) while dash is out On the list of things to work out are: - How the heck the throttle linkage from pedal gets to the side of the motor to the bell crank ... no pictures from my books on how this linkage is made ... I have a rod, but can't make out how this attached .... it can't be solely supported by bellcrank and floor board, can it? - Prime and paint - Wiring - Exhaust work ... looks like it's not possible to run true duals all the way back given the battery box and left side mounted fuel tank ... only have a small opening between tank and spare tire well to run tubing and this is not big enough for duals. If anyone has info on they did it around the tank and spare tire well, I'd be happy to see but everything I've seen, it's too tight

-
Quick update for those still following this build ... I know it's been a while. Motor is back in the car and all oil leaks have been addressed ... crank had odd hole in flange, some fittings loose, oil filter can was leaking ... all set now. Current set back is what I believe is timing. I reset the timing to #1 TDC prior to trying to start ... got some detonation and figured I was 180 out, adjusted for that ... same thing. So I decided to check the valve movement via the springs with the front cover open ... my intake valve is not moving on #1, seems to be stuck for some reason ... Next steps ... quick compression and leak down test then pull the heads off and see what that shows me ... was rebuilt a while ago and has been sitting for almost 2 years now so could be some stuck valves.
-
So the expansion plug in the crank worked out well ... no more leaking from the rear and with plugs out, starter rotating the flywheel I saw the pressure gauge jump right up to 25-28 psi ... BUT! Also noticed some oil coming from the #3 and #4 cylinders (apparent from the plugs being removed). After cranking starter like this for a bit on and off ... some small oil drips coming from the headers ... this makes sense if there was oil in the cylinders and being blown out the exhaust valves. I'm hoping this was because the motor was sitting upside down and rotated in that position while I was working through the crank flange and rear seal. however, I'm starting to not trust anything on this motor anymore and think I should do a compression test to make sure the rings are OK. Am I being paranoid with this, or should I start her up and see if it goes away? It's never been run to temp or broken in yet, so maybe there's some oil getting by until it's run at RPM and able to get hot ... on the other hand I don't want to ruin anything either. thoughts?
-
@Robert Smith I believe this one has the electric wiper motor installed as well.
-
Figured I would post the solution I used ... I found a dorman expansion plug that matched the bore ... drove this in with some permatex and it seated nicely. Re-installed the flywheel, bell housing and starter and cranked her with no load to check oil pressure .... got it now! no leaks! She's going back in the car as soon as my new clutch disk comes in from Nashville and I'll get her started on frame. Video when all goes well


