-
Posts
519 -
Joined
-
Last visited
-
Days Won
2
Content Type
Links Directory
Profiles
Articles
Forums
Downloads
Store
Gallery
Blogs
Events
Everything posted by Veemoney
-
Cool picture Sniper but no harness?. Made a few trips up above polar cranes and the first time up is the worst as I remember.
-
I worked Bay City, Muleshoe and Glenn Rose Tx. and over the years all the hot states and other countries. You learn what works for each. Most of these most know but first is this Bandana which I will put in the tool category since it is a chiller basically and the crew and I used them. We soak them and put them in the freezer. Wrap around your neck afterward and they cool the blood like a chiller when it passes your neck and then the cool blood spreads to the rest of your body helping to keep the temp down. We will all shut down at some point and once you take your body to that limit your brain will shut you down before you reach that threshold again. So I've been told. Swap coolers work well in dry heat but a dehumidifier or air conditioner was always preferred if you could swing it. Machining equipment and the laser trackers would start having issues once you topped 100 degrees so we shaded and tented to keep things dry when working outside. We then created smaller work zones within that area that we could manage to condition the air. In places where we could not tent small work areas we set-up cool down areas next to them that the teams could use. So for folks working in carports Visqueen or vapor barrier plastic could be your friend to set it up in conjunction with an conditioner. I use a portable dehumidifier but also keep this 2 ton window unit on a cart at my shop if things get unbearable. I roll it around to stick the back end out the door or under a section of plastic. I use some green house plastic tarps which is a bit tougher material then we used at work on the covered porch of the shop. With the plastic you don't need to go all the way up the wall either to cool the area. The heavier cool air will fill the area like a tub if you wall it on 4 sides which works well for ventilation. Just make sure you not trapping any heavy gases.
-

46-47 WC Series Synchromesh 3 sp transmission?
Veemoney replied to 1949 Wraith's topic in Mopar Flathead Truck Forum
I have a 47 WC with the non-syncro 4sp. You just can't force it. Did not think I would keep that trans but i did get used to it. -
I run a 6 volt neg ground alternator in my 47 with stock distributor/points. The headlights are always bright now and the electric wipers no longer slow down while idling. The generator worked as it should and I never had any issues with it outside of the norm but I drive it often and for safety the upgrade is worth it to me. I prefer the alternator upgrade on the old generator bikes as well in most cases and points for the ignition.
-
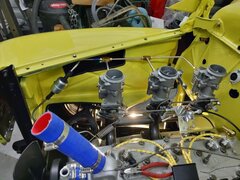
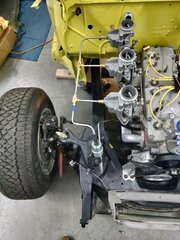
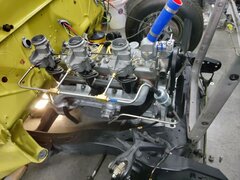
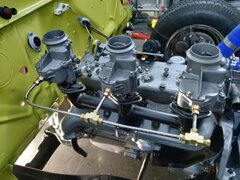
After driving any vehicle on the highway at 70+ around here when I get onto the off ramp I have to remind myself to slow it down going forward. When I started driving the older cars and trucks it also took some adjustment for me to fully enjoy going slow. For my 47 WC I purchased a 2-carb intake set-up and a T5 trans, next I found a 48 rear end complete with a highway gear. As I was getting all the parts and driving the truck I started appreciating the old battle wagon and still drive it essentially as delivered from the factory. I do still tend to come off the line fast if I'm first at the light and I learned taking off in 3rd and then shifting to 4th makes for a more enjoyable ride. I always enjoy seeing an old fish picture of a Cuda or Marlin of that era.
-
Nice work on the oil studs and the engine bay is looking good.
-
-
Eneto, Based on the 2 statements you made above I would say if you can still turn it over with a screw driver your fine. Your dad had some experience and would have surely used some lube during assembly back in 80 and 30 years later you were still turning it by screw driver so my opinion is your good. What ever was used on the crank during assembly is still there if you were just turning it over as stated. Because you were able to turn it over and if you still can I feel you should have nothing "To Tight" that would cause any harm. I would pull the plugs and make sure it still turned over by hand and if so then bump it over using the starter a few times with the plugs out. If your going to try and start it put the plugs back in and if not you may squirt a small amount of oil in each cylinder before putting the plugs back in till you are. Good Luck
-
Concrete in and mother nature played nice. Looks good so far, do you cut score lines in the concrete in that area of the country.? Most typically do up here but since I had waterlines to worry about I did not. After 20+ years only some hairline cracks in mine. Binford Picklejack 2000 Maybe, Didn't Gallagher use the sledge hammer often in his routine?
-
Was looking at adjusting the front edge of my 41 coupe door out to meet the body contour. I figured the hinge had to have some adjustment in it but I couldn't budge the screws so far and figured I would confirm the pocket hinge is supposed to adjust before I break something. Sure enough PatS posted a pretty good link to a guide on door adjustments and the late Don Coatney also provided a great link on door adjustment as well that made me laugh. Reposting both below
-
My 47 WC has the Bosch 6volt electric motors. I needed to rebuild them and found some parts on the bay to get them going again. The main issue is a small fiber tooth gear that over the years disintegrates. I think the newer style motors you find on E-bay would be a good option as well, similar in style to the Bosch . If you stick with vacuum I would run a test first to see what kind of vacuum you are getting at the engine and then to the wiper motor, and as was mentioned make sure you have good lines. The vacuum pumps are readily available used and I purchased and installed one on my 67 to boost my vacuum for the brakes. Most hybrid and electric vehicles are using them so readily available at the recycle or e-bay as well but most will require 12volts. Along with the vacuum pump I used a pressure switch and relay so it only runs when needed.
-
Great to see the progress PA. Interesting also to see how simple the prep to pour is compared to up north by me. We have to excavate more dirt out and add stone for a base. Moisture barrier optional but wire and rebar required. I added the piping to heat the slab for our cold winters and insulated around the perimeter of the pour for that reason. Likely not needed in your area. I also stubbed for water and sewer at the time. I had some friends come by and help with the pour and we finished it pretty slick with a machine. One thing I will say on the final surface finish is a slick finish sweeps up nice, a little dust or water on the floor though and it gets slippery quick.
-
I'll I had to guess I would say 16 x 24 but I would wish for 20 x 30 and in the end I would feel it would be full in no time at all. Nice project
-
As was stated by Sam this is a great tool and Advance Auto Parts stocks these and usually has a code to get you 20% off if you reserve it on line.
-
That looks like a nice project. Good job on the firewall. Keep us updated on the progress
-
Getting to where you can feel the progress and anticipate it's all coming together. Looking good
-
Don't be shy take the full .050" off you will like it. I did .070 once it got to full clean-up.
-
I attached a link with some options for the extended bell housing motors from the "Hamb" lots more information on the topic over there if you want to read up. I personally have steered away from the extended bell blocks. Picture an additional 8-10" of cast iron (estimated from memory) hanging off the back of the block. https://www.jalopyjournal.com/forum/threads/331-hemi-extended-block-modification.249741/
-
Ulu, Nicely done, looks like a good place to sit back with a cool drink and relax.
-
Beautiful car Linus. Always liked that year and body style along with the 67 GTO. Glad to see it survived the years and is in good hands.
-
E-bay has grown some for better and some for worse. The "Sniping" software made it easy for you and others to submit your bid in the last 5 seconds of the auction for example and really worked well. The trouble is most of that software available came with stuff you did not want when you downloaded it (nothings free). I am still a user and when in need it is a good source to check for parts first.
-
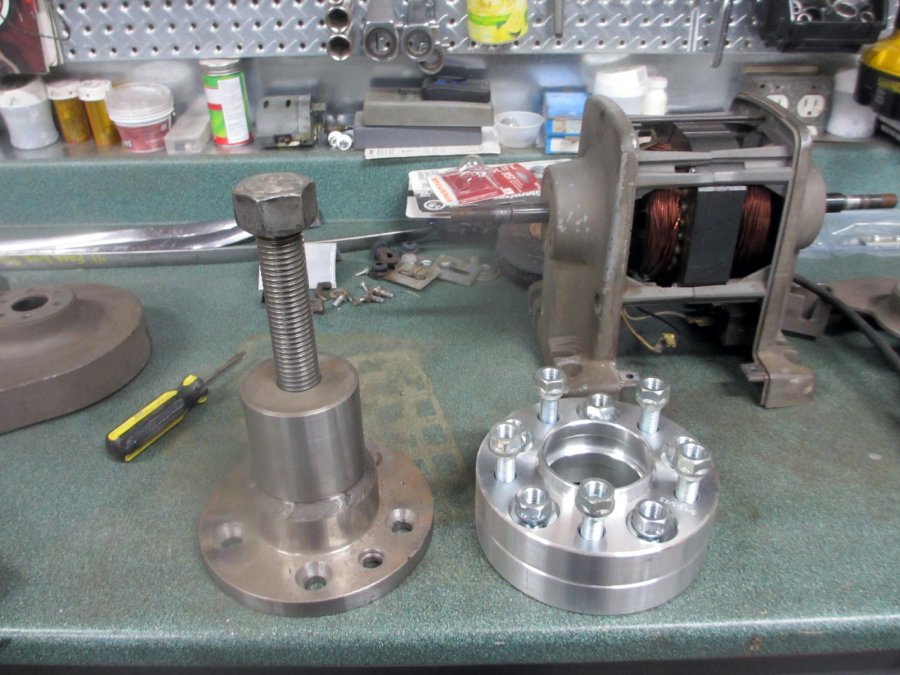
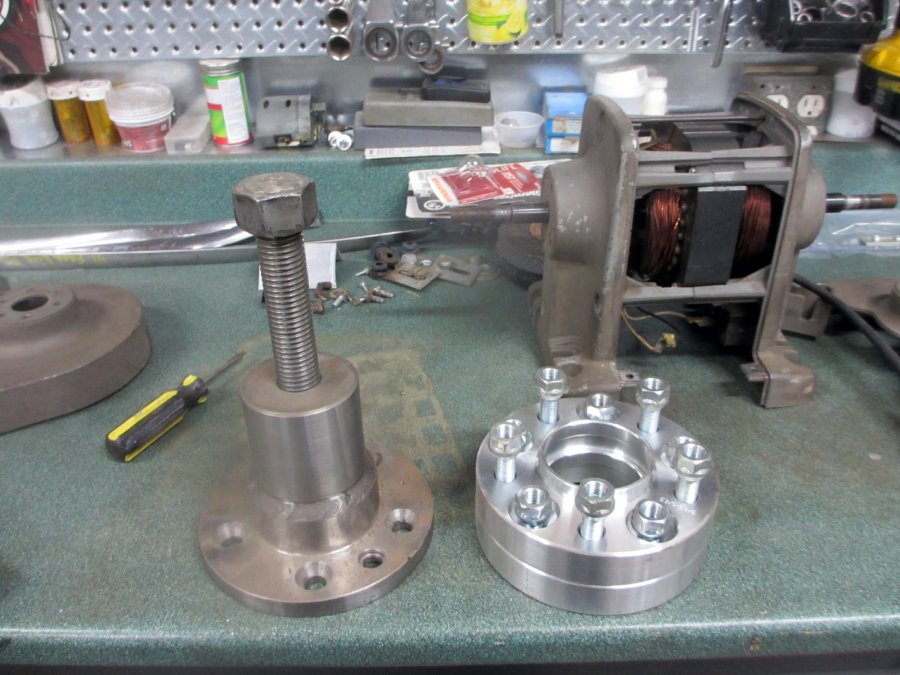
PA, The 2 adapters/spacers are 4.5BC to 4.5BC purchased from E-bay site a few years back for another project that is on hold. I am impressed with the quality of them overall for the price. Placed them in the picture to show an option for those that may want to start with these to build a cheap puller. They are aluminum but I think I paid $25 for the set of 2. Similar to these currently offered below and I doubt I could make them for less money. 2pc Hubcentric Wheel Spacers Adapters ¦ 5X114.3 (5X4.5) ¦ 64.1 CB ¦ 20mm Thick | eBay (2) 1" inch 5x4.5 to 5x4.5 Wheel Spacers 25mm 1/2" x 20 Studs | eBay
-
KeithB7, Really well thought out and executed garden. Had to be satisfying to sit back and enjoy it after all the hard work. When you work hard for something to get it the way you want it the appreciation of every detail is so much more than the eye can see.
-
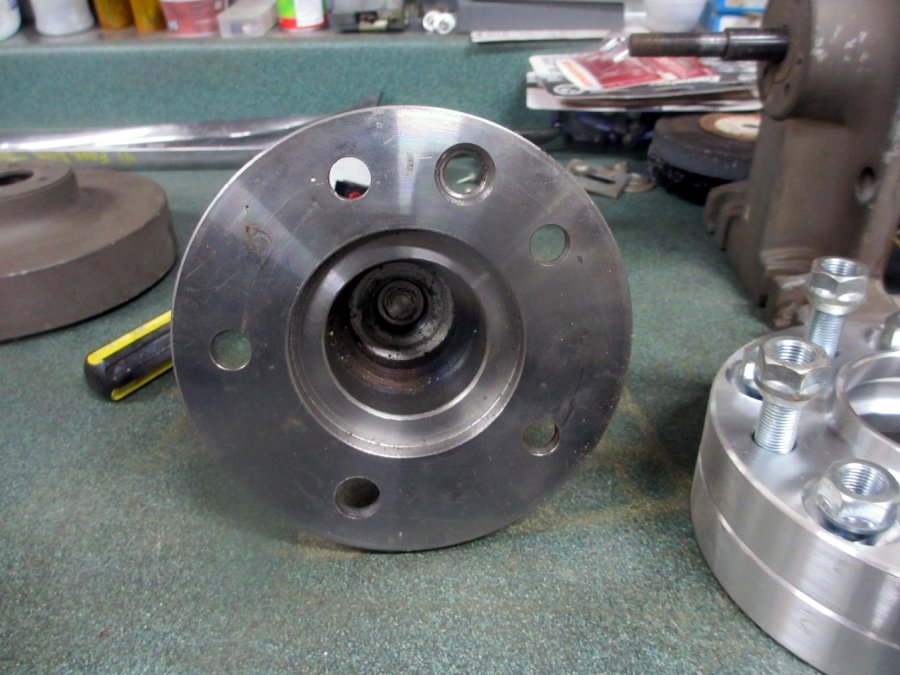
I see a lot of discussion on drum pullers for our old Mopars so I thought I would post this easy to make puller I put together a few years back. No flexing in this baby and never fails. If you slot the holes it could be used on other makes as well. You could also make an insert to adapt it for a slide hammer for pulling axles. I see some folks bidding on these lately and this may be an cheap option. Next to the puller you will see some wheel spacers that if you found in steel would give you a head start. Use a piece of pipe, 2 nuts and some threaded rod for those with limited machining capabilities. Posted in tool thread just now as well Hope this helps V$
-
I see a lot of discussion on drum pullers for our old Mopars so I thought I would post this easy to make puller I put together a few years back. No flexing in this baby and never fails. If you slot the holes it could be used on other makes as well. You could also make an insert to adapt it for a slide hammer for pulling axles. I see some folks bidding on these lately and this may be an cheap option. Next to the puller you will see some wheel spacers that if you found in steel would give you a head start. Use a piece of pipe, 2 nuts and some threaded rod for those with limited machining capabilities. Hope this helps V$


