Leaderboard
Popular Content
Showing content with the highest reputation on 02/27/2023 in all areas
-
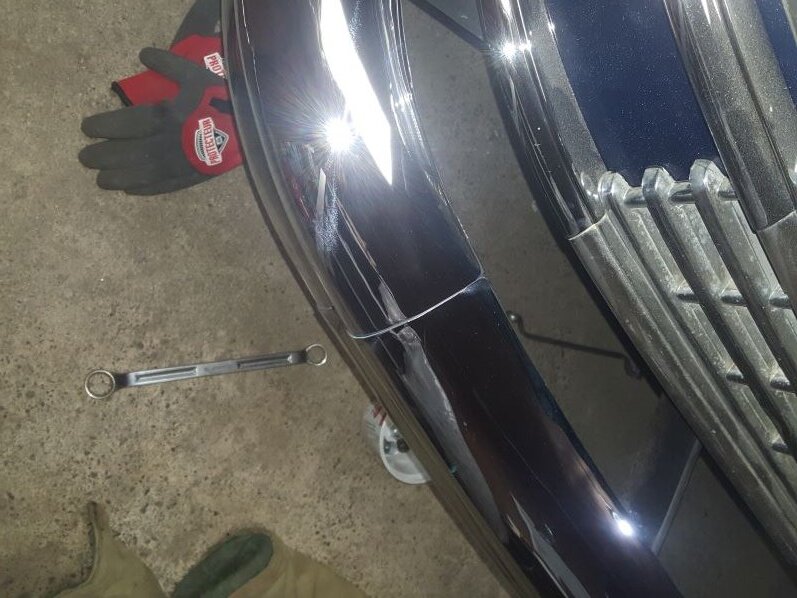
I was rebuilding/reconditioning a '47 Chrysler a few years ago. This car was turned into a static car. Meaning it was never going to be driven. It was a project initiated by an Extended Care unit of a local Hospital. Specifically to add a smile to the patients that had memory issues. They get to sit in in and bring back memories. Our car club took on the project and we got most of the things done that I couldn't do at material costs only. As for the cost of the bumpers, because of the long sides on the bumper the local chrome shops couldn't take on the job because even though length wise they would fit in the tank, they were just too wide. So that would mean they would have to go to a larger chrome shop on the mainland in an extra large tank. The price for that was $2000. Plus the ferry fees both ways adding another $300. So I decided to make some changes that nobody really notices unless it's pointed out to them, by looking in behind the bumperette where you can see the split in the bumper. I cut the bumpers right where the bumperettes are. Then welded on some brackets and studs, making them a bolt together bumper. That way the local chrome shop could do the job since they were now much more condensed. Probably not everybody's cup of tea. But it worked fine for the purpose of the car, and saved a huge amount of money. The chrome shop donated the labour costs, so their bill was minimal. since they didn't charge us for the chemical use either. The bumper brackets are positioned so that the end pieces are supported, so once it was all bolted together it was just as sturdy and strong as if it was one piece.5 points
-
3 points
-
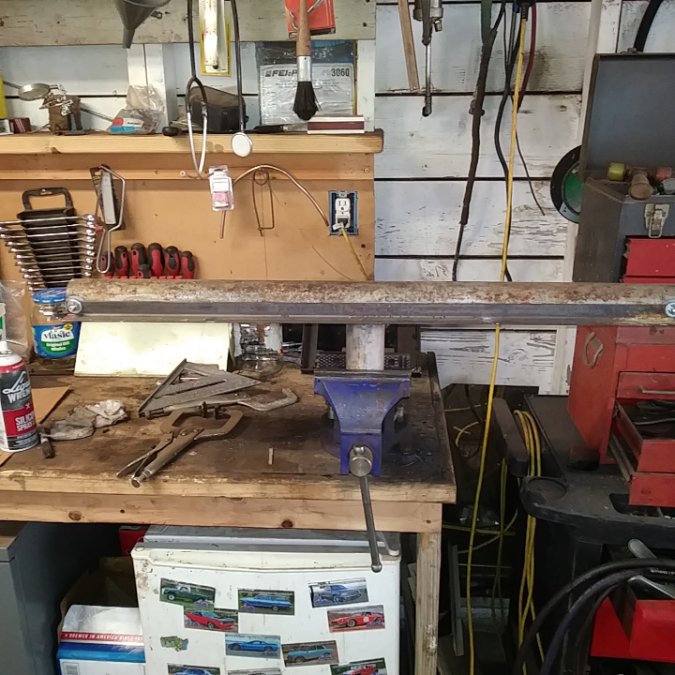
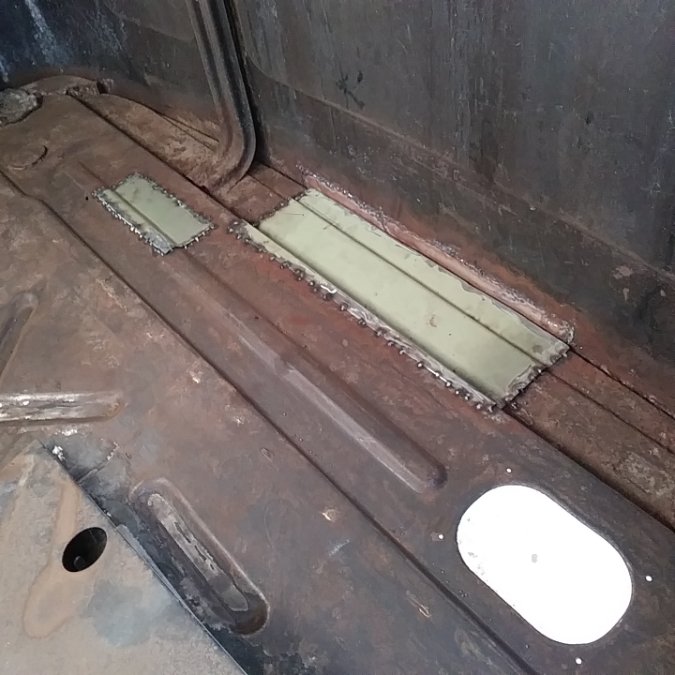
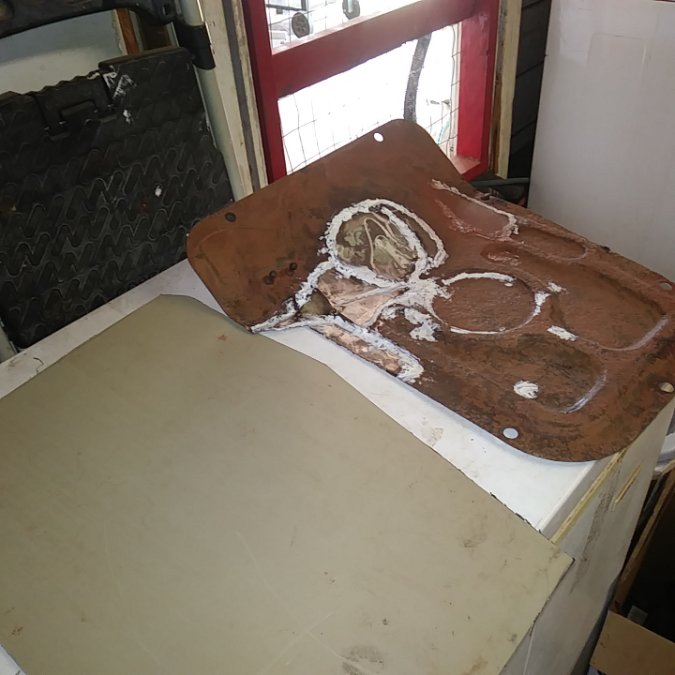
I am just learning myself. Not sure I would want to use a sharp ice pick with a hammer .... would create holes in good metal. I have heard using a screwdriver, either flat or Philips ... or a ice pick by hand to test the integrity of the metal. No need for a hammer. Fitzee is awesome at showing how to make complicated panels with simple tools. I made a cheap metal bender that I put in my vice. It has a piece of angle iron bolted in place now for straight bends. I have a length of 1" pipe I can replace the angle with & get a tight radius or bend other direction over the 2.5" pipe for a larger radius .... you have options. I just used it to create these patches for the floor of my truck. When the truck was parked in a field, there was a low spot where water stand & did rust out. The rest of the floor pan is pretty good, looked like yours until I cleaned it up with wire wheels, sand paper, grinder .... I did treat the rust with ospho, then I welded the patch on top. ...... Like a total noob. A true professional would have done the cut & butt welding technique .... blended it in and you would never know there was a patch there. Problem with cut & butt, you need to hammer & dolly the weld ... Heat will warp & create low spots. A good welder can eliminate most of those issues, some hammer dolly work will be needed ... or putty to fill the low spots. Question, are your arms 10' long that you can hammer & dolly the welding seams? ..... Make it look perfect? ..... Neither are mine. Only suggesting, as noobs we need to pick our battles. I did properly cut & butt the exterior body patch. It will require filler .... I just can not body work that area properly. I'm ok with filler on the body panels to a certain point. On the floor I do not want filler. So that is my choice, rust treated with rust converter, a patch overlapped, seam sealer on welds, rusty metal primer & paint, throw a carpet over the top of it. The underside will be treated the same way. This will last my lifetime. As suggested, you may need to use several pieces to make complex panels. This transmission cover is really junk. I know of at least 9 separate pieces of metal welded into it to make up the complex shape. It is not restored .... I call it repaired for use. Painted heavy with a brush, let it self level ... will look fine with carpet over it. As a total noob myself. You need to ask yourself what your expectations are. Do you want to do the repairs or hire them out. For my first attempts of body work I'm not proud of my repairs, I feel confident they will last. .... May not be pretty. Every repair I do, I learn from & think how next time I will do better.2 points
-
Good advice above...a further example of what I think is good quality work shown in a real situation is the Cold War Motors guys doing the rebuild of a 1960 Plymouth Fury. Excellent vids of a whole range of restoration work including panel work, painting, upholstery and stainless trim panel beating. Lots of videos but they are well indexed to pick and choose from. Check it out on you tube.2 points
-
If you want to attempt making your own panels, try forming a panel before you cut the old one out. You need to duplicate the shape before cutting. Your replacement panel can be made from more than one piece. The original piece was stamped so getting some of the rolls, curves, indents and bends to match in a single piece will be almost impossible. You can build a larger piece from several smaller pieces joined together. Check Fitzees Fabrications on youtube if you haven't already. He does a lot of multipiece panel forming. If you just purchased a welder, some practice with it may be in order as well. Practice your sheet metel welds with an air gap under the practice pieces. That's the way they will be when installing them.2 points
-
A few suggestions, nitpicks really. 1. Even though I understand the red numbering on the block to mean firing order I think it my be a point of confusion because based on placement they look like cylinder numbers. A suggestion to clarify is have a top row of number 1-6 clearly labeled cylinder number then just under that a second row 1,5,3,6,2,5 clearly labeled firing order. 2. 7:00 and 1:30 are used to denote rotor position for cylinders #1 and #6 at TDC. That assumes the distributor is installed accordingly in its "standard" position. It's possible to install the distributor in other positions and as long as the spark plug wires are clocked correctly the engine will run fine. I think this could be the case for some potential users, especially novices. So it may be more general to reference the rotor position to the cap towers for sparkplug wires going to #1 an #6. Alternatively maybe just a warning to first check that the distributor is installed as shown in the diagram.1 point
-
1 point
-
you could make a months worth of ice cubes with that grill, if you had a big freezer....1 point
-
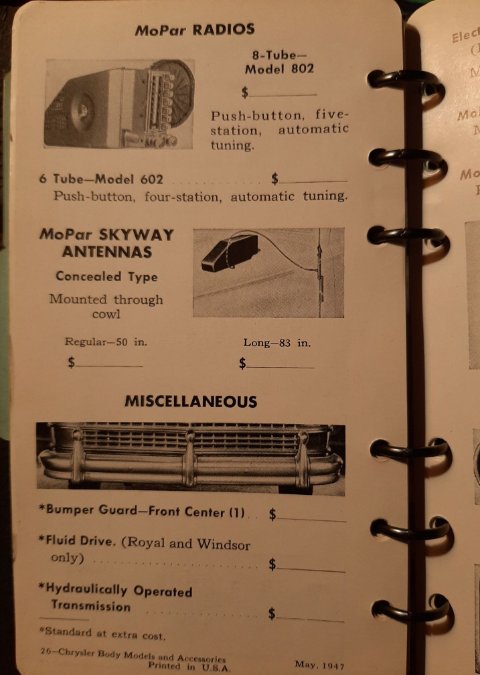
That's a salesman's Data Book. They were property of the dealership and not given out to customers, so they are rare. I have one for my 48 DeSoto. It shows all the features of the car in case a customer asks about the transmission or the horsepower or the brakes, or how wide the seats are, the Data Book would have it. My DeSoto Data Book also shows comparisons between DeSoto vs. Pontiac, Buick, Mercury, etc.1 point
-
1 point
-
1 point
-
todays cost run from 500-700 depending on condition and how must grinding and repair is required. The back of the bumpers were never ground smooth but had a ruogh surface and were painted silver. Rich Hartung Desoto1939@aol.com1 point
-
three years ago the bumpers for my 51 plymouth cost me 750.00 ea to have plated. They chemically stripped and removed a few dents before replating. The bumpers were the most reasonable cost. All the extra misc parts added several thousand to the final price. Items that I thought were ok looked like junk next to the new bumpers. Snow ball effect, where does one stop once you start. places doing the work are getting hard to find.1 point
-
If you have gas dripping there odds are the float isn't doing it's job. Bet if you took the air cleaner off you would see gas inside the carb throat too. Time for a good cleaning and rebuild of your carb.1 point
-
Here is another option: https://youtu.be/8G3MJGuKIQ8 Pull the wheel and inner fender. Pull the valve covers. Let the engine come to temp and adjust while engine is running.1 point
-
You'll like that! I got the same kit from Marden's last year. First cordless tools I've ever bought, makes me question why I never bought cordless tools before. Marden's is a quintessential Maine surplus and salvage store with several locations throughout the State. Good stuff at really good prices, just as bad stopping by one as wandering around shopping sites online.1 point
-
I think at times we all guilty of the bad weather shopping.....this was what I snagged on our last cloud burst day......1 point
-
Yep, it's my "other than winter" bombing around car. More powerful than a heard of stampeding earthworms, faster than a speeding tortoise, able to leap a stripe in the road in a single bound.... But it is easy to work on, runs like a sewing machine, and is a hoot to drive. I'd drive it in the winter, but its heater is a heater in name only. Cosmetically it's just "OK", which is fine with me. I'm very gradually improving on its looks, but I'm not fretting about it ever getting "done". Too much fun driving it as is to worry about making it pretty. I don't have any good photos of it - just picture a dull red Beetle with a few primer spots. I see you've got some paint on that EMPI. Got it running yet?1 point
-
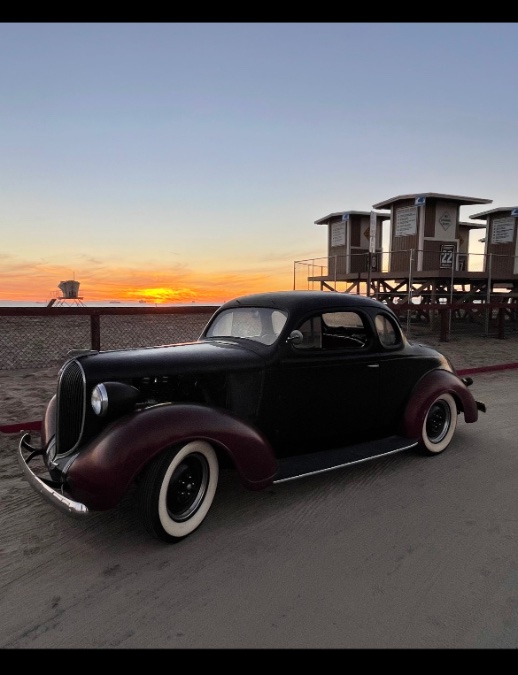
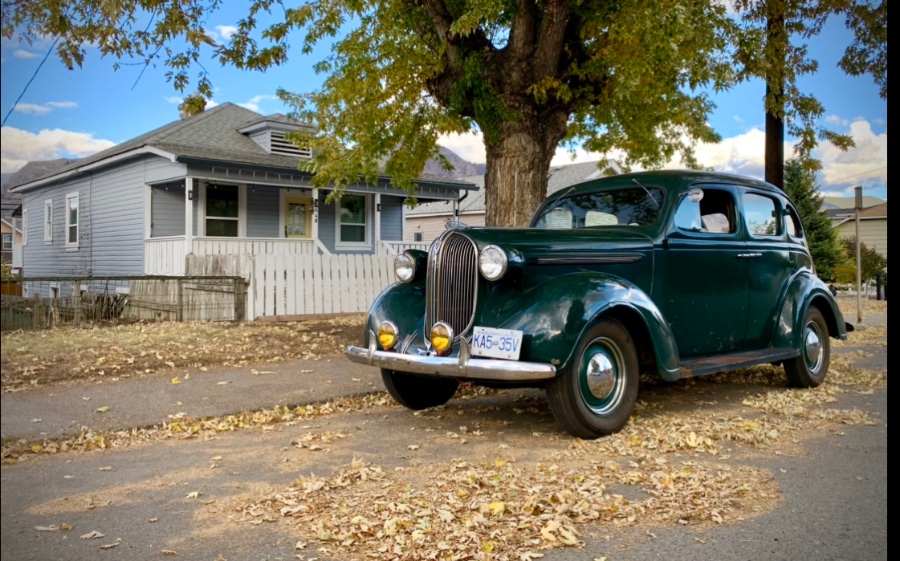
Just about done cruising in my Plymouth. Fall is here. The car’s insurance expires very soon. My Fall 2022 photo is seen here. I try to find falling leaves, and a back drop that looks like it could still be 1938. Its been a great year with the newly rebuild engine. She’s fully broke-in now. 852.4 miles.1 point
-
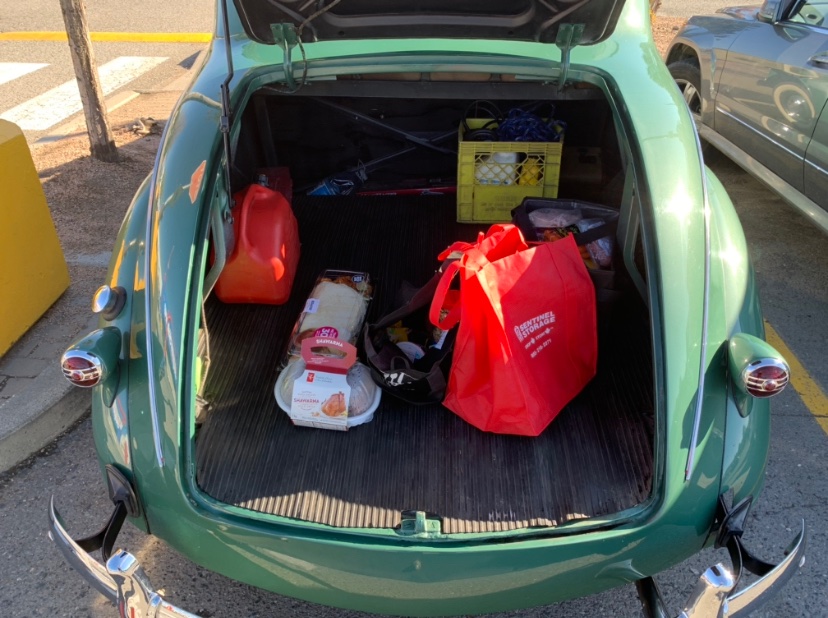
Some of the conversations are fun. This morning I took my Chrysler to the grocery store for the weekly refill. A friendly older lady approached to voice her approval of my car. “Is it a Studebaker?”, she said. I smiled and told her no. She praised the car and said “I guess you had to install seatbelts?” I replied “I don’t HAVE to install them. A stunned, confused look appeared on her face. “What do you mean, you don’t have to?”. I told her if the car did not originally come with seat belts, you don’t HAVE to install them. She paused and asked, “Don’t you want them?” I replied “Well, not really. I do wear one if I am leaving town on a hiway. Although I’m not convinced it would do anything to save my life.” I went on about how safety was far down a list, if at all in 1938. There was laminated glass in the car and that was about all the safety improvements I could think of. If someone hits me at 30 mph or less in town where I travel 95% of the time, I’ll likely be alright. Above 30 mph, I put the seatbelt on. Yet, I won’t be alright if someome hits me. “Its just some of the risks we take to drive these old cars” I told her. She was surprised. A trunk shot after I put a few items in that massive cavity.1 point

.thumb.jpg.d599d4c13e08899474e0348bd9baed3b.jpg)




.jpg.16882e32f9f12f5da3c614928ca51ba0.jpg)
