-
Posts
4,695 -
Joined
-
Last visited
-
Days Won
35
Content Type
Links Directory
Profiles
Articles
Forums
Downloads
Store
Gallery
Blogs
Events
Everything posted by Los_Control
-
Just curious if your 1940 6 is a 25" or 23"? I have read that all Canadian vehicles came with a 25" motor? Was on the internet so much be true. I know on my 1937 23" 218 it had a older distributor in it but it also had vacuum advance. And the old farm truck was a 1949. Just saying I do not know what year the distributor was. It had a early design where the points plate rotated on ball bearings. They were rusted and needed cleaning to get them operating, I did not like the way the plate was fastened. A newer distributor out of a 1952 seemed like it was built much better & was my choice to use. But I only worked on the 23" engine, I know they will interchange over the years. I know nothing of the 25" engines.
-

Way off topic 1993 caravan transmission
Los_Control replied to Los_Control's topic in Off Topic (OT)
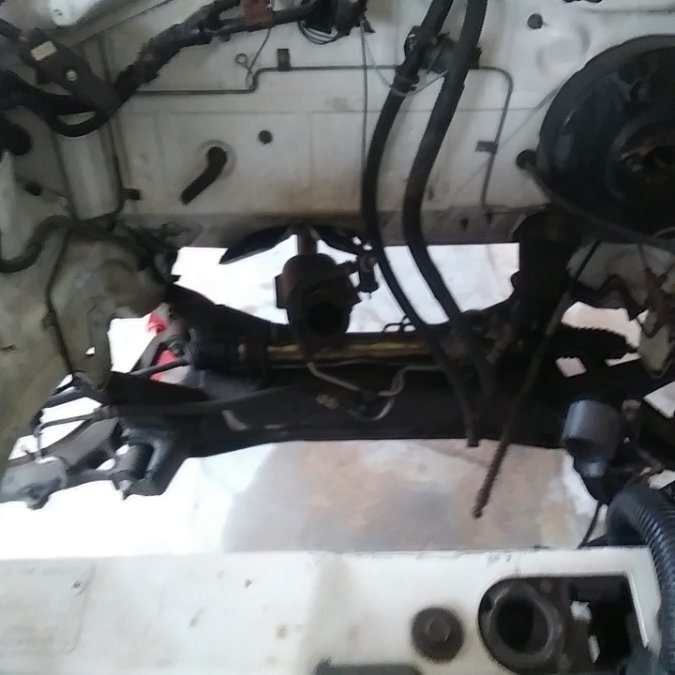
Have to admit getting the motor/trans out kicked my butt ... I needed a week to recover. Then needed to deal with the leafs & garden, A gate needed to be built then the wash machine went out. Think I got all the fires under control and ready to get back to work on this. I did a quick pressure wash, now I need to crawl into it and use some simple green and clean it a little better. Just a 28 year old dirty car. Needs cleaned. The under chassis is the same, just dirty. There is no rust anywhere. My thoughts on the drb scan tool. A:) It really looks cool and does everything you would need for a OBD1 dodge. B:) It is a 28 year old electronic scan tool. There is no new replacement cables, adapters, basically it is a nice tool at the end of it's life cycle. C:) I think it is cool, if I found one at a estate sale or something and bought it for a few $$, Fine. If someone wants to sell one for a few hundred $$. I really would rather use the money & buy a new scan tool that would work on chebby, ford, dodge & others. Something modern & more useful. I only add this for @Racer-X- ... I have the social skills of a Billy Goat. I really do not know a lot about the tool. From what I do know, I would take the money out of my toy budget, not the tool budget. One is larger then the other. I simply put @Racer-X- friendship at a higher value then the drb scan tool. -
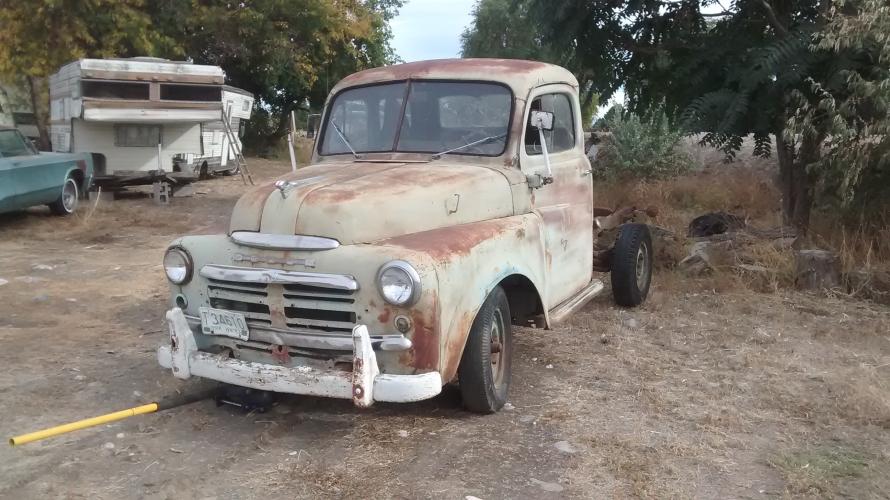
Just checking prices on my truck, I will have over $600 in rubber not including the side windows at all. They take different pieces & I imagine total package would add up to ~$1k just for rubber. While the glass cost $300. https://www.steelerubber.com/ So my idea, buy the good quality one piece windshield rubber for $220 and have a proper fit & no leaks. My rear glass, I may cheap out and just buy universal from amazon, make it work. Steele wants $200 for it also, probably less then $50 on Amazon. Side windows roll up and down and leave as is for now.
-
Might check autoglassics on ebay? I personally would not buy from them .... I simply wont order glass to be shipped by fedx or ups, when you can buy it local. Just using them for a price check. Complete glass for my truck they sell for $285 .... That really seems cheap and should fit most budgets? The expensive part is the rubber There are many options for that. Steele rubber seems to be one of the best rubber suppliers, (my personal opinion) But you pay top dollar for top quality. Amazon sells universal rubber by the foot, that may fit your budget better. Will wrinkle going around corners, will have to silicone joints & possible leaks. Again you get what you pay for. Then there are several options in-between. You just need to figure out what suits your budget there. I am guessing that your factory rubber windshield gasket is one piece and most likely needs replaced if it is original. Sooo, both sides of glass needs to come out to replace it. The glass is the cheap part, may as well replace both sides while there.
-
I think you want to address the bolt issue while the engine is still installed. My thoughts would be to use the wooden block as shown in the photo above, a 3 pound sledge hammer and drive it into place. Then a come along to strap the motor down. Either to the front axle or to the frame, will also pull the pulley into the wood wedge making it more effective. I do not have a come along, I imagine if I used some chain to go over the motor & around the front axle. Then a long bolt 6"-8" As I tighten a nut onto the bolt it would pull the chain tight, & lock down the motor to hold it. If the motor moves any while trying to loosen the bolt you lose the shock value ....
-
I ended up using some 2/0 cables from the local parts store. They were for diesel trucks or equipment & heavier then standard car battery cables. They are not 1/0, but they work. I bought them because I have no supplier in my town for the heavier cable. 0/0 would not be over kill, 1/0 will be fine. 2/0 will get you by.
-
Juggling act for sure. I guess we call that life. I have learned patience being retired on disability .... money is tight but for me time is also hard to manage. When I needed to do the rear drums on my truck, I bought the tool from ebay and waited for it to be delivered, I just buy tools I need as I go. Am happy I have maybe 70% of parts I need I bought a couple years ago. Paint, gas tank, water pump, radiator, wiring etc... Same with my wife car when I blew up the motor, bought the motor 1 month, the engine crane the next month, this month oil gaskets, heater hose etc... A good mechanic could have it installed & running in a day or 2, will be a few weeks for me yet. After I got the engine out, the leafs finally dropped off the trees so been putting away the garden, raking the leafs up. I built a compost area to recycle kitchen scraps, garden waste leafs etc .... Now I need to build a gate to hold the leafs in. I bought a stack of 2x6 awhile back for another project. I put that on hold til lumber prices come back down. Instead I scrounged some pipe I had in the scrap pile and welded together a gate. Paint drying on it now and hang it today. Then yesterday the wash machine went on the fritz. Will cost some money for me to buy parts to repair it .... Thats ok it wont break the bank, is the time I will need to invest into it to trouble shoot & repair it. I just have to be careful where & how I spend my money. All I really want to do is work on my pilothouse .... just not enough time right now. About the air compressor, as a carpenter I always have my nail guns & a porter cable pancake compressor. That compressor is pretty cheap but works well. Runs off of 110. You can fill it up then carry it with you to air up tires, it will run a impact gun well enough to change a set of wheels on your car .... will cycle on & off several times but will do the job. I bought my impact gun used for $30 at a thrift store. I have even used it to run a hvlp paint gun. You will run out of air and have to wait for it to catch up. But it will do ok for a fender or small areas. Just one of those tools that once you have it you will be glad you do. Do not have to break the bank to get there.
-
Absolutely the right attitude to have. These old cars are suppose to be a hobby and give pleasure working on them. There is no race to finish them in a certain time line. I also .have to be careful where & how I spend my money, retired living on a fixed income .... todays inflation everything cost more etc... I like @Andydodge idea with installing the pulley etc ... is a safe way to go. Your way can work. Seems like a lot of force going on to the 1 piston, the wrist pin, rod. A chance to either bend a rod or maybe crack or break the piston? Or it just may break free and no harm done .... just there is a chance to damage. Maybe it does not matter depending on your plans with the engine. @Plymouthy Adams is also correct, is a pretty hefty bolt. If you do break it, we might pass out cigars & give you some atta boys's At that point, should be pretty simple to extract the remainder of the bolt. I would guess someone here would have a spare bolt to sell you or know where to get one. Myself in this situation, I think I would go with installing the pulley, wedge the board as tight as I could get it. Investigate to see if anyway to wedge a bar or wood into the flywheel to help stop it from turning. Anything helps. Then I would take your 3' breaker bar and a 5' pipe to slide over it for a handle, twist that bolt out and get on with my day. So getting the bolt off really is not the problem. Just taking care on how you stop the engine from rotating is. While stopping 1 piston is bad. Maybe if you did the same with at least 2 pistons or maybe 4, then spread the load out. Not saying it is right! Just better then 1 piston taking all the abuse. Not sure what the torque spec is on the bolt .... not that much, just needs the initial shock to get it to start moving. Thats what the impact gun does is shock it.
-

Way off topic 1993 caravan transmission
Los_Control replied to Los_Control's topic in Off Topic (OT)
Yeah not a oil issue. I call it a opportunity for improvement, to learn to install a crank sensor properly I already have a used engine for it that I picked up pretty cheap, $200. It is a gamble, the wrecking yard owner said it must be good or he never would have saved it. Been sitting in the shed for 8-10 years he claims. I will give it a shot. It seems to be lower miles on it then the one I pulled out. I really have no plans to replace the vehicle at this time. It is a 1993 and really is newer then what I want for a daily driver. Yet it is old enough that the average guy can still work on it. The 3.3 is a solid motor, the A604 is a good transmission. The trans has been rebuilt with maybe 25k miles on it, new axles at that time, brakes are 2 years old. The last 6 months I have replaced the fuel pump, struts, shocks, tires. They had paint issues these years & this one has been repainted. Simply a beater with a heater & cheaper to keep'er The drb II looks interesting and will dm you on it ... counting the flashes of the dash kinda sucks. I have been thinking about buying something that will read OBDI -

Way off topic 1993 caravan transmission
Los_Control replied to Los_Control's topic in Off Topic (OT)
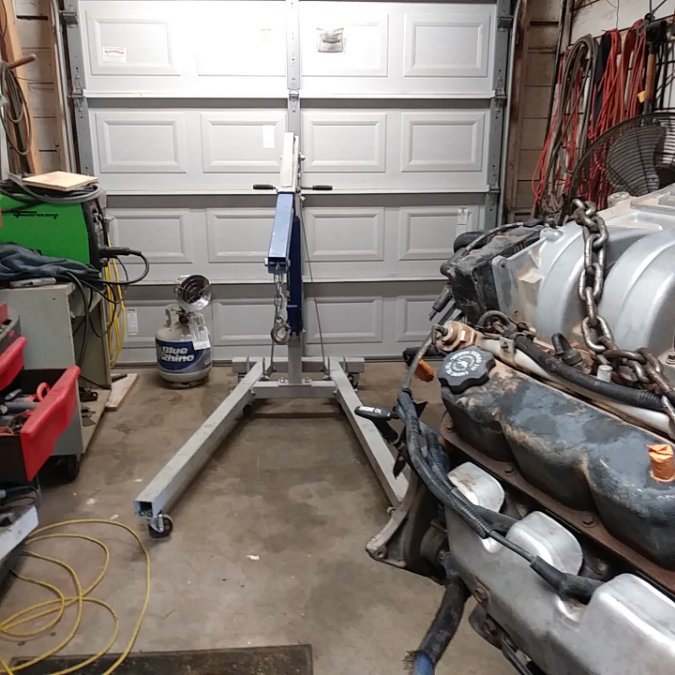
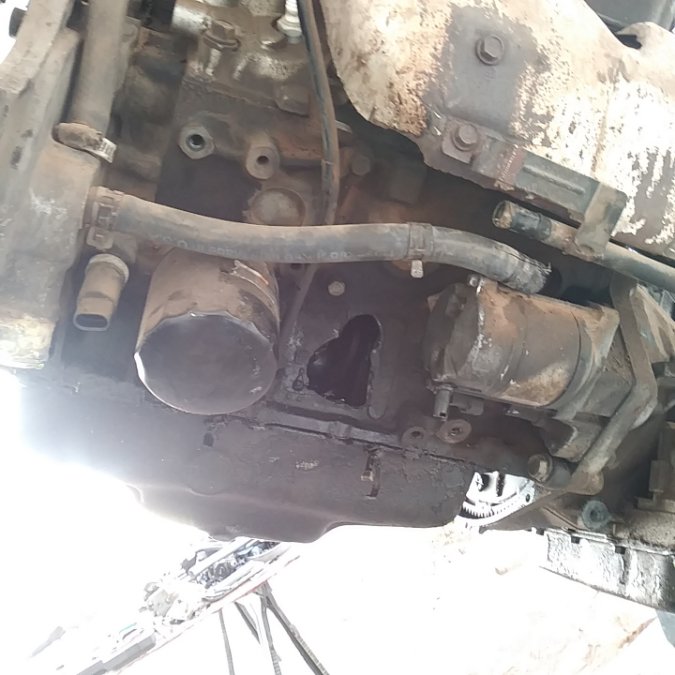
Little update on the project. I was going to pull the trigger & buy a new crane 1rst week of November. Then out of nowhere a used 2 ton crane came available for $200 ... what I wanted to spend. So I grabbed it. I was really surprised how small of a footprint it has when folded up. I have a perfect spot for it in the shop & will use it more then I suspected. .... Just use to old school cranes from Grandfather, Uncle that just took up way too much room. I now know why it came apart. RTFM! I bought a manual from rockauto ... it was in Spanish & I could not read it. So I installed the crank sensor without a manual. You install a crank sensor pressing against the flywheel. The felt washer will get removed when you turn the engine over, leaving a gap aprox 16 thousands. I pushed crank sensor tight, then pulled it out just a smidge & locked it down. Here is the result. I pulled out the new sensor and the felt is still on it ... it was too far away & engine could not keep time. I'm fine with this as long as I learn something from the process. I am suppose to be a carpenter not a mechanic Funny story time. She was driving speed limit 75mph. She called me on the phone, there was a bang, a cloud of smoke and now the van is sitting on the ground ... I do not know what to do! She seriously was traumatized blowing up her first engine. She was dazed when she called me to come get her. When the motor blew, covered the back of the van with oil, motor died & she pulled over to side of road as far as she could, & shoulders are banked ... she was sitting lower then the road. She already hinting she might want a truck like mine, but a automatic transmission instead of a manual. She may never trust this van again. -
Is always a exciting time to see these engines come back to life after a long break. Thanks for sharing!
-
In this time period, was typical when you went to town. You would park at the sidewalk then slide out the passenger side door, instead of opening drivers door into the traffic lane. I won't say that everyone exited the car this way, I imagine it was geared towards larger cities where it was more important to practice this procedure. The larger populated cities would have a larger automobile market to cater to. Those out in the country or small towns never bothered to lock the doors. For the same reasons they moved the floor shifter up to the column, they called this a improvement because it was easier to slide across the seat to exit.
-

Found my camshaft! - Pulling motor on 1948 Dodge.
Los_Control replied to Bryan's topic in P15-D24 Forum
To be honest I have never read anything about the up & down, is the side to side we need to worry about. Is the side to side I measure. I once had a 51 ferd with bad king pins., truck drove fine except for a few times it would start the death wobble doing 55 mph down the freeway. Only way to stop it was to pull over & stop ... then resume your trip. Bad king pins is bad news. I would try to get some grease in them, rotate the spindles back and forth then force more grease in them ... rinse and repeat. Then decide the condition they are in. Good chance they do need replaced, but if not properly greased to check them how would you know? -

Found my camshaft! - Pulling motor on 1948 Dodge.
Los_Control replied to Bryan's topic in P15-D24 Forum
I would guess there is a micrometer measurement that would fit the spindle & the bearing that rides on it. Give you the exact number. I would imagine if the bearing slides on and not to much slop, will be fine. What I see in photo looks good. Bearings ride on spindle, hubs/wheels ride on bearings. I have seen bearings neglected & freeze up on the spindle from lack of grease. Need a oxy/act torch on the side of the road to cut off the frozen bearing. Clean up the spindle, slap a new bearing on it and good to go. I dunno, yours look good to me. Rule of thumb with king pins. If you can get any movement out of them, they need replaced. I was told you jack up and get the tire off the ground, then try to grab the tire and rock it back & forth. Naturally you need to have your wheel bearings greased and set. I was able to look at the top & bottom of king pins on both sides while checking. Only the passenger side top has a minimal amount of movement. I found the zirk fitting was plugged when greasing the front end. I replaced the zirk & greased it ... still moves a hair but not bad. .... not tearing it apart to replace the king pins because of 1/32 movement on the one bushing. -
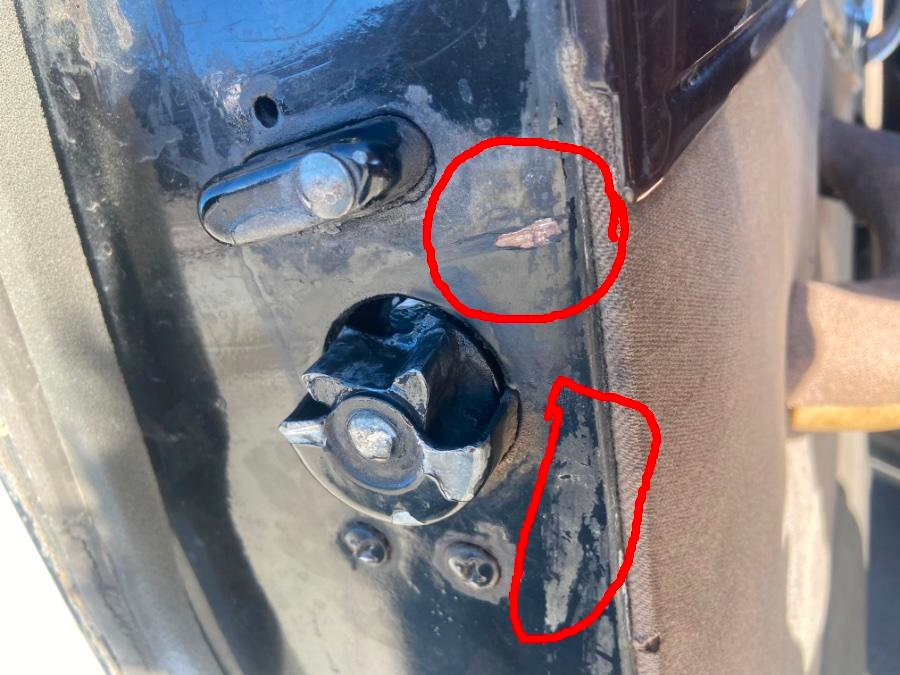
Try to offer some ideas for The path to the cure. I get that you want to replace the latch. I do not know why you think that will fix it. Although it may be what you need. If you look at the photo The top mark is deep. The bottom mark is just missing paint, is it also rubbing? Just looks like you have a alignment that may be the cause of your door not latching. Also a hillbilly fix is to spray and saturate all moving parts with a good penetrating oil like pblaster. Remove the door panels and get inside the door and get the window tracks while there. Make sure everything is moving freely, then some good old wheel bearing grease applied to areas that need it. Open the door and lift up on it and check how much play you have in the door hinges/pins. Could be the alignment issue. Seems like you may have more then 1 issue. I myself would be looking to correct alignment so the door opens and closes freely with no rubbing without a latch, then fix the latch if it needs replaced.
-
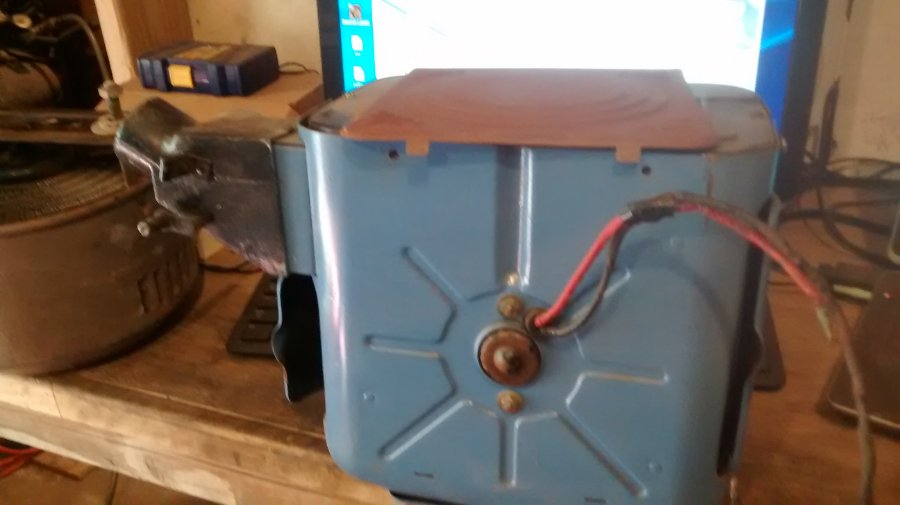
I will say, "Do not do what I do!" Was a time when I did not have a nickle to spend on my project. Was recently disabled and working through the process of social security disability. Anyways I was attempting to turn a old rusted up model 61 heater into something usable. Wife used food stamps and bought a gallon of molasses for me, brother inlaw had some blue spray paint he gave me. Mother inlaw donated some thread & wife had some finger nail polish ... I got it done. Came out ok. Anyways I wrapped the bare spots in the original wire with white thread, then painted the thread with fingernail polish. This photo was taken about 4 years after I did the repairs with the thread .... seems to hold up ok ... kinda. I changed projects since then. I had a blue truck so needed a blue heater. Now I have a black truck and will need to paint the heater again. riginal cloth has come off., needs more thread & paint ? ? ? Just saying there is a way to repair short sections. I did it at the time for my own reasons, I doubt I would do it again. When I paint the heater I plan to properly replace with new modern wire. Switching to 12 volt and probably switch the motor while at it. I laughed. I found something similar in a 52 suburban. There is a channel above the doors on the headliner for the tail light wiring. 3 or 4 wires 10' long, never seen the light of day ... I thought I found gold. I never bothered to remove it though as the car was heading to the scrap yard.
-
I believe yellow pipe tape refers to the color of the packaging, refers to the grade of the tape .... yellow being suited for natural gas or propane pipe fittings. Possibly now days the tape is actually yellow so inspectors can easily identify it? Just a WAG because modern pex gas piping is yellow, while pex water lines is red & blue. Back in the day when I was pretending to be a carpenter, did a lot of kitchen & bath remodels. When screwing pipe joints together, I always had better luck with pipe dope. Sometimes when working under a sink, I do not have pipe dope with me but always have pipe tape in my tool belt I would use it. Simply to save a trip out to the van to get the pipe dope. Only if I had 1 or 2 connections to make, if more connections I always brought the pipe dope. Just always seemed 1 out of 10 or 15 joints, would not seal with tape. The trick with either tape or dope, you need to apply more then you need. When you get a good amount of excess oozing out, you know you have enough. You can get away with this on rough in plumbing under the house or sink, installing faucets & shower heads etc... you need to keep it clean and use tape. Or spend a extra hour at the customers house cleaning up your mess after installation. I suspect after all the time we spend cleaning and painting our engines, is natural to try to keep the mess to a minimal and try to apply just the right amount of pipe dope needed and no extra mess to clean up. Myself after insuring all the threads are cleaned, I will put a generous amount of dope on the bolt. Yes it will ooze out while tightened. I will scoop the excess up, put it back in the can then spend the extra time needed with a rag and mineral spirits to clean the mess ... maybe touch up paint if needed. Just my experience using pipe dope .... make sure you have more then enough to fill all the voids and imperfections.
-

Please identify this thing on my steering column
Los_Control replied to desmondmonster's topic in Mopar Flathead Truck Forum
Kinda sorta but not really. I have a 1949 that normally would have a floor shift & a E-Brake handle on the floor. For 1950 they moved the shifter to the column & the Ebrake under the dash. Really sounds like what you have. -
I have watched a few videos from these youtubers. ... They do a lot of recovery work. Is pretty impressive the amount of equipment it takes to recover one of these old machines and get them to a shop where they can be repaired. In this video they say they bought the machine. I would not be surprised if was given to them just to get it out of the mountains. This is part 1 of a 2 part video. I also like to watch JonathaW, I remember when he bought the old drag line crane. The farmer used it til it broke then just left it. Huge hassle to get it out to the road where it could be loaded & hauled away. Jonathan did it and made good video .. He uses the crane all the time now. I can see where a land owner farmer or rancher buys a grader from a auction for cheap. Uses it for the purpose intended. They are finished with it, they saved money by doing it themselves. Later the item breaks and it is not worth fixing because they no longer need it. Will cost more to haul it to a shop for repairs then what they can sell it for. Part 2
-
Something I have seen ... the cheap points from China, the nylon rub block on the points is of poor quality. The nylon wears out and the shaft no longer opens the points because the nylon block disappeared. I guess we add lubricant to them but something to watch.
-
Being married, If I am dishonest and lie ... I can stash away & $100 or so in my wallet. Wife always asking if I got $20 ... Heck no, go kick rocks and stop at the ATM she knows am lying and sometimes give in to her.
-

Want to start engine on my 48 DeSoto with body off
Los_Control replied to MarcDeSoto's topic in P15-D24 Forum
FWIW, my truck needs completely re-wired. I currently use the key switch to start it, but the voltage regulator, lights, everything else is disabled. Runs fine, simply does not charge the battery while running. -
Rich has a good point here. When installing new points, I have found the oils on a new set of feeler gauges will transfer to the points, prevent fire. I learned to always insert a business card or heavy paper in-between the points after setting them. Be surprised at how much grease and grime comes off the points after setting them ... use a white business card and always wipe twice or more til it comes out clean. We all know it is the 3rd wipe that tells you 2 wipes was enough. Just thinking setting the points is one way to introduce grease to them ... we all need to lube up the nylon rub block that rides on the shaft to open the points ... thats another way. Even oils from your fingers while setting them will affect them. Sooo, if you did not run paper through them when you installed them, maybe just now is catching up with you. I had one truck I fought for a few days that would not start after doing a tune up on it. I was young and just as stupid then as I am today.
-
While I mentioned wood, you can use some scrap steel such as angle iron. Would be simple to get 2 pieces of angle bolt together loosely from side to side of the column. Then use your puller to connect to the angle iron to pull up on the wheel. If you go to the browse section then use the search function with "steering wheel puller" The quotes seem to be important when using search. Here is the actual tool sold to remove steering wheels back in the early days I am sure all or most makes Ford, Dodge, Chebby used the same tool. Really no market to reproduce them today when you can make something. Using plywood you may want to reinforce it somehow with some large washers or some scrap plate steel ... just to spread the load. https://p15-d24.com/search/?q="steering wheel puller"&quick=1
-
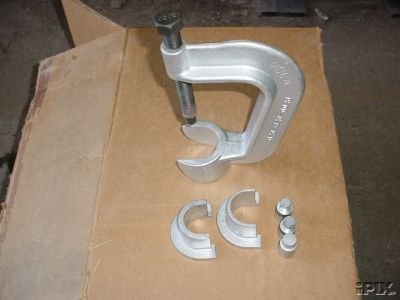
The most insert finger quotes "professional way" is to use a bearing splitter This one here is $47 from Amazon. You can get under the wheel with it then use the puller to remove it. Many have used a combo of plywood or 2x4 lumber, some threaded rod and made their own pullers. You will need to create some way to get under the wheel and mechanically pull it off. Be careful to not damage the threads on the shaft.

