-
Posts
3,462 -
Joined
-
Last visited
-
Days Won
193
Content Type
Links Directory
Profiles
Articles
Forums
Downloads
Store
Gallery
Blogs
Events
Everything posted by keithb7
-
Clutch gear (synchro) on second gear is well worn. Will pop out of gear if going downhill while holding back your vehicle.
-
Never going down a hill faster than I can travel up it in my flathead equipped old car, is a fair guideline. Indeed you have a limited number of controlled braking applications while descending a long steep hill. After 2 possible brake applications to control my speed, for me the third time is usually a hard brake. Knocking me down to 25 mph. Then I can comfortably grab 2nd gear and ride it all the way down. I can’t say I’m not always looking for safe escape paths in the event of a brake failure. I’m not paranoid, just being realistic. My brakes are stock, well maintained and work well. Yet suddenly its 1938 when I’m behind the wheel.
-
-
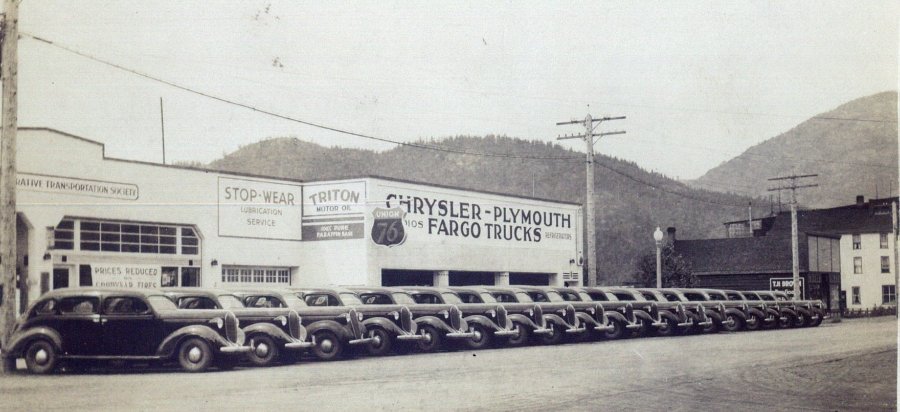
I concur, my favorite year Mopar is 1938. I am biased as I have a coupe and a sedan, both from '38. Both are stock. One is no better than the other. Both are great and fun to drive with their unique features. Check out this photo from the Mopar dealer in 1938. Not bad for a poor economic year. I think I see 1 left over '37 in there.
-
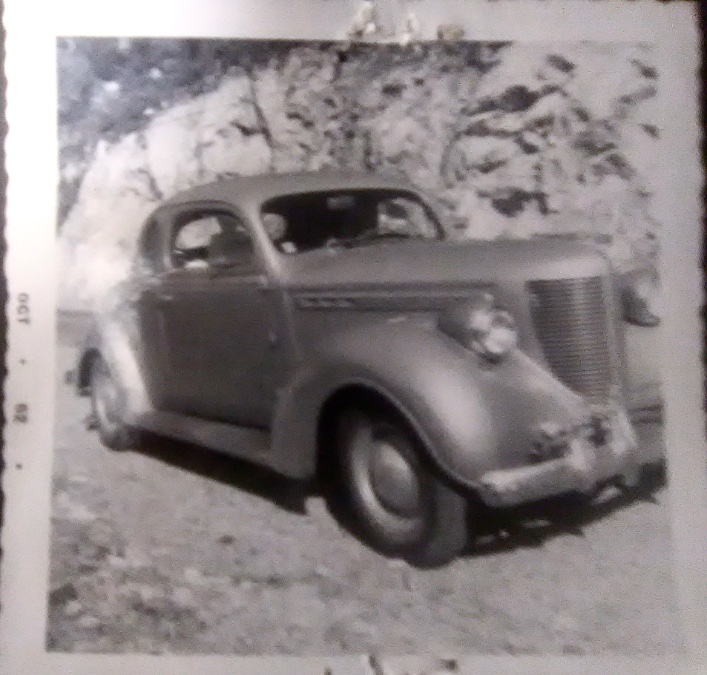
My favourite photo of 2022. This year a special photo was sent to me. Its my 1938 Chrysler. The photo is dated Oct 1962. They found me on-line and sent me the photo. It seems there are so few of these Canadian built coupes its pretty easy to keep track of them. A young boy is standing behind the seat of this coupe. The very person who reached out to me. His father owned the car. The young boy loved the car dearly.
-
This might help: The login password is "password" http://www.1948plymouth.info/1948p15/DocumentWeb/36-48PartsBook.php
-
By chance do you own tools for further troubleshooting? Multimeter. Vacuum & Fuel pressure gauge. Timing light. Dwell meter. Laser thermometer. Compression tester. When you pull the choke out you are cutting down the engine’s air intake. The engine still sucks hard so it is still drawing plenty of fuel. Creating a rich air/fuel mixture ratio. Sounds like when you do this you are able to nurse it along, a little bit at least. Might be a clue if it is running lean. Not enough fuel for some reason. Lean running engines generally do run hot. Not saying that’s it but worth looking into. When was your carb last cleaned? A partially plugged main jet and leaky sandwich gaskets could create a lean mixture. I like the “plugged exhaust or exhaust thermal valve stuck” idea. When the engine is dead cold the counterweight on my Mopar is sitting up, vertical. When its hot the counterweight rolls forward toward the rad. If yours is not moving, wire it to the fully forward “when hot” position. Meaning it won’t be able to direct any hot air up to the base of the carb and intake manifold. Too tight valve clearances. Could that be happening? A vacuum/pressure gauge may be enlightening. Its well worth buying. It can tell you a lot. Fuel pump condition too. How about turn engine piston #1 to TDC. After TDC turn it until its on the exhaust stroke. About piston halfway back up, with spark plug out, have someone blow compressed air into the cylinder. Put your ear near the exhaust tip. Good air flow out the pipe? Hopefully you shouldn’t have to drive far-away to replicate the problem. By running the various tests with all the tools I mentioned, something “should” turn up. Right in your driveway at home.
-

40mm Bofors Anti Aircraft Canon manufactured by Chrysler
keithb7 replied to greg g's topic in P15-D24 Forum
This adds a little more background on this Mopar mass produced weapon: https://youtu.be/5CDPhCI72oY -

40mm Bofors Anti Aircraft Canon manufactured by Chrysler
keithb7 replied to greg g's topic in P15-D24 Forum
As ugly as war is, it sure brought many a country together. It is amazing what they were able to accomplish at that time. Outstanding! -
I assume the engine is mounted in the car? I'd install the housing first, then you can wedge the the flywheel up in there and get a bolt in. I did it here on the hoist, much easier than trying to lay under the car.
-
Later in my In my video you’ll see that the grease packing method failed. I could not get pump to build oil pressure. I removed pump again and submerged it in oil. Got all bubbles out. Then it made great pressure at cranking speed.
-

1951 dodge Coronet wheel bearing preload torque
keithb7 replied to nr1freak's topic in P15-D24 Forum
Bearing pre-load? Outer axle bearing is set up by shimming brake baking plate, where it bolts on to axle housing. No so much pre-load, it is end play on the axle shaft, which the bearing is pressed on. Allows for heat expansion. You should have a dial indicator and various shims to get the right clearance. -
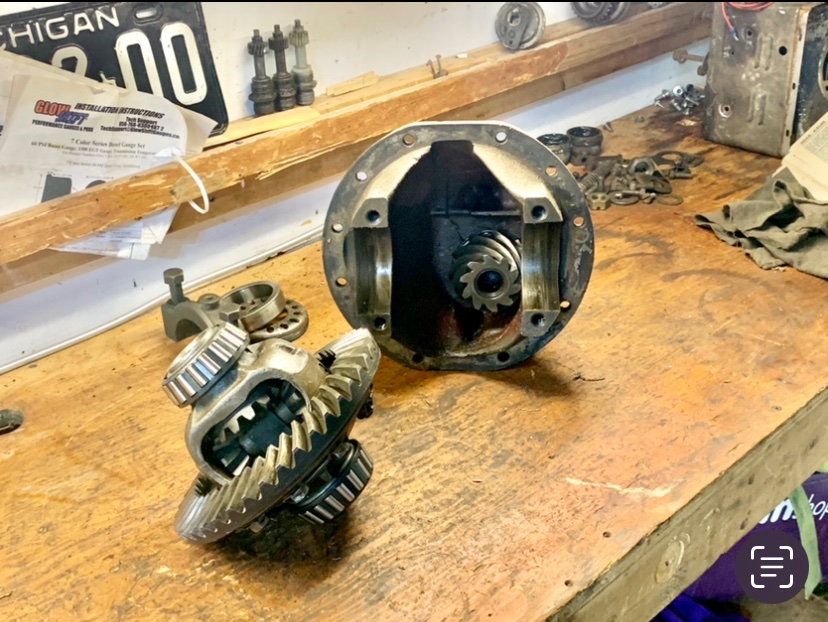
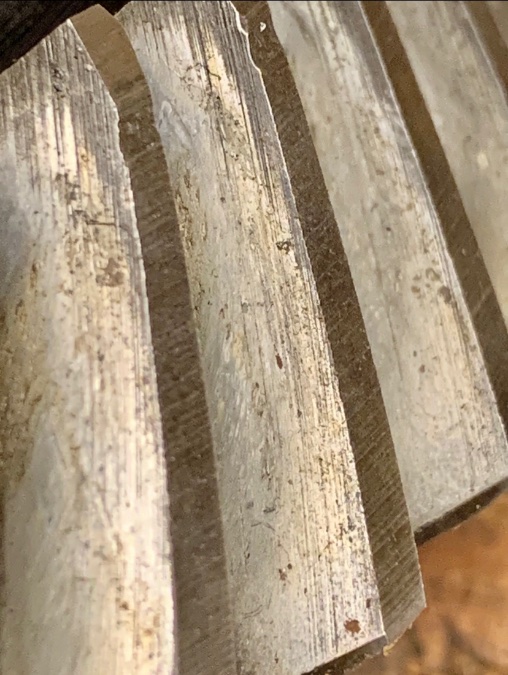
I was kinda thinking I’d learn what I’m doing before I publish a video about it. Lol. I am pretty green when it comes to rear ends. I understand them. I’ve certainly “read” lots about them, yet we know that means little until we put that knowledge into practical use. Book-smart is only part of it. Maybe I should consider a new video method. I disassemble an entire rear end. No commentary. Just relaxing piano music. Then I throw it all out as I have no idea how to reassemble it all. Lol. Just kidding. I’ll give it a go. See what I can do. @Dodgeb4ya I think I see more wear on the pinion teeth. I’m leaning towards a new gear set. I’ll post more pics once I get the pinion out. I could just re-bearing this one and put it all back together. Then set it up. Yet its a long ways-in, if something howls upon reassembly. I’m thinking about: jack up car remove rear wheels remove rear drums remove brakes remove brake backing plates remove axles remove carrier assy Swap out and install new carrier assembly Repeat for reassembly. bleed brakes Re-fill rear end oil Re-do it all again if I get it wrong. Ah well, I digress. Its a hobby. It keeps me out of trouble.
-
I’ve never rebuilt a rear end before. I want to. I have some spares and I want to put a 4.11:1 in my Chrysler. Seems like a good winter project to me. I’ll learn as I go. I’m really just an apprentice running amuck with no Journeyman watching over me. I’ll post questions here as they arise. Hopefully someone can steer me right. I’ll take the carrier housing to work this week and see if I can impact that pinion flange nut off. I don’t have anything powerful enough here at home. I’ll think I’ll shop around for a new crown and pinion set. This one’s been around the world a few times times. By the looks of it, it might have been under an extended drain interval maintenance plan too.
-
I am of the belief that a person with an engine hoist at home, and a load leveller, would still be better better off to remove the tranny first. Then lift the engine, clutch and FD out together. If this is video of any use to you, here is what I did. 3 speed manual though. No fluid drive. When I put my engine back in, I did remove the rad nose cone. Much easier. I realize you have a later model ‘51 year car. I just thought this might give you some perspective. Also see the tools and safery tips I recommend.
-

Problem putting fan and pulley on new water pump. 48 DeSoto
keithb7 replied to MarcDeSoto's topic in P15-D24 Forum
Yet one more tool you could have: https://www.amazon.com/Stainless-Thread-Measuring-Precise-Imperial/dp/B07FVSH38T/ref=sr_1_19?crid=3CFMCGZ8DBV4X&keywords=thread+pitch+gauge+metric+and+sae&qid=1668821294&sprefix=thread+pitch+%2Caps%2C201&sr=8-19 -
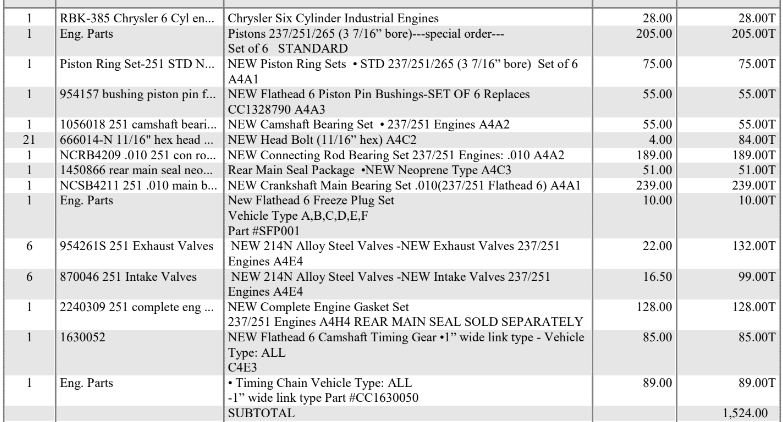
My parts list from Dec 2020. Most of it. Not all. All from Vintage Power Wagons. I see they have increased a bit. But not much. $235 today for a set. I have no complaints. Engine is running great.
-
Naw. There’s nothing to it. Go for it. The most important thing is understanding TDC for each piston and 100% confirming both valves are fully closed. As mentioned in my videos, you will feel tappet clearances at this point, by wiggling the tappet up and down. Start at #1, precisely followed by 5,3,6,2,4. Trial and error is character building and gains confidence. Never again pay someone to do a valve set. Do it 3x and you’ll be better at a flathead set, than the average pro today. When you think you are done, leave the inner fender window out. Drive it for a few days. Just incase you need to go back in there again. I seem to recall I got distracted with other work and drove without the inner fender window for 6 months. Once you feel swelled with pride and are reaping the benefits of your new developed skills, reassemble the inner fender window and join me in the “pride lounge” for a beer.
-
Thanks for the positive words folks. @JohnTeee I have uploaded multiple videos on valve sets I have done over the past few years. I hope you find them useful. One of my goals is to keep things simple. I begin by stripping down a topic so my little, under-utilized brain can grasp whats going on. Lol. Once I feel I have a pretty good understanding, I think, why not make a video for others to learn as I have learned?
-

Problem putting fan and pulley on new water pump. 48 DeSoto
keithb7 replied to MarcDeSoto's topic in P15-D24 Forum
Yes there are both SAE and Metric thread pitches. Good chance that yes your water pump has metric threads. It was made in a country where they are asking similar questions. Is there such a thing as SAE threads? Maybe email the MoparPro and ask about it. -
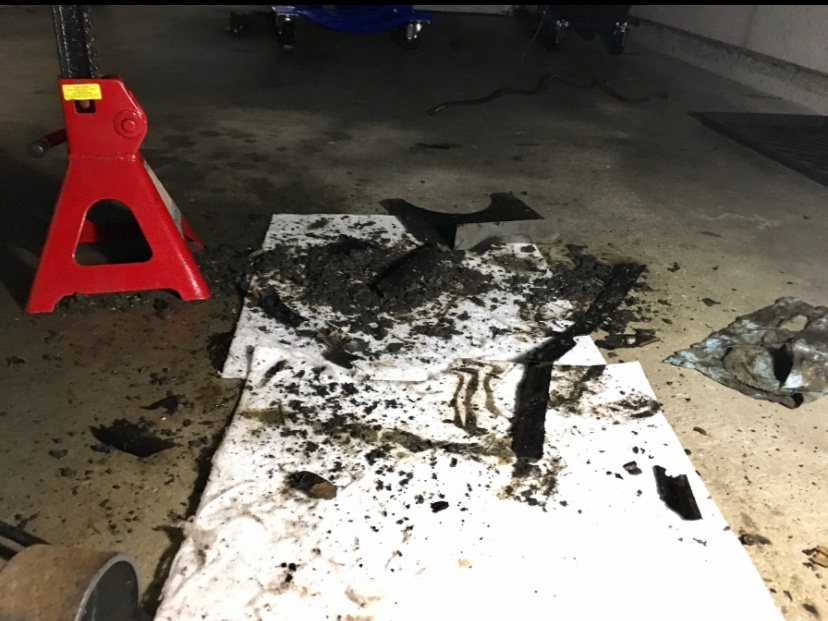
Jack up the car. Remove front tires. I’d probably remove any splash pans, inner fender window too. Lay out some cardboard. Start with a scraper putty knife and get the big chunks off. A screw driver will help in tighter areas. Get a solvent brush a toothbrush for tighter areas. Kerosene works awesome to breakdown old sludge. Swap out cardboard as needed to clean up your work area. Effort will pay off. I did this and got great results.
-
Glad it helped you @OUTFXD. Re MoparPro: “Never” is not quite long enough. That guy…If I ever meet him at a show like Hershey, I’ll be known among the Mopar community for alot more than my silly little YT channel.
-
This should help you::
-
Every one of us here knew nothing at some point. We just put in the time doing, reading, and thinking about our car problems. You're doing just fine. Even though you found the disconnected wire at the hi/low beam switch, you definitely need to fix up that yellow cloth covered wire at the head light switch. It will get worse, corrode, get hot and eventually cook the phenolic board in the the light switch. As seen in my example: https://youtu.be/w79Khf2f0eM


