


keithb7
-
Posts
3,462 -
Joined
-
Last visited
-
Days Won
193
Content Type
Links Directory
Profiles
Articles
Forums
Downloads
Store
Gallery
Blogs
Events
Everything posted by keithb7
-
 Drag me in to this will ya? Lol. I am still enamoured by old cars. Their simplicity. Doing the needed repairs and maintenance on them. It’s not much work to me. Keeps me outta trouble. Yes I still work full time. Another number of years before retirement for me. I don’t grasp the “time is more valuable after retirement”. Maybe I will get it once I’m retired someday. Yup, my old ‘38 is an old car. Old technology. Old axle. Old brakes. Ancient generator and regulator. Electric wipers were unknown still. But I like it. It takes me back to a simpler time where gas stations were all full-serve with energetic people who wanted to check your oil. Top up your rad. Clean your window. I’m not even allowed to do these things at a Costco gas station. They took away the paper towel. Get in, take your money and get out asap. Build your hot rods. Resto-mods. Or Keep it stock. Whatever you like. Whatever makes you happy. Have fun!
 -
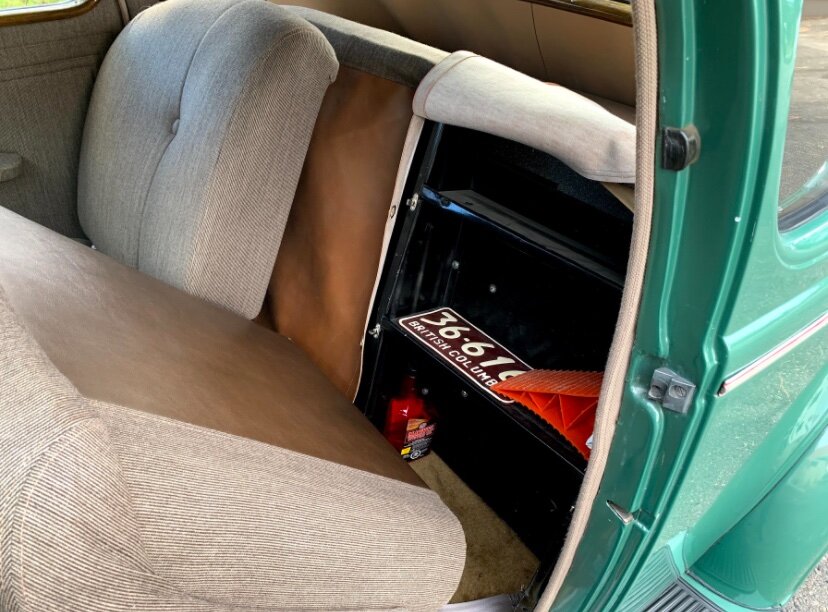
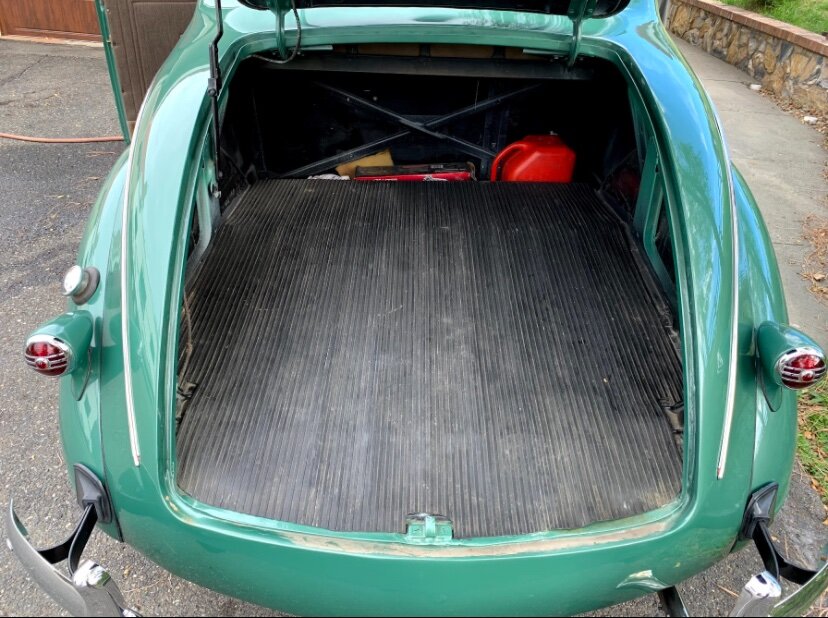
I see myself trying to spread out inside the trunk to sleep. Rear cab wall removed. Then clambering to get back out. The split (rear cushion splits only) bench seat, tilts forward only slightly. So you can access the spare tire behind the seat. There’s no way to get out the truck hatch from inside the trunk. I’m over 6 ft. Could be an interesting manoeuvre to get out of there via a cab door. Perhaps I’ll send my wife in there first. See if she can get out. She’s much smaller than me.

-
Did car people just sort of add the word “business” over the last 60 years? Were they called a business coupe back in 1938? I hear stories of travelling salesman selling, out of cars like this. The rear cab wall being removed, and then they could easily sleep in the trunk. Is this folklore? I’m tempted to try it honestly. Go on a 2 nite road trip. Sleep in my ‘38 coupe. Try and find old roadside cafés to wash up and have breakfast. Could be fun!

-
Well gentleman I did it and she's home 1934 Plymouth PE business coupe
keithb7 replied to Solly's topic in P15-D24 Forum
Free wheeling, my limited knowledge about it is: the drive line automatically disconnects from the engine when you lift your foot off the throttle. Cool but…Extremely dangerous when trying to control your speed down a steep hill. Mis-adjusted 4 wheel drum brakes with non-asbestos linings. You likely won’t want to utilize the free wheeling system on this car. -
Well gentleman I did it and she's home 1934 Plymouth PE business coupe
keithb7 replied to Solly's topic in P15-D24 Forum
Beautiful car. 201 ci 23” long engine I suspect? If I recall in 1934 they offered “Free Wheeling”. Does your plymouth have this feature? -
You should reconsider the speedi sleeve. I don’t consider that as looking good.
-
At the 3:25 mark here I install front timing cover and gasket. The crank seal install in the timing cover is shown earlier in the video.
-
At the 18:35 mark in this video, I install a speedi sleeve on my crank pulley. Front seal surface area.
-
Boyertown PA, Visited the Boyertown Car Museum
keithb7 replied to desoto1939's topic in P15-D24 Forum
I will admit I do take a special linking to the harmonica-grill period of post war Mopars. They look good. Navy blue with chrome is very classy. A NY’r coupe with a straight 8, manual 3 speed with OD would be a nice acquisition. Was it offered configured as such? -
To get at the front timing cover you’ll need to remove the front engine mount. You need to support the engine to do that. The rubber on your front mount looks poor. It should be replaced. You’ll need to remove the centre crank bolt. Then a puller to get the pulley off. Look at the sealing surface of the pulley. Clean it up. You may very well want a speedi-sleeve on it. Remove timing cover bolts. Remove timing cover. Kerosene and a brush. De-sludge everything. Clean all mounting surfaces like new. How’s the timing chain play looking? Install a new crank seal in the cover with a press. Get a new gasket in place. I like to copper spray both sides. Lay the cover and gasket in place. Do not tighten it down. Use crank pulley as centering guide. Install pulley. Then tighten down cover bolts. Put thread sealer on cover bolts.
-
Correction. Largest engine in 1968 C3 was a 427 ci.
-
Today was the first I ever heard of it. The movie popped up on my You Tube feed. I watched and quite enjoyed it. I read that a 1968 Corvette 454 4 speed provided the sound track for the hot rod scenes. It sure did sound mean. The movie took me back to simpler times. I didn't realize I needed that but it made my day. It's free on YT if you want to check it out.
-
My 1938 Plymouth sedan had a stock 201 ci 23” long engine when it was new. It currently has a 25” long 237 ci Desoto engine in it. Its fantastic. Stock 3 speed, 4.11 rear end, she makes good torque! The rad was replaced with smaller one and pushed forward into the rad enclosure. The cross frame member cut out a bit to allow for front crank pulley clearance. Custom fabricated font engine mount to account for engine mounts on the block being 2” further forward than stock 201.
-
Find a 25” USA Desoto or Chrysler engine manifold. I suspect it’ll bolt right up.
-
Sniper you have mentioned before your engine has low compression . Maybe 50 psi per cylinder has something to do with it? Maybe lower psi cylinders can take a higher mixture of fuel and still fire? Just guessing. In my engine I could see raw fuel spitting out of the carb’s idle orifice at the throttle valve. I witnessed raw fuel in the intake manifold, pooling. My exhaust flapper valve works properly. My engine labor’d more to fire when the A/F mixture was rich. My conspiracy theory allows me to mostly make sense of what’s going on here with my car. I don’t quite understand why its not happening to all of us. Aside from bringing my car to Texas and driving it in 100F heat, I don’t think I’ll find answers to Sniper’s comments.
-
In all honesty... a case of the nerves - 49 Plymouth Engine reassembly
keithb7 replied to nbn's topic in P15-D24 Forum
I took my time assembling my flathead engine. I checked and re-checked all my work. It was a first time flathead rebuild for me and I took it slow. I thoroughly enjoyed the process. I suppose a flat-rate mechanic back in the day would have done so many rebuilds, he could do it in a day. Not me. I did it when I had spare time. Between my full time job and honey-do lists. Everything that I was unsure of I stopped and researched. Even when I was sure it had it right, but didn’t grasp the why, I stopped and researched some more. I considered my engine to be a self taught correspondence course in flathead rebuilding. I learned a ton. If I recall I dragged the block home from the machine shop in about mid-June. I let it sit all summer. I believe I started reassembly in early Oct. i flashed it up about Jan 1 or so. A very memorable, enjoyable period in my life. Out to the shop to tinker and make a real man outta myself. Lol. -
I did the same. Set my first one up too tight I guess. I smelled something. I figured it must be the pulp mill in town. I kept driving. At the next street light at a red light the magic smoke was quaffing up into the cab. WTH! I pulled over and laid under my Plymouth, in some gravel. I used my handy leather man pliers in the glove box to back off the adjuster nut. I didn’t see any flames. I was probably seconds away from them though. As you can see, many of us have been there too!
-
Lol. The Briggs & Stratton was merely a stripped down single cylinder Mopar flathead engine with no pressurized lubrication system, silly.
-
Any info you can give would be appreciated!!
keithb7 replied to Rhino71's topic in Mopar Flathead Truck Forum
Did these big trucks have the Lockheed concentric brakes? -
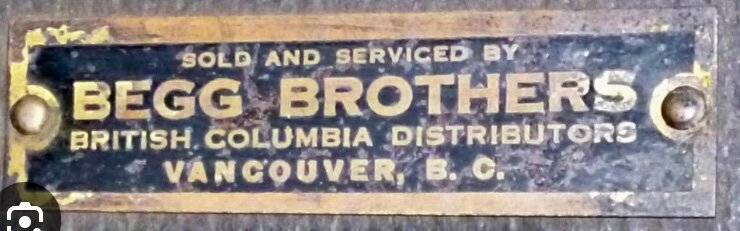
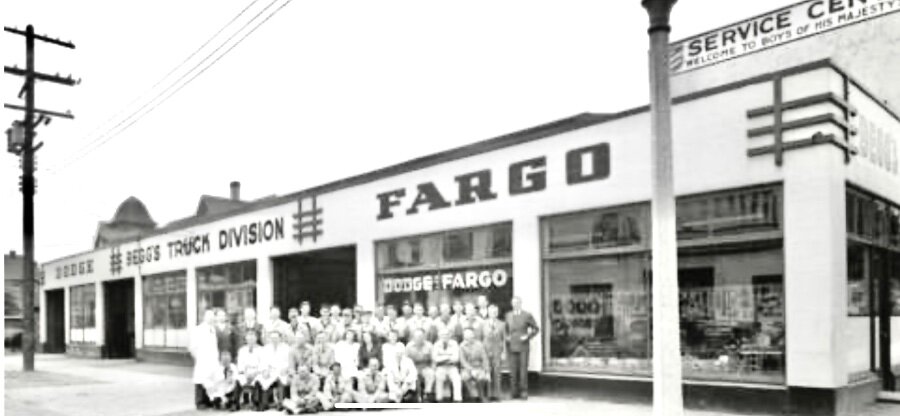
I am fortunate to know the original dealerships that both of my 1938 cars came from. In British Columbia Canada, Begg Motors was BC’s very first automobile dealership. They had a branch in Vancouver BC where my ‘38 Chrysler was sold. Jump on a ferry across the Georgia Strait (a considerable feat) in 1938 to Vancouver Island. There was a Begg Motors in Victoria BC also. My cars lived in those areas for all those years until I came along. I drove and ferried to Victoria to buy and load up my 1938 Plymouth. I found the “Begg Motors Victoria” dealership badge nailed down on the engine wall down by the shifter knob base. A couple years later I hauled a trailer to Vancouver BC to pick up my 1938 Chrysler. I found another Begg Motors badge in the same place. This badge said “Vancouver” location on it. Both cars reside now in an arid area of BC’s southern interior. In my care. If I win the lottery I’ll get a DeSoto, and Dodge. Maybe a truck too. Build my own replica Begg dealership. Couple old of gas pumps outside. A showroom for them all. Wouldn’t that be awesome.? Here is a photo of the actual old Begg dealership in Vancouver back in the day. These old things still make me giddy. Money and common sense are the only things holding me back. Lol. Good chance one of the mechanics in this photo prep’d my Chrysler, after is arrived on the train from Windsor Ontario. Here’s my dealer plate.
-

-
The thinnest block section between the siamese’d pair with no coolant flow between. Not surprising as I have heard if its going to happen this is usually where it’ll happen. Have decided if you are going to test your valves for leakers?
-
The gouge in the cylinder wall is a permanent scar from an earlier injury. There is no cheap simple fix that I know of. Oil and combustion gasses will get around your piston rings, through that gouge void. New piston rings won’t help. A lower priced repair could mean boring out the bad cylinder and inserting a sleeve. Won’t be easy or that cheap honestly. Rebuilding the spare engine will be best, but pricey. Be prepared. Machining costs were among my biggest expenses in rebuilding my engine. I also agree with other comments here about lapping the valves and putting it back together. Milling the head .040 or so will increase combustion, but also have a larger effect on oil consumption and crankcase blow-by gases. I don’t think I’d mill the head at this point. Take your time and rebuild the spare engine. As time and money allow, progress slowly. Strip it right down and send the block in to a machine shop. Hot tank it. Get all machining performed as needed. New valve guides too. Then build it up from there. It is a ton of fun and extremely rewarding. Budget $4K USD or so when doing the rebuild yourself. If you wanna do it right.
-
Your info is believable. Yet the performance of my Royal with OD vs my 4.11 Plymouth has me questioning what is going on with my Royal. Perhaps my Royal got a custom swapped gear set. It Sure feels like 3.9x-ish to me. One day I’ll have it open and can confirm. I’d say, my Chyrsler definitely does not feel like 4.3:1. Definitely not.


