


keithb7
-
Posts
3,468 -
Joined
-
Last visited
-
Days Won
193
Everything posted by keithb7
-
I’ve had a good experience breaking in new shoes. No arcing. No sanding. When you decide its time to install new shoes, for example install just a front or rear set. Not all 4 corners at once. Say you do just the fronts. Install the shoes and set them up best you can. Get them concentric. Get them set so you can just barey slide the drum on. Get very close contact at minor cams. Ensure you have some slight drag there. You’ll have crappy pedal feel as the shoe lining does not contact the drums evenly yet. Drive down a steep hill a couple times. Give it a few good shots of the brake pedal. Later, Re-adjust the front minors. Pedal will improve. Go for a couple more drives. Down a hill or two. Steeper and longer is better. Exercise some good braking. Go home and re-adjust the front minors again. Pedal height will now be firm and high. Shoes are now arc’d and concentric and will feel great. Like new. The reason I don’t suggest doing all 4 at once like this is for safety. Do 1 axle only. Once the new shoes are all set up and you have a good firm high pedal, then proceed to do the other axle. You don’t want to be driving down steep, long hills with 4 new poorly arc’d sets of shoes. You can set minors in literally minutes. A hydraulic floor jack and 1 wrench are all that is required. If this seems like too much trouble, for me it is free, educational, and rewarding. I have tons of time and patience . Almost endless. Money…Well that’s a different story.
-
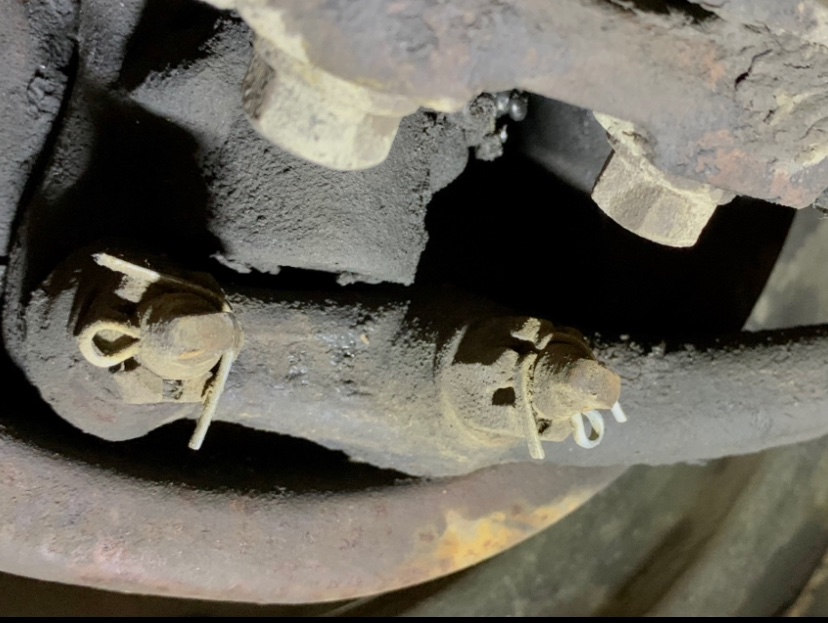
In 1938 in Canada the stock adjustment cams could be tweaked without removing the drum. The bolts have ends designed for pliers or a wrench. @capt den I’ll send you a direct message through this site. Soon. Keith
-
Thanks for the info. I went back in to take another look. Nothing up top either. I’m not seeing anything.
-
My 1938….I don’t see a wick. Is someome able to steer me towards a wick?

-
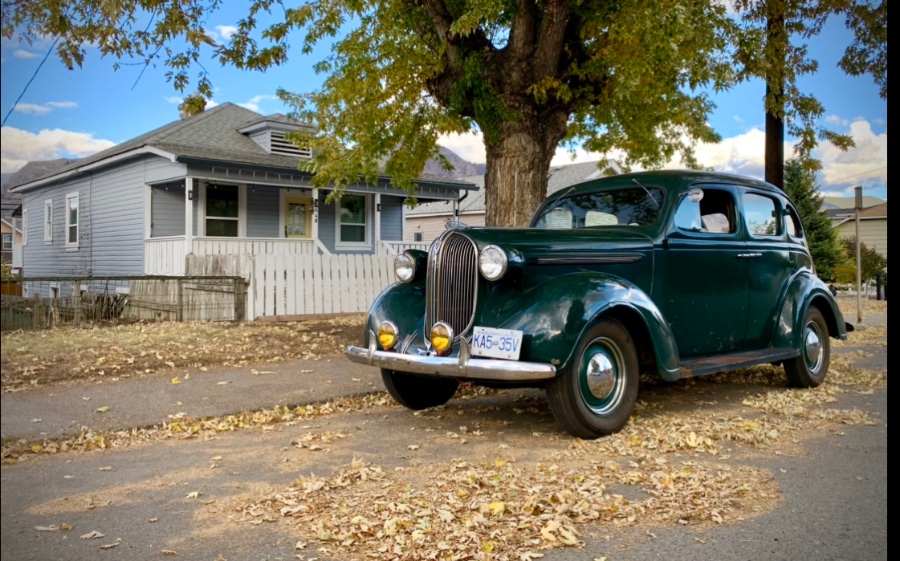
Just about done cruising in my Plymouth. Fall is here. The car’s insurance expires very soon. My Fall 2022 photo is seen here. I try to find falling leaves, and a back drop that looks like it could still be 1938. Its been a great year with the newly rebuild engine. She’s fully broke-in now. 852.4 miles.
-
My speedo bounces too. I removed my cable assy. It Spun nice and smoothly in its casing. I lubed it with light oil anyway. Re-installed. Immediately no better. The ”wick” comment has my attention. I’ll go look for it and try that.
-
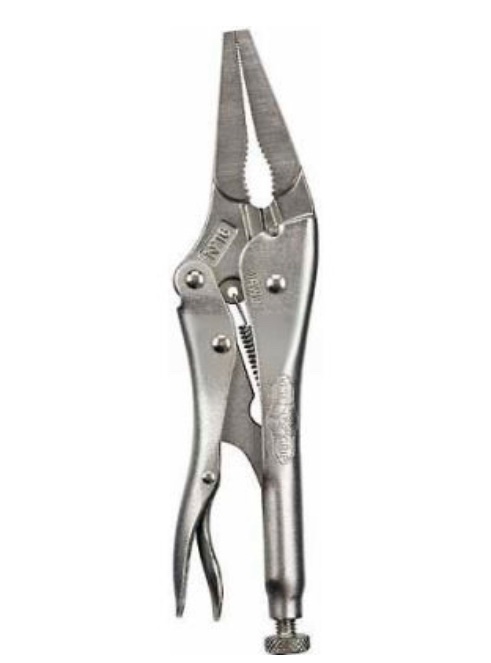
I had no issues using my mid-sized needle nose vice grip pliers. A tool that can be used for many things besides just brake springs. A better investment in my opinion, if you are buying a tool. Maybe you already have vice grip pliers? Put a good bite on the spring and pull it into place. Wear safety glasses. If you need a little extra oomph, you can guide the spring hook with a screw driver. Voila. Easy! Tip: don’t buy cheaper priced grips. The original brand is pretty darn good. The over-center locking spring mechanism often craps out on cheaper made copied tools.
-

'50 Dodge jack up car to remove exhaust manifold?
keithb7 replied to 52ismine's topic in P15-D24 Forum
Good times. In theory it can be done without jacking up the car. Yet rust never sleeps. It will surely cause you grief. I sure like pulling the right front wheel off and removing the inner fender window. Great access and visibility to every part to be removed. Also every piece hampering progress.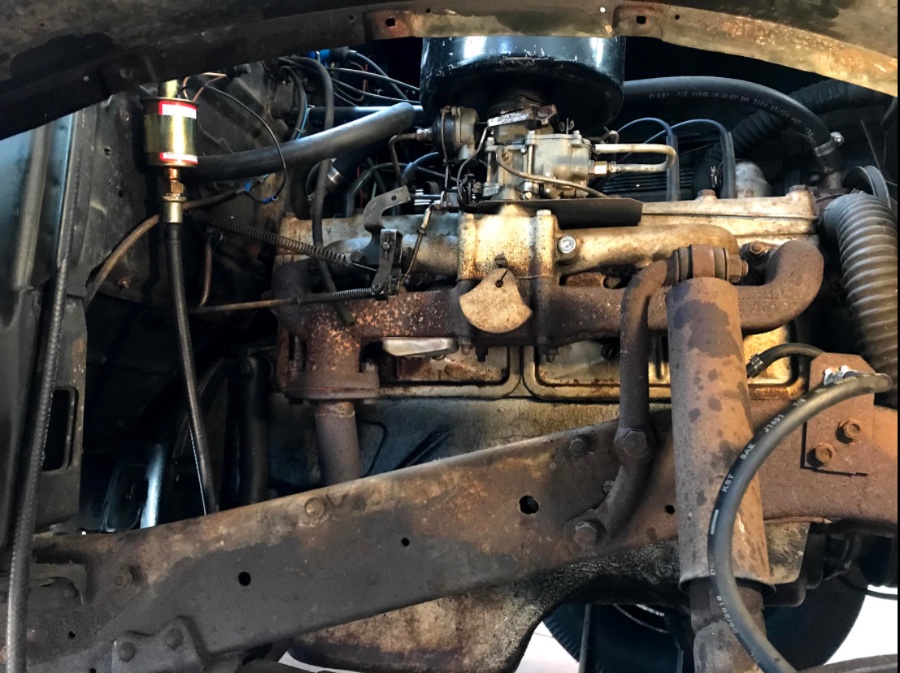
-
Whats your crown and pinion gear ratio? What is your tire size? Do you live and drive in hilly or flat terrain? How much luggage and passengers are you carrying around?What is your desired top speed? Lastly, does your car use stock brakes and stock worm gear steering with king pins?
-
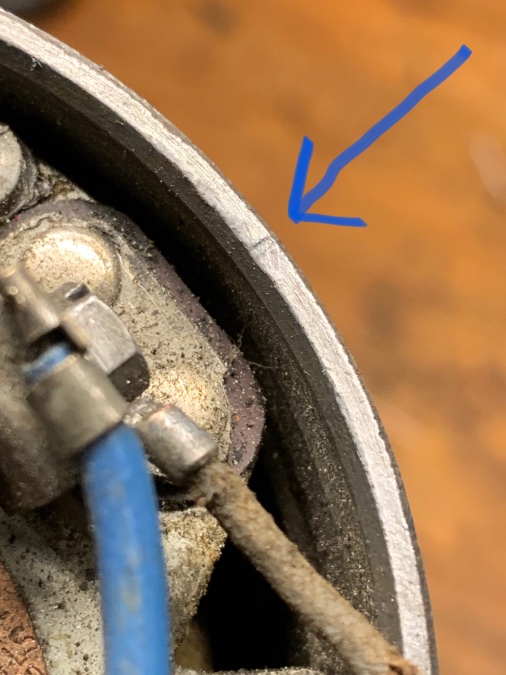
Close up of line in top edge of distributor housing. 3 out of 4 of my Mopar distributors here, have this line. So apparently not all of them are marked.
-
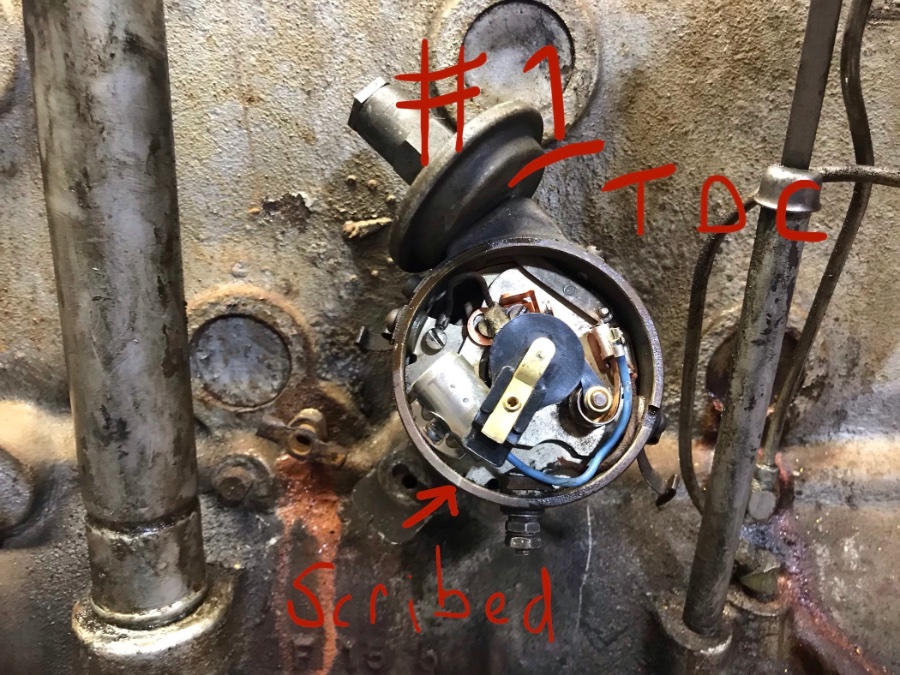
Factory setting seen here.
-
Look for a little line scribed into the top metal distributor housing. The Rotor pointed to this machined line when it left the factory. Where #1 is today? Who knows? Lots of folks get it wrong. Could be 180 degrees out. More info to come. We’ll help you.
-
I believe Mine is 15L size.

-
I am happy with my Ultrasonic cleaner. I’d buy it again. Have not owned it long yet though. So far I’ve cleaned 2 carbs. Both were immediately improved very much. In fact my lawn mower would no longer run at all. Now it’s like new again. I did not see any indication of my carbs “losing their finish”. Perhaps some folks are using cleaners that are too harsh? I used 1 cup of Spray nine. Then about 10L of water. I set the water heater temp to about 150F. The little imploding bubbles did their job. I ran it for about 3 hours per carb. I am enjoying excellent results. I’d have to look up the brand name when I get home, then report back.
-
My vote is ultrasonic cleaner. Worked well for me.
-
It walk through it here:
-
We have compression... working on ignition next!
keithb7 replied to Chris-R's topic in P15-D24 Forum
Consider running a heavy 1:1 oil/gas mix ratio not unlike a 2 stroke? Lol. Just kidding. Do not do this! She’ll fail quickly. I’ve personally never seen 120 psi in a flathead mopar engine. I wonder if you have severe carbon build up in there? Or maybe I just need to drive down to sea level and perform a compression test. That’s a tall order. I’m probably a 4-5 hour drive each way in my ‘38 to get to sea level. That’s a pricey compression test. Lol. -
After a long cold nap there may be multiple issues when trying to get the car to fire up. There are many tricks that can be done. Pull all spark plugs. Re-install plug wires. Lay a plugs on cylinder head, to ground them. While cranking over the engine with key on, do you see sparks? Having a friend to assist from in the cab helps here. Put about a teaspoon of engine oil or Marvel Mystery oil down each sparkplug hole. Leave plugs out. Crank engine over again. Now remove air filter. Look down carb. With key off the engine sitting, cycle the throttle linkage fully a couple of times. You should see a stream of raw fuel squirting down inside the carb. No fuel? Get a smaller-ish syringe from a pharmacy. Re-install all spark plugs. Suck gas into syringe. Manually squirt some raw gas down the carb. Not too much. leave air filter off. Walk back to the cab. Turn key on and push the floor starter. No choke required. Does the engine run for a few seconds, then stall? Repeat again, squirting raw fuel down carb and start engine. If engine stalls , do it one more time. If engine stalls again, your fuel system is likely the cause. Look down the carb again. Cycle throttle open wide a couple times. Are you seeing raw fuel squirting inside the carb yet, while cycling the throttle open? You should by now. If not, time to test the fuel pump. Do you have fuel in your glass bowl at fuel pump? Remove fuel inlet line to carb bowl. Crank engine over. (Spark plugs out is preferred, easier to crank over) Do you see any raw fuel flowing out the fuel line while cranking the engine over? No? You may have a fuel pump problem. Or constricted fuel line. More troubleshooting required. No spark right from the beginning? Then its time to deal with that first. Then come back to the fuel testing described above. My old Mopars require no throttle at all to start when hot. They flash up instantaneously. This phenomenon varies by car for many reasons. Including; engine state of tune. Dwell. Timing. Carb cleanliness. Health of ignition system. Plugs, wires, points, condenser coil. Valve seal ability. Valve lash gap. Amount of compression engine makes. Type of choke system. Type of fuel being used. Ethanol, non-ethanol. Winter blend or summer blend fuel. Fuel pump pressure. Float height setting.
-
Rebuilding My 218? 230? 1940 Desoto Flathead Suggestions
keithb7 replied to 40desoto's topic in P15-D24 Forum
I am not aware of anyone that offers a “rebuild kit” for a flathead Mopar. Engine rebuilds vary wildly. Many get new bearings and gaskets, a hone and new rings and call it rebuilt. Others much more. New Valves. Tappets. Valve guides. Camshaft and new cam bushings. Timing chain set. Main bearings. New pistons. Bore over. Oil pump. Expansion plugs. Etc etc. After a complete disassembly and thorough inspection with measuring tools, then you can determine the level of rebuild it needs. Or cut a few corners to “try and save a few dollars up front”. Meaning you are likely deferring the dollars today that will likely cost you a lot more later. When I rebuilt my engine I guess I assembled my own rebuild kit. Some parts from Andy Bernbaum. Some from Vintage Power Wagons. Some from Rock Auto. Nobody could supply the 0.001 polished rod bearings I needed. Those came from E-bay. NOS. It is a bit of work. It can take time if you are inexperienced. To get it right and know exactly what you need, and the proper sizes. Or if you are keen to learn, books and experiments in the garage on a spare engine worked out extremely well for me. I learned a ton. I had the most fun in a long time. The lessons and the experience were priceless. I sometimes wish I had another one to rebuild.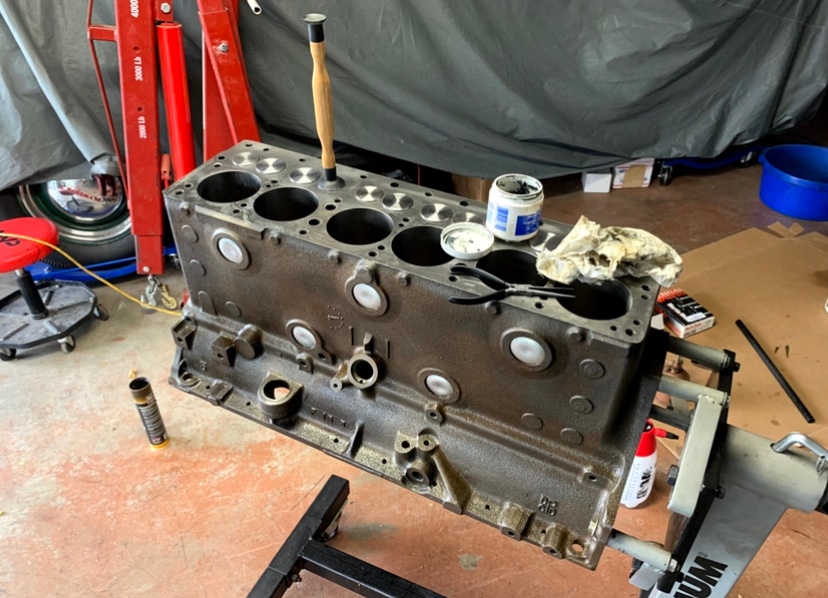
-
Thank you very much Los. We met in high school and basically grew up together. Just kept reading. Learning. Trying. In beginning we were always trying to save a buck. We discovered that we were enhancing our lives. Now it's just fun. Co-existing so close together I suppose we may have influenced each other along the way. I guess we sorta are alike in our ways.
-
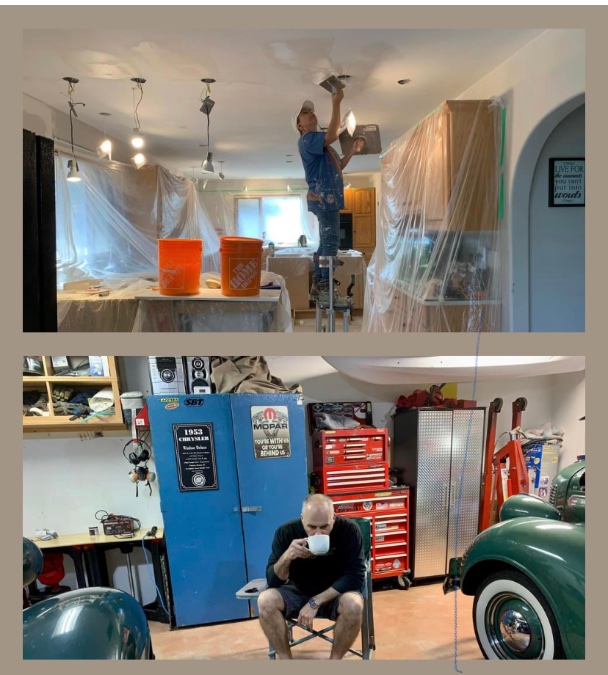
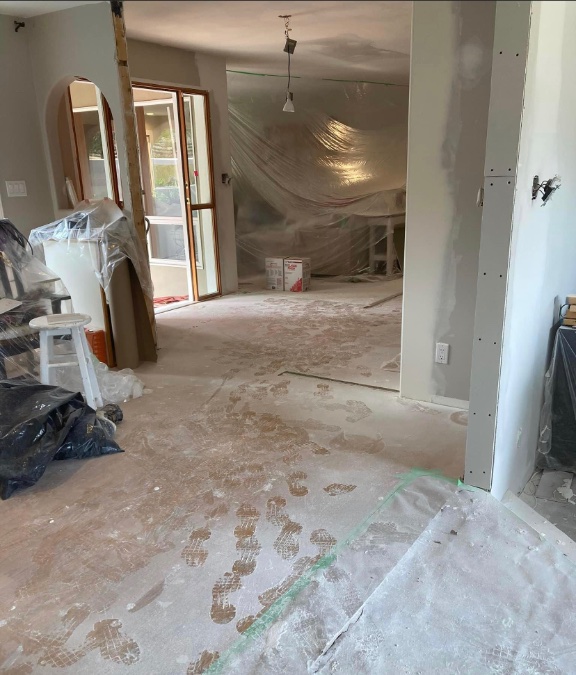
Our house is a little less than typical I think. My wife is a very competent and experienced home building, renovating hobbyist. I have yet to see a project, repair or reno that she hasn’t tackled. She does it all. And I do mean all. This summer she started on the main floor of our house. Moving interior walls. All flooring removed. Tile jack-hammered apart. Ceiling textures scraped clean. Lighting moved. Plumbing upgraded and moved. Kitchens. Bathrooms. Rec-rooms dining rooms tore down. Exterior stucco. Hardy-plank. Windows. Roofing. Retaining walls and much more are among her resume. I am there as her joe-boy when needed to offer some muscle. Or someone to just listen to her ideas and thoughts. She’s an extremely hard, talented worker. This is her passion. She works 40 hours a week at her day job. Then puts-in about 50 hrs a week on the current home reno project. Its not often I am called on for some assistance. These photos were taken last Sunday morning. She’s on stilts drywalling the new ceilings here. I’m in my dust free zone, the garage, having my morning coffee. Our kitchen has been a war zone for months. Not super easy to live in the home currently but we work it out. I play with my cars and make You Tube videos as a hobby. My wife works herself like a mule and loves it. I am humbled by what a small person with such small hands. What this woman, can accomplish. A few pics of the current project are below. Many other bigger projects have preceded this one. In hind sight I should have created a You Tube channel, and made content following her projects and work.
-
Nice work! Great looking product. I keep scrounging up powertrain parts that people are scrapping. I seem to have amassed quite a collection of axle shims! Pretty sure someome will throw them out after I’m long gone. Lol.
-
Imagine the car parked for years. The engine not started. #1 and #6 at or near TDC. The con-rod bearing not submerged in the oil in the pan. At least not the top half of the con-rod bearing. The top bearing has the oil hole right? Consider that bearing corroding from humidity. Maybe on a hot day gasses flash off the sump oil and travel up the dry upper bearing. At night things cool down. Humidity condenses on the metal parts. Water drip down into the oil pan. Maybe some drips down an ends up in the con rod bearing too. Next summer it gets hot again. The water partially vaporizes maybe. Vapor travels into the dry upper bearing again. This happens year after year. Seasonally. The upper bearing surface corrodes as witnessed here. The pitting you are seeing here on these bearings is not friction wear. At sone point some type of dirt or other foreign object did enter the bearing area via the oil feed hole. You can see the wear score mark lines up right to the oil hole. These are called witness marks. The bearing did its job and absorbed the force of the object as it rotated around the crank.
-
The surface area of the crankshaft where the main thrust bearing contacts. How does yours look?

-
This pic looks bad. The rear main thrust bearings by chance? By chance did you pre-measure crank thrust before disassembly? Does rod bearing #1 have pitting? Did you squeeze your oil filter in a vice. As per my video. Possibly metal filings from thrust beatings present in filter? I think we see some pitting in valve seal surfaces? Hard to tell. Valves are cheap. I put all new in my engine.


