Leaderboard
Popular Content
Showing content with the highest reputation on 02/09/2023 in all areas
-
The transmission is out of my Plymouth PJ and on the bench. I have waited and finally received replacent parts, etc. Before the assembly process begins, I made an image of the gears with a J. Lancaster "Extra Special" large format camera from about 1890. Captured on film with a vintage lens these gears look pretty cool, so sharing them here seemed appropriate.9 points
-
i used to work in a motor repair shop and we would do this kind of work daily. Emery cloth to clean up the comm. Then examine the slots between the comm bars. Clean out with a small screwdriver turned the thin way if there is any crud or copper filings. Done. You cut the insulation down only if you've cut the comm down in a lathe in order to even out a comm that's been worn/grooved down from the brushes. And, in that operation, a hacksaw blade can be used AFTER grinding off the sides of the teeth that have been set out a bit. In this way, the teeth will cut down, but not out at all. You don't want to widen the gap of the comm bars. Have fun!2 points
-
What I find interesting is how nominally complex jobs like replacing all the synchronizers in the trans were so “normal” then, and presumably relatively affordable while the same now is major surgery and costs a fortune today. I like the dialog between the gruff mechanic having to get the job done, and the parts guy who just wants to learn. In the background a smorgasbord of interesting vehicles . I guess it was always in my mind that these jobs we struggle with were simple one-two hour jobs for the trained mechanic.2 points
-
It will only install one way due to the spacing of the holes.2 points
-
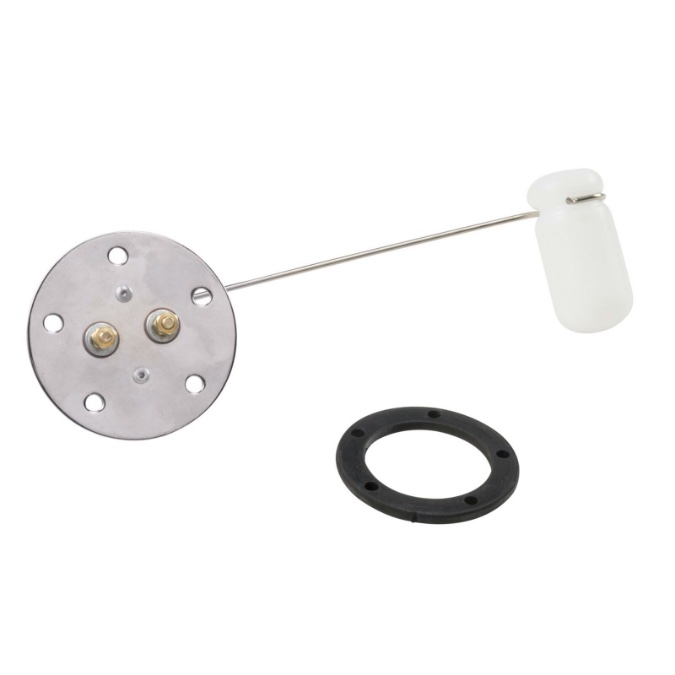
Mark: the top unit has five holes in the body of the flange these will align up with the holes onthe top of the tank. these holes determine the direction inwhich the the float and arm will be when installed. do not try to force the unit to have the float facing forward. Also recommend that you run a ground wire. Rich Hartung2 points
-
No adjustment with air screw is an indicator that it may be time for an ultrasonic carb clean. Fluttery vacuum indicates valve seats could possibly use some hand lapping. Check your points anchor screws. Tight? Points may be moving around a little bit, seen by the jumping mark with the timing light. Return spring arm on points adequate? Wear block and points cam in good shape. Closely inspect wire from coil to distributor, junction, and internal wires in distributor. All solid? No stray wire strands occasionally grounding slightly? Any possible porcelain cracks in the spark plugs? Fire up you car in the dark. No lights. Look for possible sparks to ground. Check wire from ignition key switch to coil. Set points open. Set a multimeter to reference ground. Check continuity of all wires in ignition system that they are not "beeping" the multi-meter indicating they are grounding somewhere.2 points
-
We have had some spammers take the time to do a full registration and get in. I often get comments that new registrations are hard to fill out but it does slow the spammers down. To slow them down more from now on I'm requiring both email confirmation and admin approval before gaining access. I should be able to catch more of them on the front side.of the process so that don't get access. And a big thank you to the mods for getting the spam posts cleaned up so fast!1 point
-
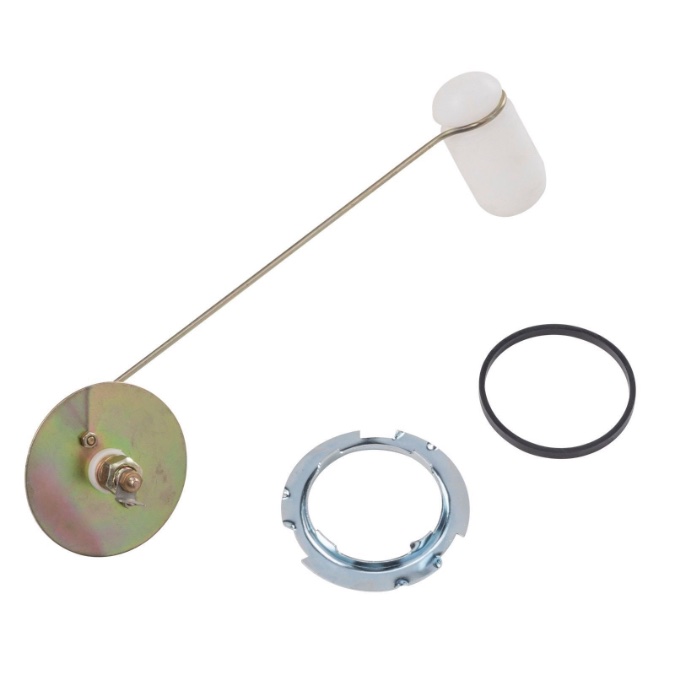
I assume that this sending unit is installed with the float slanting toward the front of the car. Mine has two wire terminals to the top of the unit. I was surprised to learn that in the new 49 model Mopar cars changed to a new type of sending unit with just one wire. The two wire sending units are called the thermostatic type, and the one wire units are called the electrostatic sending units. So I guess the 46-48 models were the last cars to have the thermostatic sending units. No directions came with my unit so I assume that the float is installed to slant toward the front of the car. There is a good booklet on all of a car's gauges in the MTSC booklet Gauges from 1950. The filmstrip is missing so I will try to contact MyMopar to see if they want to borrow my filmstrip and/or record to put online. https://mymopar.com/mtsc-1949-volume-2-6-transmission-fundamentals/1 point
-
I will send you a picture of this transmission & selector lever position within the next hour for you to compare ?1 point
-
The 218 in my '48 P15 runs great at 10* BTDC. The manual suggests advancing the timing until there is a little pinging under heavy load then retarding enough to eliminate the pinging. I've never tried this so don't know how close my timing is to the 'ping setting'. But the engine is very responsive at 10* on cheap gas.1 point
-
There shouldn't be any vacuum advance at idle. Fluttery idle vacuum usually indicates a valve related issue https://www.onallcylinders.com/2016/03/31/vac-visual-quick-guide-vacuum-gauge-readings/1 point
-
I think the main issue with valve to head clearance at full lift is more along the lines of them smacking into each other rather than flow issues. The higher the RPM and/or faster the lift speed the more I would worry about that. Stock cam? not too worried. If I get a chance I'll cc my Edgy heads, have to get the tools first.1 point
-
Too late. Op is at .480 .375+.125 = .500" Of course the HG is probably .0.60 compressed. Lol1 point
-
Be careful when milling your head as the valve will stand proud from the head and the valve will lift a tiny bit more than .375" at higher revs. I would allow for the amount the valve stands proud plus the lift plus at least .125" just to be safe.1 point
-
If you have not watched this 1949 MTSC filmstrip yet, you should as it is all about the the transmission and adjusting the shift linkage. There is also the booklet there that you can read or download. https://mymopar.com/mtsc-1949-volume-2-6-transmission-fundamentals/1 point
-
They work fine for the occasional user. I had a couple of them, different size ranges, well worn from usage. I was building engines on a fairly frequent basis so the Snap-on was a really nice upgrade. When I sold the business and most of the tools and equipment, those band units went, no regrets. I kept the Snap-on.1 point
-
I never had any issues with the simple ring compressor shown above when I rebuilt my engine. Like most of us here, we might only have 1 engine rebuild left in us! Lol. This low cost tool gets the job done if you pay a little extra care. Mine may never get used again. ?1 point
-
I have used every ring compressor known to man and I have to say I’ve hated them all. That is until I bought a Total Performance tapered and slotted Ring made by a piston ring company. It’s a hard anodized aluminum ring with a slot in it, then its made adjustable with a hose clamp. I could not find a solid one in the size I needed so I found this one which covered all the possible sizes for this one type of engine. Pricey at $65 at Summit Racing but….that darn thing works! It came with no instructions which kind of bothered me. Knowing the skirt is larger than the ring lands I adjusted there. Lubed up the bore, the compressor and the piston and everything goes together with nearly thumb pressure ( but use the handle of small hammer or mallet ). Almost effortless ( by comparison )and extremely controllable. The pistons I was installing were 3 ring pistons and so they are pretty easy. On a 4 ring piston I think I’d spend the money again with even greater satisfaction! Only issue with these is you can’t use them on a VW or Porsche, you’re stuck with the band and ratchet plier type. Which is a great reason never to work on one of those again. lol1 point
-
The wheel studs will press out, the hub will press out of the drum as well. 2 steps, press the studs out first, flip the drum over and press out the hub.1 point
-
1 point
-
If it sat for a couple years, carb is probably crusty. Sounds like you part swapped everything and still have a problem......Pull the carb off and clean it. Even a good soaking and blowing out all of the passages will work. Soak it, sonic clean, whatever gets the job done. These things are so simple, even a caveman can tune one. Good luck.0 points


