-
Posts
507 -
Joined
-
Last visited
-
Days Won
2
Content Type
Links Directory
Profiles
Articles
Forums
Downloads
Store
Gallery
Blogs
Events
Everything posted by Veemoney
-
Happy New Year everyone. Smoked a pork shoulder yesterday for the last day of the year. Some made it to the freezer for the new year. I always enjoy it when food is mentioned in these threads for some reason it puts a smile on my face. All is well so far here for 2023. Will be heading out to the shop soon and get it kicked off right.
-
Glad to read the stories from everyone. I love the Holidays starting with turkey for $.59lb at Thanksgiving. We gathered at my sisters for a great Thanksgiving meal and the following day I cooked a 26lb turkey because as mentioned there is never enough. Our family stuffs the turkey and does a separate pan of stuffing for those with a preference. I used the time between Thanksgiving and Christmas to take down 4 tall pines by the road. 3 had died and 1 had some growth at the top. The weather outlook was good for the week, so I cut them high and then used a machine to pull them with the stumps. Cut and cleared just before the big freeze hit us and got to burn some calories before the Xmas spread. All is good and with Christmas behind us I'm looking forward to the New Year. Have a safe and happy New Year everyone
-
Airing out photo. I like it
-
The pad and stamping to me look to have had some rework. I don't recall see a stock pad with a burr like that at the bottom. The TP23 also appear larger than the rest of the numbers. Just my observation at first glance.
-
Nice when they practically bring it to your front door. I would guess a bit later than 39 but hard to tell from the picture. He put it on the curb like trash so make him an offer quick.
-
Smart to develop a plan based on what info you can find here and online before ripping into it. As PA mentioned the trim for the 41 Plymouth is not easy to come by in excellent shape as yours is along with the lack of rust on your project which us in the Midwest are used to seeing. Andy's cars are excellent examples and although he posted pictures of them before I never tire of seeing that 41 and this may be the first time I viewed the back seat arrangement of that car so always something new to pick up here.
-
I like it. Would sure like to see some pics of the inside if you have a chance.
-
A chebbie?
-
For me it really depends how much crud I'm seeing. If bad another option prior to starting any hands-on is to plan a trip to a local do-it-yourself car wash with the wands for water pressure when desired. There are some by me that have doors for the winter months and selectors for soap, engine degreaser, and rinse. Very helpful if you spray some cleaner on the problem areas first and drive it down. You should be able to get the top, sides and bottom of the motor and sides/bottom of the trans where most leakers make deposits. With water pressure you can get some blow back as you go so safety glasses or a shield should be worn with some old clothing. Once finished at the car wash I start the cleaning as others described and then detailing. Just be careful around the distributor and thoughtful where you pull the trigger for the higher water pressure.
-
Bosch electric wiper motor. I have the same ones on my 47 WC. They are a simple motor with some gears for the drive. 1 gear being small and it does wear. You should pull them and clean the old grease which has likely hardened if it has not been serviced. You can see in this picture where the wires connect
-
On my 47WC I have the same style Cleveland joints as Los shows for his truck. When I pulled the driveshaft while changing out the rear gearing and servicing the axles, I could not get the rear joints of the driveshaft out. I remembered reading a thread here where a member had added weight to the bed of his truck to get the required clearance by compressing the leaf springs. I started stacking what was closest till it came down enough to clear. My u-joints had dried grease which I cleaned, greased and reassembled. Make sure the front and rear u-joints are phased correctly which could be creating your vibration problem.
-
Hope to hear your back at it soon. Some pretty good swelling. I had a break same leg in the same location years back. Healed up well and doesn't bother me so I wish you the same. The bad news is I was decades younger than you when it happened.
-
I have a gallon can of the Berryman as well. I purchased it years ago at a price of $17.60 which is still on the lid. It does a nice job of cleaning up carbs and I have used it on many over the years. Mine has a steel galvanized parts basket inside and that finish is still fine on it. I usually leave parts in anywhere from a few hrs up to 24hrs.
-
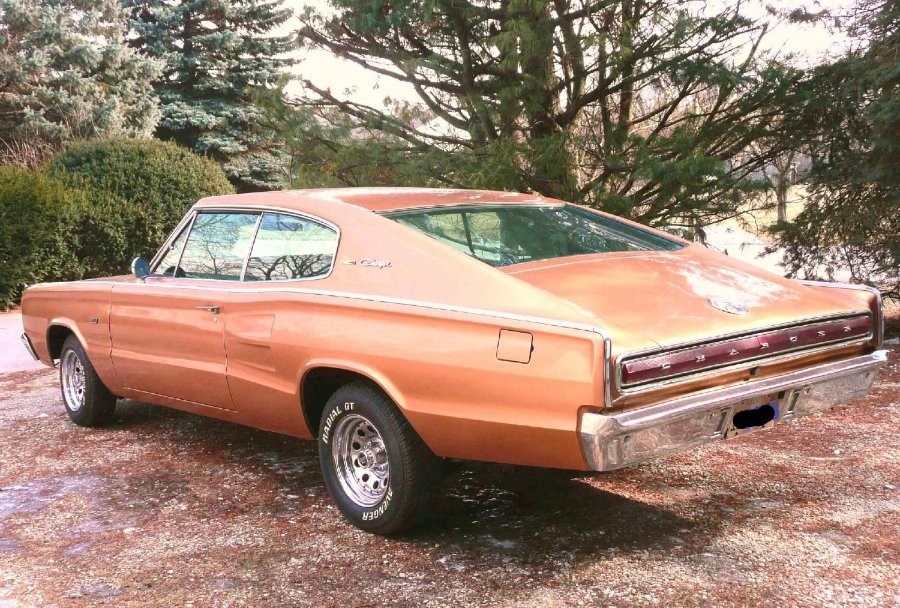
Long story so to summarize, I found a few donor cars for the interior, gauges and glass. Picked up a rebuilt motor and trans from a young man I worked with to beef up before installing and then did some sandblasting and painting on this one. Interior used to be gold and white but it only had a drivers seat when it arrived and no interior panels or headliner. The Az sun did them in or they were scavenged along with the gauges so now it is black inside. Traveled between Detroit and here for most of the parts and accumulated a stash of extras parts along the way.
-
I located this rust-free sheet metal specimen in Arizona back in the 90s on the internet. Internet is nothing like it is today for search options for car parts. The seller sent me the hard copy pictures below by standard mail along with pictures of 3 other 67 chargers he had for sale at the salvage yard. Bought this one for $500 with the intention of parting it out and keeping the sheet metal for spares. It arrived on the top rack of a car hauler the seller arranged for shipping to me that he knew was heading my way and needed to fill a spot. The seller was supposed to make it a roller. The hauler called the evening before arriving to confirm address and informed me I would need rims and tires. I was fortunate I had some and worked at a place with a large forklift to pull the car off the top rack. Once I looked it over, I had to make a decision on moving forward with this one.
-
The milk truck is in nice shape and in good hands now. looking forward to the updates. I don't recall ever seeing a truck with as many dents in the fender as the 39. I'm sure there is an interesting story on those dents. Learning to drive on a farm starts in an open field for most, I guess they skipped that step?
-
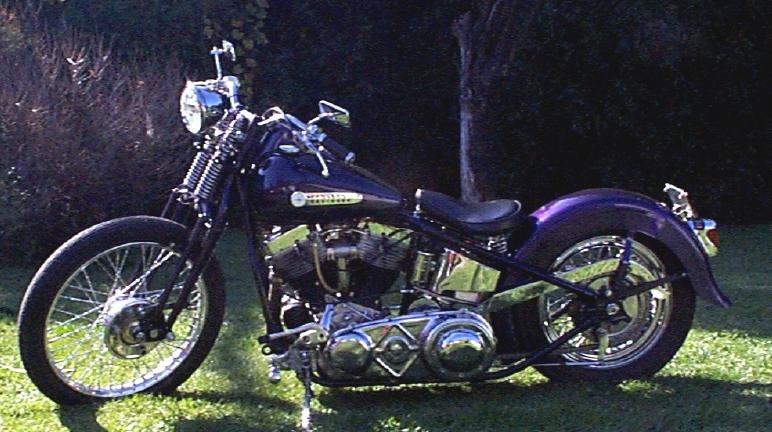
What is not to like about an old panhead? just a few mods for this old girl that starts on the first kick as long as the gas in the bowl doesn't sit to long.
-
P, I enjoyed chugging along in the video. You asked for some pics so I just shot these tonight in the garage. Only had it out a few times this year but it was my daily driver for years once the salt was off the roads. PE is set-up as a highboy (fenderless) with more modern 70s drivetrain modifications. It is still all Mopar, fun to drive but a far cry from that original beauty you have. I have a 4 piece hood but never mounted it
-
The headlight 3 wire plug has a ground wire that screws to the inside of the headlight bucket and mine had no gaskets when attaching to the fender. Headlight bucket therefore needs to ground through the fender to frame. You could run a separate ground wire to each bucket from the frame for a clean connection which I did on mine.
-

1950 Plymouth front brakes completely locking up HELP
Veemoney replied to canadiandeluxe's topic in Technical Archives
It could be once stopped it has time to seep some fluid back giving you just enough clearance to release the wheel till you brake again. I took it for granted when you said you checked for "broken or sticking really bad" issues that everything was observed moving freely before putting things back together. I should ask when you pulled the drum and did your inspection did you pull the rubber boots back on the wheel cylinders to see if they had rust inside or lightly actuate the brakes to see they were moving freely? Not sure what or how you checked to see if something was "sticking really bad" to rule that out but a rusty wheel cylinder with a sticking piston/s could also cause the issue. Air in the line would not cause it to lock-up. If you haven't ruled out the wheel cylinders that would be my first guess as to the problem and then the brake hose after that. -

1950 Plymouth front brakes completely locking up HELP
Veemoney replied to canadiandeluxe's topic in Technical Archives
How old are your rubber brake hoses? They go bad over time on the inside and can plug the return brake fluid. -
The harsh truth is there is at least 1 bare wire maybe 2 showing here screaming for some attention. Consider it the price of a lesson learned. It could have been worse. I hate plastic insulators on lugs, heat shrink tubing is cheap reduces the stress at the connection.
-
Sniper, makes sense. Was hoping you or someone else may have seen one before Jgreg, I also looked at gauges first and did not see any with the red part so looked at the wiring to see if it would show any additional components. What I did find today is the possibility it could be a radio resistor as called out in my Motors manual, 1 version of the fuel gauge had a provision for it though I don't know that I see any provision on the back of this gauge. My suggestion would be to bench test without the red part using the 6v battery from the car and starting with the old fuel sending unit hooked up as shown in the second picture. Third picture shows the numbering on the sending unit that corresponds with the terminals on the back of the gauge. 1 goes to 1 and 2 goes to 2. this assumes the sending unit resistor is correctly installed with the small end at number 1. Make sure the sending unit flange is level and grounded to the battery. I had a tough time getting a good ground at the flange. Carefully clean the points of the gauge by pulling bond paper through the closed set Gauge does not require ground but should be upright as if it were in the dash so the balance is correct. Set float on gauge up near the position it would be when the tank is full Use jumper wires to connect numbered terminals first Hook up power with jumper wire from 6v battery to Ign SW terminal on gauge. Give it a minute or 2 to warm up and start moving to full if it moves great If not check gauge ground and try it at a couple positions mine was touchy Move the float 1/4 inch to see if this gets a reaction Next position the float as if the tank was empty. You can measure the gas tank from the flange to the bottom of the tank to get the position. and see if the gauge responds correctly. If the gauge is responding but not accurately for the position of the tank float try hooking the 1 terminal wire to the 2 terminal and the 2 terminal to the 1 terminal repeat steps 4-8 if this does not correct the issue replace the old sending unit with the new sending unit and start testing from step 1 for the new sending unit This above testing assumes the gauge is good and the tests are quick and easy when done on the bench. if you cannot get good results then the gauge can be tested separate from the sending unit.
-
I walked away from a few projects when mice had taken hold and stunk it up not to mention the rust damage from piss. Sounds like you got it early but set some traps, if you find 1 there may be more around. Before I tore down my old 1-1/2 car garage I came home after a few weeks assignment to a bad stench in the garage. It was an old wood sided building, and the concrete was cracked and beat up. I had a few 5 gal buckets in there with tools and motorcycles. Buckets had bird seed in them at one time but the one had water for washing the cars. A chipmunk must have jumped into the one with water thinking he was going to get seed and I can imagine he swam in circles for some time before he went belly up. It was hot, he was swollen like a balloon that I was sure would pop open as soon as I picked up the bucket. I was inspired. I tore the garage down that fall and put up the new one with the help of a few buddies by Xmas.
-
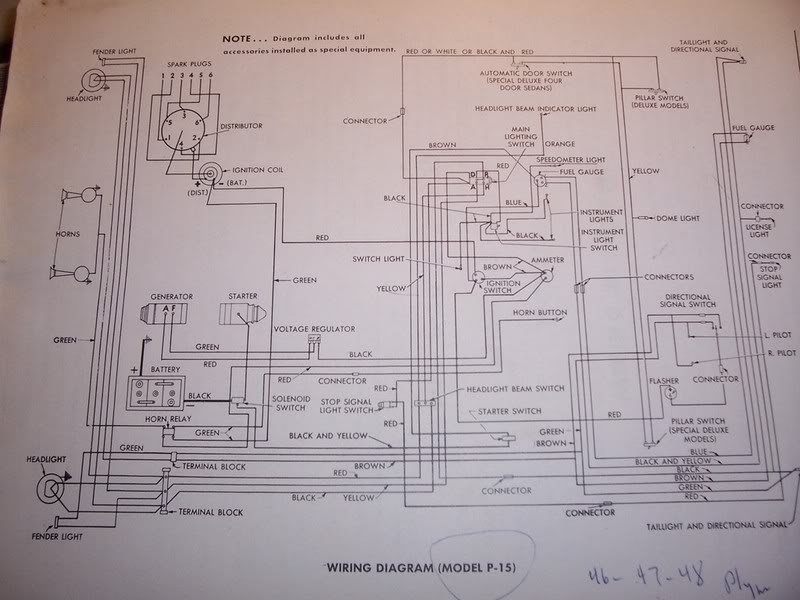
Without any further pictures or info I would be guessing and that is not a good idea since the fuel gauge is a fairly delicate piece. I not sure what the round red part is myself or it's function without further information. I did a quick search here and found a wiring diagram for the P15 which does not appear to show the red part. That doesn't mean it is not required if say you are running some other modification or power different from original. The fuel gauge depicted in the diagram has a terminal 1 & 2 which would be the old-style gauge. If you can confirm your gauge has a 1 and 2 terminal designation it should then also have power from the ignition switch to the IGN SW terminal. This is why I requested a picture of the back of your gauge which you have not provided.


.jpg.1cbda2c11abdd09016385c51805878ff.jpg)

