


Veemoney
-
Posts
534 -
Joined
-
Last visited
-
Days Won
2
Content Type
Links Directory
Profiles
Articles
Forums
Downloads
Store
Gallery
Blogs
Events
Everything posted by Veemoney
-
In addition to what was mentioned so far I would add the following: You will likely be pulling the coolant bulb for water temperature if it is still intact from the head. Small tubing so be careful not to kink it and also removal of the bulb from the head may require some patience and rust dissolver. If it is the stock device it contains ether which is flammable. I would plan on having a machine shop mill the head mating surface to up the compression if it has not been done yet. If you had any overheating issues it would be a good time to look at water pump and distribution tube.
-
If you should decide you want to put the hole in another option would be using the hole saw with these modifications: The pilot drill on most pulls out to allow sharpening or shortening. In this case I would shorten it so it protrudes past the cutting teeth of the hole saw half the diameter of the pilot drill. For a 1/4 inch pilot go 1/8th inch past the saw teeth. Using duct tape wrap it around the outside diameter of the whole saw 6 or 7 times creating a stop that should prevent you from diving through. Create the stop so only 1/8th inch of the teeth are exposed. Take your time and don't get it to hot where your tape can slide up. If you can manage a piece of thin sheet metal, plywood or duct work up in-between the sender and the floor from under the cab that should provide a safety barrier. You would also need the location for the hole and if so someone here should have it or I could pull my seat and provide.
-
Happy to hear you had the correct tank and that the sender they provided may work with the thermostatic gauge. I hope you took the time to cut an access hole to allow for adjustments of the sender if needed and future access as someone on here mentioned it took a few adjustments to dial it in for him.
-
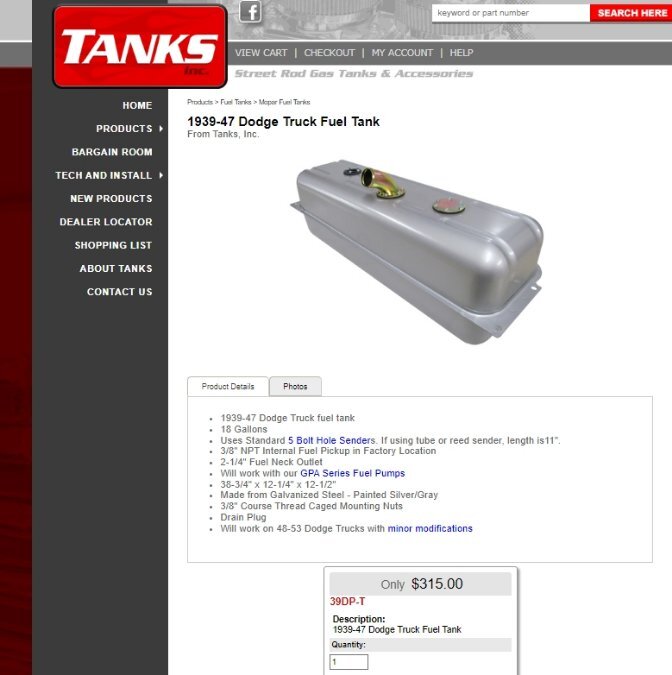
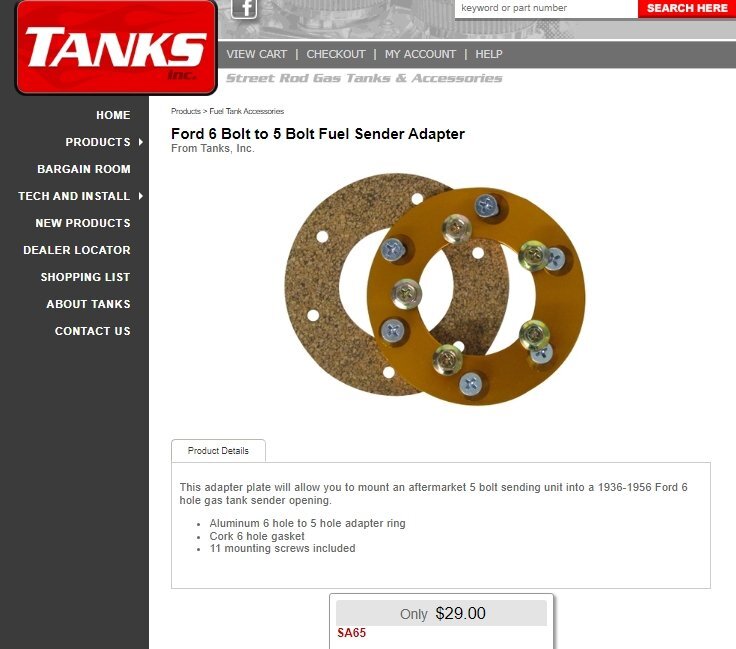
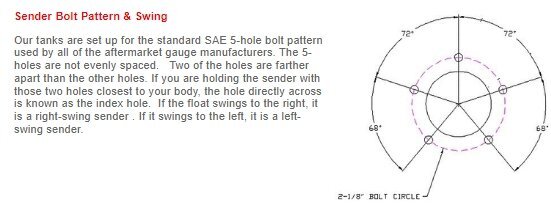
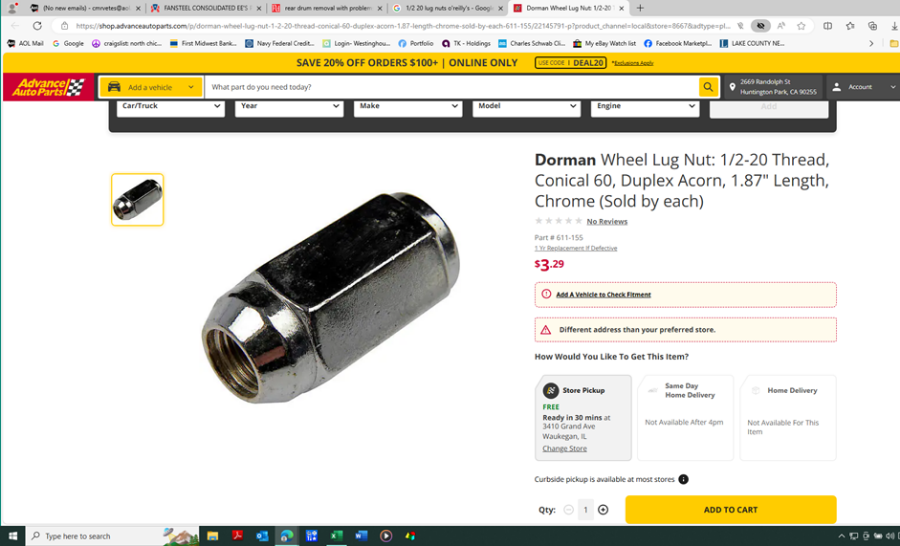
Mertz, The auction you posted shows Tanks Inc. tank "39DP-T" and when I looked up that tank part # at Tanks Inc website it states it uses standard 5-hole senders. They even provide the bolt circle and spacing of the 5-hole flange. They did not send you the 39DP-T tank because it would of had 5 holes just like it shows on the 3rd bullet above in blue. Important to make sure the details of what you purchased matches the delivery. Now for options to get you going: You likely missed your window on E-bay to dispute the item is not as described but maybe you have some room to negotiate since they sent the wrong tank. You could go for an aftermarket gauge and mount under the dash as suggested but I would not waste my time or money on adding another wrong part to the truck. In this situation I would right the wrong you have and get a 5 hole sender made for the thermostatic gauge that you have in your truck. I would not buy any of those high dollar ones that Sniper linked with cork floats that may not last with todays gas or the prices they are charging when Andy Bernbaum sells the one you need for $63 + 11.95 shipping and about 5 bucks tax. Link provided again for you. For 1939-1947 Dodge Truck Fuel tank sending Unit | eBay Now you have to pull your tank anyway. I would weld up the holes and drill it for a 5 hole sender or make an adapter but for you I see Tanks Inc. sells a bolt in adapter to do just that. It goes from a 6 hole to a 5 hole and looks like about $30 bucks which I would hope someone who made the mistake would send it to you for all the trouble they caused you. Link for adapter here Ford 6 Bolt to 5 Bolt Fuel Sender Adapter (tanksinc.com). I hope this helps get you going.
-
PA's explanation provided previously is correct for a 2 wire fuel sender set-up. I pulled the one in my 47 truck a year or so ago, took it apart and cleaned it up. It worked up till about a few months ago but it was in pretty bad shape. I just purchased a new sender from AB off E-bay and it tested out just as described above. If your sender is a 10-70 ohm I'm not sure how your gauge readings would react to that. The link below is the one I purchased and installed, $63 +tax and shipping or make him an offer. For 1939 Chrysler DeSoto Dodge Plymouth Fuel Tank Gas Gauge Level Sender Unit | eBay
-
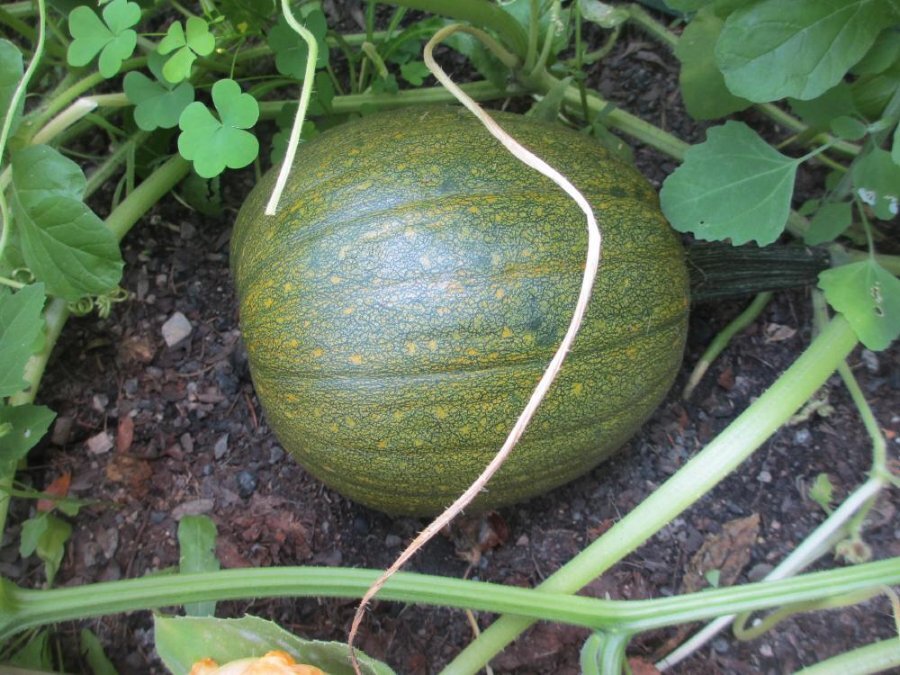
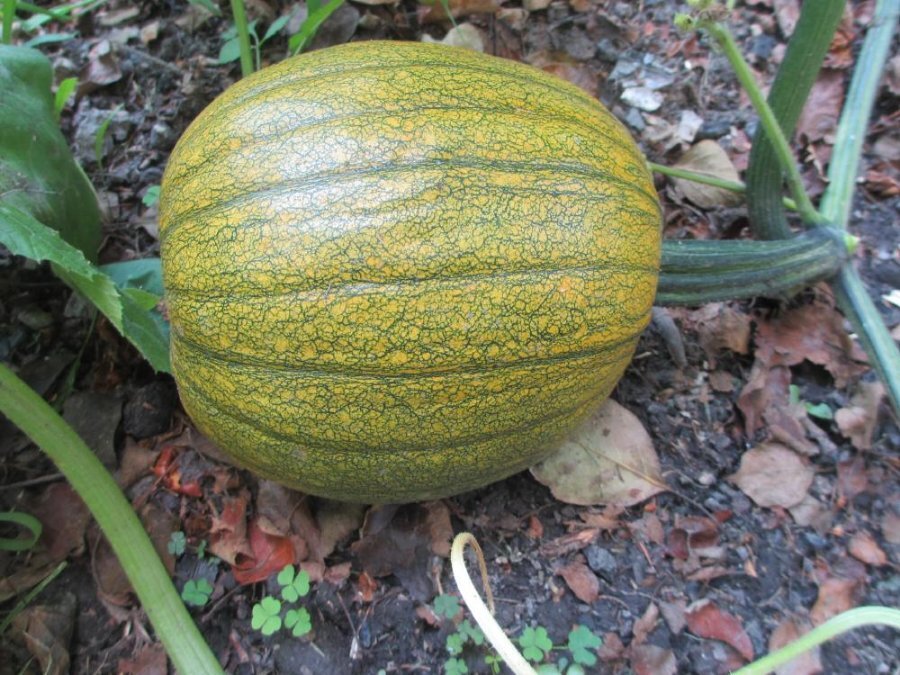
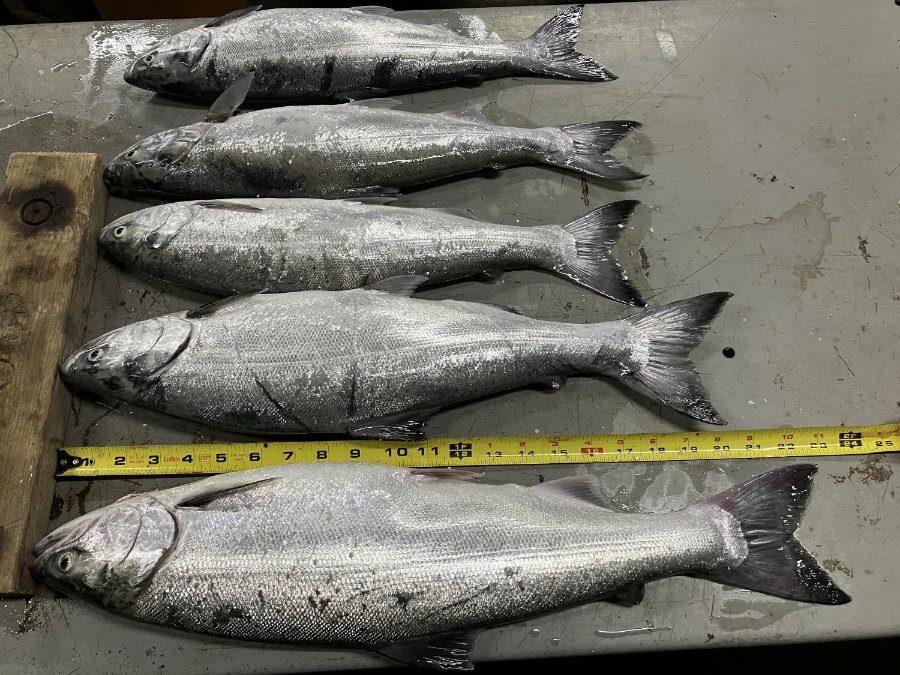
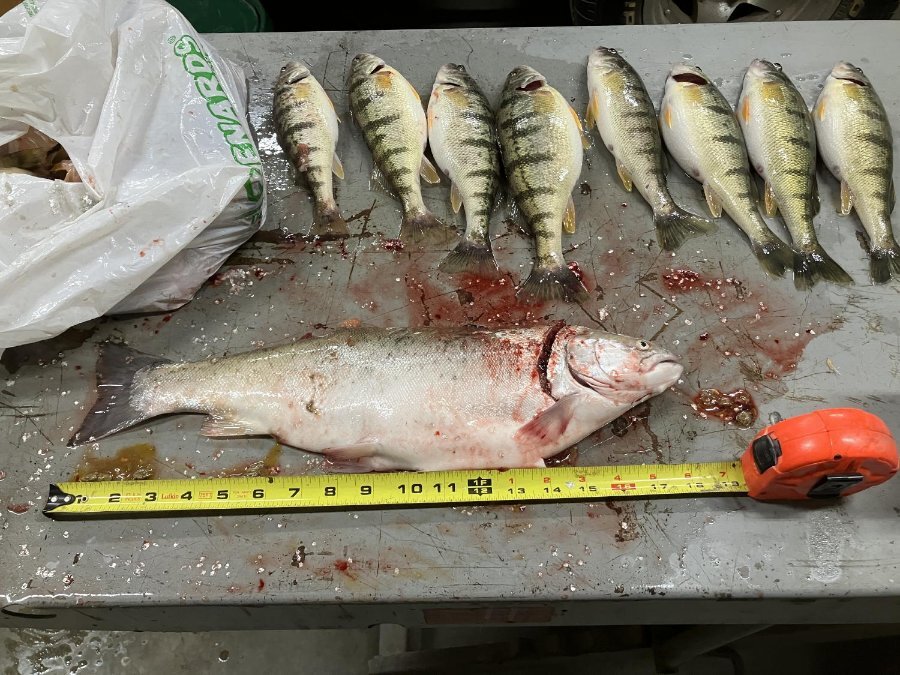
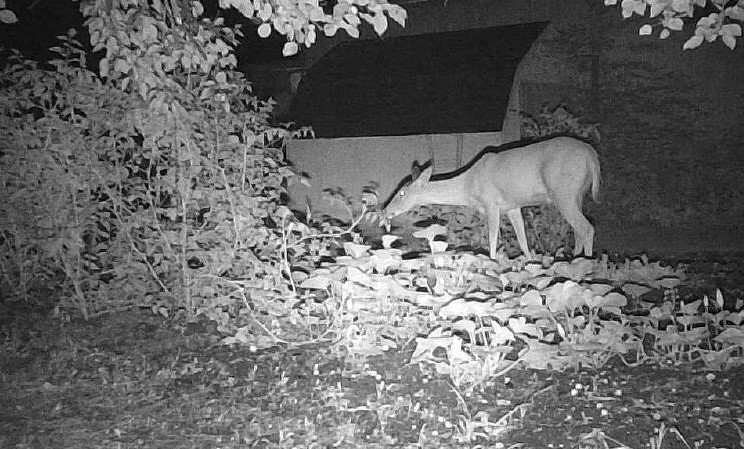
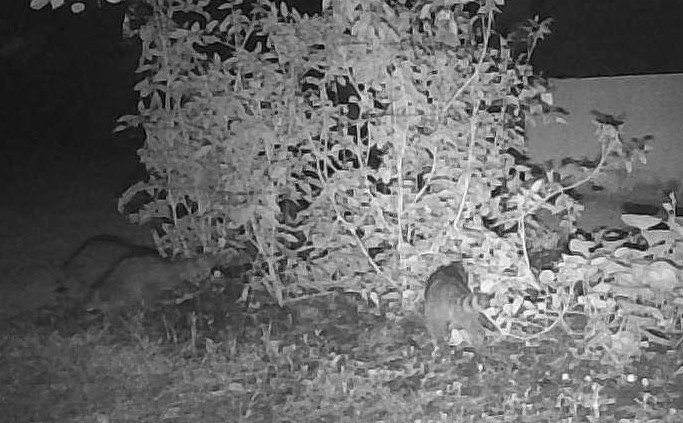
The very next morning after my last post an adult and young deer ran from the garden when I startled them. The trimmed the tops off the beets and pepper plants. Some of the beets were ripped out of the ground so some fence is planned for next year. There are 4 racoons in the earlier picture but you have to look hard and they like to pick and taste as they make their way through. No ground hogs this year so far, they can really do some damage. I have a lot of ash from burning the last 10 years or so where I planted this year and used to till in horse of goat manure prior to that. Always seemed to help. Tomatoes seem to like the ash and are growing and producing better than I remember. Will add some manure this fall to keep it going. I have an unidentified growing object (UGO) that I'm trying to figure out. I planted summer and zucchini squash along with acorn, buttercup and butternut squash. I have a plant producing zucchini type markings that are turning orange and pumpkin shaped and eventually almost all orange. I did plant watermelon next to the squash, but they look normal. Any ideas appreciated. I guess in the end I will cut it and see what the flesh looks like. Some of the Spring bounty I handpicked from the big water garden braving the wind and cold this year. Bounty is bounty
-
Check the new fuse to see if it blew again, if so it would be a short somewhere.
-
Increasingly Difficult To Find Manual 6V Battery Chargers
Veemoney replied to keithb7's topic in P15-D24 Forum
6-volt pos or neg ground alternators are reasonably priced and seem to keep my battery well maintained as opposed to the generator in my truck. I used a cheap 6 to 12-volt upconverter to power a radio for awhile. -
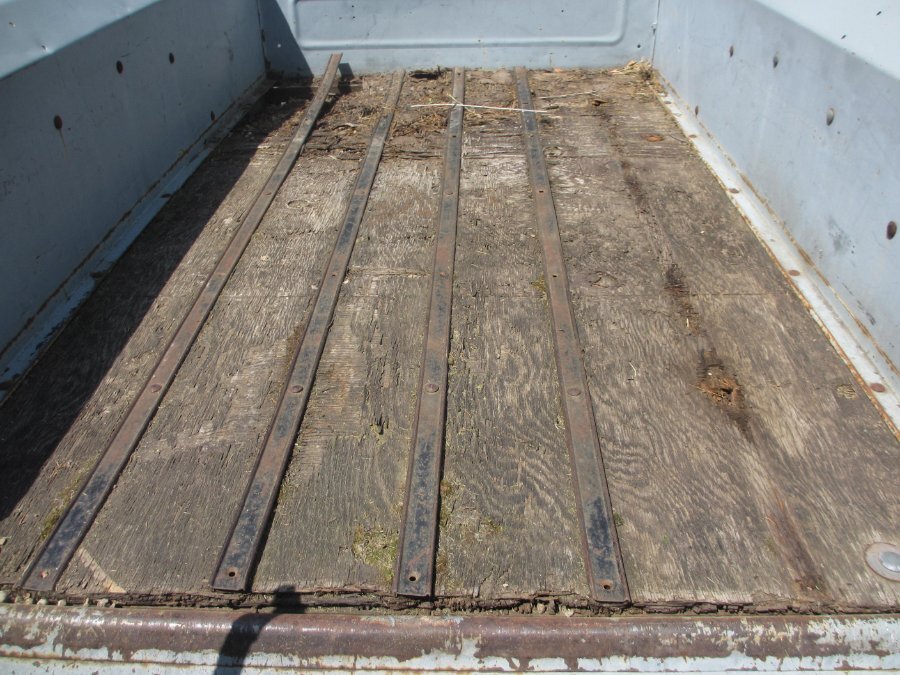
Here is my 47 when I started replacing the wood. I believe these are the stock strips with screws that line up to the wood cross braces if you put them in correctly. If they don't line up flip them around there in backwards. You can see on the old plywood bed where I pulled the first metal strip the plywood was not cut for the kerfs.
-
Despite some vegetarians invading during the night hours, I am managing to harvest some produce for human consumption.

-
I would give Midwest a call and see if he would sell just what you need and also confirm length and the type of holes available. My 47 has carbon steel strips with the combination of carriage bolts and screw holes like yours and I assume they are original to the truck but I'm no expert. I do like the ability to screw the strips down to the cross braces first and then install the remaining carriage bolts and wood screws are cheaper than carriage bolts. I installed the wood with the steel sides and bed front still sitting on the truck and just removed the tailgate to slide the wood in place. I installed a ratchet strap to pull the bed sides together at the tailgate section and then took my final measurements prior to cutting the kerf and drilling holes in the wood.
-
I see this putty used to hold those closed and in place with no additional hold downs so I grabbed some to hold my transducer and battery inplace inside my kayak. It is sticky and holds well while sealing at the same time. 1 lb. Plug Duct Seal Compound (homedepot.com)
-
Knuckleharley (Arthur Hines)
Veemoney replied to Plymouthy Adams's topic in Recognitions and Remembrances
Thank You for the follow-ups on Knuckle. GBNF -
I haven't put in a garden patch in 10 or more years but bit the bullet this year. The weeds were so thick they had matted roots under the soils and I had to use the skidloader to get under them a little bit at a time and then hand lifted the sections out before tilling. I used the old garden patch for burning brush and spread and tilled all the ash in. Wasn't sure it would produce but it is doing well. I started some tomato, bell pepper, squash, cucumber and misc from seed and probably a bit to early as my tomato plants had fruits and were almost 4ft in the window before I could get them outside. I tried to harden them off but they looked sickly for a bit then kicked in. Something grabbed 5 beefsteak tomatoes a week or so after they were out. I suspect deer and put a camera out to see. So far the vegetarians caught on camera are deer but now they are eating apples that have fallen, racoons, rabbits, skunk and a cat on the prowl all in the evening hours. The squirrels by me have raided the apple and pear trees and between the deer, geese, the remnants aren't a problem but something ate the tops off my beets which stunted them some and I just picked, cleaned and bagged 2 gallons off leaf lettuce before I seen all the updates here. I've got a good share of the cherry tomatoes, yellow squash and green zucchini so far and acorn squash should be ready next week. My black raspberries were small this year and are done for the season. I opened up a new patch to move some and will add the red variety. I have 8-10 rhubarb plants that have supported my pie habit well and expect I will be eating another this weekend. PA mentioned cats and my neighbor has one that comes by my place all the time stalking a kill. He does well with the mice and an occasion bird or chipmunk but left an adult rabbit next to the garden last week. I wondered what happened to it till I rolled it over and saw the bloody neck wound, came back later with a shovel and part of the hind quarter and leg were gone. Buried it and something dug it up and well it's gone. Guess that's one way to keep the rabbits out of the garden


-
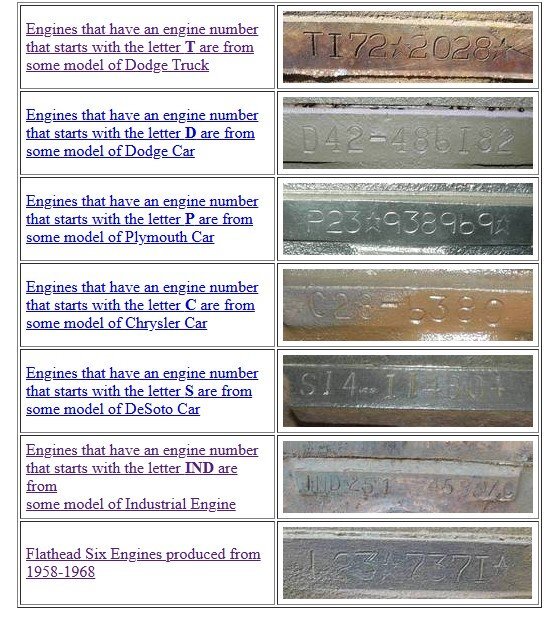
IMHO the number pad looks to be restamp or altered at some point and not a factory OEM number. You can see grinding swirl marks on the number pad. The freeze plug below the number pad also has some grinding as it is rounded and not flat across the top The numbering does not include any stars, dashes or long separation spaces This picture is from the T137 site identifying OEM mopar numbering conventions
-
They used to have them right next to the curb feelers and headlight visors. 🤣 You may find some blanks at Summit
-
I have a 53 flathead in my 47 pickup truck. It is all stock except for shaving the head to increase the compression. Mine was set-up as FarmerJon shows in his calculator snapshot. There are variables that I feel effected normal driving speed for me that you may or may not have . I experienced similar fuel and oil consumptions as others on the thread. My normal driving speed with the truck trended around 45-55mpg mainly due to not wanting to push the rpms up higher and the bias ply tires which tended to follow any crack or path worn into the road. They also transmitted a firmer ride, and I had more rattles at the higher rpm. When I switched to radial tires my normal driving speed increased and a few years back I change my rear gearing to 3.54 which is a much more relaxed ride and enjoyable at 60-70mph.
-
Rich shows the best style in my opinion for this application. I made one and it was easy enough to fab up. I have a few 3 jaw pullers but I could see the issues for this application and wanted a 5 hole +1 for the locator pin. I did not slot it for multiple applications like the one Rich shows. I can say I used this many times on some where others could not get to budge and never needed to let it sit under pressure for any length of time. I do use an impact gun if it doesn't come with a few turns of the wrench.


-
Driving in a circle with the retaining nut loose would be the first and least damaging option as Tom suggested. I'm not sure what type 3 arm puller you have. Some set-up rigid while others can flex and not pull straight putting more load on 1 stud then the others. You said welding was not available so here are some other options that might help: Warm up the hub some. Get some mag wheel lug deep lug nuts, they will use more of the threaded studs available to hold on better. Call the local auto parts stores and see if any have a 5 lug puller. They usually lend them out if they have them. More studs you use the more you spread the load.
-
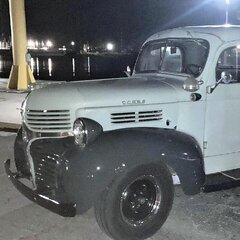
The first 2 pictures of the motor you posted showed it with a finned aluminum head. This latest motor picture in the vehicle looks like a black cast iron head. Was there an issue running the finned head? Looks cool either way.
-
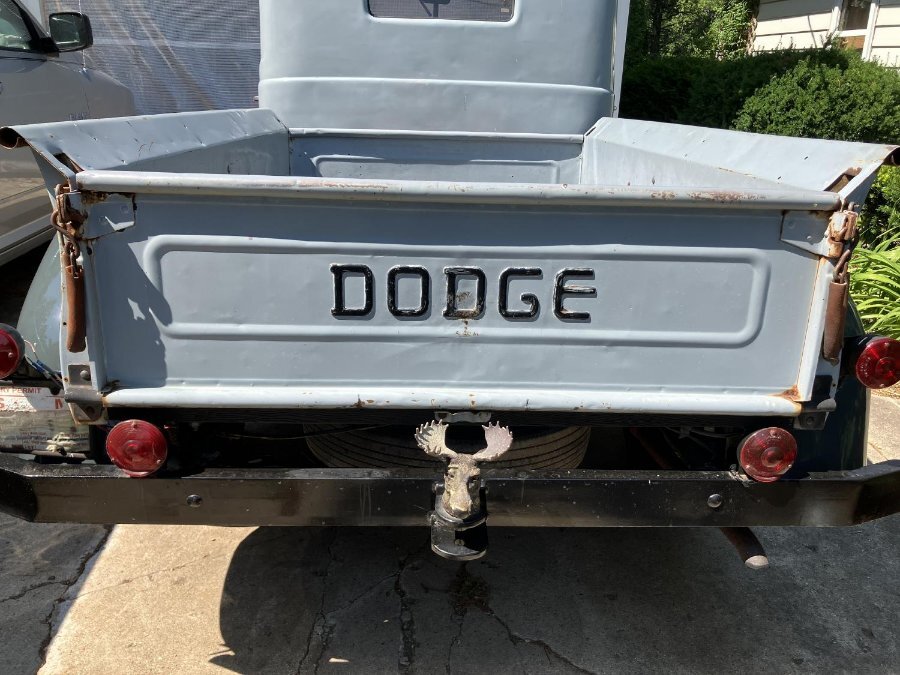
As Jerry stated they did not come with a panel but you can make one easy enough. Here is a picture of how they came stock. The bumper is home-made and was on the truck when I bought it.
-
This is posted in a few places on this site. The measurements will get you in the ball park for ordering your wood. I used white oak and shaved thickness down to 3/4". I recommend if you have your side and head panel in place you confirm the rest of the measurements but I believe they worked out for me. As far as cutting the kerf If I did it again I would do without. My truck sits outside and the kerf seems to catch pine needles and other trash. My truck had plywood for the bed with the strips just mounted on top like Los shows on his truck. If your truck sits higher in the rear like mine make sure you leave a bit of room up front for drainage. I did and that is also where the pine needles gather. I far as I know our trucks did not come with anything covering the last wood cross brace. Just open but others have made one to cover that area. _BedWoodDimensions (1).rtf
-
Some other options would be moth balls or plants around that smell like bee balm or lemon balm. I read where snakes and mice don't like the smell. I made one of those 5-gallon bucket traps using a cardboard cut to fit the opening at the top and a hanger to spin on. Caught a few out on the porch but I don't have a pest problem for the most part.
-
For our 1939-1947 trucks the bed strips and the wood were black as these trucks were made to work. However, the Cab and truck bed had matching paint color as I understand it and with the new body style in 1948 they started doing some of the bed panels standard or optional with black paint.
-
The #1 piston is up once on the compression stoke with both the exhaust and intake valve closed. This is the compression stroke where the air/fuel mixture gets compressed and the ignition sparks. The #1 piston comes up to the top again with the exhaust valve open to let out the burned gas out the exhaust. You need to make sure you are on the compression stroke when the piston is up (both valves closed) when checking the rotor position of the distributor.

