


TodFitch
-
Posts
6,309 -
Joined
-
Last visited
-
Days Won
33
Content Type
Links Directory
Profiles
Articles
Forums
Downloads
Store
Gallery
Blogs
Events
Everything posted by TodFitch
-
Those are in the same position as the core/welch/freeze plugs on my older engine. My way to take them out is to use a screw drill to put a self-drilling, self-tapping screw in the middle leaving the head proud of the surface. Then the claw on a carpenter's hammer can be used to pull them out. Only did the job once and only on one engine but it was quick and easy.
-
Start a thread asking about 1/4 mile and 0 to 60 MPH times and don’t actually post yours? With my dead stock '33 Plymouth two door sedan (190 cu. in. engine, non-synchronized transmission, 4.375 rear end and stock size tires) and running a GPS based performance measurement app on my Android phone I get a range of measurements from run to run. Or at least I did as the last time I did this was well over a year ago. Average for 1/4 mile is 25 seconds and 55 MPH. Zero to sixty times average just under 40 seconds. I strongly suspect my carburetor needs rebuilding and maybe that would help the above. The early ('33 and '34) Carter B&B carbs are not quite the same as later ones and a bit harder to get parts for and the car runs well enough for me so it is what it is.
-
I've had better luck if the shoes are first shaped to the drum and adjusted before I bleed the brakes. I used sticky back sand paper from my local hardware store: Line the inside of the drum with the paper and rub the shoes against until there is uniform contact. If the shoes are not shaped and adjusted then the shoes will be moving and will be working against you when you press the pedal trying to bleed air out. I've also had better luck by making up a pressure bleeder using an inexpensive garden sprayer as mentioned in several other threads on this forum. Makes bleeding a pretty quick one man job.
-
The '36-42 factory service manual shows that "airplane type" shock absorbers were used from '37 through '42 and it gives refill and rebuild instructions for them. It looks like the '41 and '42 versions were slightly different in some respect from the '37 through '40 ones. The '48 through '54 factory service manual says that all models had non-servicable shock absorbers and only gives procedures for testing and replacing them.
-
I've seen some where the case of the starter was ground down enough to fit. And another where the bell housing was machined to move the starter mounting location. OTOH, there should have been a hand crank that came with that car. . .
-
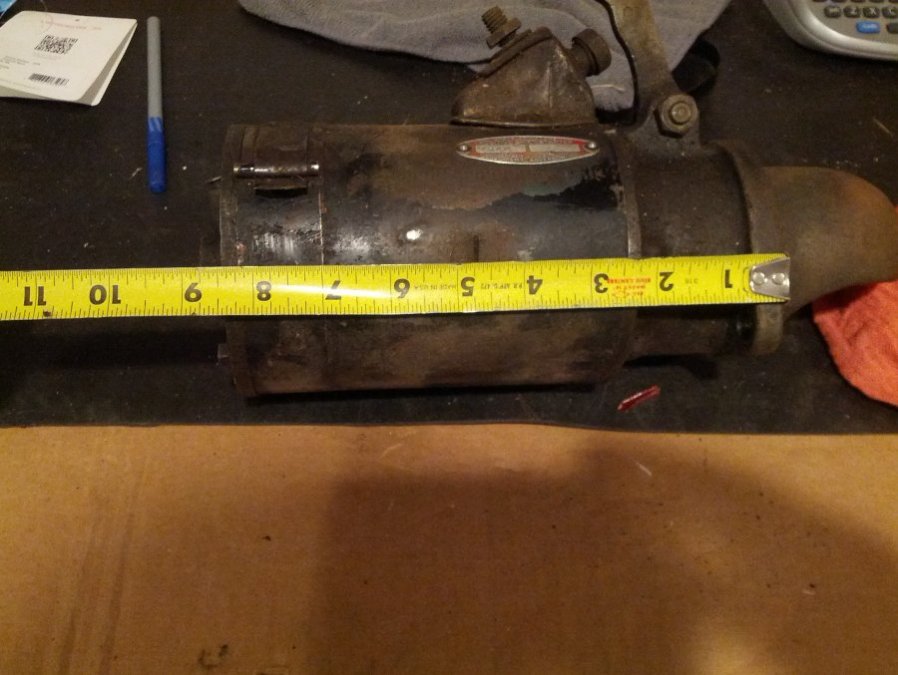
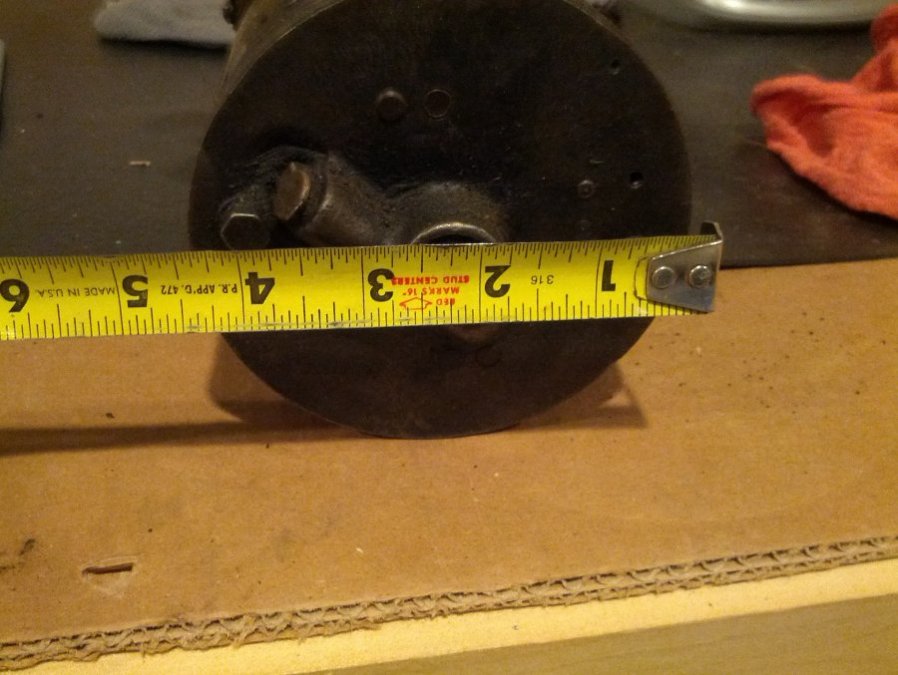
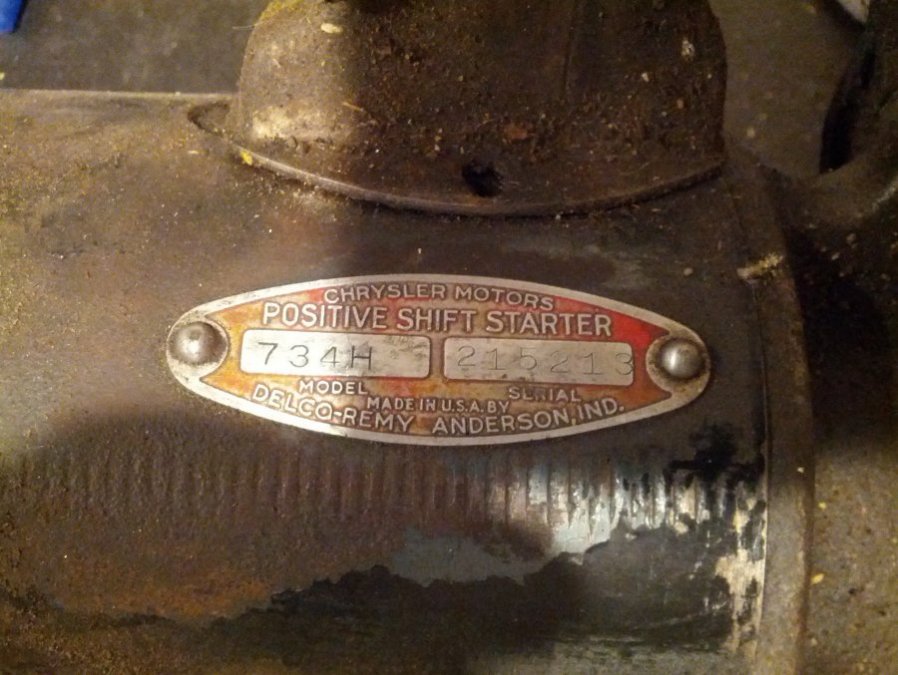
The 1933 and 34 Plymouths were equipped with a Delco-Remy 734-H starter. I've attached some photos for you of what it looks like. From the mounting flange to the back is about 9" (including the protrusion for the bearing area) and 4 1/2 inches in diameter. If you have a '35 and up engine installed in your '34 with the original bell housing then you will have a fit problem with the starter.
-
I'd swap those out for the correct expansion/core/welch/freeze plugs: Since the lip of the ones you installed is outside the bore of the hole it seems unlikely that it will be secure for long. I know that most years have unpressurized cooling systems but I did have a time when an improperly installed plug popped out when I was accelerating down a freeway on ramp when the engine was cold and the thermostat was still closed. Apparently the water pump, when spun at high RPM can put some pressure in the block when the outlet to the radiator is closed off. By my records, the “expansion plugs” are a pretty standard: http://www.ply33.com/Parts/group18#18-CS Maybe they can’t find them in their computer or will have to order them from a warehouse, but any auto supply should be able to get them.
-
Putting a colon space (": ") in front of your location make it look okay. Of course you'll have to remove that when IPS fixes it.
-
1-5-3-6-2-4 is your firing order and the connections on the distributor are sequential counter clockwise from the #1. That is all you need to know to put the spark plug wires on. If you forget the distributor cap wiring direction, pop the cap and see which way the rotor moves when cranked. A bit harder, but if you forget the firing order you can also work it out from knowing it is an inline 6 and there are only two possible firing orders for a balanced engine (hint: the pistons move in pairs with 1&6 together, 2&5 together and 3&4 together).
-
While it is true that white wall tires have been around longer than black wall tires, in the 30s and 40s (at least pre-WW2) white wall tires were really rare. Usually only on body styles that were considered sporty like convertibles. Almost never seen on sedans or coupes. OTOH, many (most?) restored cars are tricked out with all the upscale things that could have conceivably been added when relatively new. So if white wall tires are one of the things you want, go ahead and put them on even if it is unlikely the car ever had them during its first 20 or so years of existence.
-
Chrysler had an assembly plant in Kew starting at least in the early 1930s and quite a few cars and trucks were assembled/built there. Since the original poster indicates they are located in the British Isles, it seems that the vehicle originated there and was not imported (even if most of the pieces were imported from North America). In the early 1930s the vehicles were shipped from North America "completely knocked down" with all the bits and pieces needed except interiors which locally sourced and fitted. Also locally sourced and fitted were things standard or required in the UK that were not used in the US like front fender/wing mounted parking lights. For 1933, the Chrysler Kew 6 (know in the US as a Plymouth) came with a small bore version of the US engine. It would not surprise me if they used the 25" Canadian engines once the Windsor plant for building them came on line as there seemed to be a import/tax savings on "Empire Built" items. I don't know if they eventually had their own foundry and manufactured their engines from scratch but it seems unlikely.
-
Don't know the max RPM but the engineers tested the design at max BHP (typically 3600 RPM) in 50 hour tests and the one factory HP chart I've seen goes up to 4200 RPM.
-
I believe you intended to type "spel" instead of "spell" in the above.
-
Can do a rough guess for non-power brakes: I can put at least 200 lbs force on the pedal. Pedal arm has at about a 10 to 1 leverage between foot pad and where rod to master cylinder attaches. So that would be about 2000# into the master cylinder. IIRC, Master cylinder has a bore of about 1 1/8" or pretty near 1 square inch. So that would be about 2000 psi. It is a bad idea to use compressed air to break things free like you did: You want a non-compressible working fluid (water, oil, brake fluid) pumped in as when the part gives the pressure immediately drops to zero and you don't get a explosive release. Its the reason they use hydrostatic pressure testing for things like air tanks rather than using air to do the test.
-
That "line" is actually a tube and cutting it will release the working fluid (ether) and really and truly render the gauge inoperative without significant effort. As the bulb, nut and line came permanently attached to the gauge head unit, there must be a way to get it through the firewall.
-
Does selecting the other "theme" using the pull down at the bottom of the page make it look any better to you? I did not like the "P15D24PH (default)" theme very much but the "Default" theme is okay.
-

Fuel Additives to counteract modern fuel additives
TodFitch replied to Tubeviper's topic in Mopar Flathead Truck Forum
I haven't checked, but I'd be really surprised if ethanol free gasoline for highway use was available anywhere within a 230 mile radius of my house (approximately the distance to the state border). And even if it was, those of us who like driving our old Plymouths would either need to do a lot of research before each trip to see where ethanol free gasoline was available near our intended route. It is a whole lot easier to replace the old rubber parts that are likely to be ready to fail with new ethanol compatible ones and not have to worry about where to get gas. Cheaper too: The http://gasprices.aaa.com site indicates that premium is typically $0.50/gal more expensive. For me that is about $7.00/tank. Doesn't take too many tanks of gas to pay for a $40 ethanol compatible fuel pump rebuilding kit. With respect to "fuel additives to counteract modern fuel additives" and the fact that ethanol reduces the Reid Vapor Pressure of fuel, contributing to heat related issues. I can see why you might want to remove it. You might try water. Mix water into your fuel to get the ethanol to go into the water, then wait for things to separate due to different densities and then decant the gasoline off the top. I am suggesting this mostly as a joke: Not sure it would work and even if it does, it is way too much hassle to do every tank full. Better to adjust your carb float level, assure your fuel pump heat shield is properly installed and your fuel lines are properly routed. -
It does not seem to stick: If you come back to the thread later you have to change the sorting again. And it is only on the one thread: It would be nice to have a per account preference for that. Or even to change the site wide configuration so the default is sort by date rather than sort by vote.
-
Vibration from the engine causing a short that is not present when the engine is off?
-
Commercial discussions should be done over the private message (PM) facility rather than in a general discussion thread.
-
Another suggestion to use the search feature gets posted. You can find results by typing "temperature gauge repair" in to the search function. But, I'll save you that and post the first couple of results from that effort:
-
Plymouth used 13/64 inch thick linings for the service brakes for all models from 36 through 42. (Hand brake used 5/32 inch thick linings.) With centralized engineering at Chrysler, it would not surprise me if Dodge was the same.
-
Reporting now works, so everyone back on their best (or at least "good enough") behavior.
-
In the 60's cars had full flow oil filters. At least the cars I worked on in the 60's (or built in the 60's that I worked on later) all had full flow filters. And to be safe, you should replace a full flow filter every oil change. The reason is you can't tell how full the filter media is and bad things happen if the pressure drop across the media becomes too large. Bypass filters don't have that problem.
-
Hmmm. Not only do I not see a notification that a post has been reported, I don't even see the report button on posts. Might be one for GTK to look into or explain. Edit: I see the report post link now. Still don't see it show up in the moderator stuff.


