


Dodgeb4ya
-
Posts
10,005 -
Joined
-
Last visited
-
Days Won
181
Content Type
Links Directory
Profiles
Articles
Forums
Downloads
Store
Gallery
Blogs
Events
Everything posted by Dodgeb4ya
-
A long heavy duty screw driver...pound it off as already mentioned or a good pair of vice grips on the lip...TIGHT...twist and work it off. That's how I remove them. NAPA has those clips in different sizes.
-
OK...A long read... That Miller tool does not set the race to the proper spec. It is only a race driver tool...not really necessary to install the bearing race....though I use one most of the time if not a large brass drift. As for axle shaft bearing end play yeah it should be roughly checked for end play before axle shaft removal.. I should have stated that and I do generally check it on jobs. The rear end must be up on stands before checking any axle end play job.. The drums can still be installed if doing a quick end play hand check before pulling axle shafts for more service repairs. Use a dial indicator. Axle shafts readings on the dial indicator should and must read equal either side. Push and pull hard on the axle shaft and or drum and read the amount of end play. Do exactly the same on the other side... it must read the same end play as the first side and normally always will on a properly operating rear end axle assembly. **On a rear axle that has had new seals, bearings etc it is critical to make that approximately the same thickness of shims are installed on both sides or the differential centering block will bottom out... **It's also important to use the original factory width inner seal and drive it in fully to the machined housing stop depth. If this inner seal is too wide or not driven in fully the axle shaft step will rub against the inner oil seal (seals) causing erractic end play reading issues. As for installing the axles and races/cups... ..Don't drive the bearing cups into the housing flush..drive them to with in a 1/16" of the housing mount surface. Then install the original shims both sides. Install both the backing plates semi tightened. Now fully tighten up either backing plate which will push the bearing race in as far as the shim will permit. Go to the other side and gradually tighten up the backing plate while "hand checking" for some axle shaft end play movement. Usually you will have correct or close to it if re-installing good original axles shafts and bearings. If you don't have any end play before the second backing plate is fully tightened up you will need to add more shims (.005", .010", .015") etc and will need to be evenly added to both sides with in reason. This till an .008" max end play dial indicator reading is achieved at both sides. You will need to set up a dial indicator to properly do the final accurate end play check and adjustments. Always double check for even side to side end play readings by firmly wacking the ends of both axles to be sure the opposite side bearing races are forced tight to opposite side backing plates. Re-check axle end play a couple times to be sure it's set right. Uneven uncommon side to side end axle play truble could be caused by ***Wrong or not fully seated inner seals. ***Wrong new axle shaft bearings or not fully seated on axle shaft ***Worn end of axle shaft ***Damaged centering block ***Wrong outer seals and seal plates (up to 1942). And that's enough for me to type out for tonight!? .
-
Also a couch is called Chesterfield.? .
-
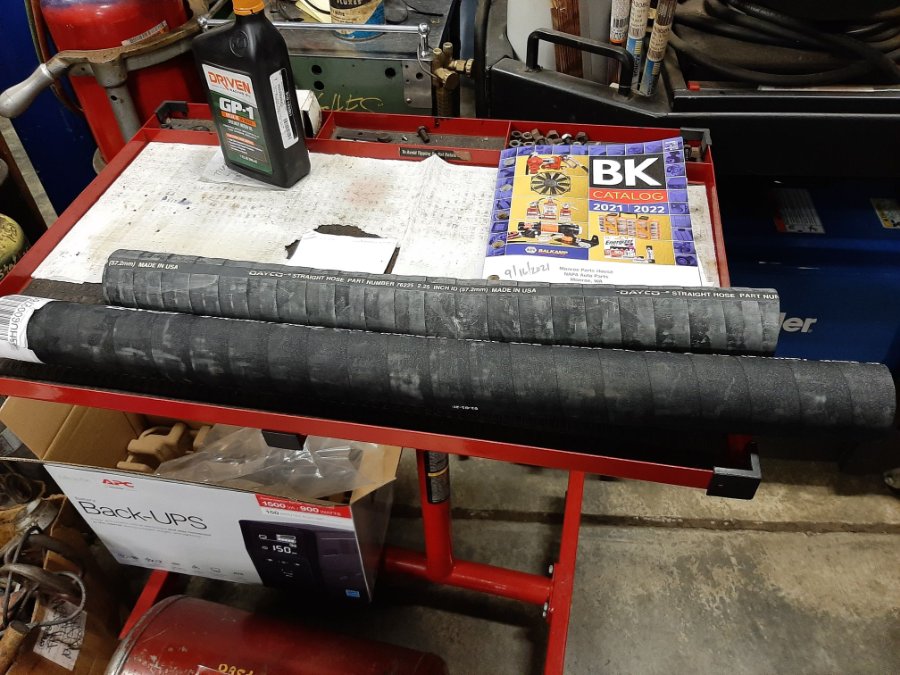
Just bought exactly that hose two days ago at Carquest...2" and 2-1/4" each about 2 foot long. USA hose. 59 bucks! Sold by the inch. Probably do much better online...maybe.
-
My 52 B3B came with FD 3 spd and the 218. Most any engine can be repaired/rebuilt unless worn excessively or spun main bearings ,oversize cylinders etc.
-
Some things to look at..after making sure Ignition system is tuned properly and if the car still is not running out right.. Carb is plugged up... Step up piston stuck and or jet plugged up.. Main jet partially plugged Accelerator pump weak... Good luck..?
-
Take that four blade fan off then you would need traction bars.
-
The "Rotor style"oil pump on a B series does not use a gasket on the pump cover. A quad style O-ring with out any sealant is used. The O ring is seated down into a groove machined in the pump housing. Rotor to pump cover clearance is factory set...no clearance adjustment required. The Old 30's style MoPar "Gear Tooth" type oil pumps had gaskets used to both set clearances of gears to cover clearance and to seal the cover. Make sure which pump you have to service it correctly. I think the cover clearance is no more than .004"
-
You said oil was leaking out of the filter top...so the pump was working.. So #1 ...Check that the relief valve and spring is correct before worrying about the oil filter lines Oil filter housing should be stamped "in" and "out" at line connections. There are different brands/ types of oil filter housings (oil lines reversed). #2....Possibly but unlikelythe floating oil pick up is floating too high in the oil sucking air.? There are little metal tabs on the pickup tube that if get bent change the floating oil pickup drop and height. I've had a couple engines that had this issue. The oil pan needs 5 qts plus at least one for the filter. The oil filter had to fill up completely up to start leaking ... That also means the oil pan oil level dropped too. Recheck the oil level.
-
Generally if it's really over the limit pulling and pushing on the flywheel hard you will hear and feel a heavy clunk. And you will easily see the crank and flywheel move forward and backward. A proper end play of approximately .005" would not show any movement or sounding clunk to say a novice mechanic. A dial indicator is the accurate way to see the exact crankshaft end play clearance. Also end play would have to be way way out of spec to cause a serious engine issues, difficult to achieve proper clutch adjustment, crank pulley moving, timing chain rubbing timing cover with clutch pushed in of course while running. Just something that probably should be checked.
-
Make sure crankshaft end play is less than .010".
-
No 1946-52 MoPar flathead cars came with a shroud or five blade fan.....except... 1946-50 Chrysler flathead eights which did use a shroud and a five blade fan. 1953-54 Plymouths used a upper partial shroud and six blade fan with a larger water pump pulley. Heavy six cylinder Dodge trucks also used a shroud and five blade fan. Some Mid to late thirties cars had shrouds and five blade fans too.
-
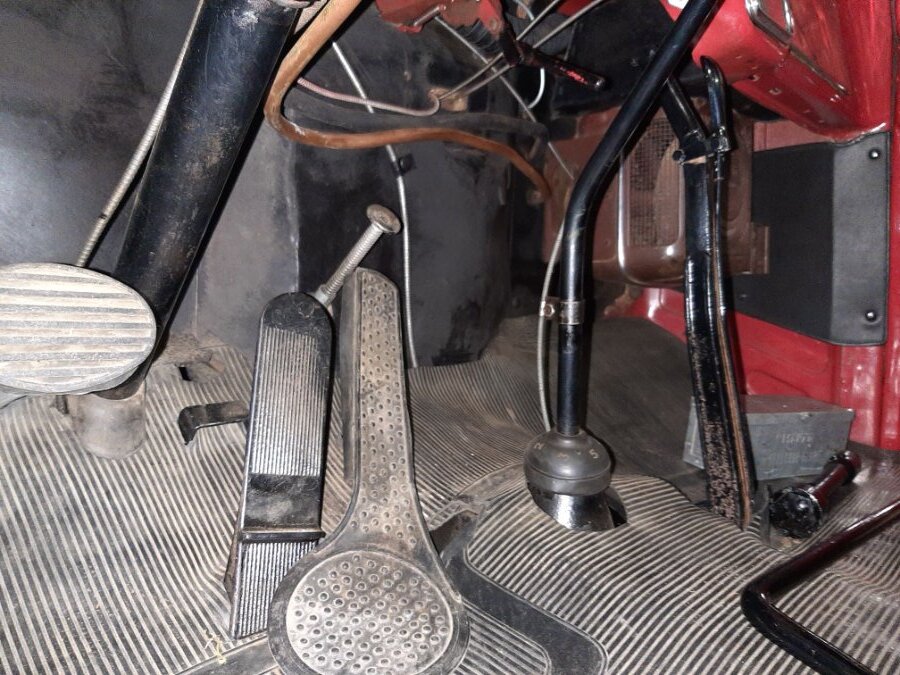
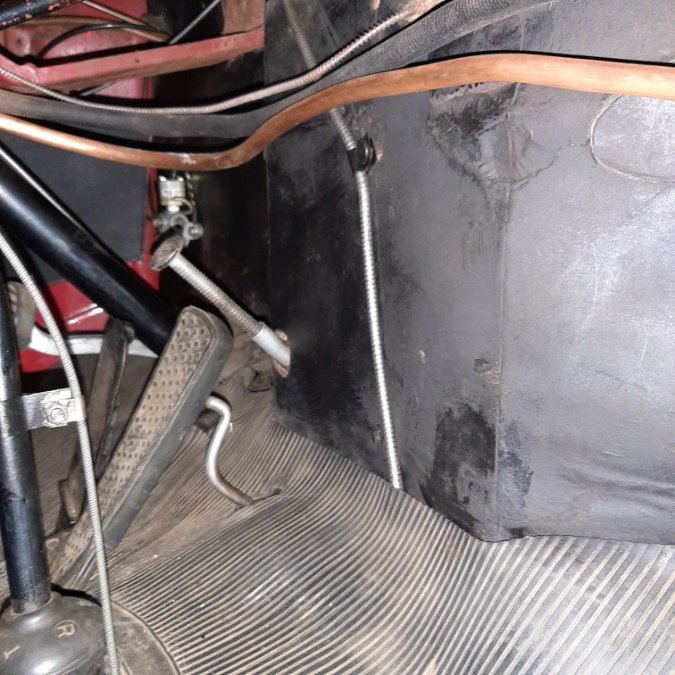
You can see the cable and clip...
-
A "P" cable clamp or clip is used to position the cable to the firewall insulator. A push in sawtooth metal retainer clip holds it in place. It is approximately 12" straight up from the cable exit hole in the floor board.
-

Fuel Pump and Appreciation of this Forum
Dodgeb4ya replied to dcotant's topic in Mopar Flathead Truck Forum
Jeez...what hackers! Flex Seal/Tape probably would be better.? -
The engine will run fine with out the vacuum advance for testing. Disconnect and plug the line...run it and see.
-
It's a job removing the floor pan, rubber matt/ carpets pedals accelerator pedal etc. If the floor is rusty the 1/4" X 20 bolts can break. Taking the seat out will make easier removal of the floor panel too.
-
Oh.. it just looks like the gasket barely seals these stud and water holes.. Looks like from the picture maybe the water port holes are cast slightly off compared to the factory head...maybe just the picture.
-
Some of the stud and water jacket holes are really too close to the crush ring of the head gasket IMO.
-
Black and red wires to battery... The third...green? To the distributor terminal of coil or directly to the distributor terminal.
-
The shafts cannot be loose in the master cylinder. This makes sure the pedals are not wobbly and don't scrape the floor pan openings. I have seen the shafts pinned, bolted and pressed onto/ into the master cylinder bore. Now days all are pressed into the cylinder using preferably a press.
-
Do I see those wonderful greaseable E-Brake cables?
-
I have done so many brake jobs on the old MoPars over the last 45 years ...second nature to me.... All the newcomer's...new things to learn and then the need to have good tooling and a good mechanical mind.
-
Yesterday took my 1952 Belvedere for a drive...last one for the year..

-
Yes it can and was done from underneath at the dealers and brake shops. I have also done them that way for years but now days most cannot or don't want to do it to me the much easier way. Takes about an hour and a half start to finish including pressure bleeding for me from underneath. You probably better remove the floor panel.?

