-
Posts
9,999 -
Joined
-
Last visited
-
Days Won
180
Content Type
Links Directory
Profiles
Articles
Forums
Downloads
Store
Gallery
Blogs
Events
Everything posted by Dodgeb4ya
-
This same topic came up a few years ago and Ed found those special ferrule nuts..cannot remember if a # was posted then. I used one on my truck guage line...no leaks. A regular compression ferrule will leak.
-

11th Annual // International Work On Your Truck Day!!!
Dodgeb4ya replied to 48Dodger's topic in Mopar Flathead Truck Forum
Maybe a one of the shift forks is not positioned right because of a worn or damaged detent shift ball/spring or shift rail in the cover. Maybe a bent even a fork from power shifting? This would let the fork rub on one side of a syncro clutch sleeve or a gear shift fork groove. This possibly causing the noise. -
These wheels have a load rating of 2200lbs and have plenty of setback and caliper/suspension clearance. LoJack tracking available too.
-
I'm just joking on the rear axle diaphragm... I've never seen one that didn't work because of a torn diaphram..
-
You're gonna need a huge actuator for the rear axle shifter if that 2 speed diaphragm ever fails! Good going on your speedo adapter repair?
-

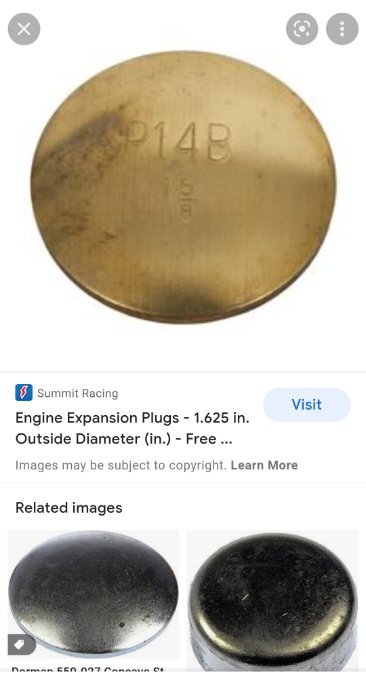
EDIT: ready!!: installing new core/ freeze plugs
Dodgeb4ya replied to Go Fleiter's topic in P15-D24 Forum
-

EDIT: ready!!: installing new core/ freeze plugs
Dodgeb4ya replied to Go Fleiter's topic in P15-D24 Forum
Winner winner! Have done many many brass disc this way over the years on both flat heads and Hemi's. Pitted or not proper prep and install...never a leak. -
It's great to see you work that truck. I used to use my 2-1/2 tonner almost every week driving hauling all over Seattle back in the 70's/ 80's... My 4 tonner not as much but plenty in the late 80's/90's...it kinda replaced the other truck. Now it is just mostly a drive it in the farming valley for fun these days. Appreciate your pictures of working your truck?
-
Rope seals do not leak small puddles if installed correctly. The only easy and proper way to install ropes is engine out and on a stand. The installation of rope depends on the type of rope seal design and retention in or on the engine. I have and do use only the factory asbestos/graphite MoPar ropes. Modern new ropes leak. The seals need to be carefully pressed and shaped to both the crank and the retainers if used. The ropes need to have oil applied to the surface while being fitted. As for drag of the rope on the crank...needs to be checked...only way to do it right is with just the crank in the block..no rods or timing chain connected. Chinese finger to install...nope. Trying to install ropes in retaining plates up through bell housing...nope.
-
I have seen the steel supply line to the speedo adapter rub thru on the firewall small and end up with a vacuum supply leak preventing the speedo adapter to shift to high. That speedo adapter once the line is disconnected and cable pulled off will come right out to bench check it over. The adapter needs to be checked out that you can manually shift it...move the little flag lever to shift it from lo to high. Also check that again by sucking on the brass line connection fitting... duplicating engine vacuum being applied. If it does not move the lever Also if the lever doesn't move when sucking on the fitting the small rubber diaphragm is probably stiff or torn. Speedo cable needs to be checked out that it is not damaged and properly lubed. Same with the speedo head. You will see that small 1" stem sticking out of the bottom of the speedo,,,it unscrews and has a felt wick in it....put some light weight oil in it to lube the speedo shaft and bushing. You can use you fingers to make sure the speedo input shaft spins easily using your fingers. As Brent mentioned usually the problems with the speedo not up-shifting are with adapter...I added a few more common possibilities.
-
I did look quite a while to find a great picture of that shifting plate...couldn't. The 60's Dodge trucks did use a decal instead of that plate...a real close copy of it too. As for original paint....I believe it was alkyd enamel. Some lacquer was us3d on cars back then...not too sure on trucks. Rub the paint with lacquer thinner...if lacquer paint the paint will come off on the rag...if enamel very little will rub off. As for your fire engine paint...probably a custom paint job when built and possible re paint later on. As for paint reaction issues.. sant it..use sealer and continue. But I am not the one to ask or go into quagmire of how to properly prep and paint a vehicle.?
-
Yeah I sold it just a year ago...thinning down the herd. It was a fun very rare car I had for over 30 years. Sold it to a close friend.
-
I cannot answer why. But have seen worked on and driven and own or owned many straight eight C39 Chryslers. Have never seen a 48 with the two barrel Stromberg. As you know the extra 5 hp is good. My 46 NewYorker 3 passenger coupe was the 140 horse and that car hauled ass!
-
The factory Carter 1 bbl on late 1947 to 48 Chrysler eights has 135 hp. The 1946 to mid 1947 Chysler eight with the Stromberg AAV 2 bbl carb has 140 hp.
-
Non of the 1946-48 Dodge cars had wiring to the factory BXVD-3 Stromberg carburetor. These cars were only a 3 speed transmission with the Fluid Drive coupling using a adjustable screw type anti-stall dash pot on the top of the Stromberg carb. Starting in 1949 Dodge offered the new M-6 transmission in the new upper line model Coronet cars. This transmission did use electrical controls and wiring for shifting and required the new Stromberg BXVES-3 carb having an electrical kick down switch and a round anti-stall solenoid mounted on the side of the carburetor.
-
Just send me five bucks and we will call it good on the theft issue Brent? Now we really need to find a like new shifting instruction plate for making a reproduction decal for the fire truck. I looked for a 1/2 hour....nada
-
The pivot pin this lever is on might be bent not the lever..but if necessary take it off the car put it in a vise and slightly bend it slightly using a dead blow hammer. Bend and fit to the car as necessary It will not break.... First figure out what actually is bent.
-
I do not have a nice enough one to photograph. I'll look around..
-
November 13th, 1953 K= strut type syncro rings.. OD= Overdrive Transmission
-
Around here the 30 bucks would barely get an estimate as to how long it would take for them to even look at it. Labor and parts, environmental fee's must be really cheap where you live!
-
Mice will get in any car or truck regardless of how well it is sealed up. Keep the mice out of your garage. Use traps, de-con sticky traps or the 5 gallon bucket. Cats and snakes work well too. Once the mice pee a trail to their nest in your car, truck tractor..good luck stopping all the hundreds of family members who are next coming to visit.
-
I made a bracket bolted to the LS transmission mounting bolts with adjustable bolts to control pedal height and stop. Hated the rattle. Been good for 30+ years.
-
The 1949 Vacu-Ease brake booster is of an internal valve design and is a one year only...different than the external valve 1950-54 design. Be careful not to take apart or even attempt to adjust the vacuum/air valve screws... .The external 1950-54 Vacu-Ease unit will work in place as a complete unit in the 1949 eight cylinder cars if no one will rebuild it. The smaller style type Midland C-3400....1955-57 Ford/T-Bird cars booster is a good replacement....but with out a core it will be really $$$ expensive.
-
As Brent says pull it through with another thin wire. I have learned to just angle the bullet connector 10 degree's off center... push the perfectly straightened wire down till I feel it hit the lower inner tube. Then lightly twist the wire while pushing down...it will go on down and out the bottom of the steering gear. Takes some.practice but is fast and easy once you learn it for the cars and trucks.


