-
Posts
9,999 -
Joined
-
Last visited
-
Days Won
180
Content Type
Links Directory
Profiles
Articles
Forums
Downloads
Store
Gallery
Blogs
Events
Everything posted by Dodgeb4ya
-

Can't get front brake shoes to go in so drum will fit on 48 DeSoto.
Dodgeb4ya replied to MarcDeSoto's topic in P15-D24 Forum
When I drove my daily driver back in the late 60's early 70's ...a 51 Plymouth I just replaced the shoes too....put them on and drove it after adjusting only the minor cams.. Doing three or four adjustments as they wore in over a couple months. Brake pedal got to be high and very firm and soon enough were very excellent in stopping that Cranbrook beauty. Of course todays eco friendly burnt toast linings are not nearly as good as that deadly asbestos lining.? Todays owners generally never drive the cars enough in a year to even wear the linings in. Most all new wheel cylinders generally always came with the push rods. I remember the MoPar cars new wheel cylinders sometimes had the longer factory length pushrods installed and sometimes the 1/8th " shorter push rods. This was the case with EIS, Raybestos, United etc. Those short push rods saved the day when the shoes wouldn't let the drums fit on. -

1949 plymouth 218 oil pick up screen
Dodgeb4ya replied to Zlinkcobra's topic in Mopar Flathead Truck Forum
No o-ring is used as the floating pu pivot point is submerged below the oil. There will be no suction air leak as long as the oil level is with in the correct oil level range. Also make sure the floating pu does not raise up too far...the two small 90 degree bent metal tabs control both drop and max floating height of the pu. The two 90 degree tabs normally look the same and not distorted. Factory even looking bent tabs.- 1 reply
-
- 1
-

-

Can't get front brake shoes to go in so drum will fit on 48 DeSoto.
Dodgeb4ya replied to MarcDeSoto's topic in P15-D24 Forum
The old softer organic asbestos shoes work so much better than the new linings. I won't use modern linings.. they just don't work right on our old drum cars. I re-line my own shoes with old stock asbestos rivet type linings now. -
Moparnopro charges the highest prices he can.
-

Can't get front brake shoes to go in so drum will fit on 48 DeSoto.
Dodgeb4ya replied to MarcDeSoto's topic in P15-D24 Forum
I have had to arc/grind many sets of linings that were too thick with std. non turned drums and also with short push rods. Also different depth pistons.."China problem" too shallow can add to this issue. This has all been hashed out on here in years passed. Like has been mentioned make sure the lining thickness is as per the shop manual. Use the shorter push rods when necessary. -
It's a relief to get the tree's dropped safely and where you want them. Danger of the tree's taken care of.? Another to buck them up and move/lift thousands of lbs of wood.? I do my share of that each year too. Good job and smart to know which ones you can handle and which you cannot. Better safe than sorry!
-

Can't get front brake shoes to go in so drum will fit on 48 DeSoto.
Dodgeb4ya replied to MarcDeSoto's topic in P15-D24 Forum
I thought Jeff didn't like teaching new customers how to do brake work or even accepting Diy'ers.? -

Increasingly Difficult To Find Manual 6V Battery Chargers
Dodgeb4ya replied to keithb7's topic in P15-D24 Forum
I have three old (25 year old) transformer type..no circuit board/electronic type chargers with real steel enclosure cases. No plastic electronic import chargers for me.. These sometimes charge...sometimes don't...yet the little LED green light is telling you the battery is fully charged....but really only half charged.? Garage sales, swap meets and craigslist are a few of the ways to find the good old school high quality chargers. -

Can't get front brake shoes to go in so drum will fit on 48 DeSoto.
Dodgeb4ya replied to MarcDeSoto's topic in P15-D24 Forum
You need to check the arc fit of the shoes to each drum...shoes off of the car. Arc those shoes of they don't perfectly fit/match the drum surface. Then also...here we go again....more Hell to throw at me.....look up the factory shoe lining thickness in the DeSoto Shop Manual. Make sure your shoes are no thicker than the factory spec 5/....." Then use the shorter push rods...if required. Then start all over setting up the shoes with the MT-19. -
The factory Dodge head nuts on my engines (7/16" X 20) 11/16" Hex measure at .441" in height. They are a heavy grade automotive nut.
-
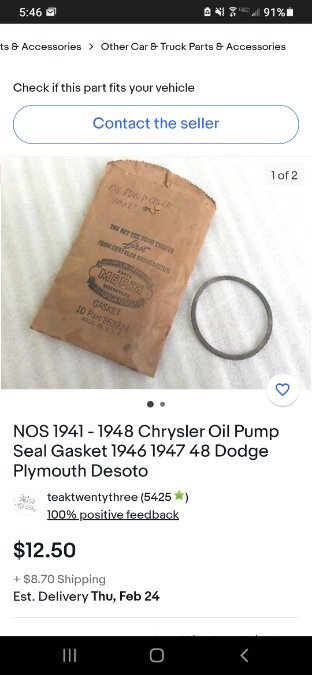
Those oil pump cover quad O-rings are out there...here's one... I think AMS has them too...always around 12 bucks. There always were supplied in the engine gasket sets....of course not anymore.
-
Instead of them supplying the factory design straight piece of round rubber strip they give you a O-ring hopefully of the correct diameter that you have to cut to length ....stupid..?
-
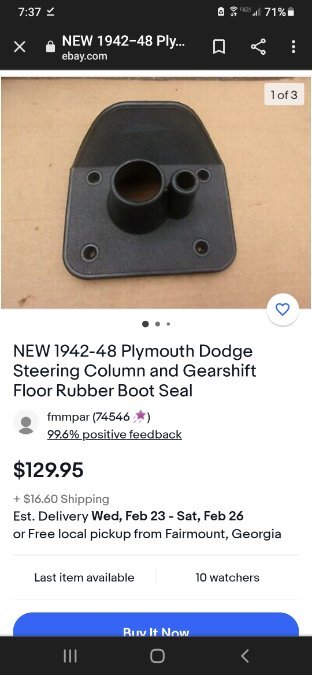
Two well known vendors of MoPar sell that 1942-48 all MoPar cars steering column rubber boot on and off Ebay...
-
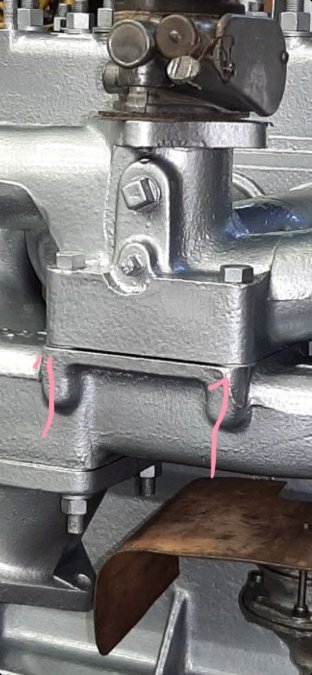
A picture of factory 30" DT mounted twin carb linkage brackets mounted to head ... ARP studs were used ..you might call ARP if needed for long enough length if others cannot help. Good to have stud stick up for sure.
-
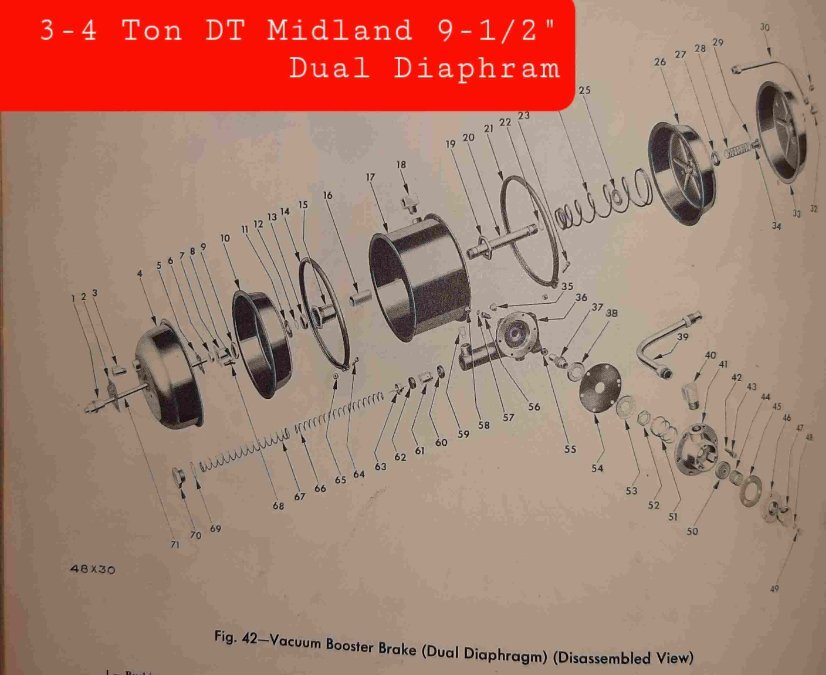
So here is what I found in a 1994 booster catalog I used to use back in the late 90's. I 'm sure that Hydrovac unit is a replacement of the original "Midland" Dual 9-1/2" Diaphram unit. Which is listed as standard equipment on the 3-4 ton Dodge hydraulic brakes. Doesn't matter though as you have the Hydrovac unit and it will most likely have to be rebuilt. Shown is that Hydrovac in a "Prior" rebuilders catalog book...1994. The other pic is the booster used originally in the 3 and 4 ton trucks..not available anywhere...pic out of the B-4 series shop manual. Brent has had success with his rebuilder...he might be of help on a good rebuilder. Maybe not enough help but some...
-

Need help on how to use Miller Brake Gauge MT-19 tool kit.
Dodgeb4ya replied to MarcDeSoto's topic in P15-D24 Forum
Ok I accept the hell you have showered me with... Thank you. Don't forget to arc your shoes...the ones on the car. -
As mentioned above plus Aluminum Throttle body shaft bores will wear and cause vacuum leaks.. Back in the day they were a high mover carb at the auto parts stores.
-

Need help on how to use Miller Brake Gauge MT-19 tool kit.
Dodgeb4ya replied to MarcDeSoto's topic in P15-D24 Forum
And...I'll probably catch hell for saying this.. Have you read the factory DeSoto shop manual for the best answer to your question? -
Why don't you make it easy.... Take each cable out...mark it's position ***Get a pan and put some solvent or you choice of penetrant/ solvent... ***soak the cables for a day or too. ***after soaking put the knob back on cable and start working the inner wire core back and forth till free. A vice to hold the cable housing makes this easy. ***once cables operate like new..rinse the solvent out....dry the cables with air hose. *** pull the inner wire cable out and spray or squirt the oil or lube of your choice into the cable housing...lube the core wire too. ***make sure to straighten out any and all kinks in the cables to near perfection. The original cables if not rusty or damaged are the easiest way to fix your issue. I have done many small to large diamter cables this way.. Though I soak and loosen them up using diesel. Then wash it out and the fully lube the cables...not so much that they will drip onto the floor or upholstery. E- brake and OD cables easily loosened up this way too.
-

'52 B-3T 172 Fire Engine with T322-3243 motor
Dodgeb4ya replied to PlugUgly's topic in Mopar Flathead Truck Forum
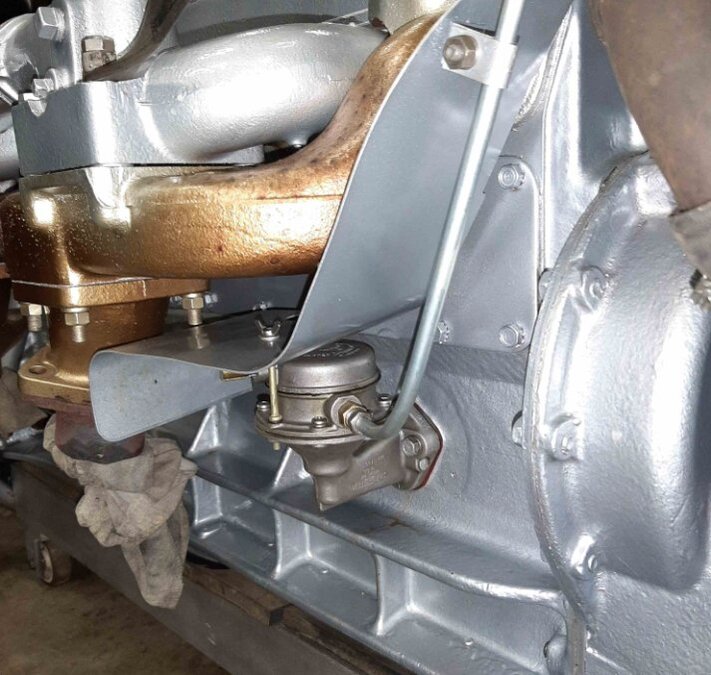
I have had to get the two sets of manifolds surfaced myself. The intake/ exhaust manifold runner ports won't pull evenly/fully up against the block intake exhaust ports. Also Remember ..the intakes bolted to the exhaust manifolds are spaced apart by four washers. No gaskets are used intake to exhaust. -

'52 B-3T 172 Fire Engine with T322-3243 motor
Dodgeb4ya replied to PlugUgly's topic in Mopar Flathead Truck Forum
That is awesome you brought it back to life after at least 12 years! Another running Moly Block engine?... those engines will easily idle down to 250-300 rpm when the carbs are set up right. Not that the engine needs to but they are a flawless running engine when right. Keep running it for awhile check, points dwell timing if you haven't etc. The manifolds were ofg and the sync'ing of the carb throttle plates probably might be necessary as you keep fine tuning it. Thanks for sharing your fire truck "I can do it" efforts and video!! These big Dodge trucks give me more satisfaction than any of my other cars and trucks... Keep on posting! -

Fan placement post water pump replacement
Dodgeb4ya replied to White Spyder's topic in P15-D24 Forum
^^^^Yep...that is right. It is mounted only one way to do it as factory though.? -

Fan placement post water pump replacement
Dodgeb4ya replied to White Spyder's topic in P15-D24 Forum
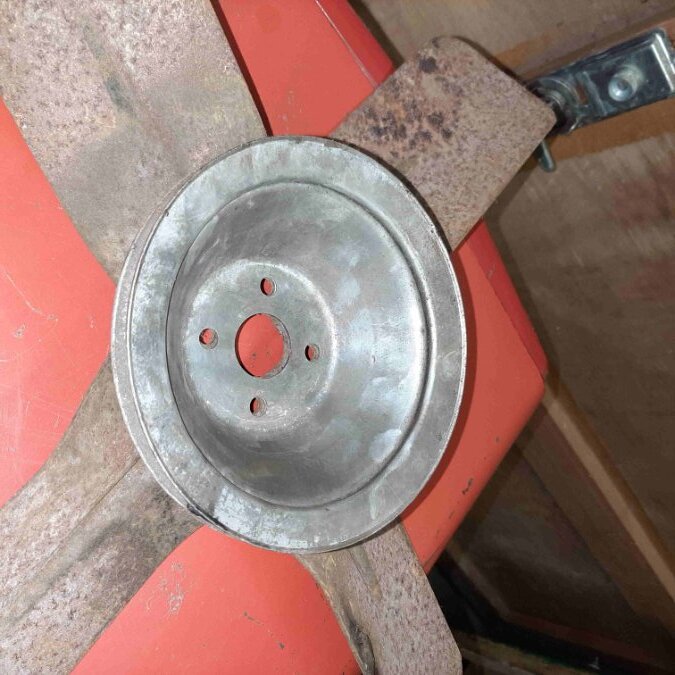
The fan is on correct shown by the OP to pull air over the engine. The crevass creases of the fan blade face to the rear of the engine as shown in my poor picture. The rivet heads are located just outside of the fan pulley radius so blade should mount flush to the pulley as shown in these Chrysler pulley and fan pics. -

Fan placement post water pump replacement
Dodgeb4ya replied to White Spyder's topic in P15-D24 Forum
Better cooling attempt. Poor one if so. That fan has huge rivets on it? Needs a better fitting belt too....should be a 3/4" wide belt. Stock 1946-48 Chrysler fan and pulley shown. -
That machine is a real work horse! Awesome you got it running and can make use of it. It sounds great too. Like the sound of the fan roar!?


