-
Posts
1,312 -
Joined
-
Last visited
-
Days Won
14
Content Type
Links Directory
Profiles
Articles
Forums
Downloads
Store
Gallery
Blogs
Events
Everything posted by Adam H P15 D30
-
Sounds like you're keeping the stock master cylinder as I did. Is your rear axle stock or??? I removed the internal check valve from the stock master cylinder and did not install any residual pressure valves or proportioning valve to see how well it functioned. That was years ago and never had the need to install any other items. I am running modern 10x2 drum brakes in the rear and a Rusty Hope disc brake kit. Since your stock master cylinder has 2 outlets, consider installing a combination valve if you want added safety. It wont help if your master cylinder fails but it will help if you blow a line between the valve and the front or rear brakes. Most come with residual pressure valve built in too.
-
I KNOW! CALL PERTRONIX DIRECTLY, BUT.....
Adam H P15 D30 replied to PT81PlymouthPickup's topic in Mopar Flathead Truck Forum
Are you sure about that? I have a couple of Pertronix coils around they were all 1.5 ohms. When I toss the modules, I save the coils. Running one on my 49 with a slant 6 conversion and no ballast. 3 ohms is only needed to protect points in a 12v system. Why would you lower your coil output so much defeating any gain from electronic ignition? -
Vehicle number verses serial number
Adam H P15 D30 replied to Dryerventwizard's topic in P15-D24 Forum
My 49 uses the engine number, never been registered out of CA I titled my 47 using the serial number in the driver's door post area in CA. Frame/engine numbers never came up in the conversation. -
And to add, my 49 with a stock master, front disc/rear drum didn't need residual pressure valves either. Even after I removed the factory check valve in the master cylinder. My 35 needed them front and rear (disc/disc).
-
Anywhere between the master cylinder and rear axle works. Have you tried it without the proportioning valve yet? I didn't need one on my 49 but my 35 Ford needed one, every car is different. Manufactures have a hard time "standardizing" what components a vehicle may need because of so many variables, they cannot predict brake size, weight bias etc. so it is a mix and match until you have adequate performance. I have had to reduce master cylinder bore size on every aftermarket master cylinder kits I've installed, power or non power. Most come with a 1-1/8 master and I've gone down to a small as 7/8. No kit is a complete bolt in and go.
-
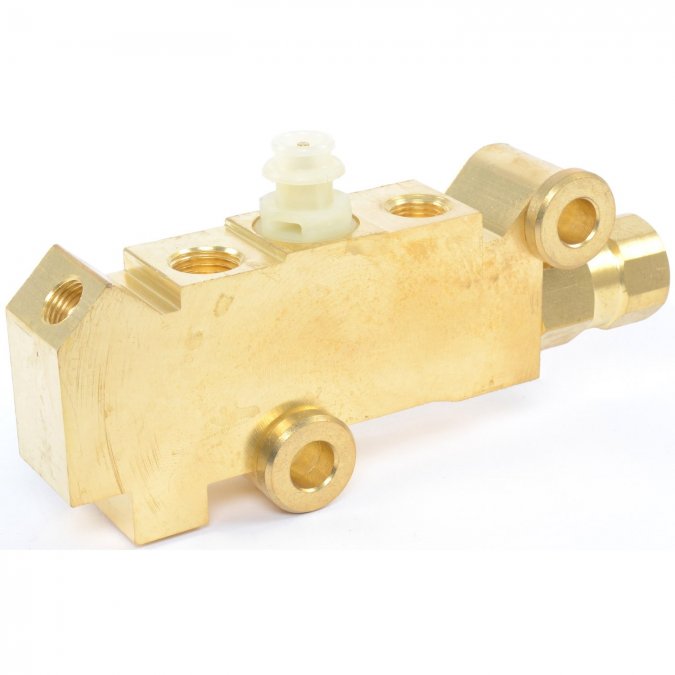
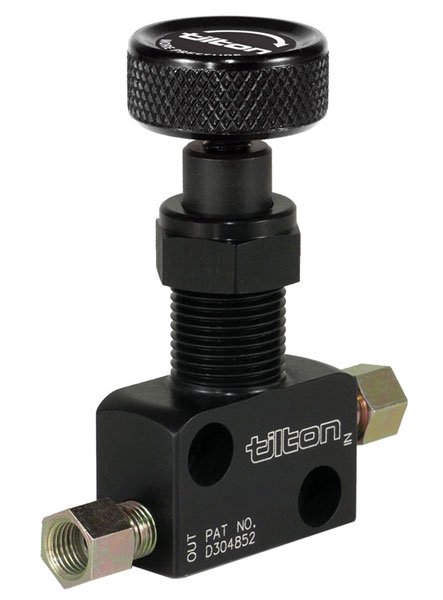
With the stock master cylinder, put the proportioning valve in the rear brake circuit. I am assuming you are talking about one of these.
-
Pulling my hair out on my '49 Desoto
Adam H P15 D30 replied to James_Douglas's topic in P15-D24 Forum
Can you get any negative camber? With positive camber you are riding on the edge of your tires. Pos camber is bad. Adjust the toe to about 1/8 inch toe in. Will track a little better. With 0 or 1/16 toe you may also start wearing the inside of your tires. BUT with positive camber and more toe, you will eat the outside edges of your tires. -
Pulling my hair out on my '49 Desoto
Adam H P15 D30 replied to James_Douglas's topic in P15-D24 Forum
BTW, make sure the alignment shop (or you) set all the tire pressures first. If they don't do this step or ask you first, find another shop. -
Pulling my hair out on my '49 Desoto
Adam H P15 D30 replied to James_Douglas's topic in P15-D24 Forum
Hello James, Some suggestions.... Rip out the page in your service manual with factory alignment specs and throw it away, we're going to get it as close to accepted / basic RWD specs as we can and see how it drives? - Caster is the easiest way to bring stability and you are at the wrong end. We already know this... Can you get it into + territory at all? - Adjust you camber to -1.0 to -1.25 on both sides, this will help with stability. I don't have the factory specs but I can't believe + camber would be call for. If it is specified in the positive, the engineers made a mistake, I don't care what type of tires you run. - Adjust your toe in to 1/8 inch. We keep focusing on caster only, but these other specs are almost as important. Give this a try. Was your set back or thrust angle in spec? P.S. Optimal specs are 3-7 degrees positive caster (I got 2 out of my 49) 1 to 1.5 degrees negative camber (I'm at 1.?) 1/8 toe in (I'm there) Drives good, wheel returns to center and is fairly stable at freeway speeds. so good enough... -
Pulling my hair out on my '49 Desoto
Adam H P15 D30 replied to James_Douglas's topic in P15-D24 Forum
Hello James, What are your actual alignment specs as it sits now? I looked through the old thread about this and I only saw your caster. Camber:? Toe:? SAI:? Toe out on turns:? Thrust angle:? -
Almost forgot, I was peening the welds as I went to relieve stress
-
I've done it with high nickle arc welding rod. 1. wait for spouse to go out for the day 2. turn oven to VERY HOT 600+ deg 3. heat manifold to VERY HOT while preparing your welder 4. weld for 2-3 minutes and put back in oven for 10 minutes 5. leave in oven after welding and lower temps over a few hours Hard, yes - Impossible, no
-
A most recent pic, and the story...Share your old Mopar!
Adam H P15 D30 replied to keithb7's topic in P15-D24 Forum
-
Don't forget modern engines have: Much lighter rotating mass (allows thinner oil) Low tension rings 16-20 lbs pressure in the cooling system which substantially raises the boiling point. With a 50/50 mix of coolant at seal level it boils at 226 degrees with 0 psi and 275 degrees at 20 lbs pressure. Emission requirements that necessitate hotter running engines Finally @Sharps40 My heater / defroster will fry eggs at 170 degrees.
-
I've tried both 160 and 180 degree thermostats and my oil temps in the pan were within 5 degrees. Ambient temps on both days were also within 5 degrees, same freeway drive... Either way mine runs at 170 - 185 degrees with a 160 thermostat and a 185 degree fan switch installed at the rear of the head.
-
Yes, clearly an airflow issue. If you're 12v I would dump the engine fan and run a good electric fan. If you're still 6v, finding an electric fan with enough CFM may be a challenge... I never use old engine fans for safety reasons, they all go in the trash. I believe 52 uses a pressurized system so a 180 thermostat will be fine. If it is non pressurized I would use a 160.
-
That’s too hot for a fresh engine and cooling system. What thermostat is in it? Does it cool down if you raise the idle a bit?
-
I guess I am lucky, my wife has a vinyl cutter for making t-shirts etc. and I have found the program and cutter makes perfect gaskets.... Sadly it all came to an end when she found out what I was doing. Here is an article I found that gave me the idea and gives the settings needed.
-
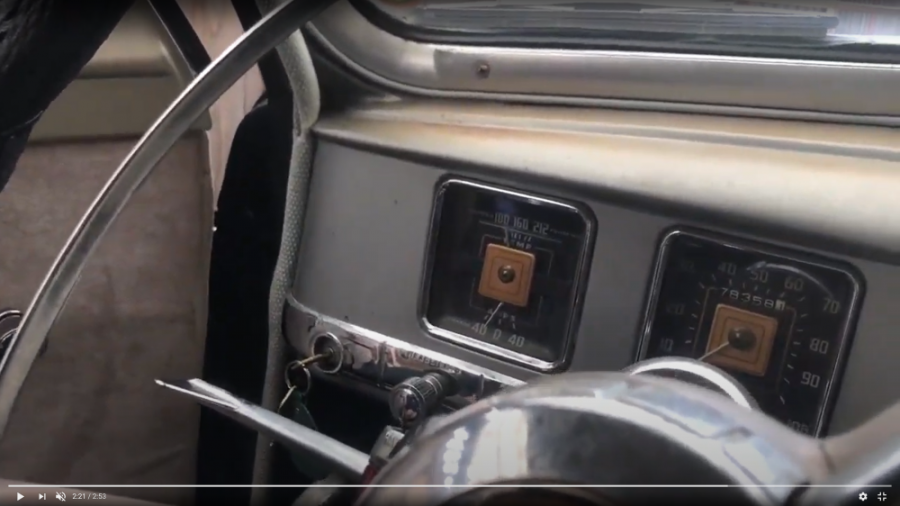
I don't like ammeters but that's a personal choice... When I added a 70a alternator verses a 40a ammeter I decided it was time to change to a volt meter but I wanted to install it in place of the ammeter and not as a separate gauge, another personal choice. Here's what I did... Original ammeter New gauge attached to ammeter face I left the numbers and glued the original white needle on. Straight down is 12v any movement to the left is charging Picture with engine running
-
Keep in mind the type of coil you use will determine the spark plug gap.
-
My First Car -- P15 1947 Plymouth Deluxe
Adam H P15 D30 replied to NickPickToo's topic in P15-D24 Forum
If you don't cut it out and weld new stuff in the rust will be back. Maybe not an issue in the fender well but anything visible will bubble back up shortly. -
Langdon makes a nice dual carb linkage. Still some fab work to do on your end. http://www.langdonsstovebolt.com/store/#!/Stovebolt-linkage-kit-for-2-Weber-32-36-carbs/p/108016195/category=18665965 it says for Weber carbs but it’s universal
-
need for speed in an antique car or truck
Adam H P15 D30 replied to desoto1939's topic in P15-D24 Forum
I’m running 235/60/15 with a 3.0 rear gear in my 49. Works well, may try 225/70 though. The 235/75 I had made the gear too tall. -
need for speed in an antique car or truck
Adam H P15 D30 replied to desoto1939's topic in P15-D24 Forum
What size tires are you running? I know you said "smaller" just curious -
need for speed in an antique car or truck
Adam H P15 D30 replied to desoto1939's topic in P15-D24 Forum
Not exactly, I was not referring to those who choose to drive at certain speed, I was referring to those who tell others not to and it's unsafe. The "father and son" story is closer to the latter.


