

Los_Control
-
Posts
4,700 -
Joined
-
Last visited
-
Days Won
35
Content Type
Links Directory
Profiles
Articles
Forums
Downloads
Store
Gallery
Blogs
Events
Everything posted by Los_Control
-

Way off topic 1993 caravan transmission
Los_Control replied to Los_Control's topic in Off Topic (OT)
It was loose, I put 2 full turns on the holding screw. Just to check how loose it was. End of day putting tools away and just tightened it to satisfy curiosity. I thought it was looser then that, it has a plastic cover & a metal shield going over the plug. They still wiggle a little bit. I think the next few days I will remove the plug, clean everything up ... figure out why the shields are still loose ... is the bolt too long? Do I need to add a washer? I think this is the problem, still needs more attention. every chance i get, i replace the whole unit,main reason is i dont want it coming back needing a mount/bearing assy in 3 months. And i cant see any real saving in buying the cheapest strut on the planet. But, to each his own, buy what the budget allows. Struts are pretty cheap if you do not buy the whole assembly. Good gas was $90? Quality standard was $45. Cheapest struts were $12 ... Mine were normally $35, but on a clearance sale for $16. Now if I took it to a shop and paid shop labor rates to swap over the springs, would be better off to replace whole unit. The mechanic that did the alignment pissed me off. Was only the camber they needed to adjust. Or tried to adjust .... it steers fine and the old alignment seemed to be spot on. Camber was off from strut installation. Passenger side adjusted fine, Drivers side he said he adjusted the cam as far as it would go ... could use a little more but just cheap struts and poor fitment .... not his problem. Next time buy them from me. If you look at the 3 top bolts on top of shock tower, you can see witness marks from old strut placement. The holes are not slotted, but larger then the studs. You can loosen the top and shove it over almost a 1/4". And have all the adjustment you need on the bottom. I just assumed that would be part of the process. He spent 15 min on the job adjusting the camber, said the best he could do and charged $100 + tax. I just smiled and paid. Now I will fix it myself. -
Way off topic 1993 caravan transmission
Los_Control replied to Los_Control's topic in Off Topic (OT)
I just feel I need to add some closure to this thread ... Not positive all is fixed yet. Took me 5 days to get the tank & pump out. Then I found out Rockauto sent me the wrong fuel pump. While ordering a new pump from Amazon, I replaced the struts I ordered from Rockauto. Only took 2 days ... maybe 3 to install the tank .... But I got er did! I only tightened the wire harness ... I feel it was not the issue, yet I did get 2 turns on the bolt to hold it. We drove it the other day for a 1 hour trip, we had no problems with it. I took it in for a alignment, took 2 days to get it back. Today we took it for a 4 hour drive. 1.5 hours to Abilene, 1 hour around town making a few stops, 1.5 hours back at 80 mph. It performed perfect. So we have about 7 hours driving time on it. I am still skeptical if the problem is solved. But the journey I have learned much about the 3.3L engine & the A604 transmission ... Confident I can fix any future issues. ? ? ? -
Are you sure about this? .... If a + ground coil from new has been run in the 3600 rpm range, ran that way all of it's life .... It is the side of the coil that the energy is coming in from .... A simple way to explain it, you are getting power from + or - on the coil ... electricity flows both ways. I really do not think it matters if it is 6 volt, 12 volt ... ballast resistors do matter. But if you switch polarity on any used coil, you will run into strange issues at higher rpm. The coil is basically broke in to run one direction, when you swap polarity it is now running a different direction. .... while rpm matter and where you notice it. I would think the rpm is connected to the motor and not the coil.
-
I am just asking because not sure .... If it is a original + ground car, you hook the battery up this way. Can you tell by the way the volt meter is working? ... if it is charging it is correct ... if it is discharging then you need to switch the battery connections? Make sure the radio is not turned on, other then that I do not think anything would be hurt if installed backwards. Or is there a better way to tell?
-
1949 Plymouth Coupe 3.6 VVT Powertrain Swap
Los_Control replied to Mopar 49's topic in P15-D24 Forum
I have seen some videos on the strengthener of the 9". Seems they would add some gussets to the housing. Now days they sell kits for them. Back in the day they were doing it in the garage with scrap metal. While the housings had some weak points that needed some beefing up to handle the power, they did that and used them behind nitro dragsters. Today they are still using the same concept. Dennis Taylor building his car, He is hoping to get it in 6 seconds on the 1/4 mile. Rear end is all custom, no parts say Ford on it. But a custom built set of gears for a Ford 9" is the heart of it. He ordered his with larger side bearings etc ... he is running full floating axles on it like a 3/4 ton truck. His thoughts is for safety, if it breaks a axle you wont lose the rear wheel. Might cost him some speed but his daughter is also driving the car. -
1949 Plymouth Coupe 3.6 VVT Powertrain Swap
Los_Control replied to Mopar 49's topic in P15-D24 Forum
I know my 1996 explorer had rear drums. Thinking around 1999 or 2000 they came factory with rear disk brakes ... really not sure on the year of the switch but newer explorers have rear disk. Just seems it would be easier to find a 10 or 15 year old car in the wrecking yard with rear disk, then a 30 year old with drums. Not sure what search parameters you are using for your search. As far as I know, the widths never changed from older to newer explorers and newer will work fine. I can see where the 4:10 may be harder to find, less of them made as the explorer was more of a family 4 door suv market. My 1996 with 4:10 was the 2 door sport model. It had a badge on the fender that said sport. Any 4:10 come available and the jeep'ers would snatch them up. But they are out there. -
1949 Plymouth Coupe 3.6 VVT Powertrain Swap
Los_Control replied to Mopar 49's topic in P15-D24 Forum
Have you considered rebuilding the existing front suspension, adding a disk brake conversion ... tweaking it some maybe a stronger sway bar and better bushings etc? ... they really were a decent front suspension for it's time. Possibly replace it later if it does not do what you want? Just tossing a idea out there ... -
1949 Plymouth Coupe 3.6 VVT Powertrain Swap
Los_Control replied to Mopar 49's topic in P15-D24 Forum
The Ford explorer 8.8 will come with disk brakes on newer models, older is drum. They come with many different gear ratio's. My 96 explorer 2 door sport had 4:10 ratio ... it was fun with the 5 or 6 speed auto trans. They are a very common swap for these vehicles .. width and wheel bolt pattern is correct. I hear they are not as strong as a Ford 9" ... but really close to it. You have to admit the 9" has a reputation thats hard to beat. If you insist on mopar, the Jeep Cherokee also fits, comes with disk brakes and many different ratio ... is owned by mopar ... no clue in strength how they stack up against the 8.8. -
This is one of those moments you want to spend time on. What is your goal for your car? Keeping it 6 volt is fine, are you sure you do not want to convert to 12 volt? This is a choice you need to decide for your application.
-
Life is a journey. We all have the same destination, it is the ride and how we get there that matters. I suspect @Sniper friend enjoyed having the projects and staying busy, he enjoyed his life. I do agree is something to think about, who will be affected by your passing? My only worry is my wife. Not just croaking off ... you die and game over. Thats the easy way out. What if you just lose your ability to earn a living? I never planned to become disabled. When we are young some like me never think about earning a living. I call this the house from Hades. I was 48 years old and on top of my game. This was the house I burned out my back on ... 4 bedrooms, 3 bath, 2 story, 2 car garage Adition on a 100 year old adobe home in Old town Albuquerque. While it ruined me, I really love this house ... it is awesome. Another photo of a kitchen remodel. They wanted the 6 burner gas stove ... yes there was a lot involved, electricians did their job, plumbers did theirs, I was lead carpenter on a crew and we did the rest. I did the drywall, cabinets & tile, paint. Another photo of a bathroom remodel I did ... I really think it is stupid, but a professor at the local collage wanted this ... Yes Mam. See where I am going? I never thought I would have to worry about creating a living. I got this sh*t handled! You never know what cards life will hand you. Dying is the easy way out .... lets get disabled and no longer be able to create a living. I just never saw it coming. I thought I would work til I die. Lets be honest here ... I managed for 3 years before I lost my house and became homeless. Been with my wife 36 years and that really hurts. Her father helped us out for 2 years. Her father supplied us with a travel trailer with no water for 2 years. That is social security making it difficult to retire on disability. All said and done all is paid for, our house our cars ... we have no bills. Our life is now great, not really the life we planned. I thought it would be different, same time it is pretty decent. So I say death is the easy way out. The journey is what makes us great.


-
Nice video on Youtube......"Halfass Kustoms"
Los_Control replied to 48Dodger's topic in Mopar Flathead Truck Forum
I watch a lot of his videos, his wife drives a ls swapped dodge & not really into them. Last winter he chopped a think it was a 52 or 53 Plymouth ... pretty cool stuff but not really my deal. I like to watch his problem solving skills and how he works through them He built the General now that is a cool truck. A lot of fabrication skills mating the 2 International cabs creating a 4 door mounted on a Dodge cummins chassis. Making the bed and the rear fenders. The 22.5 super single semi tires ... one heck of a tow rig. -
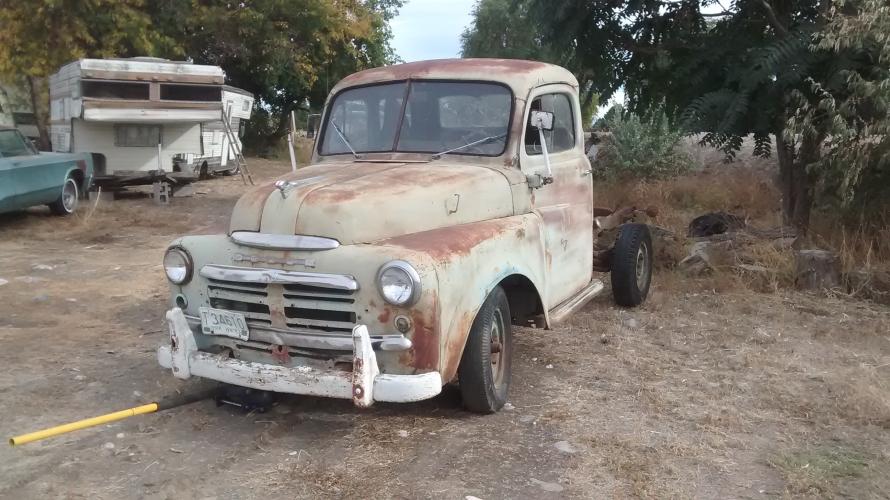
Not sure if it was a factory ordered option at the time ... many things were. My B1C had the spare tire carrier and also my B1B has it.
-
512 cid C series on Dakota chassis- build thread
Los_Control replied to Radarsonwheels's topic in Mopar Flathead Truck Forum
Sounds about right to me. Even for old school drum brakes. I replaced the hydraulics in my brakes last year, but still not driving it. I wont bother to adjust the brakes until they are set in place from braking. Actual driving. While disc brakes will self adjust, there still is a break in period to get everything set in place from all the hydraulic pressure. Kinda reminds me of piston rings. There are different brands, chrome molly, iron ... all need different break in procedures. Reminds me of a old customer, lady in her 70's and bought a new corvette in 2016? Not surprised if it had ceramic brakes ... she was not reading any manual she just drove the piss out of it. .... And the brakes worked. -
Well almost done mowing the lawn ... watched that short clip and saw they were cheating ... well you know. Cutting the body up and extending the frames ... make a altered wheel base to run in stock class ... hrmph! Reminds me of the story where the old man always bragged about his 35 dodge race car. His kid was driving dad to town one day in his chebby truck and when he took off he lit up the tires and then he banged the gears and went sideways and banged the gears again and straightened it out. While cruising to town he asked his father if that was how his old dodge ran? Naw replied the father, my car hooked up. Back to mowing the lawn!
-
No idea if he could beat Ronnie or not, but he did drive there 2nd car a few times in part 1, now am finding out there is 4 parts to the series and here is a short 11 min video shows him driving for Sox & Martin. Maybe I'll watch after I mow the lawn ... just got weed eating done now.
-
I honestly never heard of this guy before. Ran across this video in another forum and I thought it was interesting. He started off racing chebby's but was interesting how he was introduced to mopar Hemi 4 speed cars. This is just part 1, there is part 2 also. I dunno maybe I just wanted to get out of cutting the grass .... kk I'll go mow the lawn now
-
You sure not a girl that goes with it? Not saying is a bad thing .... just a thing.
-
512 cid C series on Dakota chassis- build thread
Los_Control replied to Radarsonwheels's topic in Mopar Flathead Truck Forum
@Los_Control puts on his best Grumpy old man face. You young whipper snappers ... you left things alone you would not need ceramic brakes. In my day we used ceramic to separate the wires the telephone man left. .... Dumb ass electrician should have left his teeth out of the equation. Los growls for proper identification. -
Nope...My Old Mopar Will Not Leave The Garage This Week!
Los_Control replied to keithb7's topic in Off Topic (OT)
Yes the weather has been really wet this year. Keeping up with the grass has been a never ending chore. Really happy I have the riding mower. But still, I have other things I need to get after. On the other hand, it is saving me money. I have not had to water the lawn much this year. Garden is growing wild. As @Snipersays the grass will go dormant with lack of water. I am fine with that in the front yard. While in the back yard with dogs, they would run down the dormant grass and leave nothing but dirt. So I water. November is usually my last mowing of the season. -
Yeah probably not what you meant to say. I would venture we all lived a life and we all lived them our own ways. I would then venture to say your Grandmother wore a mini skirt and go go boots. Yeah we get by today, our grandparents were way more cool then we are.
-
I forgot to add, about 15 years ago Goodyear truck centers also offered a wheel reconditioning service. At least the one in Spokane did and I assume others. They had a system where the wheels would be sandblasted, inspected and painted. Les Shaub use to be Oregon, Washington, Idaho ... maybe they expanded now ... not seen them here in Texas. With most wheels going away from steel it may no longer be available.
-
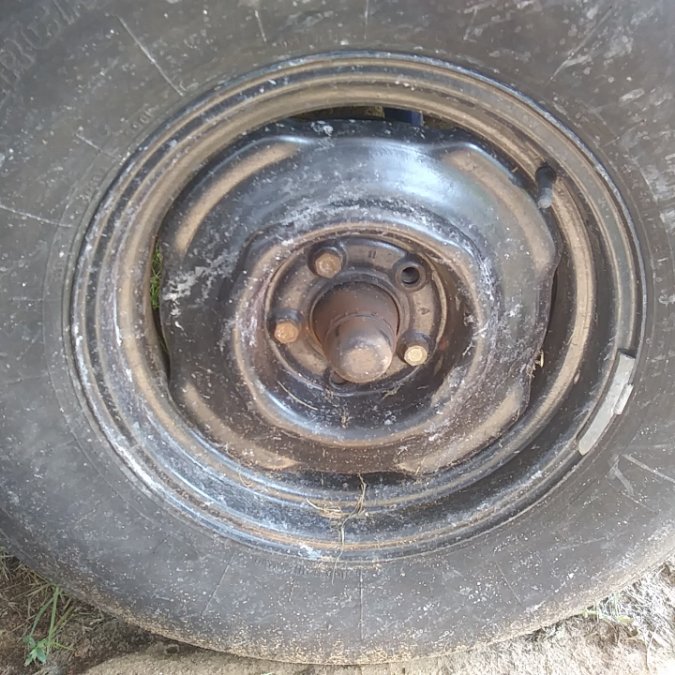
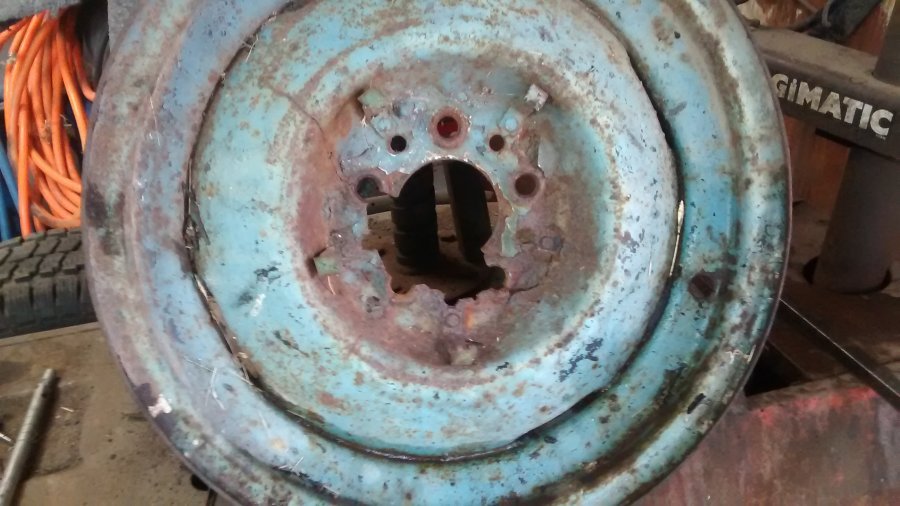
I agree with the others, 1949 they had the Bias ply tires and 4.5" rim widths. Seems my 52 plymouth had 16" wheels with 4.5. Then my B1C 3/4 ton truck had 15" wheels that were 5" .... little fuzzy on the memory. But they were not using 6" wheels on 1949 mopars is my bet. If you show a picture of the center of the wheel will tell the story. The original wheels will have clips near the wheel bolts to hold the hub cap on. Later wider wheels will have nubs on the outside to hold a hub cap on. I suspect you have the later wider wheels from the 60's-70's ... I dunno it may be possible yours are original ... I think how the hub cap mounts may tell the story.
-
Way off topic 1993 caravan transmission
Los_Control replied to Los_Control's topic in Off Topic (OT)
@Sniper I had a plan to use your method. Sadly just was not in the cards .... I have to admit doing it my way took 3 hours ... But I got er did! Really just not possible on this car has the shock towers kinda hidden and no access to the bolts. I actually feel very comfortable I did the springs the way I did .... pissed me off I clocked the hat wrong and would not line up. So for a 2nd time I compressed that spring an learned why we clock them. Really was less then 2 hours for me to get them changed .... Why nobody tell me the ATF would pour out while changing the strut? -
Paint jail is such a easy place to avoid .... same time people with a busy agenda end up in paint jail so often ... it really should be a crime. I bring this up because in 04/21 I took my wife car in for a local Texas inspection and get registration renewed. Old men tend to gossip. We were talking about the 60's merc fastback out in the yard. Plain & simple the owner sent the car off to be painted ... Was a perfect running engine with a brand new Holley carburetor. Painter was taking too long and car owner complaining. So finally got painted. Owner comes to pick it up, worst paint job you ever seen. Besides the runs all over the place. it was arrest me red with 2 black stripes down it. When they removed the masking tape, it also removed chips of fresh paint. So when the owner comes to pay $3500 for a paint job and pick up his car .... The car was sitting on the street, battery removed, carburetor missing. The paint was all screwed up ... they called the local tow company to come pick it up. 8 months later, is time to take my truck down for inspection. Same Mercury is sitting in the same spot. I assume the tow yard owns it now. Now is safe to say after all the effort the owner just gave up. Now the tow company owns a 68 fastback mercury. My neighbor has a 1964 cheby 1/2 ton .... asked his cousin to paint the tailgate to match the rest of the truck. Not a problem. The cousin daddy dies and leaves him over a million dollars. Cousin is now overseas on vacation and my neighbor is searching for a new tailgate. Paint is such a hard tedious, long process. You really need to do it yourself or be diligent to find a reputable painter. Finding a paint job for $4k you may find your car in paint jail.
-
Add parking brake to orig rear end
Los_Control replied to kencombs's topic in Mopar Flathead Truck Forum
I love you @kencombs you always have great information and do great work. The way I think about this ... YOU CAN DO THIS! What parts will you need? You will need a donor rear end for the backing plates & Brake parts. While grabbing the donor rear end you want to grab the existing E-brake cables & brackets to go with them ... Many just modify the original brake cable to fit on the original E-brake handle. So Now that you have the donor rear end and cables/brackets secured and at home. You want to cut it up and uses the pieces from it to modify your original Tapered axle rear end? I personally can not imagine how many hours would be involved in converting the original tapered axle rear end to a modern brake system. My personal red line in the sand is bad brake drums. When my drums are no longer usable, I will do a modern rear end swap. Simply just cheaper. My only point here ... I bet you will spend more time and money converting a original rear end to E-brakes. Then a simple rear end swap. For these reasons, I never heard of someone doing the E-brake conversion .... I think it can be done .... would have to ask why be done?

