Tom Skinner
-
Posts
1,441 -
Joined
-
Last visited
-
Days Won
3
Everything posted by Tom Skinner
-
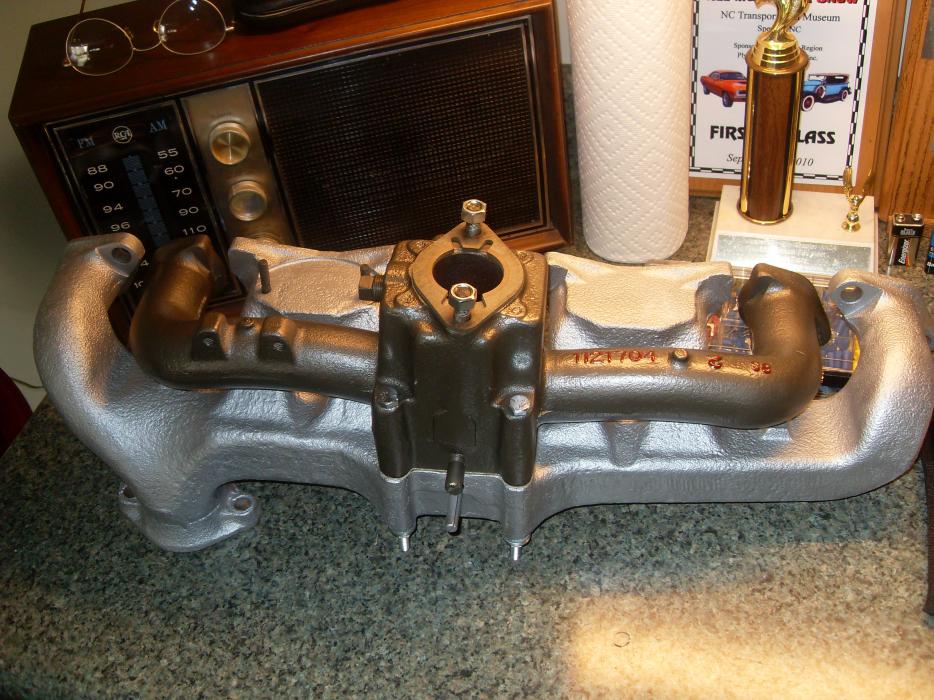
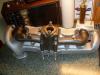
Thanks Fellows I thought about it and I have never really kept paint on my Exhaust Manifolds long - but they looked so purdy on the bench I got disapointed seeing some paint trying to cure off when running it for the first time. As a side note when I shut her down Hot I re-snugged all the nuts and they all really tightened up quite a bit more Hot/Warm then when first installed cool. Test Drive tomorrow after I use a Vacumm Gauge to set her at the best - highest setting. Tom
-
-
Installed these new Manifolds this week, but the exhaust Manifold Paint tried to smoke - heat up - turn gold from silver in places when I warmed her up? I used Engine Paint good to 600 Degrees? Any Ideas?
-
Mark, My switch is on the Frame behind the Radiator on the Driver's side of my 1948"Crashler".(as our buddy Don C would say). Hope you fid it - its easy to replace. Tom Skinner Huntersville, NC
-
You Tube has tutorials on how to bleed brakes and repair them. In addition to this you can obtain a Service Manual for your car and read up on all the steps it takes to repair brakes. In this way you may become confident in your own ability to make the necessary repair. One more thing when working on brakes do one side at a time in order to use the opposite side as a snapshot guide as to the correct way to re-assemble everything as you go. The Northern Tools sells a self Brake Bleeder Vacumn/pump so you don't even need a buddy, wife or child to help you with that task anymore. STAND UP - its your turn to do what is needed and do it now! When the going gets tough the tough get going! Start with rebuilding Wheel Cylinders. Then Master if need be then bleed and fill them - check shoes along the way - GOOD LUCK! Tom Skinner Huntersville, NC
-
Bob, My Patti could use a lesson here. Great Gal she is a keeper - the car too. Tom
-

i've just about had it.! ready to fold on this car stuff.!!
Tom Skinner replied to claybill's topic in P15-D24 Forum
Bill, When I get to that point a few nights off reading always helps. The best trouble shooting Book for your money is: Automotive Trouble Shooting For WW2 Wheeled Vehicles Volume 1 by Robert Notman. Contact him at: notmanr7@comcast.net and get a copy @ $30. When your done reading that you'll fell so confident you will go back to your Hobby with both Barrels. Good Luck. Tom Huntersville, NC -
Gents, und Maidchen, I am aware that the markers only come on the the first position. I must have a grounding issue at the markers. By way of reference to a Gentleman that is an Outstanding Ebayer, his handle is "Pugrudy". He refunded my Switch that did not work on ebay with no questions asked. I would highly reccommend him on any ebay deal as it is getting tougher to find honest people in this world. In a word he is a First Class Citizen. I still have to correct my electrical problem (Marker lights in front don't work) however its nice to know honest people still conduct business these Days. Hats off to Pugrudy he is a Hail Thee Well Type of Fellow. Tom Skinner Huntersville, NC
-
Well once again you fellows came through. The Knob and Collar came off as you'all described to a T. Unfortunately the switch I bought on ebay didn't work at all. I'm trying for a refund. Old one back in only my front Markers not working everything else is in order. Thanks Again! Tom
-
Rich, Thank You also! The Collar is slotted in two opposing places as you say. Thanks again for your help. Tom
-
Tim, Thank You its getting late so I'll try tomorrow when I'm rested and patient. I can't see that good anymore even with glasses. My son and I tried once with a small screw driver thinking there was a tiny set screw there with no sucess. I/we will try again tomorrow night Tom
-
Charlotte Auto Fair and Swap City Shindig 2011
Tom Skinner replied to BloodyKnuckles's topic in P15-D24 Forum
BloodyKnuckles, I'll be in the Carolina Chrysler Club Section with my Green 1948 Chrysler. Please stop by and say hello. I believe we met at a NAPA one Saturday a year or so ago. You had a Killer Desoto with multiple Carbs very well done under your hood. See you Saturday - I hope! Tom Skinner -
Gents, I need advice. How does one go about removing the Light Switch "Knob" off of the stem of a light switch? The bottom of the Knob has a small slot - that is all - I don't want to tear anything up. The 1942-1948 Chrysler Service Manual shows a special slotted wrench/tool to remove a Light Switch, it shows a slotted wrench/tool much like one one would use to remove an oxygen Sensor on a newer vehicle, however this is not held on by a nut in the back but some kind of "Collar" on the front/dash side. This is a 1948 Chrysler Royal. Thanks in advance for any help or advice. I don't want to force it off or ignorantly remove/damage it as the chrome and Knob are in great shape. I'll try to get back with a picture soon unless its something simple that I am missing/ignorant to. Tom Skinner Huntersville, NC
-
I think I need a Drink. Whew, chill out people
-
I run bias, but what is important is getting the right size. By that I mean the width especially because the car will handle like new when the right size tire is on it. Run them wider than they're supposed to and they could rub the inner fenders as well. The right width is extremely important for proper alignment wear and handling. Tom
-
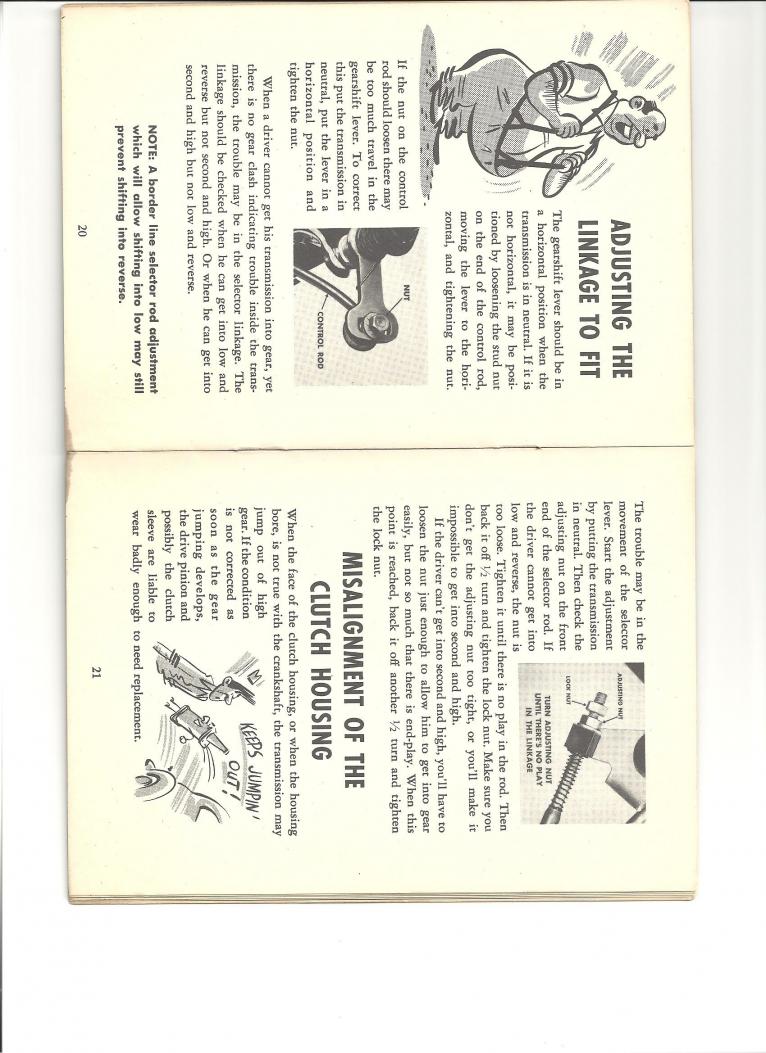
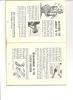
Fellows, A week or so back a Forum Member needed advice on Transmission Linkage adjustment, so I thought I would post this Booklet Page in hopes that he will see it. Tom Skinner Huntersville, NC
-
My book says Low Steady Vacumm at @15 or so is Late Ignition Timing. You don't mention a Timing Light. Set Points at .20, then set RPM's to @450-475 then Check Dwell @32-38then set Ignition Timing, then use a Vacumm Gauge in that order. Then everything should be as close as its going to get. Seek the highest setting with the Vacumm Gauge. Bring us back some results from these tests and we can look into other stuff.Remember loose wires are the bane to an ignition system. Clean and tighten all connections.Good Luck Tom Skinner Huntersville, NC PS. Just using a Vacumm Gauge to diagnose isn't going to isolate trouble unless the Hand is Fluctuating and you have a good Vacumm Gauge Interpretation Chart.
-
Tysouthwick, A great trouble shooting guide is available for @$30. It will get you started. Automotive Trouble Shooting for WW2 Wheeled Vehicles Volume 1 by Robert Notman. Contact notmanr@comcast.net If you can read you will start your car in no time flat. Best Damn Book I have ever owned. Tom Skinner Huntersville NC
-
Mike, I just installed that Tractor Supply Set - NICE - and only about $26. My Car Runs Great! Tom
-
Transmission Removal Question
Tom Skinner replied to Jim Shepard's topic in Mopar Flathead Truck Forum
Jim, INHO, I believe removing the emergency Brake Band, and then removing the Selenoid and Governor and then removing the transmission before removing the engine is in your best interest. The reason why is so simple. If its already "tight" in there to remove the transmission you stand a high probability of jostle and damage to parts trying to swing all that out in one piece. Your Vehiclce your call. I removed all that stuff first, and in so doing didn't need to fix any potential damage later on. Good Luck! Besides wrestling the nut off of the Band after removing everything will be some trick with all that movement - ie - its not bolted to the car anymore. Tom -
The NAPA Carb re-build Kit only costs $19.95 and has all the Carb Gaskets The Pump Piston Springs etc., and I believe 2 of the ones you seek as well at the base of the Carb. I forget the NAPA # and its pouring rain here and my Dat Timers in my truck so if someone doesn't give you the Carb Kit # I'll get back with it later. Tom
-
Ditto - IMHO - Restored properly the original System works - and works good. Tom Skinner Huntersville, NC
-
Windsor 8, They sell these on ebay, just type in 1946 chrysler. They sell 10 for $19.99. Pry up to loosen them/remove them, and pinch downward to install/tighten them for use. Pop trim off with a small flat screw driver and catch it so as not to chip paint Tom
-
It followed me home, I swear.............
Tom Skinner replied to Olddaddy's topic in Mopar Flathead Truck Forum
Road Trip! Go enjoy that bus. Bring along some friends! Tom -
Burning it out takes just the right amount of time to have a beer. Thats the fun part.