-
Posts
2,561 -
Joined
-
Last visited
-
Days Won
83
Content Type
Links Directory
Profiles
Articles
Forums
Downloads
Store
Gallery
Blogs
Events
Everything posted by Sam Buchanan
-

My First Car -- P15 1947 Plymouth Deluxe
Sam Buchanan replied to NickPickToo's topic in P15-D24 Forum
In that case the door switch should be wired to a nice set of lavender-colored LEDs........ -

Clue me in on thought process on my new ride
Sam Buchanan replied to Slickster's topic in P15-D24 Forum
I use an electric fuel pump for starting.......matter of fact I also use it for driving....glad I have it since I removed the mechanical pump. ? -
Good ol' acetic acid........ ?
-
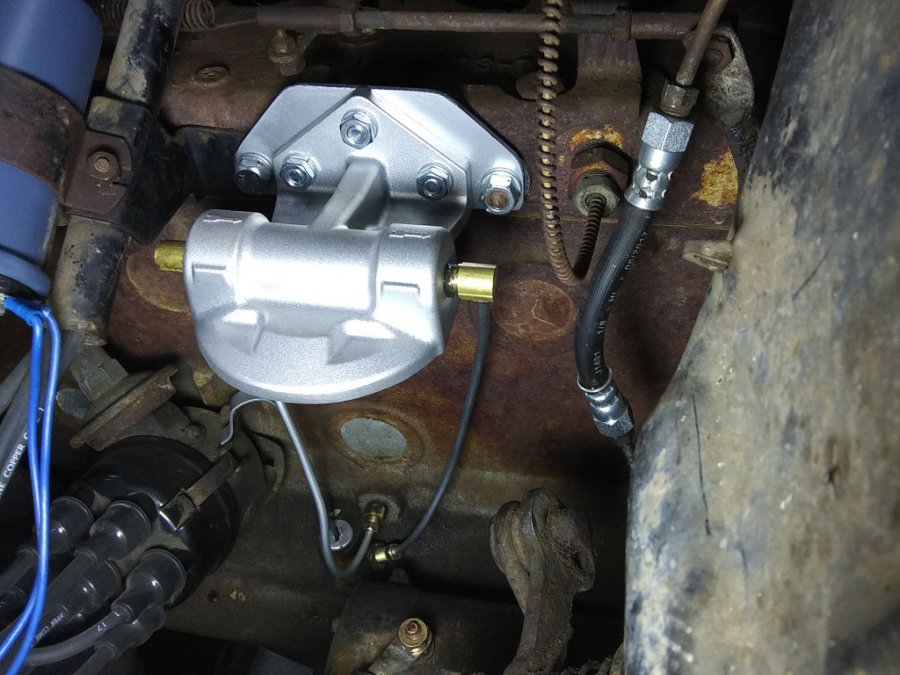
Filter is a bypass, works the same way as the filters that were originally on our engines. Here is the thread about the installation: https://p15-d24.com/topic/50622-installing-a-spin-on-bypass-oil-filter-photos/?tab=comments#comment-537063
-

winterizing steps for your antique car/truck
Sam Buchanan replied to desoto1939's topic in P15-D24 Forum
I open the heater valve........ ? -
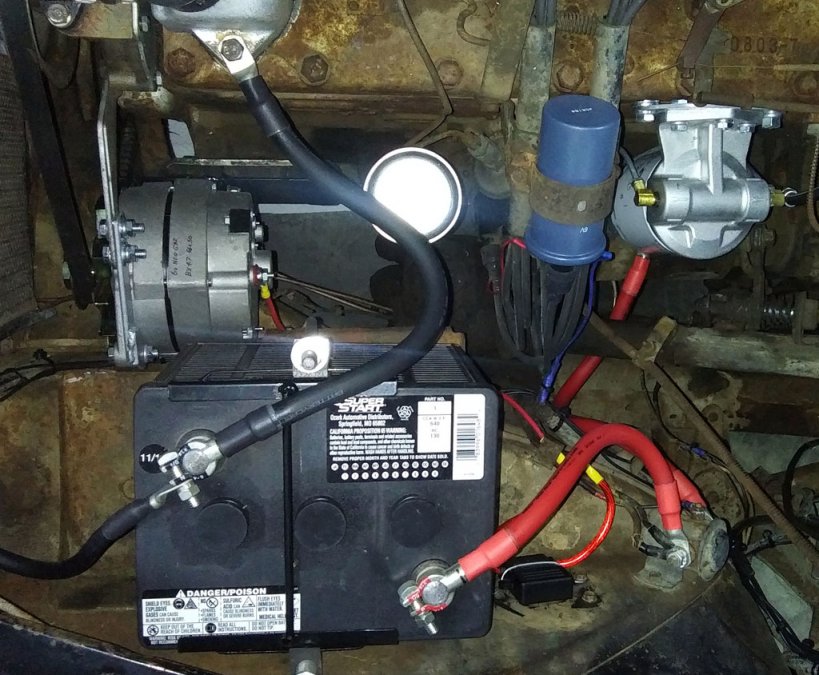
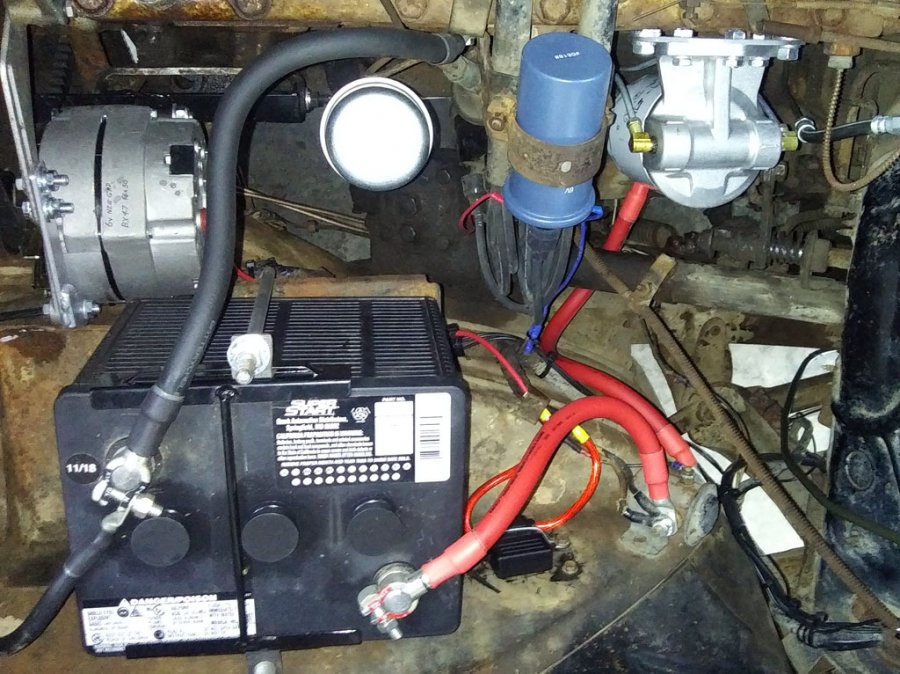
If originality isn't your highest priority, but reliability is, a 6v alternator will bring your charging system up-to-date and keep your battery fully charged. A hot battery, even at idle, does wonders for your headlights. ? Here is the vendor I used for my 6v alternator, been very pleased with performance, price and support. This is a one-wire alternator, your ancient and trouble-prone regulator is eliminated. Howard Enterprises While you are at it, install new properly sized battery cables so you can get the full potential (pun?) out of your system. (My wiring as been converted to neg ground.)
-
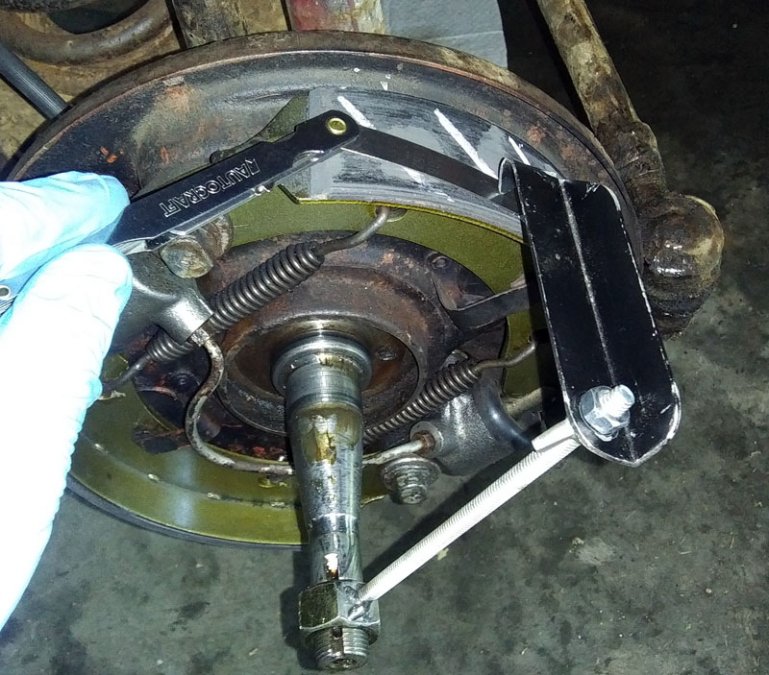
Don't have an authentic brake tool but if you can't find one you can easily make a tool that will do the job....here is my version: Before removing the wheel drum, one minor cam adjuster is tightened enough to create noticeable drag on the drum. The drum is then removed and the brake tool is threaded onto the axle. The pointer is located over the portion of the shoe that contacted the drum which indicates the ID of the drum and adjusted for a snug fit on the shoe. If you want to get really fancy a 0.006" feeler gauge can be inserted between the pointer and shoe. I tried chalking the shoe to assist with indicating the high point during the initial adjustment but didn't find it to be of any advantage. Notice how these brand new shoes have not yet worn enough to have full contact with the drum. I'll readjust the brakes after some miles have accumulated on the shoes. Once the pointer is adjusted to match the high point of the shoe that was adjusted against the drum, the tool is swept over each shoe so the major and minor cam adjustments can be set so each shoe is concentric with the drum. Hopefully this will remove some of the mystery of adjusting the brakes and provide visual confirmation of proper adjustment.
-

My First Car -- P15 1947 Plymouth Deluxe
Sam Buchanan replied to NickPickToo's topic in P15-D24 Forum
Nick, if you are going to be wet-sanding paint you might want to hold off on the fender welting. The cutting and buffing process is pretty messy. -
Don't know, I'll check. What's the deal with "lynx eye"?
-
That would be my guess.
-
-
I don't think so............ ?
-

41 Plymouth adding turn signal flasher.
Sam Buchanan replied to JCSpecialDeluxe's topic in P15-D24 Forum
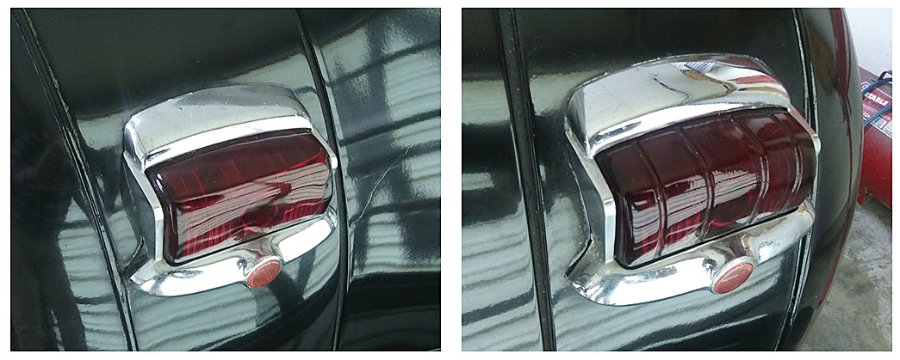
I went through the same process with my '48 P15. The dual circuit adapters pictured above were added to the taillight sockets along with new wiring from the front of the car. I kept the center brake light so now the car is "modern" with a third brake light. ? The turn signal switch I used manages interrupting the brake light on the side that is 'turn signaling'. It needs to be connected to the brake light switch so it will know when to blink a brake light. Here is a source for the dual filament adapters: https://www.ebay.com/itm/Vulcan-Universal-Pigtail-Repair-Phenolic-Disc5-8-Double-Contact-Bulb-Socket-Base-/272559900289?hash=item3f75d60681 And the turn signal switch: https://www.ebay.com/itm/Universal-7-Wire-Turn-Signal-Switch-Signal-Stat-900/143096919345?ssPageName=STRK%3AMEBIDX%3AIT&_trksid=p2060353.m2749.l2649 -

My First Car -- P15 1947 Plymouth Deluxe
Sam Buchanan replied to NickPickToo's topic in P15-D24 Forum
Cutting and buffing is a good winter project. If you use a professional buffing compound it will go much quicker than you expect. I recently rejuvenated really poor 15-year-old paint on a TR6 with 1200 wet-dry paper and this compound: https://www.amazon.com/gp/product/B0002ZQ016/ref=ppx_yo_dt_b_asin_title_o01_s00?ie=UTF8&psc=1 Don't sand in a circular pattern, straight lines only, and I used a lambs wool pad on a rotary buffer. If you want a really deep gloss finish up with a foam pad and polishing compound. The professional products are several steps above the consumer products you buy at a local auto parts house. It's gonna look great! -
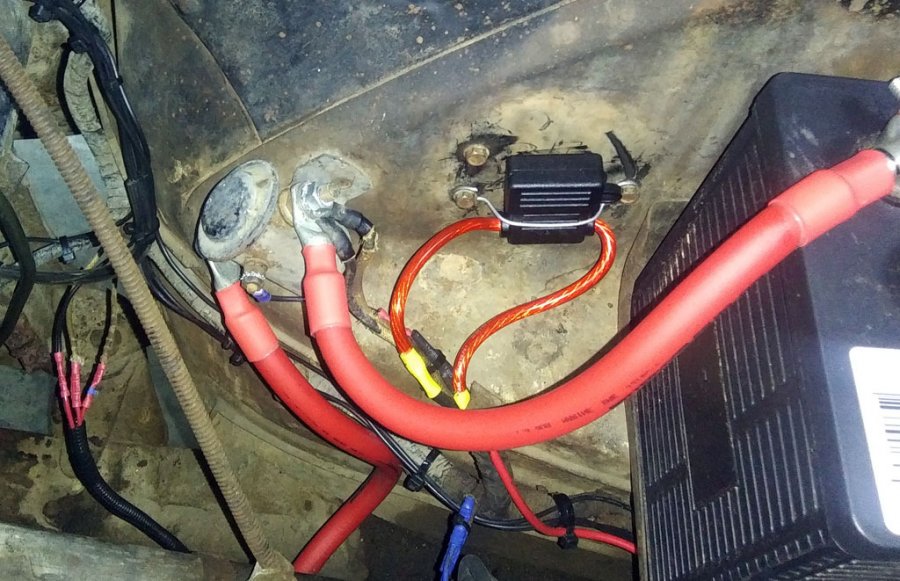
Along these lines....what would it take to draw 100-ish amps from an alternator? A dead shorted battery?? In the photo below you can see the 60a fuse I installed where the old regulator used to be. I might change it to a 35a. My alternator is rated at 60a but I've never seen the ammeter indicate more than 10-15a for a minute after a cold start with a charged battery. A semi-related story: My RV-6 has a Nippon-Denso based 35a alternator. Some idiot left the master switch on for ten days and ran the Odyssey PC680 battery dead flat. I stupidly (see a trend?) jumped off the plane and watched the poor little alternator pump 49a into the totally dead battery. Within a half hour the alternator was toast, killed by trying to charge the dead battery. Lesson learned----I never jump start a vehicle with a completely dead battery due to the stress it puts on the alternator. Charge the battery for awhile first, then jump start if necessary. The alternator will appreciate you.
-
60a is more than enough capacity for our cars. The stock regulator can be eliminated or used merely for a terminal junction if you want to retain it for cosmetic reasons. Be sure you check shipping charges for a vendor you are considering. Howard Enterprises doesn't charge additional shipping. There have been recent threads about installing usb power ports, use the forum Search engine.
-
Howard Enterprises is the vendor I used for my 6v alternator, I'm very please with customer support and the performance of the alternator. This vendor includes shipping in the listed price. https://www.ebay.com/str/HowardEnt?_trksid=p2047675.l2563 About $140 shipped, an optional bracket is available at reasonable cost. That is all that is needed to do the conversion.
-
What I think is......you will most likely end up considering the alternator to be the best money you have spent on your car if you drive it often. Unless you have electric radiator fans or other high-load devices 60a should be far more than your car will ever need. My P15 gets driven about every week and after a cold start the ammeter will swing over to 10-15a for a minute until the battery is topped up then settle in at about 5a while driving. Turning on the headlights makes no significant difference in the ammeter since the alternator keeps the battery fully charged even at idle.
-

48 p 15 master cylinder removal and install help PLEASE!!
Sam Buchanan replied to whippersnapper48's topic in P15-D24 Forum
Practice makes perfect. ? For many of us, replacing the master cylinder in one of these cars is a first-time (and hopefully last-time) experience. The removeable floorboard in my P15 is a greatly appreciated design feature.....it was wonderful while I was going through some tranny yanks and reinstalls. -

Old guy with a new car and introductions all around
Sam Buchanan replied to KyMoonshine's topic in P15-D24 Forum
For reliable starting even hot be sure you have 6v battery cables installed. They are much heavier than 12v cables because the current demand is greater. Here is what they look like: Another upgrade that removes aggravation and adds reliability is an alternator. They are available for 6v in either positive or negative ground. Battery Cables Alternators -

Old guy with a new car and introductions all around
Sam Buchanan replied to KyMoonshine's topic in P15-D24 Forum
Guess I should have said...in order to avoid my quote being taken out of context....that a 12v bulb will be dimmer on 6v than a 6v bulb with the same lumen rating. -

Old guy with a new car and introductions all around
Sam Buchanan replied to KyMoonshine's topic in P15-D24 Forum
I've never heard of "positive ground bulbs", as greg stated incandescent bulbs don't care which way the electrons are flowing. Yes, a 6v bulb is definitely brighter than an 1157. My P15 had a couple of 12v bulbs that I had to change out to get the taillights up to full brightness. If the positive ground thing is messing with your mind just change the car over to negative ground. It's a simple process as long as it doesn't have a radio. My P15 had been partially converted when I got it (I had to reverse the ammeter wires) but I probably would have done it anyway just to avoid mental gymnastics. -

Old guy with a new car and introductions all around
Sam Buchanan replied to KyMoonshine's topic in P15-D24 Forum
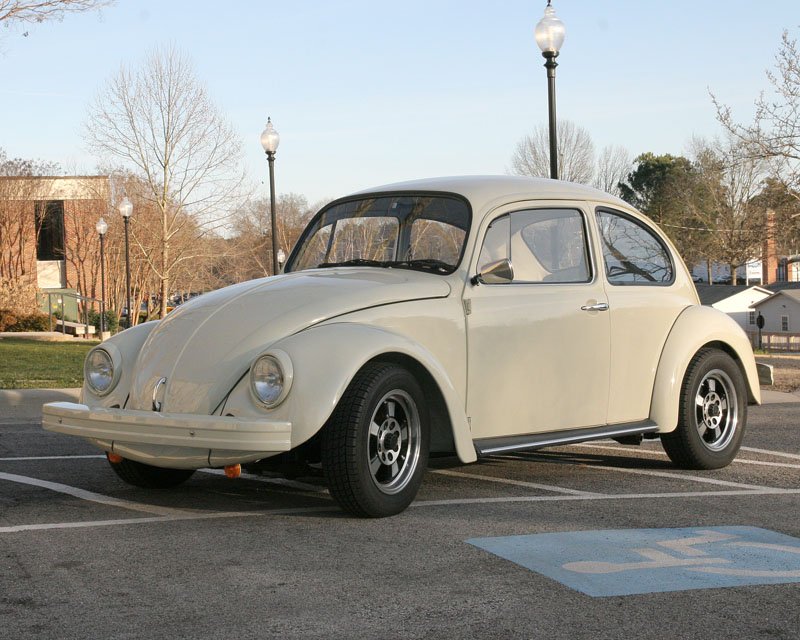
The headlight switch fuse is a SFE 30a which is 1/4" x 1 7/16". This is longer than the more common AGC fuses. I bought a box of them at the local Napa store. I'm a Beetle dude, too, they were my first cars and I went through several. Here is the last one, a '74 Standard, which was a total ground-up restoration and went to a new home three months ago when I was adopted by a Triumph TR6. Front beam narrowed 3" and 2" drop spindles and quite a bit of body shaving. Your '50 fastback is a really cool ride, don't hesitate to modify it however you wish. You don't have to please anyone but yourself (definitely not a few old cranks on an obscure internet forum....). ? -

Tappet adjustment on new rebuild flat 6- when and how?
Sam Buchanan replied to '41 Fat Bottom Girl's topic in P15-D24 Forum
Valve adjustment tips on the Tech Section of this forum: https://p15-d24.com/page/p15d24/tech/tech_tips.html/ The Chrysler Master Tech service film on valves: https://www.youtube.com/watch?v=tCj0XktYuM0 -

48 p 15 master cylinder removal and install help PLEASE!!
Sam Buchanan replied to whippersnapper48's topic in P15-D24 Forum
Yes, and some of the bolts may be frozen. Go ahead and do whatever is necessary to remove them even if you need to snap off a couple. You can deal with replacing them later......after you have brakes. The gas pedal pulls off of a couple of ball-ended studs, just give it a firm tug to break it loose. To replace it I clamp a pair of vice-grips on the accelerator rod to prevent it from going down as you snap the pedal back into place. As mentioned above, if your carpet isn't a problem just removing the bottom cushion of your seat will give you a lot more working room. The seat frame can stay in place. Just lift up on the front edge of the cushion and it should pop free.


