-
Posts
2,511 -
Joined
-
Last visited
-
Days Won
78
Content Type
Links Directory
Profiles
Articles
Forums
Downloads
Store
Gallery
Blogs
Events
Everything posted by Sam Buchanan
-

Got hot rod 53 going but need something for trunk lock
Sam Buchanan replied to DavidJose1's topic in P15-D24 Forum
-
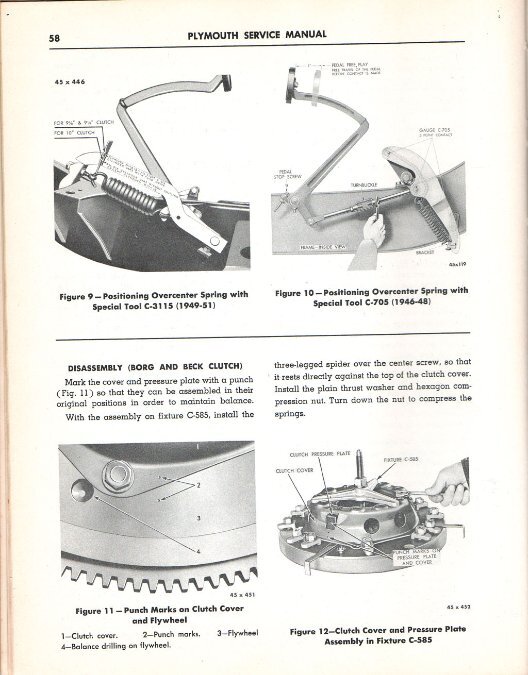
You do have a service manual, right? From our Downloads section: https://p15-d24.com/files/file/5-overspring_toolpdf/
-
Using the hammer is often more effective, similar to what an impact wrench would accomplish. But glad you were able to get the drum removed, they can be aggravating sometimes.
-
I don't have a specific part number but here is the Gates catalog page for their locking caps. Take measurements of your filler neck and see if you can match a cap. https://www.gates.com/us/en/search.p.7410-000000-000011.html
-
I had already drilled a small hole in the filler neck while troubleshooting fuel issues when I was returning the car to driver status. However, the Gates 31620 cap is a legacy cap that includes applications for 60-70's Ford trucks so the venting is probably fine. I gave it the informal suck-n-blow test (no comments, please) and it seemed to vent readily.
-
While pulling out the P15 for an afternoon drive today I discovered that a few days ago an absent-minded old man had driven away from a gas pump with the gas cap sitting on the rear bumper. The poor idiot proceeded to blissfully enjoy an extended drive and in the process launched the gas cap into places unknown. What an idiot.... In case anyone needs a gas cap, a Gates 31620 is a perfect fit, it is chrome and vented. I found one at my local family-owned auto parts emporium but this part number will return some hits from online vendors. Note to self.......hold the gas cap in left hand while refueling, don't put it down anywhere.
-

1949 Plymouth Transmission Frozen to Bell (Clutch) Housing
Sam Buchanan replied to temecularevev's topic in P15-D24 Forum
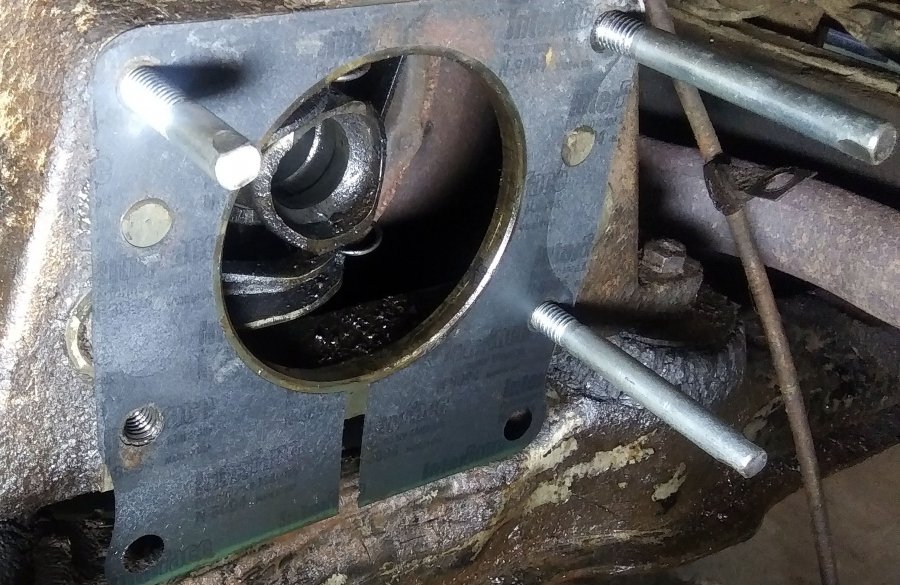
Some info about chasing transmission leaks: https://p15-d24.com/topic/50800-chasing-transmission-leak-48-p15/ https://p15-d24.com/topic/58630-major-leak-countershaft-3-speed/ And a long thread about transmission mounts: https://p15-d24.com/topic/50844-engine-mounts-p15-caution/#comments Also, make a set of guide pins: -

A bit of engine building demo for those hesitant to take the leap
Sam Buchanan replied to greg g's topic in P15-D24 Forum
I've been watching Pete's videos for a few years and they are easy and pleasant to watch. He also enjoys restoring old tractors, has a pretty good collection in his barn. He isn't a formally trained mechanic so many of us can relate to how he does his projects. -
Your original wiring and components only need to carry half the current on 12v as they would on 6v, you are good to go!
-
Just as a datapoint, we sometimes need to "pickle" an engine in the aviation community for several years while an aircraft is being completed. All the openings in the engine are sealed and it is totally filled with oil. The type of oil isn't important, we usually just use the least expensive motor oil available. This eliminates internal components from having contact with air which removes the possibility of corrosion. The crankshaft is not rotated! These engines can cost $50-70K so this method is used since it has been found to be effective. If I needed to store one of our MoPar engines for several years I would consider the same method.
-
Just for grins buy a quart of black implement/tractor paint at a farm store and use your HVLP gun to shoot a sample coupon. You might get lucky.
-
The fluid reservoir is not pressurized when the brakes are applied. The gasket on the cap is to prevent fluid from seeping out due to the fluid sloshing in the reservoir. Also, the reservoir would have to run nearly dry before air would be introduced into the master cylinder. Having a good cap gasket is desirable but its failure doesn't explain the problems you are describing.
-

Electric Wipers for '51 Plymouth? - Going 12 volt
Sam Buchanan replied to Bob Riding's topic in P15-D24 Forum
If you want to run a 6v motor on 12v you need a step down converter.- 16 replies
-
- 1
-

-
- wipers
- electric motor
-
(and 1 more)
Tagged with:
-
That arrangement would very nicely lend itself to connection to a power bleeder. Connect the bleeder at the remote reservoir line, add a bit of pressure and bleed each corner.
- 11 replies
-
- bellcrank
- bell housing
-
(and 3 more)
Tagged with:
-

Steering box replacement for 46 Dodge Custom
Sam Buchanan replied to VinceM's topic in P15-D24 Forum
Ok, guess it will make sense when I see it. The steering on my car is nice and tight, I just need to replace the seal. Most likely I'll leave the bearing shims as they are. Thanks for the info. -

Steering box replacement for 46 Dodge Custom
Sam Buchanan replied to VinceM's topic in P15-D24 Forum
Loren, Thank you for your description of the steering box assembly. I'm going to be replacing the sector shaft seal soon so am doing homework on how all this goes together. Question about your step 2: You state to rotate the adjustment screw "one turn" prior to removing the top plate. Does "one turn" mean 180 degrees (actually half a turn) or 360 degrees (a full rotation)? I'm looking at the illustration in the service manual and struggling to see how a 360 degree rotation buys us anything but can see how 180 degrees (half turn) might disengage the screw cog from the sector shaft. Thank you for any clarification. -
Here is a tutorial from our Research sub-forum on understanding how to adjust brakes. Some time with this document and checking your adjustments may help your brakes. https://p15-d24.com/page/p15d24/tech/brakes.html/
-

🔅🔆What led bulbs are needed? I'm lost on what buld size.
Sam Buchanan replied to rcl700's topic in P15-D24 Forum
I haven't researched LEDs for the dash but I did install microscope bulbs which have twice the candlepower as the original bulb.....big improvement. Details in these two threads: https://p15-d24.com/topic/53657-dash-lights-question/ https://p15-d24.com/topic/59913-microscope-bulbs-for-dash-lights/ The vendor: https://www.ebay.com/itm/Plymouth-1946-1947-1948-extra-bright-tail-light-bulb-63-replacement-6-volt-63/161410757417?ssPageName=STRK%3AMEBIDX%3AIT&_trksid=p2057872.m2749.l2649 There may be excellent 6v LED options, if you find some please keep us advised. -

Steering box replacement for 46 Dodge Custom
Sam Buchanan replied to VinceM's topic in P15-D24 Forum
I just ordered a seal from O'Reilly Auto Parts, less than $6 delivered to my local store. Been putting this off for a long time, might as well get it done. https://www.oreillyauto.com/detail/c/precision/precision-multi-purpose-oil-seal/ope0/240356 -
Rich, that is why I think your price is too low..........law of supply and demand....... On the other hand, there might not be very many owners who will want to go to the trouble to measure with precision the drums and have the shoes shipped and arced........but what do I know, I have disk brakes! 🤣
-
-

how to open the hood without a hood release cable
Sam Buchanan replied to OUTFXD's topic in P15-D24 Forum
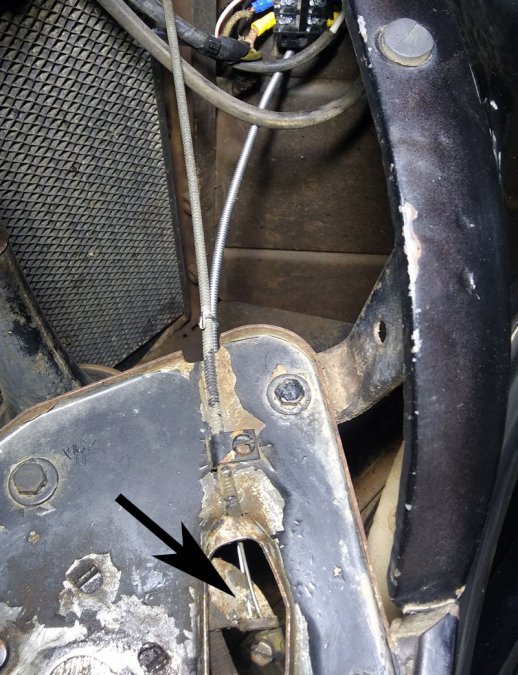
Because I was concerned with the cable failing and leaving me with the aggravation you are experiencing, I installed an emergency cable that works independently of the standard cable. I goes through the left fender liner, I can pull it by reaching up and forward of the front wheel. -
That is only a difference of 0.18", about 3/16", I don't think that will be any reason to worry about the drive shaft. However, you will most likely need to adjust the shift linkage after installing the new mounts but that is an easy procedure, just follow the service manual. The lower mounts are still a mystery to me, I've never been able to figure out what the original config was on my car. It only had the washers on the bottom when I got it but I installed lower mounts in an attempt to reduce clutch chatter. But the lower mounts do transmit a bit of engine vibration. Be prepared to experiment some and use what works best for you.
-
A lot in the forum archives on this subject, here is a search string to get you started: http://site: p15-d24.com transmission mounts Here is a thread I started while sorting out the mounts on my P15: https://p15-d24.com/topic/50844-engine-mounts-p15-caution/ In answer to your second question......many of us are not happy with the mounts currently available.


