-
Posts
2,555 -
Joined
-
Last visited
-
Days Won
83
Content Type
Links Directory
Profiles
Articles
Forums
Downloads
Store
Gallery
Blogs
Events
Everything posted by Sam Buchanan
-

It was 106 today, and 'Fatso' was enjoying the ride!
Sam Buchanan replied to 49D-24BusCpe's topic in P15-D24 Forum
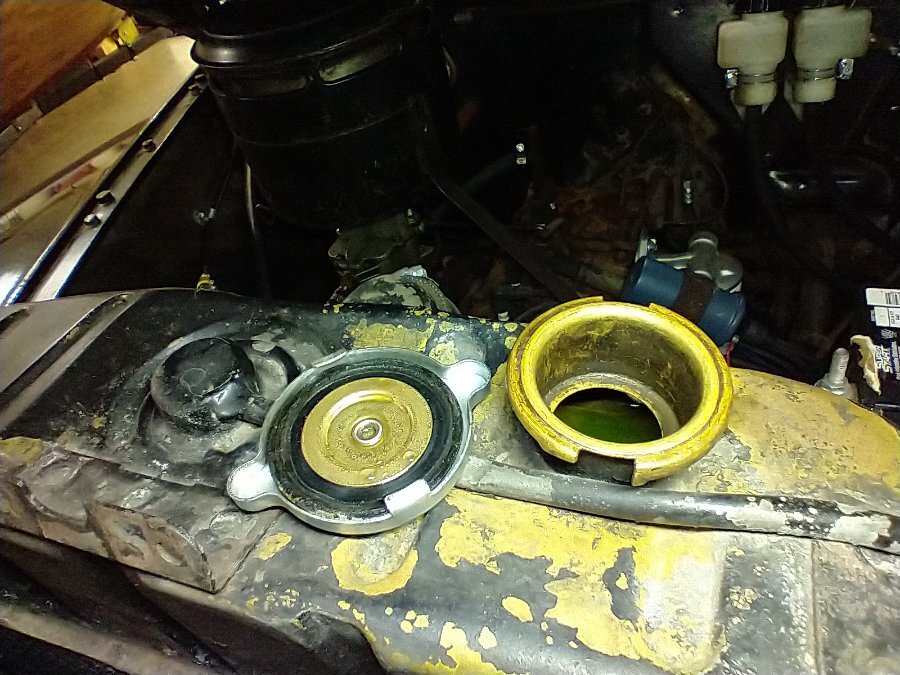
Yep, it doesn't matter what cap you use, even a 30lb cap wouldn't make any difference since the system will never develop pressure with the open vent. A cork would work just as well. ? Below is where I keep the coolant level in my P15, you can also see the non-vented cap. The car runs no hotter than 185 in our horrid summers and I've never seen it burp. Maybe I'm lucky to have a radiator that seems to be healthy even though the top cap really needs paint or polish (!). -
If you ever have vapor lock issues that filter that close to the exhaust manifold would be a prime suspect. I would also prefer not to have any fuel line connections/interruptions that close to the manifold. If any line failure occurs while the engine is running the fuel pump will be spraying the manifold with fuel.......
-
Me thinks this is a solution in search of a problem.......... These old cars ran for decades without a coolant recovery system.
-
Plastic filter downstream from the fuel pump in engine compartment on same side as the exhaust manifold? Why roll the dice? Use a metal filter.
-
https://vansauto.com/product/gas-tank-49-52/ If you're going to the effort to replace the tank, go ahead and replace the sender and all fuel lines. You'll never have another fuel delivery problem and that will eliminate a huge part of the drivability problems with our old cars.
-
Having a plastic filter that close to the exhaust manifold gives me the heebie jeebies......... Metal more better.
-
From the front pages of the Plymouth Service Manual: You're bound to have a service manual for your car.......but juuust in case you don't: https://www.rockauto.com/en/moreinfo.php?pk=10593924&cc=1486874&pt=10335&jsn=379&_nck=WBKHhreJM44JUrfLGZGGZPRSwAK6bnIDtbWzPnJK%2BoY0TPW1OI%2FT7dTgoJk%2BSIHCz%2FtZIli7hQZ4ll1B9RzORH0K7u9dCrrEXVEotVYXdSU4W3W%2B1s9l0m0roMK4U%2FXHV6pOZtjSU4KQEFxZgE9SN%2F2NEVJI64EAKeib6rMyye64jBGnf0P%2FNubNXOef33488UoFQtVBxiJcynuL7c4DffXzKItzk9MMLrQXdgvSa%2Fg68gQEY1h3CWdwmALz9oaOwQYhQ1DsiX8fDakDfZRn4GQXlefBylRqPu5tTItM4i3z%2F5WZCa8BBtmUpSckcw%2B4
-
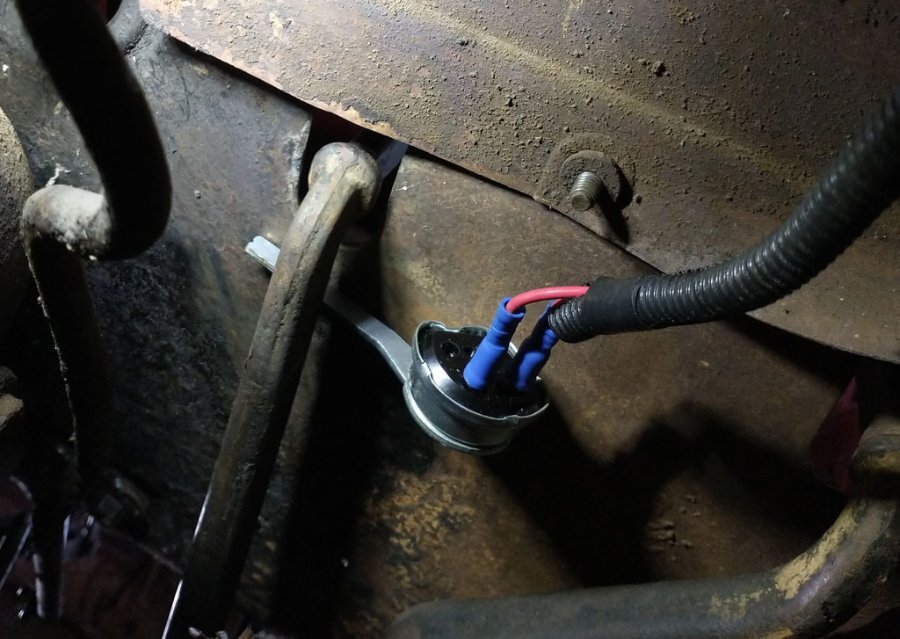
Got the SLS40 mechanical stoplight switch installed, it works just as I was hoping it would. The install was simple, I removed the floorpan to make it easier to access but it can be done with the pan in place if an extra set of hands are available. When the pedal is depressed the switch arm rotates and closes the switch turning on the lights. They activate after about an inch of pedal travel well before the master cylinder kicks in. I like it. I intend to remove the new pressure switch (which didn't work as I wanted it to) to eliminate the possibility of the switch developing a leak like the old one did. The wires going to the old switch are long enough to reach the mechanical switch with no splicing necessary. I'll just need to remember to disconnect the wires from the switch if the floorpan needs to be removed.
-
I had to replace the float while returning my P15 to road service. I purchased a hollow plastic float from Mike's Carburetor Parts, it works well but it seems Mike's only offers a brass float now (for less $$$'s than I paid). https://www.carburetor-parts.com/carter-ball-ball-brass-float-fl2000 A heavy float can cause all sorts of carb issues, a new one is an easy repair.
-
This a non-pressurized system, it has an open vent and the cap won't hold pressure regardless of how it's rated.
-
Fill it up with water and see if it leaks?
-
True, but I like being able to set exactly when the lights are activated.
-
That is the same switch I have coming. And I'm going to a mechanical switch for the same reasons you did. The way drivers tailgate these days I want to give as much warning as possible that the P15 is about to have its great speed arrested. ?
-
I recently replaced the switch due to leakage. But I don't like the new one, erratic and requires too much pressure to activate. I'm going with a mechanical switch so I can set how much pedal travel turns on the brake lights. I want the lights to go on with very little pedal travel. This will require fabricating a bracket under the floor but should be worth the effort. I'll replace the present switch with a pipe plug so leaks won't reoccur. To address the original question, I didn't need to bleed the brakes after replacing the switch. I had the switch ready to go and quickly swapped out the switches with very little loss of fluid.
-
The mercury switch comments had me going back for a second look at the photo. I also assumed there was a plunger activating contacts but instead the entire fixture appears to be spring-loaded and hinged so the pushrod tilts the fixture down as the hood closes. The mercury switch detects the tilt and opens the circuit. Clever!
-

Do Gas Tank Coatings Break Down With Age?
Sam Buchanan replied to YukonJack's topic in P15-D24 Forum
Borescope cameras are so inexpensive they can be part of anyone's tool kit. Below is the latest one I purchased to inspect the interior of aircraft airframes. This particular camera connects to your phone via wi-fi so you can view and capture video and still photos. I used a similar one to look inside the P15 tank and saw that what appeared to be alien lifeforms had taken up residence in the tank and it was too far gone to waste any time on it. The fuel sender was corroded into a solid mass. https://www.amazon.com/gp/product/B07C9C6P5D/ref=ppx_yo_dt_b_asin_title_o09_s00?ie=UTF8&psc=1 -
You need to add either (or both) a DC test light or a multimeter to your toolbox, many uses around our old cars. Ground one end of the light and use the probe to find the hot terminal. https://www.harborfreight.com/612v-circuit-tester-with-5-ft-lead-63603.html?utm_source=google&utm_medium=cpc&utm_campaign=12144811130&campaignid=12144811130&utm_content=117789286078&adsetid=117789286078&product=63603&store=3256&gclid=CjwKCAjws7WkBhBFEiwAIi16870gqGlSJagQZbKOzQjTkxN6astH4vcz9SnGfNVFuse7UoZcjXoYXRoC-A4QAvD_BwE
-
Using an oil filter? Detergent oil?
-
Impressive! Great mix of traditional and modern tech.
-
OK, so the seat is part of the fitting. Guess that's what I was thinking about when wondering if permanently attaching the fitting was a good option.
-
You're probably correct, been awhile since I've had mine apart.
-
My recall is a bit fuzzy on this but I think it is necessary to remove the brass fitting in order to access the needle valve on the B&B carb. While JB Weld is wonderful stuff and can permanently fix the threads removing the needle valve may no longer be possible.
-
I like this....clever. I suspect some of the rocker arms on my TR6 may be slightly dished, may try this next time as a reality check.
-
Remove the distributor cap and try moving the rotor laterally. Most likely you will feel some play as you move the shaft side-to-side. Worn bushings on the shaft will allow the timing to wander. Timing jumping one degree probably isn't enough to worry about, when it starts wandering several degrees it's time for a distributor rebuild.


