Sam Buchanan
-
Posts
2,561 -
Joined
-
Last visited
-
Days Won
83
Content Type
Links Directory
Profiles
Articles
Forums
Downloads
Store
Gallery
Blogs
Events
Everything posted by Sam Buchanan
-
Looks like the alternator is working fine so you have a wiring problem. You need to use a multimeter to start at the connection where you attached the alternator to the BAT lead to verify voltage then start working downstream to find an open connection. I don't know if it would make any difference but disconnect the A and F wires from the regulator. You do have a wiring diagram, right? Use it to trace the paths from the alternator to the battery verifying voltage as you go. YOu should see about 7.5v with the alternator running. I don't understand your 10v reading....how did you test the alternator??
-
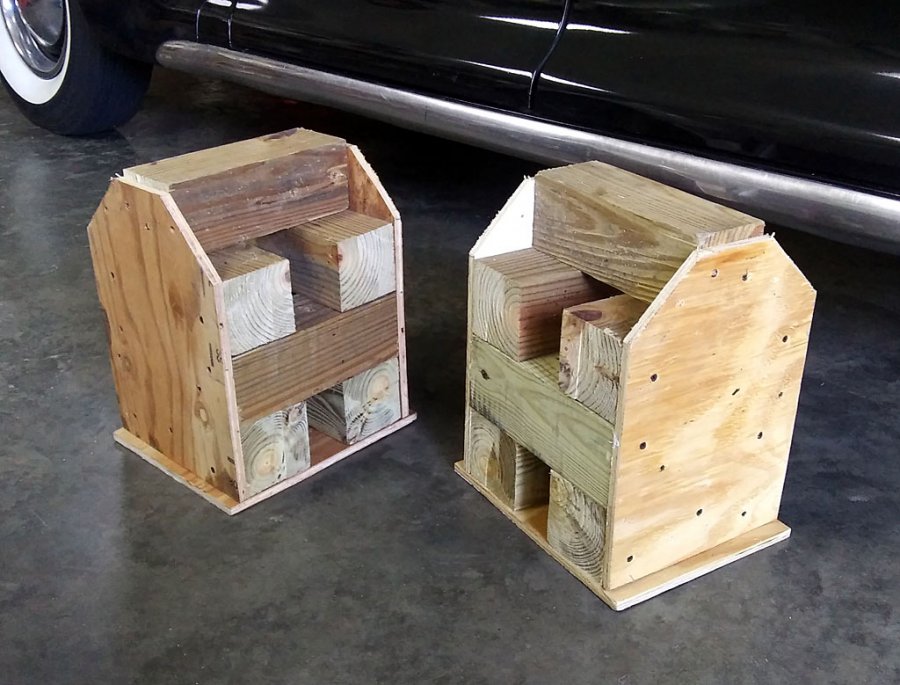
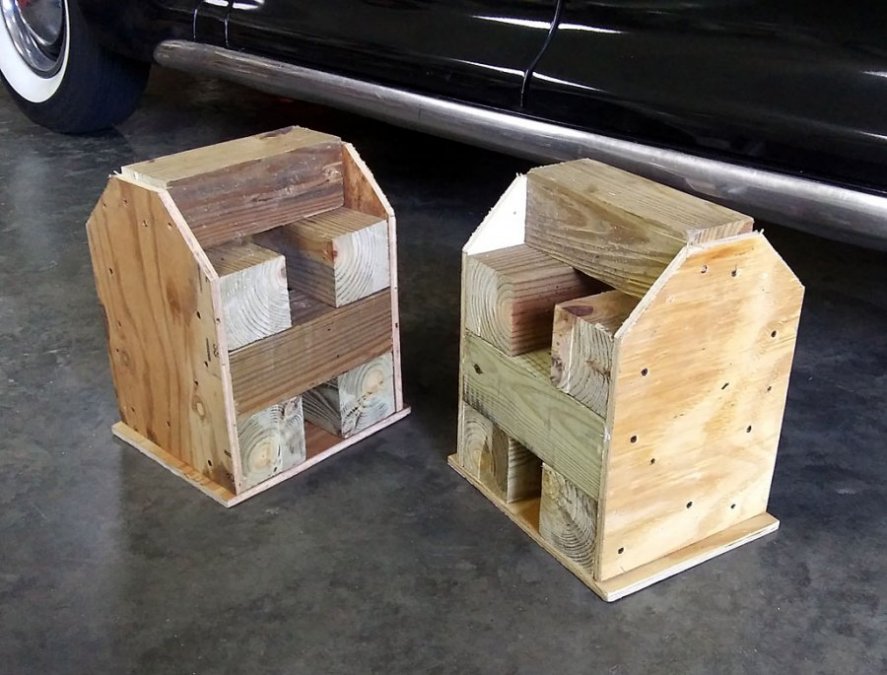
 Not a chisel, a drift.
 -
I have no reservations about sliding under the car with these stands under the frame rails. But I would set them on plywood if working on dirt.
-
Oil leak under chaincase cover on 48 DeSoto!
Sam Buchanan replied to MarcDeSoto's topic in P15-D24 Forum
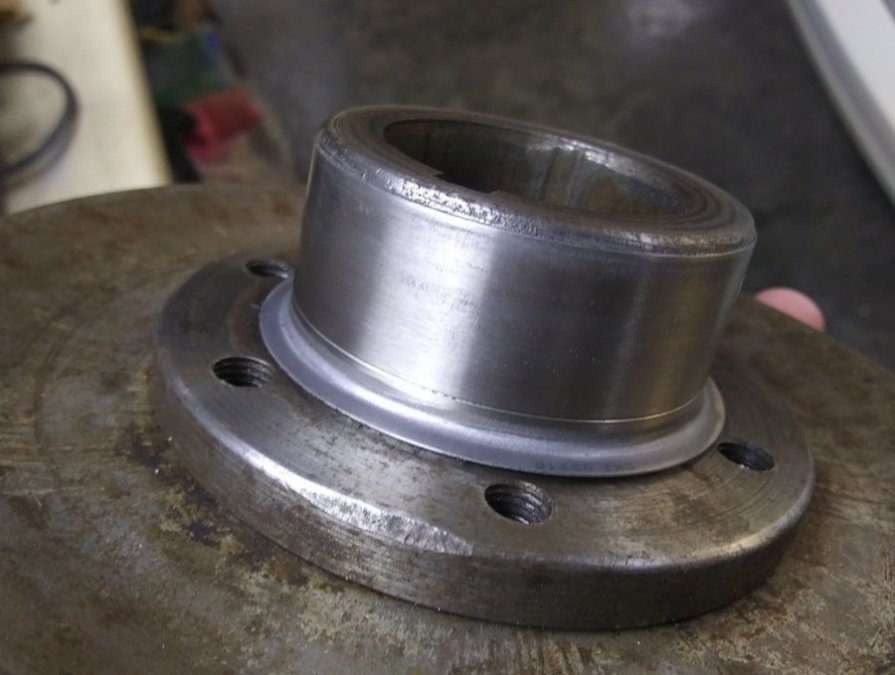
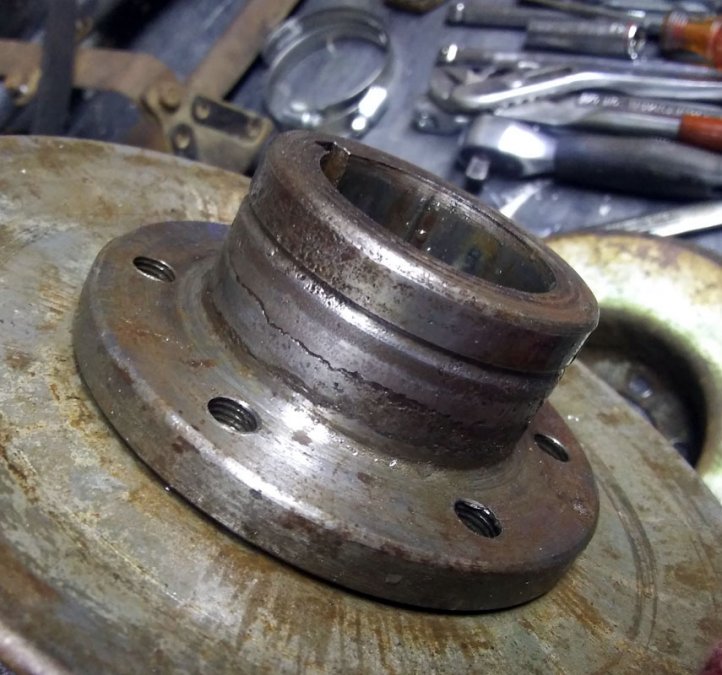
The pitiful-looking hub on my 218 (no, that isn't a crack, just surface corrosion): Installing the Speedi-Sleeve: Good to go.
-
Do any timing cover bolts connect to water jackets on 48 DeSoto?
Sam Buchanan replied to MarcDeSoto's topic in P15-D24 Forum
Yes and yes. -
Take several photos before disassembly! ?
-
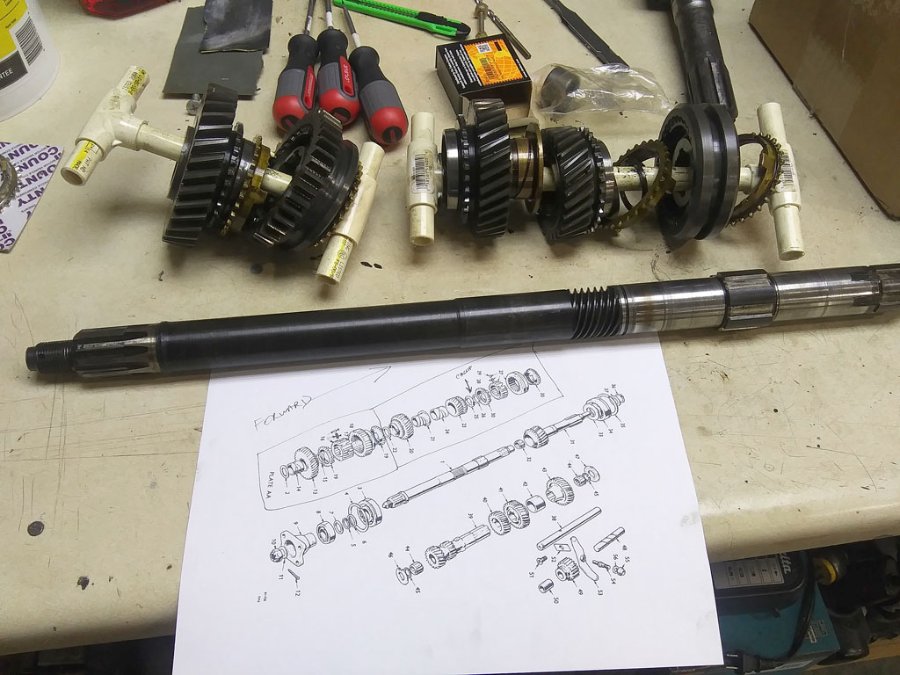
The tranny in my P15 works splendidly since going with RedLine oil so haven't had any reason to open it up. But the transmission in the Triumph TR6 was noisy so I decided to rebuild it even though I had never had an automotive trans apart. The rebuild went well and the transmission works as it should. But homework, organization and a bit of courage is necessary to take on your first transmission rebuild. Here is a method I found useful while taking apart the TR6 tranny to assist me in seeing how everything fits together...and to help with reassembly! The parts were stacked in order as they were removed and retained in order by the PVC holders. This allows careful study of the drawing while getting everything fixed in mind. Hope this helps!
-
Interesting photos. The first part you must purchase is a service manual for your car. They are available in either hard copy or digital versions, here is one vendor: https://www.rockauto.com/en/catalog/plymouth,1948,p15+deluxe,3.6l+218cid+l6,1486874,literature,repair+manual,10335 This is a trunion-type universal joint, they are repairable and parts are available but you must have the manual in order to service them. If yours are too far gone to save a new driveshaft can be built that uses modern universal joints but it will set you back a few hundred dollars.
-
That is recommended when installing leather seals.
-
It didn't appear to have any pre-treatment, I installed it as is. I suppose it could be sprayed with a repellant now with it installed.
-
1950 Chrysler Windsor Convertible Seatbelts
Sam Buchanan replied to Jim Neville's topic in P15-D24 Forum
My P15 belts came from Retro Belts: https://www.retrobelt.com/collections/lap-belts/products/aviation-style-lap-belt -
Here is the vendor that supplied the belts I put in my P15: https://www.retrobelt.com/collections/lap-belts
-
Sounds like this ammeter is wired to function as a loadmeter. Like this:

-
Cool! Wonder how late the Mopars came with leather boots? My service manual only shows the rubber ones. I just got in from a 35 mile drive and the laced boot still looks secure. P.S. Make sure you tighten that top nut.
-
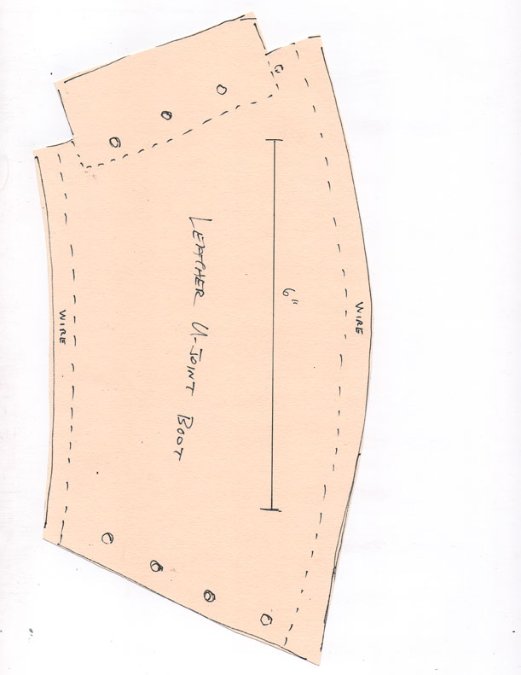
Update: Initial test runs are promising--didn't contribute to roadside litter....the boot and lacing are still intact! Here is a quick-n-dirty pattern from the boots I have for anyone who might want to play around with this option. Print this on an 8.5x11 sheet, use the reference scale for assuring proper dimensions.
-
I don't know either, just wanted to post a link to a vendor that offers curved glass, maybe what he needs is available.
-
https://www.vendio.com/stores/bobsclassicautoglass/item/plymouth-glass/1948-plymouth-sedan-curved-bac/lid=36879477
-
That is interesting, thanks for the link! Some automotive archeology going on here.
-
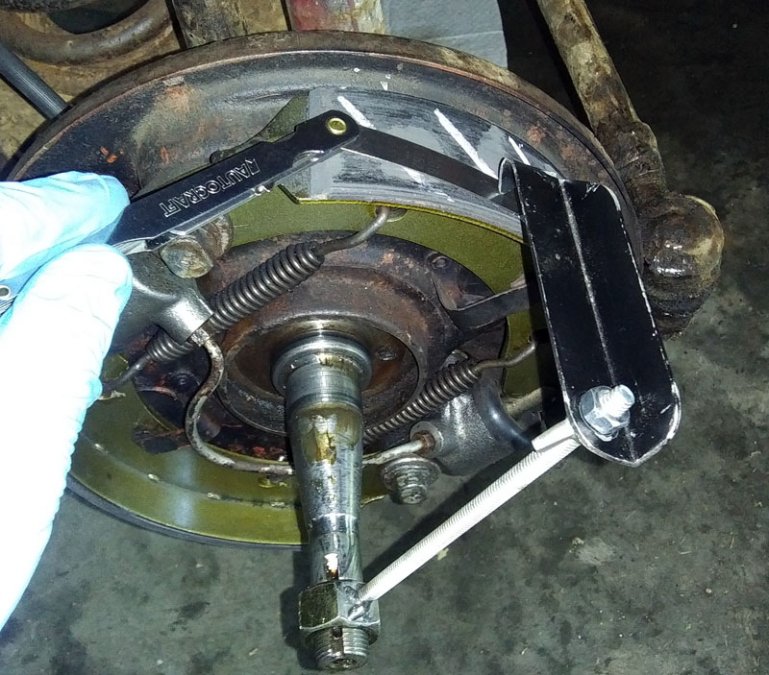
I suspect the tool you have has a poor-quality (cheap) nut with loose threads....or maybe the threads on your axles are very worn. I used a nut for a John Deere tractor, a little pricey. You might try getting another nut and lightly "double nut" the tool to firm things up so it will be useful.
-
Sounds like you got a sloppily-made copy of the original brake adjusting tool. ? https://p15-d24.com/topic/50182-brake-adjustment-tool-updated/
-
The second link I posted lists rear glass.
-
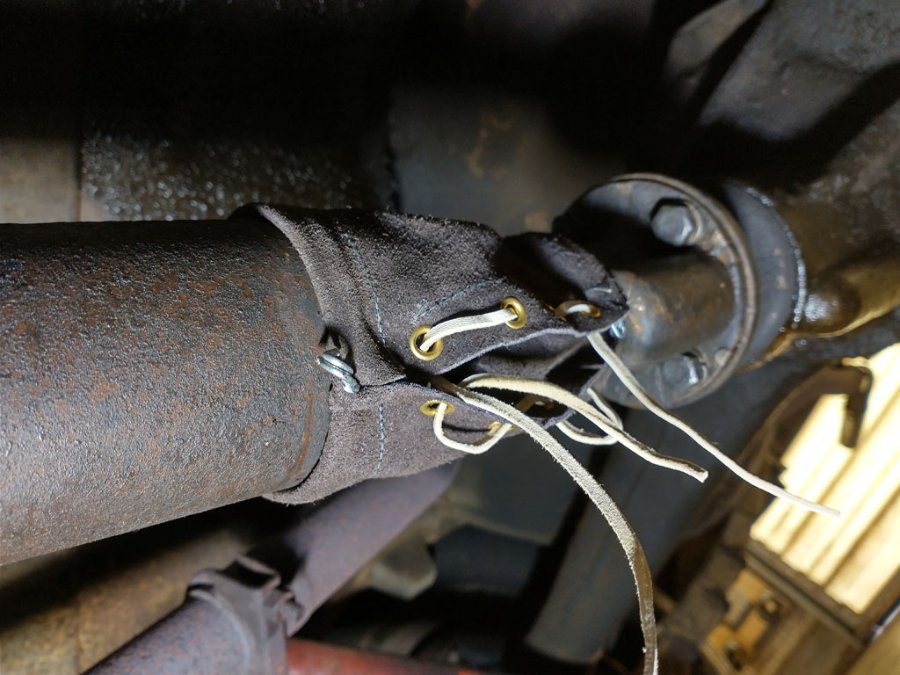
I started a new thread about installing the leather boots. https://p15-d24.com/topic/59682-installing-leather-u-joint-boots/
-
I'm definitely not Sniper but here is a doc from the Tech section of our forum: https://p15-d24.com/page/p15d24/tech/brakes.html/
-
Here are two vendors: https://www.sandersreproglass.com/ https://www.vendio.com/stores/bobsclassicautoglass/category/plymouth-glass/catId=4144656
-
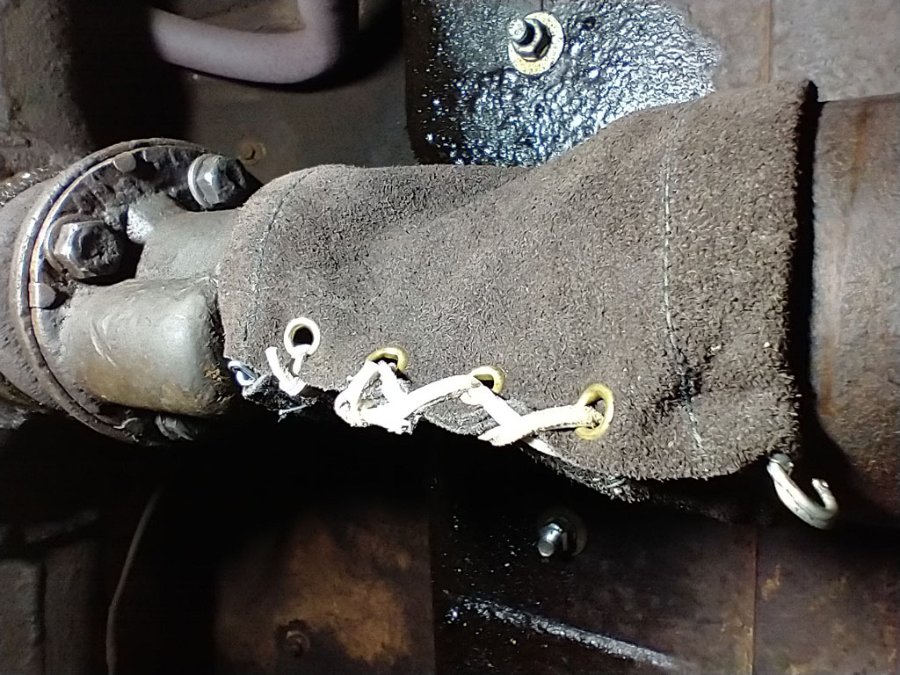
There is a wire in each end of the boot and I twisted it tightly to hold the ends in place on the drive shaft and trunion yoke. One wire was too short so I replaced it with wire I had in the shop. I had decided the boots were too large until I figured out the big end goes on the shaft instead of the smaller diameter boss where the rubber boots fit. Since I've never seen one these boots installed I was left to figure out how to lace it. Maybe one of our old-timers can chime in on the correct way to do this and I'll redo if needed. But I suspect each mechanic back in the day had his own way of lacing u-joint boots. This is what I came up with after the leather thong broke and I had to use a second piece. We'll see how this holds up with mileage, maybe this old-school tech is still effective.