


keithb7
-
Posts
3,467 -
Joined
-
Last visited
-
Days Won
193
Content Type
Links Directory
Profiles
Articles
Forums
Downloads
Store
Gallery
Blogs
Events
Everything posted by keithb7
-
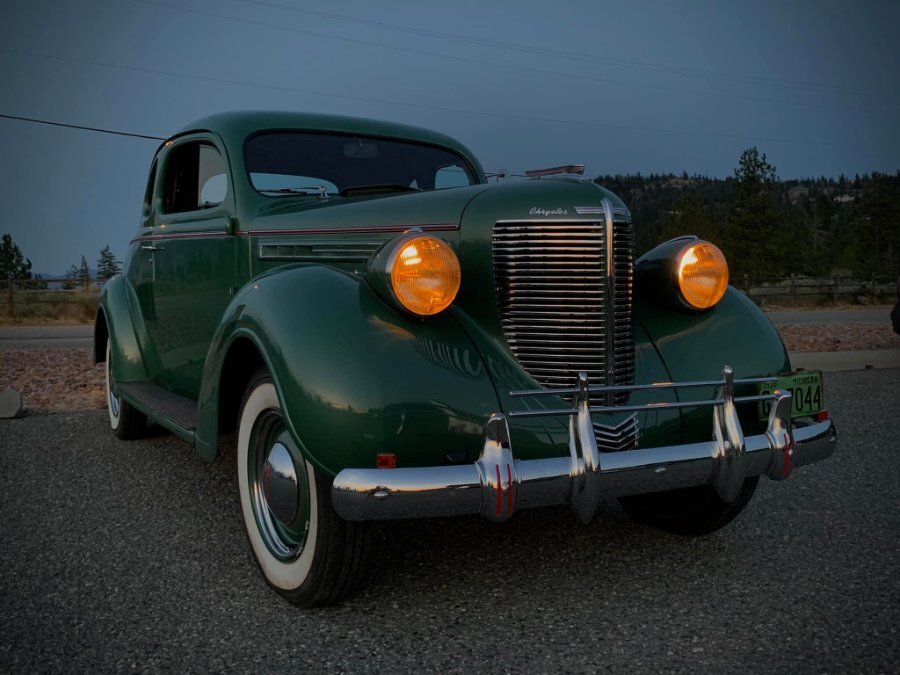
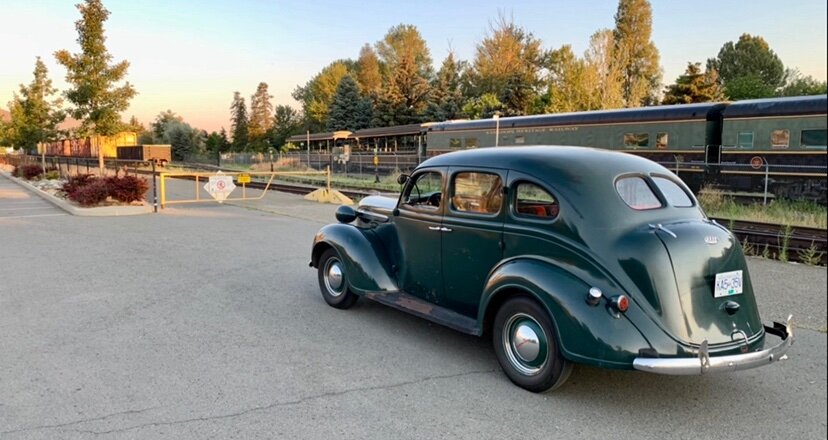
My Chrysler is running fantastic. The cylinder head swap was well worth the time investment. A couple of leaky valves were also sealed up. Best of all are the results of the carb cleaning in the ultrasonic cleaner, then rebuilt. Its running so nice and smooth now. I also checked my throttle linkage. I put a couple of bricks on the gas pedal, so it was to the floor. (engine not running of course) I then proceeded to check my throttle valve at the carb base. I still had room to open it further. I then twisted a threaded rod in the throttle linkage, making it longer. Now the throttle was opening further. All the way now, wide open. I definitely picked up more HP and torque. She's pulling harder than ever. Did I mention smooth? Very happy with the latest work I completed on this engine. A rewarding project. Tonight at dusk it cooled off enough to take this car, and make it do what it was built to do. Thanks to everyone at Chrysler Canada in 1938.
-
So many factors Lol. M-I-L not factored in. Riding solo. Non-Ethanol fuel. Oil bath filter. Stock brakes set correctly. Detergent 14W40. 25" block. No headers. Single carb. Maybe it's the lack of zinc in my oil. Lol. ?
-
@Worden18 If I could get a run at this hill starting with a good speed like you mentioned that would likely solve my issues. It's not possible as you make a LH 90 degree turn at the road at the bottom of the hill. You can't take a 90 turn at much speed in a '38 car. The road is single lane, no shoulder, with winding sharp turns. Blind turns with tall mountains on both the sides of the road. If the grade slope, and limited visibility wasn't enough to slow you down, the early car's handling surely will. At some spots I can get my speed up to 50 mph, then a steep hill with a combined sharp turn kills your speed. The flathead has HP and torque limitations. Grab a gear and push-on, keeping the revs up. I have sling-shotted and pushed the car hard enough on some turns where I am close braking tire-to-road friction. With the skinny little tires, it doesn't take much. I surely don't want to end up out of control or in the weeds. On July 1, I was on a 4 lane highway traveling at 50-55 mph up a mountainous pass. It was a hot day. I was able to maintain 50 mph and my temp, same as yours went up to about 190F-195F-ish. Of course hi-ways are designed with wide turns easily navigated at high speed. This goat trail to my house is far from that. Combine the grade of slope. Sharp turns. Lack of a run up entrance. Car's weight and handling. Limited visibility. All the other factors I mention above..I would tend to think any Moapr stock flathead cooling system will suffer a similar fate. I make a decision each time I tackle the hill. Either go as fast as I can up the hill so I get to the flat top as soon as possible. Moving as much air as I can. Staying in top gear of my manual 3 speed as much as I can. That means pushing the car to its handling limits. Putting your safety at risk. Versus drop to second, lower travel speed. Less air flow. More coolant flow. Higher engine rpms. Solid car handling & control. Safer. It takes longer to get to the top. Meaning more time for the block and head to really soak up all that heat. So far, either option is not producing improved cooling results. Anyone wants to try this exercise, you get a free night here in a spare room. Lol. Come on up to Kamloops with your stock flathead! ?
-
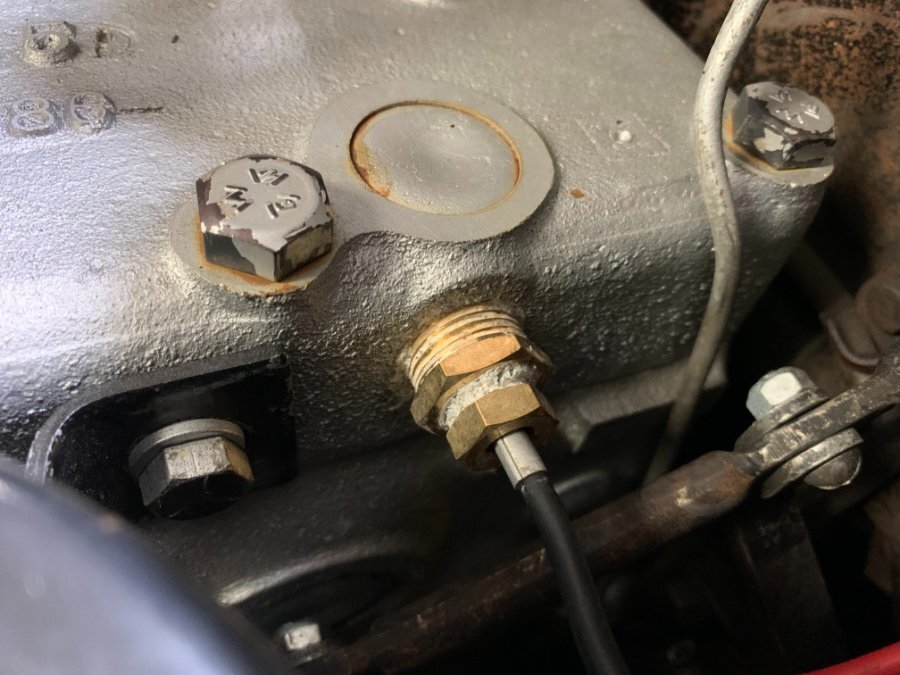
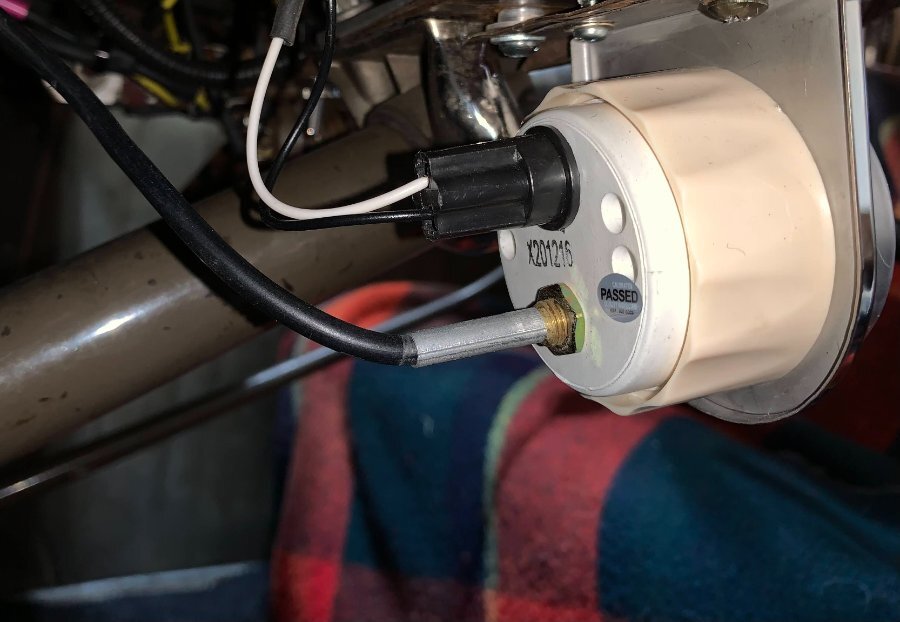
The mechanical temperature gauge that I found appears to work just like the stock one. There is ether gas in the bulb and tube. The new gauge included a couple of different sized gland nuts that thread into the cylinder head port. One gland nut was a perfect fit. I put some Permatex High Performance Pipe Sealant on the threads of the gland nut and the bulb thread and tightened everything up. For my car, there was is nothing difficult about installing this gauge. The gauge utilizes a 12V bulb. My '38 Plymouth has a 6V to 12V converter for my USB charger. Its tucked up behind the glove box at the A-pillar. I tied-in the 12V light into there. The 12V converter is tied-in to a circuit that is controlled by the ignition key switch. The fuel gauge circuit. As soon as I turn on the key, the fuel gauge functions, so the 12V converter and the temperature gauge lamp cycles-on then too. The sensor wire length from the head to the gauge is generous. I rolled it up loosely and zip stripped it up behind the dash. Don't compress it tight and clamp it down tight. You will likely damage the tube and impede ether gas pressure, distorting gauge accuracy, or completely puncture the tube allowing the ether to escape. Then you need another new replacement gauge kit. The Equus gage is low priced and seems to work quite accurately. It does not come with the chrome gauge mounting plate. I bought it separately. It easily mounted to the bottom edge of the dash. Sure 2 new holes were drilled but not easily seen. Easily removed again if wanted.
-
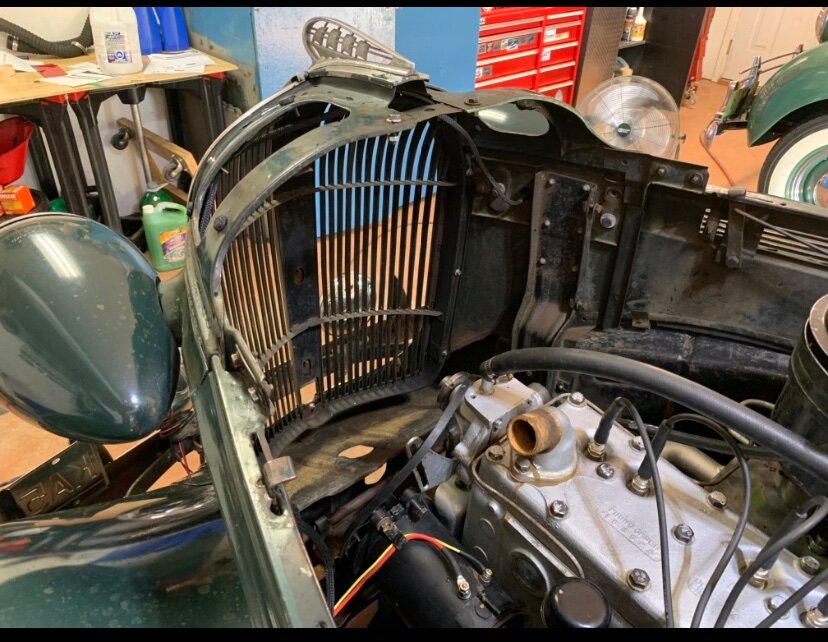
Staying out of the sun today, I got bored so I pulled to rad to consider shroud options. My garage at least offered shade.
-
Not a bad suggestion Ken, but 2nd gear has been tried as well. To no improvement. Higher RPMS, and no better cooling was offered. I don't lug my engine. All the factors add up it seems: Long steep hill up to 11% grade 80F-105F summer weather New re-cored 2-row rad Clean rad fins Clean, good condition stock 4 blade fan No airflow obstructions 4 blade belt driven fan 7 psi rad cap 50/50 glycol & water Sparkling clean brass water distribution Tube Block removed, hot tanked. Like new inside. Engine rebuilt New Water pump New Hoses New Belt New Thermostat Various ignition timing trials, no improvement No engine lugging It's just dang hot and the engine is working hard. My current cooling system cannot expel BTUs as fast as the engine makes them, under my summer conditions. On a hot summer day, if I want to drive my car after 9am and before mid-night, something in the cooling system has to be improved. Wetter water is an options but it still gets hot. Just won't boil over. A larger diameter fan pulley would likely help. A new 3 core rad and an electric fan would help. A full shroud would surely help. I am not against trying these, but a 6V electric fan I am skeptical about. 12V would do much better, yet I am not convinced I want to convert my 6V stock system. A 6V alternator could likely drive a 6V fan easily. Yet as @Sniper mentions, nobody seems to readily share 6V fan air flow specs. They just want to sell you a fan! It's all over in about another month. The summer heat gone. Then I'll be begging for a reduction in airflow and and hotter thermostat.
-
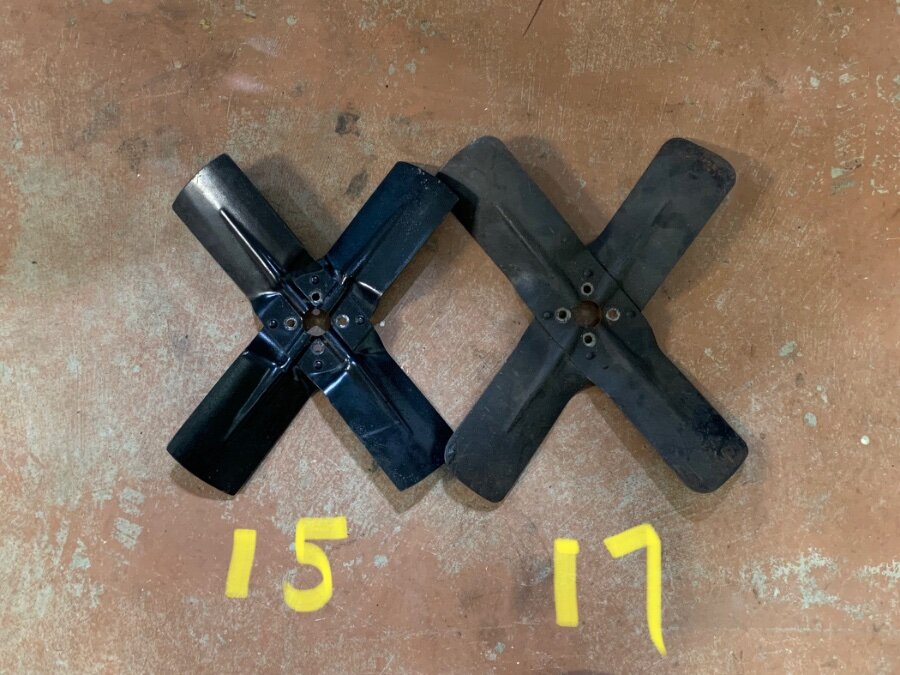
I discovered something today. New to me so I thought I’d share. My ‘38 Plymouth had a 15” diameter fan. I noticed a spare fan in my parts pile. 17” diameter. Then I measured my ‘38 Chrysler fan. It’s 18”. I did not stop to ponder various mopar fan diameters. I just installed the 17” in my Plymouth. I performed a simple before and after airflow test. A piece of paper on the front side of the rad. Engine at idle. The 17 is definitely pulling more air. Especially out at the further edges of the rad. Its about 95F here now. Went for a big hill climb test. No better. She cannot keep cool in these ambient temps while climbing slow up the steep winding road.
-
If you do some research you'll see the same Gemmer made steering gear boxes were used also in old Ford cars. The Ford aftermarket is huge compared to old Mopars. I studied the Ford parts and found precisely the same parts were used in my old Plymouth gear box. I bought them out of California. Warning, stay away from "The Early Ford Store". The owner with a great reputation passed away and incompetence has taken over. I cannot seem to recall exactly which business I bought the parts from. Initially I did reach out to Argentina. They did respond with good service. However I did source good quality replacement parts in the USA. All parts but 1 were an exact fit. The cover gasket needed a little cut with a hole punch. 1 bolt hole elongated slightly to fit. No leaks and like new steering again!
-
Great to see you figuring this out. We've all been there and have fond memories of completing similar tasks. I suppose the memories are embellished for many of us as the end reward was so satisfying. That's a nice new looking engine hoist. Aside from the color, the design and parts look identical to mine. Not there to see your job, but wondering...Could you just hoist the engine up high. Choke-up any lifting chains. Lower your truck's tail gate and back right under the slung engine? Lower your engine onto some staged wood blocks. Then ratchet strap it down to the 4 corner tie-downs in your truck box? Might be easier than trying to push/pull the hoist with engine on it up the sloped ramp. A cheap ratchet come-a-long would earns it's keep here if you are alone.
-

What are these brass plugs on the left side of the block?
keithb7 replied to MarcDeSoto's topic in P15-D24 Forum
Just confirming that you are not planning to tap any ⅛ pipe threads in the main oil pressure gallery. Its too late for that in my opinion. You do those threads before the block gets hot tanked. You cannot afford to risk metal, dirt and rust entry into the oil gallery. That would be very bad.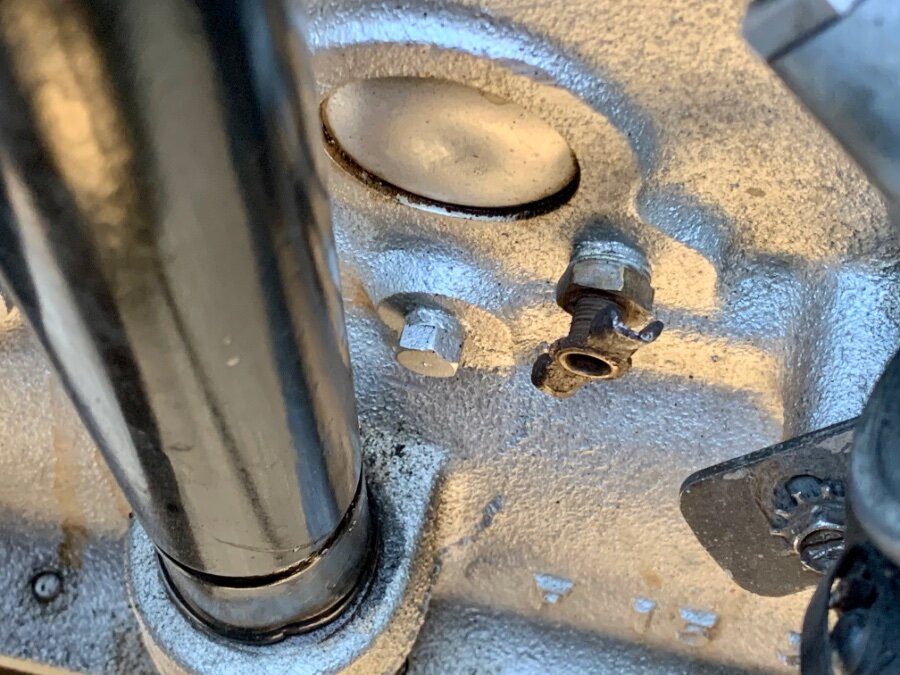
-
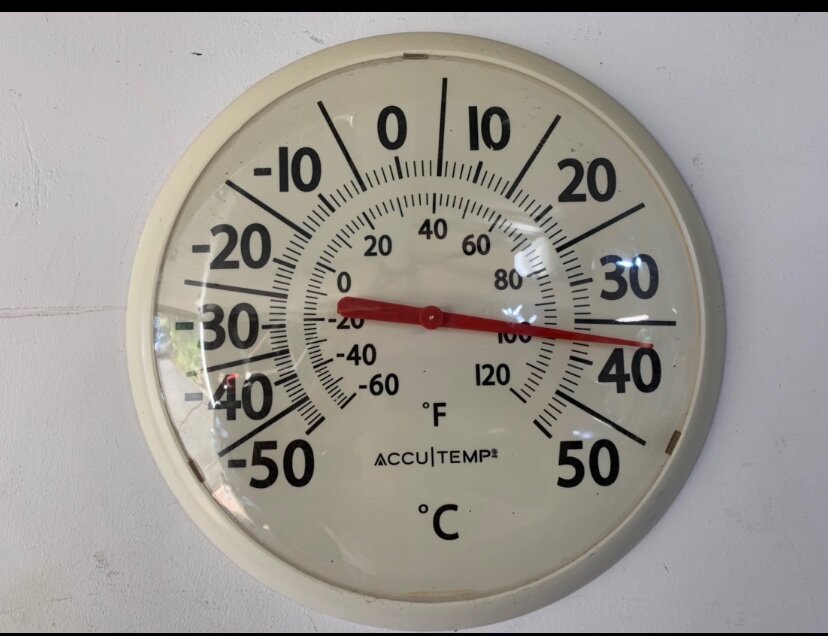
Its been so hot in this mountainous area, I’ve been driving my Mopars very little. We have been seeing 100F for the past week. The big hill home packs a punch to the cooling systems on both of my cars. This morning I got up before the sun to hit the roads and grab a coffee. Nice and cool, about 72F. I’ve missed enjoying them. I wish I could say say the cars have benefited by maximizing my time in the garage. Not so. The garage hits 100 each day as well. Small projects have me leaking worse than an old radiator. Next week we are expecting a cooling period. Very quiet out here this morning. Nice. Very nice.
-
What are these brass plugs on the left side of the block?
keithb7 replied to MarcDeSoto's topic in P15-D24 Forum
When I have to go the store to buy brass fittings or plugs I always buy extra and store them in my storage containers. Inverted flare, pipe, 90 deg, straight etc. Lots of them in our old Mopars. -
How do you put an initial timing on a newly rebuilt flathead six?
keithb7 replied to MarcDeSoto's topic in P15-D24 Forum
Hook up oil pressure gauge. Remove coil wire at distributor so engine cannot start. Crank over engine and watch oil pressure gauge. You should build pressure while cranking. Do not start engine unless you have oil pressure. No pressure? Remove and prime oil pump and repeat process. -
@Happy 46Rafter a decent, thorough engine rebuild up here in Canada, I ended up at about $5,300 Canadian. Doing all the labor myself except machining. All New pistons & rings new cam & all tappets new timing gears and chain All new valves new mains, rod and cam bearings piston pins & bushings, c-clips all new seals and gaskets Rebuilt generator bored cylinders over crank mains .010 under. Rods .001 polish valve grind & lap Head milled & new head bolts block & head hot tanked & crack checked Con-rods tested & re-used new oil pump speedi-sleeve front crank seal area Parts were ordered and in-hand by March 2020 I think it was. (the pandemic period is a bit blurred). I’m sure parts prices are up considerably since then. The above price included about $400 in extortion fees. (the border crossing mafia collectors)
-
I have used fel-pro head gaskets. Several times. In my 53 Chrysler, 38 Plymouth and 38 Chrysler. I have no complaints. They work well. I do like to coat them with Permatex copper spray.

-
If you own and plan to maintain the old Mopar I recommend you consider acquiring a Mity-Vac evacuation pump system. Works awesome for: Cleaning out oil filter housing Priming fuel lines. Bleeding brakes evacuating master cylinder Sucking oil out of diff housing fill plug. So you don’t disturb gasket. Sucking out tranny oil cleanly if wanted. And many more uses! Love mine and use it on all cars. Not just old mopars. A great investment.
-
As a spare engine, you’ve got a lot to work with there. Plenty of good spare parts. Carb, manifolds, generator, distributor, starter and lots more. I’ve salvaged many a part from my spare engine. Spare parts really save you a lot of time and money. Just recently I needed a cylinder head. I had one. Imagine the potential freight costs on that hunk of metal.
-
This is the story of a very dedicated flathead-era Mopar enthusiast. Bryan, nobody can you aren't motivated. Over here I am trying to decide if it's worth my time to drive 3 hours each way in an air conditioned modern truck, to pick up a Mopar engine for under $100. Then go for a leisurely swim in the very warm Osoyoos lake while I am there. Stop at a few fruit stands. Grab an ice creme cone. Maybe have the meatloaf & mashed potatoes dinner at the "Home Restaurant" on the trip back home. You're making me feel a little guilty over here. Maybe as a reward for your hard work, I'll buy an extra ice creme cone for you, and eat it on your behalf. To help keep you motived here's the lake where the engine is .?

-
I find the old style skimny bias tires at low 20’s psi tend to fight me on the twisties. I up’d the pressure to 30 psi. She does follow the road seams like a trout up a stream. But I am ok with that. I push her pretty hard up a twisty road home. So 30 psi it is for me.
-
Yes, although synthetic has higher qualities under extreme heat or cold, it may come with other unexpected qualities. I have experienced additional oil leaks and more oil entry into the cylinders (burning oil) when using synthetic oil in other older vehicles. I see no reason to run it in a flathead engine. I run a thicker detergent oil for the dog days of summer. The typical flathead engine is a far cry from high performance and extremely tight tolerances. Non-synthetic oil will be just fine if oil changes are done at regular planned intervals when using a vintage car for typical driving. If I were going to the Arctic in January, or the equator area in June towing a trailer, I'd certainly consider running synthetic oil under those conditions.
-
I had no success with the grease idea. I even cut a groove in a perfect sized bolt, to hold an o-ring. To seal in more grease when I pounded it with a hammer. No go. I bought at $20 puller. It fit in there with the bell housing still in place. Easy peasy with the $20 tool.
-
Thanks for joining in @Desert Rat. That's a great car. That is the first time I have seen a photo of a coupe's back seat. Mine does not have a back seat. My spare tire is back there. Also a storage shelf.
-
I just researched this. The 251 25” head combustion chamber holds 100 ml of oil. The 218 (Canadian) 25” head holds 85 ml of oil. 15% smaller. The 218 head is going on the 251 engine this week! 15% more compression? Not quite. 15% more heat to disperse? Likely. FYI the waterpump comes off to check water distribution tube.
-
New head gasket. New Thermostat housing gasket. Little water neck 90 gasket. Drain and save coolant for reuse. Break a head bolt. Damage mechanical temperature gauge bulb upon removal. Ether is now gone. DOA. Next, you end up getting in there and testing valve seat seal-ability. New Intake manifold gaskets. New Exhaust manifold gaskets. New Carb mounting gaskets. Then the valve lap ensues. Followed by a complete carb disassembly and ultrasonic soak. Full new carb kit and reassembly. But hey, that’s just what happens to me when I try to upgrade to the cooler looking “Spitfire Head”.
-
Well another $2k in this engine will get you started. ?


