Leaderboard
Popular Content
Showing content with the highest reputation on 11/22/2024 in all areas
-
I have done most of my work through the years under a car port or in the drive way. I was glad when I had the car port. At 71 it was time to do something about that. The walls started going up yesterday and I didn't sleep much last night - kept thinking about all the projects I'm going to do in the new space. More news latter4 points
-
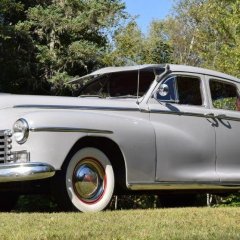
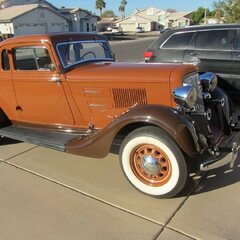
It took awhile 50 years to be exact but my dream has finally been realized , fat fenders and running boards !! All went well, sales transaction, (private party) title transfer and registration with the 1934 vintage stamped from copper license plate, any way I am very impressed with a few things 1. how quickly and easily it fires up , I was a bit skeptical of the 6 volt system 2. how well it rides and steers even with the bias ply tires. 3. how smoothly and quietly that flat head runs, it actually rides better and quieter than my 56 Olds. I named her Fannie Mae . If your from the Midwest and love chocolate you may recognize Fannie Mae as the big chocolate company from Chicago. she reminds me of a big box of assorted chocolates and caramels , this color combo may not be everybody's cup of tea but it works for me and turns a few heads. I've heard some people say it doesn't show up on Plymouth color charts some say it is a factory color carrotine # 4 I think also referred to as the burnt cars ? I'm sure you here would know better than me I'm a pre-war Plym newbie !! I'm learning more daily and as I dive in hope to learn more, I'm not sure what's 100% original to the car and what's not (I'm not a stickler for that) I hope to lean on you guys as I try to learn. here's a few pic's of Fannie.2 points
-
2 points
-
I wasn't certain I would do a build thread here until I saw Loren's recent post on Resto-Mods which more or less paved the way. We'll see just how far that grace extends! I have had this car for just over one year determining my direction before finishing my last project (situation normal per my wife). I think having something hanging around the shop and mulling possibilities helps it evolve into a fun project. My last project was a 1961 Volvo PV544 which sat out the required year while I determined its fate. It did not have the stock engine in it, but it was a sound car. I decided to go to the next wave of hot rodding - Electric conversion. Now mind you, I did not do this for green reasons, although that is a nice by-product. I did it for the performance I could get. Approx. twice the horsepower and torque of the original power plant. Let's just say it is quite spunky! I have always liked the business coupes from all the auto makers, so when a Plymouth showed up locally I snagged it. My first impression was the proportioning was perfect for another EV conversion. While finishing up the Volvo, I became aware that I could save a ton of money if I did a swap, rather than from scratch. I did a search for rear wheel drive and learned of someone in Ireland who had reverse engineered the gas engine out of the Lexus hybrid model. In other words, toss the gas engine, buy his $350 circuit board and you could run just the electric part of it. HOWEVER...that would lose the chance at a full 340 HP. So I decided to look for a complete donor vehicle. I totally lucked out at my first salvage auction, getting a running/driving 2007 Lexus GS450H (hybrid). I really didn't know what I got until it arrived at my doorstep on a car hauler. I was amazed it was a totally function vehicle! Just a little smooshed. I have been driving it on our rural roads and really want to transplant as many of its features as possible. Including the 0-60 in 5.2sec take-off. (The Lexus weighs in at 4,134 lb vs the P20 at 3,068 lb) Even by adding for the batteries, I think the final car will be less weight than the Lexus total. I finally got the Lexus on the lift today to check dimensions of various components, including IRS, and it appears it is all doable. I like to keep my builds as reversible as possible, so minimal cutting and chopping are envisioned. The V-6 should slip into the narrow frame at the engine bay from what I can see. Wheel bases are within 1.2" while track will be just inside the fenders. The Lexus uses the same wheel bolt pattern as the Plymouth, so the custom wheels are also in play. Let the fun begin! (Although I have a couple repairs required before rearranging my shop to get both vehicles adjacent to each other.) I think the first order of business will be to strip each vehicle down to determine where everything will go. This could take awhile... John1 point
-
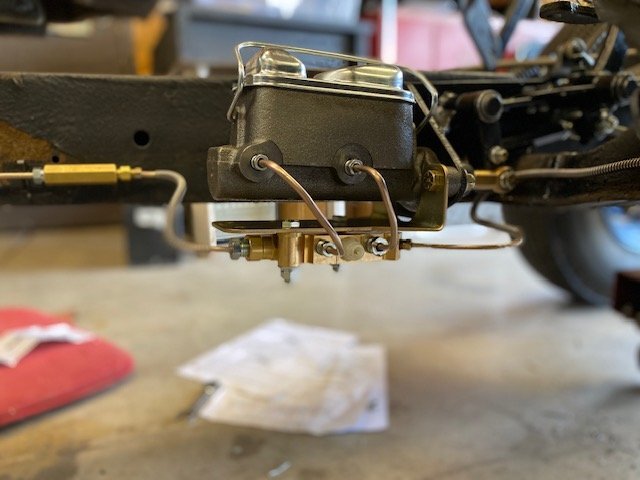
I'm moving right along on my '52 Suburban build. This week I finished upgrading the brakes to a dual master cylinder from ECI Hotrod Brakes and Brackets. It's very well made and I had no trouble fitting it to my existing underfloor brake pedal. The instructions were good, and the only thing I had to buy extra was a bracket off eBay, to hold the combination valve below the master cylinder. I tried to re-use all the original clutch parts that I could, but needed to add a bit of metal to the clutch pull back spring arm as it was wallowed out, and install new clevis pins. My wife donated her old tan purse for the clutch fork seal. I saved some $ by using the P15D24 Forum template and made one myself, as AB and others are all out of stock. Next-steering column fun! ECIChrysler.mov1 point
-
1 point
-
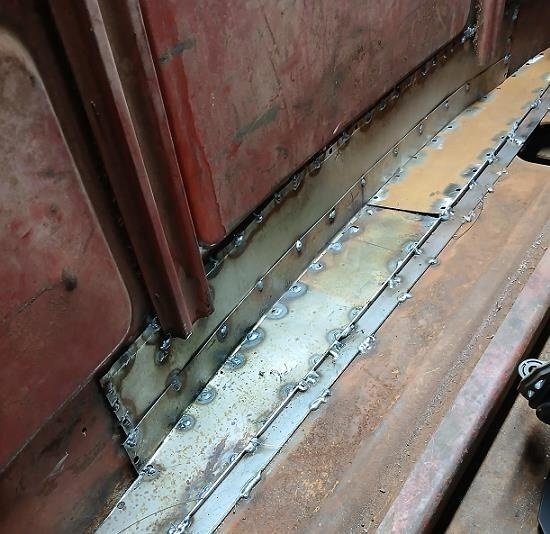
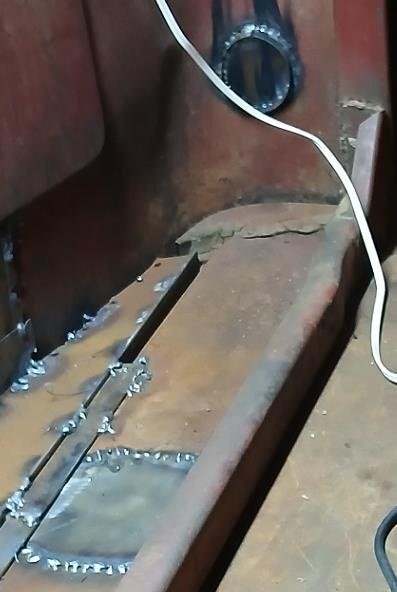
Been busy and working late and to tired to post. Exhaust is in, back of cab and floor are welded up, primed and seam sealed. holes where gas filler went through the cab and where it went through the floor are welded up, ground down and seam sealed. Bed mounts are made but not installed. Pilot bushing is replaced and clutch install is next week. Today is wiring up the brake, tail, turn signal and license light along with gas tank sending unit wire. Ray j.1 point
-
'33 was 189.8 or more colloquially, a 190. They stroked it to 201 in 1934. Then in 1935 they widened the block to fit the water distribution tube and made the water jackets full length. Bearings, pistons, etc. are the same for the '33, '34, and later 201 engines. All gaskets, etc. are the same for all those years except the head gasket which is a bit more narrow for '33 and '34. Crank and rods are different between '33 and the rest though you could drop a 201 crank and rods into a '33 to make it basically the same as a '34.1 point
-
Thanks Gents !! I wish I could take credit for its restoration but I cant. I am the benefactor of somebody else's hard work. All I can do is claim to be the caretaker for the next generation. I do have one complete restoration under my belt (1964 BelAir ) and partial on a 56 Olds but my increasing age and health necessitated purchase of a 98% completed veh. Ill find enough maint. to keep me busy.1 point
-
1 point
-
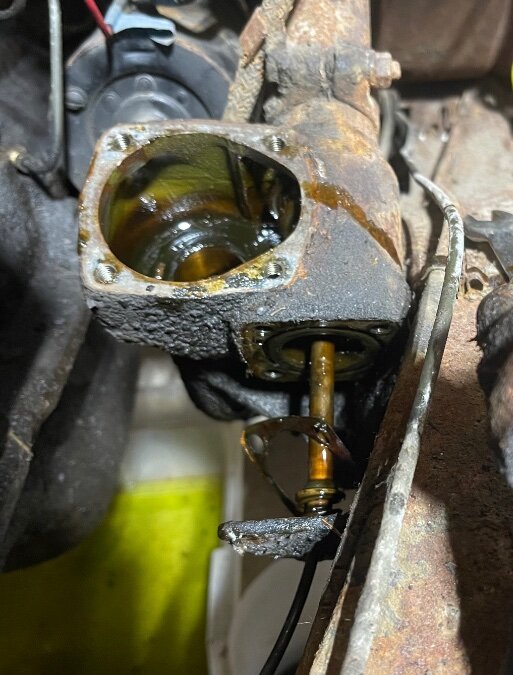
Thanks! I started off by cleaning out the back of the gauge, then tested it with air. It was right on the money. Reassembled it and ran the motor and the pressure looks good now. It's actually showing slightly higher pressure than before across the board. I think the relief valve was stuck in place, it took a bit of wiggling and turning it inside the get it out. Cleaned up that assembly and replaced it was as well (without the nut). Always pleased when the simple solution in the correct one. I'll sure be watching the pressure closely as I continue to wake the truck up.1 point
-
I'm so jealous of you guys, with your large multi-bay service barns, equipped with lift, compressed air, and professional welding and machine shop equipment, not to mention LED lighting, while I get by with an extra stall in my 3-car garage. But I get by. "I cried because I had no shoes. then I saw a man who had no feet." {Wise-ass retort: "So I took his shoes.")1 point
-
Mine was actually too far gone to repair (extreme wear on the gear teeth) so I had Lares rebuild it with NOS parts. Not cheap,($600+) but perfect now. Earl Wells is the Shop Mgr and is great to work with.1 point
-
I bought a rebuild kit for mine ,never used it a member of our group suggested I just put in synthetic grease and see if that helped . so I did it dosen't leak and works fine.1 point
-
Ditto Loren's and Doug&Deb's post. Rebuild kits are available, I got mine from Andy Bernbaum. It is not difficult, and if you are adept enough to get the steering box out, you should have no trouble fixing it if you so choose. Mine needed a complete rebuild - hardest part for me was getting the old bearing races out simply because I didn't have the right tools. If yours is just leaking, you may only need the seal and perhaps the sector shaft bushing. I can't give any better a run-down than Loren does. As Doug&Deb notes, getting it out of the car first can be a little challenging if you can't get the front end high enough off the ground. I had to use extra blocks on my jack and jack stands to get it high enough, if you've got access to a lift, that would make it so much easier.1 point
-
Not sure how relevant this is, but KeithB has some good posts his made when he redid his box.1 point
-
I replaced the seal on my 49's steering box as it was leaking badly. The seal is at the bottom of the box and that means if it's bad anything you put in there will leak. NAPA still has the listing for the seal. Here's how I did it. 1) take the pitman arm off the bottom of the sector. There's no need to remove the tie rods, but the car needs to be on reliable jack stands. 2) remove the lock cap from the top of the sector adjustment screw. ( do not mess with the adjustment! ) remove the top plate's bolts. Now mark the position of the slot in the sector adjustment screw on the top plate. If you push up on the sector the plate comes with it. The sector adjustment screw has a plate that slide into a slot in the top of the sector. Now this is tricky, you need to screw the adjustment in one turn in order to clear the housing to remove the top plate, when you push the sector up. ( the dimple in the top plate prevents it from coming off, so you have to turn the adjustment one turn ) 3) with the top plate off you can slide the sector completely out. This is where you want to inspect his for damage and extreme wear. If it looks reasonable replace the seal. 4) here's the key to the whole job. Grab ahold of the steering wheel and see if you can feel any play. Sometimes you can't but if the steering wheel turns super easy the bearings may have some wear. To get the play out of the tapered roller bearings on the worm gear/steering shaft, there are gasket/shims under the end plate. They come in various thicknesses and you will want to remove at least one. On my 49 I couldn't remove the end plate as it hits the frame but I could slide the end plate down a little to select the gasket I needed to remove. ( the tube that runs up the middle of the plate is for the horn wire and it doubles as a breather ) 5) put the bolts back in the end plate and check how the steering wheel feels. If it's tight you took up too much clearance and you'll need to add a thin gasket. If it's still loose try another thick gasket. I have found there's more play to be removed from the steering in this bearing than there is in the sector adjustment. In fact I try not to disturb the factory adjustment. They knew what they were doing. 6) Set the steering wheel at center and drop the sector in, slide the top plate into the sector and once in place turn the adjustment back one full turn. Now you can put the bolts in the top plate and add the oil. Put the pitman arm back on and check the steering. If you can't help yourself screw the adjustment in ONE notch and lock it in place with the cap. 7) road test. If all is well you're golden! In my humble opinion it's easier to try to fit the steering box than it is to replace it. The problem is usually in the preload of the tapered roller bearings. However there is always the possibility that it's too far gone.1 point
-
Rebuild kits are available and it’s not a bad job. Removing it sucks unfortunately. The shaft goes from the box to the steering wheel. You have to get the front end high enough to pull the whole thing out from the bottom. Now would also be a good time to check all the tie rods. I’ve done this and I’m the worst mechanic I know lol.1 point
-
I also spent some time getting familiar with wheels with oval valve stem holes. I took the original wheels to Discount Tire to replace the old tube tires with tubeless, and they used standard round rubber valve stems. One of the tires would only hold air for half a day, so I took it back, and they concluded that the valve stem hole in the wheel had "wallered" or rusted into an oval shape, and that the wheel would no longer work. I looked at the wheel when I got it back, and the valve hole definitely looked purposefully oval, so I took it to a mom & pop tire shop, and fortunately he knew about these types of wheels and had an oval valve adapter that could be used to seal a tubeless valve. The other three tires are holding air with the round base valve stems, but I ordered some of these to have on hand and am tempted to have them swapped in preemptively: https://ts-warehouse.com/products/tr501ov-1-1-2-brass-clamp-in-oval-tubeless-tire-truck-valve-stem-pack-of-4 Also available on eBay: https://www.ebay.com/itm/383164156541 You learn something new every day with these amazing machines... 😊1 point
-
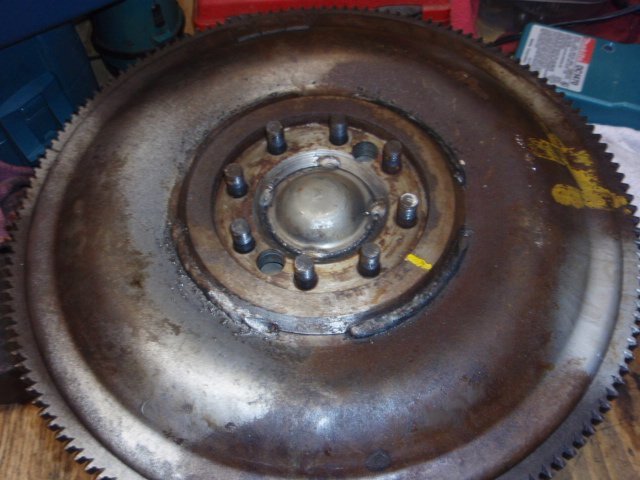
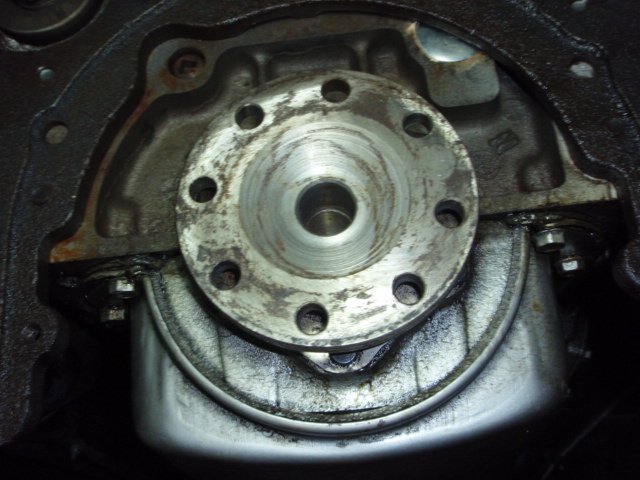
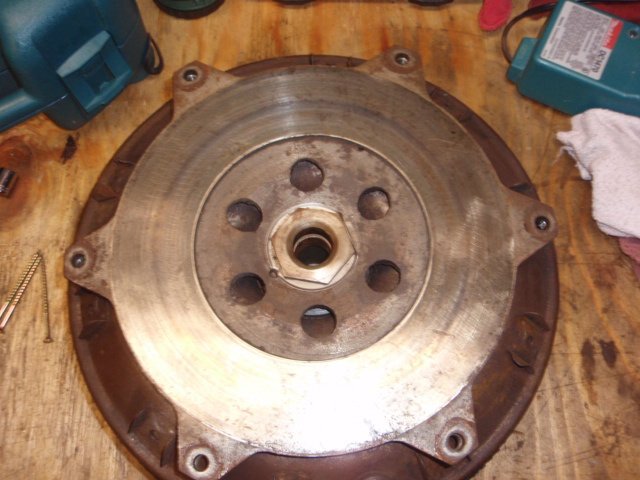
@Bobacuda It's interesting that your FD only has 4 studs. Upon a closer look it appears that someone cut off the other 4. Someone must have installed it on a 4 hole crank at one time. The crank flange for FD should have 8 holes. I believe the 8 hole flanges are also thicker. Although, with another look I see that yours has 4 holes whereas mine only has 2... interesting... And as Bobacuda showed, the driven plate, AKA Clutch "flywheel" surface.1 point
-
Early last spring, I compared the chamber volumes on three heads I had. The head numbers are listed by the blocks they were removed from and may not be correct for the blocks. Average chamber volumes were: P2 head no. 632955-2 89.5 cc P19 head no. 1311810-5 89.2 cc D30 head no. 1120804-2 95.5 cc D42 head no. 1326386-1 96.7 cc The P19 and D32 heads had a different chamber shape - the chamber fit much closer to the exhaust valve and required a head gasket that fit accordingly. I just checked a late 50's head no. 1676337-2 that I found two weeks ago. This is the 230 head with a nominal 8 to1 compression ratio. It's chamber volume averaged 75.4 cc. From this limited information, it does appear that the 230 heads have a greater chamber volume than the 218's, although the late 50's head seems to provide a small increase in compression if used on a 218. I also cc'd a used (compressed) universal copper head gasket and a used Fitzgerald 0587 head gasket that properly conformed to the P19 and D42 chambers. The copper gasket gave away an additional 4cc to the Fitzgerald so this seems to be critical when computing compression ratios. If anyone is interested, I can post pictures of the different chamber shapes and gaskets.1 point
-
My engine is a mix match now. I have a 1949 Dodge 230 block with a 1955 Plymouth crank, 1955 Plymouth head and a 1952 OD transmission. So much for original P15...LOL!1 point



.jpg.5a7238df2dcc11d50216046f38e6543a.jpg)

