John Reddie Posted January 2, 2020 Report Posted January 2, 2020 Moose, great fab work. Keep your progress photos coming. Happy New Year. John R 1 Quote
moose Posted January 3, 2020 Author Report Posted January 3, 2020 Here's more updates. Yesterday I did more finish welding and grinding on the passenger side. Today I started digging into the drivers side. While not as bad, it's still pretty bad. Planning on building a new plate to go beneath the kick panel, then I can mount the body back to the frame and do the rockers. I've already pulled the master cylinder out, and will replace brake and fuel lines while most of the floor is out. New master is ordered. Need to get tube and fittings, then I can start bending and flaring. Quote
Cannuck Posted January 3, 2020 Report Posted January 3, 2020 Love your posts the step by step reminds me of the restoration of my car in the 80s. I looked up the 54s love the looks of the hardtops . Quote
Plymouthy Adams Posted January 3, 2020 Report Posted January 3, 2020 1 hour ago, Cannuck said: Love your posts the step by step reminds me of the restoration of my car in the 80s. I looked up the 54s love the looks of the hardtops . careful, those 54's will suck you in like the preverbal black hole in space....I bought one only because it was low mileage two door and automatic, it had never been dinked with....figured for the money I could not go wrong...that car really grew on me.... Quote
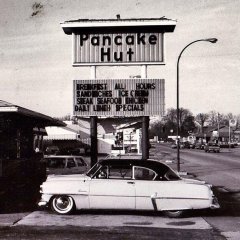
moose Posted January 4, 2020 Author Report Posted January 4, 2020 (edited) This is the one that sucked me in thirty years ago when I was 17, in Missouri. I moved in 2000, and it stayed at my brother's place. And this is when I had it brought to my house in Massachusetts in 2014. Edited January 4, 2020 by moose 3 Quote
Plymouthy Adams Posted January 5, 2020 Report Posted January 5, 2020 I like the color (lower) blue....my 54 has the same top color as yours.....the lower color on mine I was not fond of and so I changed it to a baby blue more to my liking.....not original but, if you don't like what you have change it or move it.... Quote
moose Posted January 10, 2020 Author Report Posted January 10, 2020 While I was under the drivers side, I replaced the master, all the brake lines and the fuel lines. Now I'll get back to the floor soon. Quote
moose Posted January 10, 2020 Author Report Posted January 10, 2020 Also dropped the tank, and rebuilt the left front brake. 1 Quote
Plymouthy Adams Posted January 10, 2020 Report Posted January 10, 2020 for you folks curious of tanks internals, Moose just gave you a birds eye view.....my 51 Suburban tank look very much the same when I removed it.... 1 Quote
moose Posted January 17, 2020 Author Report Posted January 17, 2020 This past week, I have pulled the upper and lower arms, cleaned and replaced bushings as necessary, painted and partially re-installed. I have to get different springs for it, the rusty and broken ones came out of this car. The new ones are Aerostar springs, new from Autozone. $60 for the pair on my commercial account. I plan to install these in my blue 54 to lower it again, and see what the ride height will be. I really want to bring the yellow one back to stock height, but if the aerostars look good, I might just do that. Quote
derbydad276 Posted January 17, 2020 Report Posted January 17, 2020 who did you buy the rockers and floor pans from ? Quote
moose Posted January 17, 2020 Author Report Posted January 17, 2020 29 minutes ago, derbydad276 said: who did you buy the rockers and floor pans from ? classic2current. Found it on ebay Quote
Sniper Posted January 17, 2020 Report Posted January 17, 2020 Another source for floor pans and such http://theplymouthdoctor.com/ Quote
moose Posted January 19, 2020 Author Report Posted January 19, 2020 I got the opportunity to swap the springs on my blue 54 today. I am very pleased. As a refresher, 25 or so years ago I cut 1-1/2 coils. Dropped it around three inches and at the time I loved it. Then about four years ago I was able to start driving it again, and it was too low for me, but I put up with it. A couple of years ago I bought replacement springs from Eaton. They messed up, sent me the wrong springs. Soon after a heated call with a representative, I got the right ones from them. Installed them, and I was happy, for a while... The drivers side spring started to sag and sit way lower than the other. I didn't really want to deal with them again, and I didn't want to have to replace them, and it drove fine, so I didn't do anything until now. I read that the best way to judge spring sag, was to measure the heights of the lower arm inside and out. My before measurements - Outer passenger 10-3/4", inner 11" Bumper (measured at center of outer bumper bolt) 14-3/4" Outer driver 10-3/4" Inner 10-1/2" Bumper 12-3/4" After measurements - OP 10-3/4" IP 10-7/8" B 14-3/4" OD 10-3/4" ID 10-7/8" B 14-3/4" Perfect! That was after much jumping on the bumper to let the springs settle a bit too. I plan to order another set of them to install on my son's yellow 54. 1 Quote
moose Posted January 19, 2020 Author Report Posted January 19, 2020 I remember reading that if those measurements were within a half inch of each other, up or down, it was good. Seems these might be perfect replacements for the 53/54's. Quote
moose Posted January 22, 2020 Author Report Posted January 22, 2020 First is the new level version of my blue 54- Now the cleaned, repainted and rebushed front of the yellow 54, with Aerostar springs. Still a lot of cleaning and painting to go, but it is getting there. Next I'll pull the rear out and give it the treatment. 1 Quote
wayfarer Posted January 22, 2020 Report Posted January 22, 2020 ...that thing needs a Hemi in it....? 1 Quote
Tooljunkie Posted January 22, 2020 Report Posted January 22, 2020 Lots of work behind you. I admire your determination! 1 Quote
moose Posted January 23, 2020 Author Report Posted January 23, 2020 12 hours ago, wayfarer said: ...that thing needs a Hemi in it....? Hmm... Wanna donate one to the cause? Quote
classiccarjack Posted January 23, 2020 Report Posted January 23, 2020 4 hours ago, moose said: Hmm... Wanna donate one to the cause? Those aren't cheap... That's for sure. Quote
greg g Posted January 24, 2020 Report Posted January 24, 2020 We are going to be in your area with the P15 Picnic tour this fall Sept 17 20, 2020. Give mark Duggan a shout and get on the event email list. You are more than welcomed to join in. 1 Quote
moose Posted January 30, 2020 Author Report Posted January 30, 2020 (edited) Here's what I did this morning. Decided it was time to drop the rear axle, found a broken main leaf(passenger side) so it was removed as an almost whole piece. Had to cut away the bumper bracket bolts and remove the bumper, to get to the upper shackle bolts. I think I'll build a table behind the car against the back wall, to go through the cleaning and painting and resealing. That gravel is hard on the knees. Also removed the front sway bar, cleaned and painted. No pictures yet, but the front is just about reassembled. Thanks for all the kind words and encouragement! Edited January 30, 2020 by moose Quote
moose Posted February 6, 2020 Author Report Posted February 6, 2020 Yesterday and today I finished reassembling the front end, brakes are adjusted and sway bar painted and installed. Then this afternoon I made a stand to make it a little easier go through the rear end. 1 Quote
moose Posted February 8, 2020 Author Report Posted February 8, 2020 More progress. Removed the drums (the other one was good), rebuilt the backing plates, and started to strip down the housing to be cleaned, re-sealed and painted. 3.73 gears! 1 Quote

Recommended Posts
Join the conversation
You can post now and register later. If you have an account, sign in now to post with your account.