Scruffy49 Posted February 26, 2013 Report Posted February 26, 2013 Someone else who likes real country? Not that whiny sappy top 40 drek by obnoxious twits like Taylor Swift and the like? I'm one of those that with a couple of exceptions thinks country music died with Chris Ledoux... Garth Brooks and most of the later "country singers" are neither country, or singers. I might, key word might, install a stock radio for looks, but it won't be hooked up... I have to many spare modern ones I can hide or install under the dash. Tailgate hinges are easy, get the stainless ones made for F1/F100 48-? I had to add bushings inside the tailgate tube to use my originals, the hinge metal was a bit worn, but the tailgate tube itself was some kind of thin. Copper pipe couplers make great tailgate hinge bushings... What I can't find so far locally is some stainless all thread to replace the snapped in half stock piece in the header panel. Every fastener I possibly (and safely) can replace with stainless or bronze is being replaced. My connector panel under the tailgate will need every stock bolt cut off. It's worth it. Quote
52b3b Joe Posted March 1, 2013 Author Report Posted March 1, 2013 I've been working on the hood this past week trying to get the entire front of the truck done. Not a single part of this truck was straight...the frame, every panel, even the steering wheel was bent bad....what did someone do to this poor truck. It must have earned its keep working for a living I guess. Here are a few pictures of where the hood is at this point. I will work on it this weekend and try to get it done. Hopefully paint this weekend or early next week. Then full focus on the bed sides. First picture is first filler, second is blocking after high build primer, third is driver-side hood half with filler. I put another coat of high build on it all tonight so I can block it tomorrow after work. I hate using filler so much but that was needed after trying my best with a hammer and dolly to get the metal straighter. Quote
48Dodger Posted March 1, 2013 Report Posted March 1, 2013 Those high spots aren't to bad....just need to shrink'em if you wanna be "perfect". Otherwise the high build (poly primers) is fine for rough panels. You dont ever really want to "burn through" your primer, so if you want, you can use a Urethane primer to finish. It sands easy and lets you get that final shape you need. Urethane isn't requried, but give it a softer feel and loves the effort of the block sanding. High builds have a lot of tecture and are a tougher to sand (not as hard as epoxy which is better for frames and brakets) but really give you a lot of solids to work with. Just a bit of knowledge since I know you're working hard at this. Read this for fun....it'll give you an idea about body work ve bondo work..... http://www.jag-lovers.org/xk-lovers/library/removing_dents.html 48D Quote
pflaming Posted March 1, 2013 Report Posted March 1, 2013 48, so every one of those 'light spots' are high spots! I would then conclude that if one would 'close his eyes' and run his hand over the surface, one could 'feel' them. Removing them then is critical on a dark color, is that a fair statement? On an original patina I call those spots "cindy crawford's". Quote
ggdad1951 Posted March 1, 2013 Report Posted March 1, 2013 (edited) 48, so every one of those 'light spots' are high spots! I would then conclude that if one would 'close his eyes' and run his hand over the surface, one could 'feel' them. Removing them then is critical on a dark color, is that a fair statement? On an original patina I call those spots "cindy crawford's". I'd say on ANY color you'd notice them when looking at them in a gloss paint. Time to shrink those puppies out with some heat and cold! Edited March 1, 2013 by ggdad1951 Quote
52b3b Joe Posted March 1, 2013 Author Report Posted March 1, 2013 (edited) Darker colors show "issues" far easier than light colors. Light colors will kinda hide imperfections. And yes you can feel the work too. You have to run your hand over it to get an idea of whats going on. Any anything you see but can't feel will more than likely show in the paint such as a sanding mark. Edited March 1, 2013 by 52b3b Joe Quote
48Dodger Posted March 1, 2013 Report Posted March 1, 2013 You can slap hammer them or use a broad body hammer if they are truly highspots. I take a thin cloth (piece of old bed sheet) and run my hand acoss the surface. If you want to know what it should feel like, run that hand/cloth across the winshield or any panel of glass....thats what is should feel like. If joe hits it with a high build primer and it burns through again.....personally I would just keep tapping it down with a body hammer and keep going at it til its done. The problem with putting heat to the panel now....even a shrinking disc...is that the filler won't like it. Body filler likes to burn...ie catch fire!!! And it will lift (delaminate) with the heat exchange..... so if you do choose to use the hot cold.....be careful...go small. The best way is to do all that shrinking before the filler goes on. But like I said before, they don't look bad. Looking good Joe. 48D Quote
52b3b Joe Posted March 1, 2013 Author Report Posted March 1, 2013 You can slap hammer them or use a broad body hammer if they are truly highspots. I take a thin cloth (piece of old bed sheet) and run my hand acoss the surface. If you want to know what it should feel like, run that hand/cloth across the winshield or any panel of glass....thats what is should feel like. If joe hits it with a high build primer and it burns through again.....personally I would just keep tapping it down with a body hammer and keep going at it til its done. The problem with putting heat to the panel now....even a shrinking disc...is that the filler won't like it. Body filler likes to burn...ie catch fire!!! And it will lift (delaminate) with the heat exchange..... so if you do choose to use the hot cold.....be careful...go small. The best way is to do all that shrinking before the filler goes on. But like I said before, they don't look bad. Looking good Joe. 48D I don't have anything to shrink the metal with at this point, so I have to do what I can with what I got. I have a set of torches I got for free but the acetylene regulator is leaking bad and those things are expensive! I will use your cloth sheet idea, sounds good. Since those pictures I have put a coat of high build on, and I am fairly sure I'll get it to block without going through, but If I do go through, I will repeat until I don't. I'm not going for a perfect 100% show truck, but more for a good reliable driver that is show-able at local events. Thanks for the tips and compliments!! Quote
ggdad1951 Posted March 1, 2013 Report Posted March 1, 2013 you can spot shrink with MAP gas or even a small propane burner. Worked for me. Quote
52b3b Joe Posted March 1, 2013 Author Report Posted March 1, 2013 you can spot shrink with MAP gas or even a small propane burner. Worked for me. Theres my Duh moment of the day...why didn't I think of that before. Now I feel stupid... I'll be trying this tonight on the part of the hood I haven't started on. Quote
52b3b Joe Posted March 12, 2013 Author Report Posted March 12, 2013 (edited) Well I painted the hood today. The body work came out great but the paint didn't. I'm too embarrassed to even show you guys! I'm so fed up with painting its not even funny. It ran like a witch. Its probably not the paints fault but rather user error. It's just been one of those days you should have just stayed in bed!! Its so bad I feel like sandblasting it again and starting over...or just take it somewhere to have someone finish it. I don't think some of the runs will be hard enough to sand for two days! The one edge was dripping on the floor. I will never again try to paint a car in parts/pieces. It just doesn't work out for me. I should have just waited til summer to paint the whole thing at once instead of a little here and there. Out of all the cars I've painted I have never had such problems. I should have stayed with a paint I was familiar to. Here are a couple pictures of cars I've painted...I just don't get it. I just don't like this single stage paint. I should have went base clear. Its just so frustrating! This truck is fighting me every step of the way...it will make it that much more of an accomplishment when I get it done I guess. I'll be able to say I did it all, and that I painted most of it twice! Next car will definitely be a different paint choice. Pics: My friends drag truck, my dodge dakota, and both one of my Corvairs. Edited March 12, 2013 by 52b3b Joe Quote
Dave72dt Posted March 12, 2013 Report Posted March 12, 2013 That's too bad. Been there, done that and more than once. What was different about the process today? Painted at the same time of day, shop at same temp, metal at same temp, flash times same, change of reducer, air pressure,change in the gun adjustment, the humidity, going from vertical to horizontal panels, can affect. how it lays out. It's still a chemical cured paint so although it may be a bit slower with the cooler weather, it'll still cure. You should be able to shave most of the runs off, color sand and buff. The P-sheet should give you a time frame for sanding or two toning, in your case topcoating it again. Quote
48Dodger Posted March 12, 2013 Report Posted March 12, 2013 If you have shot 2 stage paint, then you know to use a small tip for the clear and atomize it a bunch to get a good coat (I use a 1.3 tip).... Single Stage to me is like spraying clear coat, small tip with great atomization. If you use a medium tip like 1.5 and HVLP type airpressure (High Volume Low Pressure )...the drops are to big and form sags and drips. Do you think this happened to you? The old style guns (syphon) are better in my opinion for single stage, and I keep a few on hand just for the occasion. But they aren't legal in California anymore. The pressure pot stituation really gives a great atomized spray. I say buck up, sand it, and get it done right (by your hand, no one else) and make it shine! The hood is the show piece...its where the eye goes first....it's what you stare at right before you see the motor....it's what you stare down at when you're driving...it's the flagship panel of the truck....now get back to it, and win! 48D Quote
52b3b Joe Posted March 12, 2013 Author Report Posted March 12, 2013 Thanks for the tips! I think I'll go buy a siphon gun with a small tip. I have been using a gravity fed gun that I bought just for this truck. I always borrowed my friends siphon gun when I painted before. I never knew the type of gun sprays different. And don't worry, I'll be back out there tonight sanding. I still don't understand the atomizing stuff. I'll have to find some articles and read up on it. I was just getting rid on my paint frustrations in my last post. I took it out on the key board! I know most people have been where I am, and it isn't fun at all. Thanks guys! Quote
pflaming Posted March 12, 2013 Report Posted March 12, 2013 Hey Joe, we've all been there, sometimes if we don't have some bad luck we don't have any luck at all. Go for it! Quote
ggdad1951 Posted March 12, 2013 Report Posted March 12, 2013 (edited) Joe, while I didn't paint FEF (thanks again Dave) I think you can deal with it! Listen to the tips from the guys here. I know when I start a new "thing" for me, I ALWAYS practice on something that isn't my final piece. I played with a BUNCH of pieces of wood before I settled on my HVLP settings for a consistant finish for my wood working. And when they changed the formula...I had to do it again. Vent! It helps then think about it and take advice and jump back in! BTW, I think a vehicle painted in pieces has a better finish than one that was painted at once. All those hidden/hard to get to spots look just as good as the top surface. Edited March 12, 2013 by ggdad1951 Quote
52b3b Joe Posted March 12, 2013 Author Report Posted March 12, 2013 Thanks guys, I'll be out there tonight getting it ready for a second try at the hood. I looked at it this morning before I left for work and it does look better than when I left it last night. Maybe if I stay out there late I'll even get paint on it tonight. It will probably be tomorrow though, I don't want to rush it. I'l post pictures once its painted. Quote
52b3b Joe Posted March 13, 2013 Author Report Posted March 13, 2013 Well...I worked on the hood all evening. I wet sanded, and wet sanded, and wet sanded and...you get the idea. I did that until the runs were out. I used 400 grit. So I thought I'd give it another shot tonight. Prepped the hood, ran the tack cloth over it a few times, felt no dirt and put my respirator on. I had thought about last night all day and couldn't even sleep well trying to figure it out. The more I thought about it the more I started thinking the paint was a little too think. So this time I thinned it a little more than I had been and that did the trick. I got the paint to lay flat with no runs and lots of gloss. In the end my inexperience was the killer again...just young and dumb. Still learning as I go...but that will always be the case. Thanks again for the help. In a way though it was good I had to repaint cause when I slit the hood pieces together it scratched the crap out of the paint, so if I had painted it nice the first time I would have been more mad probably. Quote
John-T-53 Posted March 13, 2013 Report Posted March 13, 2013 Looks like it came out perfect this time. Nice work. Yeah, that three piece hood is nearly impossible to put together and install without scratching it. Just need a grip of dudes on hand to help handle the dang thang... Quote
48Dodger Posted March 13, 2013 Report Posted March 13, 2013 A "grip of dudes"....???? LOL... Like a Kettle of Hawks, or a Pride of Lions.....men had formed together around the old truck as a Grip of Dudes!! Looks great Joe....way to not give in and git'er done! 48D Quote
ggdad1951 Posted March 13, 2013 Report Posted March 13, 2013 practice, practice, practice, in anythign in life it takes a lot to be good! Glad it worked out well! Looks great! Quote
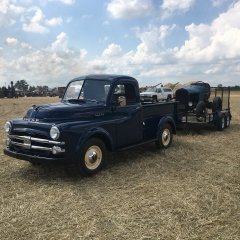
HanksB3B Posted March 13, 2013 Report Posted March 13, 2013 I just love that Blue ! Your truck's going to look great ! Hank Quote
52b3b Joe Posted March 16, 2013 Author Report Posted March 16, 2013 Here is my latest dilemma with the truck.... So I took it down the road for the first time since driving the frame around the driveway and or just idling, and hit decent speeds (35-40 mph) and have one heck of a noise coming from the drive-train. Here's a video to hear it (ignore the beginning of the video gave into peer pressure) So tonight I jacked up the back wheels, started it up and put it third with the throttle pulled out a little, and the rear end is HOWLING. The rear was rebuilt right before I got it cause my friend that I bought it from said it was noisy. He never drove it after rebuilding it but he knows his stuff and knowing him, it is set up right. He put all new bearings and races in it and set the tolerances. I called him this evening and he can't believe its still noisy. What do you think? I was thinking about swapping 3.73s in it, so I guess this is the time to do. So if you have a 3.73 pumpkin that will fit my housing laying around and don't want it, I will take it!! Quote
Merle Coggins Posted March 16, 2013 Report Posted March 16, 2013 Dumb question, but are you sure there's oil in there? I've seen it happen before. Merle 1 Quote
JBNeal Posted March 16, 2013 Report Posted March 16, 2013 that's what I was wondering, if the right kind/amount of oil is in the rear (should be about 5.5pints SAE90 or up to the fill plug). There's a diagnostic diagram in the rear axle section of the shop manual that shows if the gears are meshing properly (pre-load, backlash & whutnot), depending on how the gear oil shows up on the gear teeth. Or ya could throw some sawdust in the oil and that'll quiet it down fer a li'l while Quote

Recommended Posts
Join the conversation
You can post now and register later. If you have an account, sign in now to post with your account.