-
Posts
4,695 -
Joined
-
Last visited
-
Days Won
35
Content Type
Links Directory
Profiles
Articles
Forums
Downloads
Store
Gallery
Blogs
Events
Everything posted by Los_Control
-
-
Looks can be deceiving, just because it has been painted does not mean the pins have been pulled. I think it may be the best way to remove the doors. I pulled the door hinges from the cab myself. This created other problems & then needed to adjust the doors ..... In the end my pins still need to be replaced. I should have just pulled them in the first place. I would only assume others are smarter then me & did it right the first time
-
One would certainly want the old tires removed before shipping. Would just ship only a wheel wrapped in heavy clear wrap with a shipping label attached to it. Would be the same way tire rack ships tires. I bought toe boards & a transmission cover wrapped & shipped this way. Next I'm considering buying a lower seat for my truck. The shipper warned me there would be no material on the seat, just metal springs ..... I assume is for shipping reasons. Not shipping cotton & cloth soaked in years of mouse pee. Sounds like your wheel repair shop is a pretty good friend to have.
-
Your truck appears the pins may have been removed or replaced at some point when it was painted? ...... Thinking they should not be to difficult to remove. A old rusty one you may need to use heat, then a hammer & punch ..... force them out. I would prefer to use a large C clamp, put a socket over the top of the pin. Something to push the pin under neath and use the clamp to force the pin out. I wonder if your paint is as good as it looks? Seems it would be difficult to remove without marking the paint ....... maybe wrap tape heavily around the area before applying C clamp? I'm not using factory mirrors, will be bolting mine to the doors. ...... Is my plan for today if I get to it.
-

Outer axle seal replacement on a 51 Cambridge
Los_Control replied to motoMark's topic in P15-D24 Forum
Glad you caught it at home in the garage -

install a 1948 dodge 230 into 1937 plymouth P4
Los_Control replied to Jc Deluxe P20's topic in P15-D24 Forum
Been awhile since I've done any reading on it. Might depend on what engine was in the 1937? If it was the 201 then I would know nothing about them If it was a 218 then I do not think you will have any problems. Pretty sure you can swap the flywheels & just use 4 bolts. I think the 8 bolts were added on the later engines to beef them up. The 230 had more hp, the automatic transmissions were coming out, there was the fluid drive .... My first project truck was a 1949 with a 1938 218 engine installed. So I did some reading on it. I believe it was 1935 they made a change of the starter location which affected the flywheel & bell housing. ..... So going from 1934 to 1936, you will have to have correct parts to make it work. ...... 1935 & up between 218/230 should be no issues with bolting together the trans/engine. If it was a smaller 201 engine or a Canadian model with a 25" head .... I have no idea if they will or won't work. -
I guess I'm just baffled from the (non) issue? We can jump online & order what we want. I think the nicop is a better product. I think there is a market here, while is common we call them brake lines, they have many other uses such as hydraulic clutches, fuel, transmission .... I can understand phasing them out with a better product like nicop ..... just to drop them with no replacement .... go kick rocks & order from our competition .... just baffles me & makes no sense.
-
I would do like @OUTFXD and get all the loose rust I can get to. Then I would go in with ospho using a brush is best in my opinion, for hard to get to areas can use a squirt bottle & spray .... messy & wasteful. Once the ospho (rust converter) dries I would spray with a rustoleum rusty metal primer. Simply what I would do. Maybe the rustoleum is not needed. You can paint directly over the dried rust converter or use any primer you choose.
-
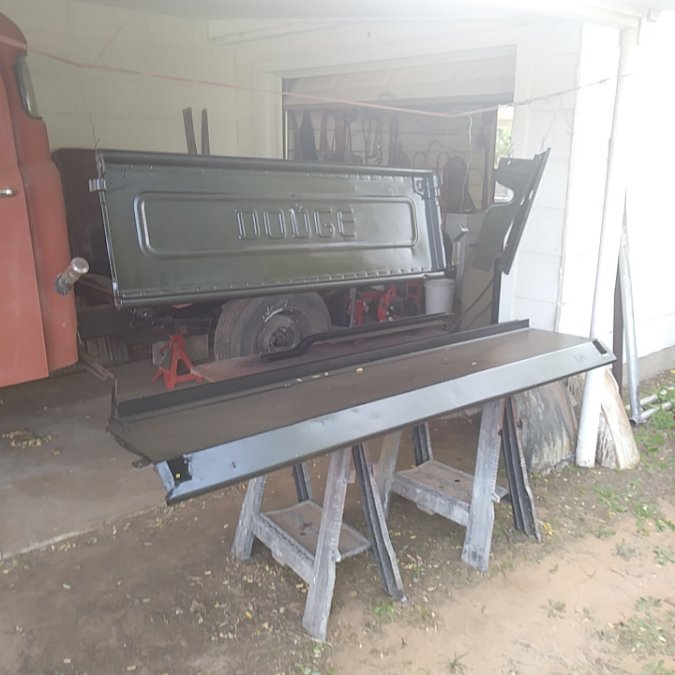
Today was probably not a good day for painting. It really was windy .... pieces in my paint booth were swinging around like wind chimes ... For the most part, I only painted the interior of the bed. I plan to haul lumber, concrete, dirt ... I painted both sides of the tail gate .... there is a dent above the D ... I call it character. .... I may not ever fix it and add another dent next to it in my travels. I also figure this truck will be a project for the rest of my life ..... I just want to stop rust and put some sort of paint on it for now. My mirrors I ordered yesterday .... suppose to be delivered tomorrow. .... another piece of the puzzle that needs solved. I have not seen them yet .... I'm not interested in the cheap cheesy chrome mounting brackets. I may make new ones & paint them. Just have to wait & see. I woke up with a goal today to work on installing my gas tank & making the mount for it. My wife woke up with the plans to wash clothes & use the dryer. ... My welder & dryer share the same plug. Just another day down & I got some things done, paint in the wind .... even if it was wrong.
-
Very true Paul .... I know of another Dodge trailer down the street that has the next generation of fenders on it .... I drive around it so I do not see it 53 or a 55? ... I dunno but still could have the 16" wheels on it & sitting full of tree limbs at a abandoned house. ..... I put my blinders on driving by. Just another example of how to find original wheels.
-
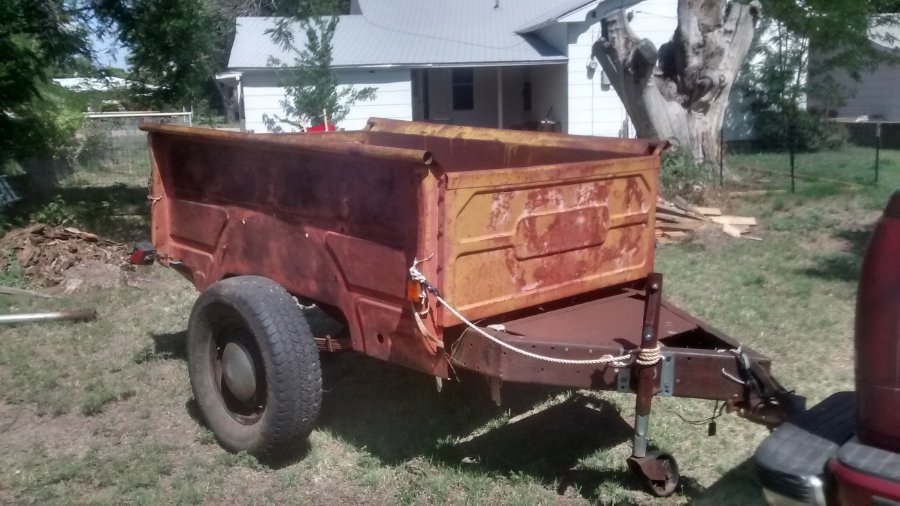
Should not be impossible to find them, they are out there. Maybe if you placed a add in classifieds you would find 1 or 2? Just for example I have 2 on a utility trailer that I have no intention of using .... I want a 60's-70's style 15" wheel with baby moons & beauty rings to match my truck. A: classifieds are not allowed in main forum. B: I'm too lazy too sell them. C : maybe add your location to your profile .... chances are I'm too far away from you & shipping would not be reasonable. Just for giggles I saw this for sale for a cheap price & bought it for spare parts .... I towed it home. It has original wheels with modern 16" radials installed. ..... No matter what I do with this trailer disassemble it for parts or restore & use it .... I will not use the original wheels. The wheels are out there ... you just need to ask the right people .... place a wanted add?
-
My first thoughts is possibly some crud got knocked loose in the radiator from overheating when the rad hose came off? Possible the T-stat is now malfunctioning getting ready to stick open or closed???? What I would do at this point I call the shotgun approach. I figure if the lower radiator hose needs attention, so does the rest of the cooling system. I would pull the radiator & flush it with a garden hose in both directions .... meaning turn it upside down and insert hose in lower so it comes out the radiator cap. I figure the water should come out just as fast as you pit it in .... or it is plugged. I would repeat this until the water comes out clean. I would check the water pump. If I can get the slightest wiggle from the front bearing, I would replace it. They are cheap & would piss me off if it starts leaking 2 months from now. I would replace heater hoses, radiator hoses, T-stat .... I would install a flushing T in the heater hoses while at it. With it all back together I would fill it with vinegar and run it through a few heat cycles to flush out the block & heater core using the flushing T. May be over kill, now you can cruise trouble free for years knowing your cooling system is in good condition. When I give this treatment to my daily drivers, I also replace the serpentine belt, pvc & vacuum hoses .... the things we normally forget about.
- 8 replies
-
- 1
-

-
- radiator blockage
- 1941 gmc
- (and 6 more)
-
I can not argue with the high price of everything today .... $22K for a Dodge seems pretty high. They never did sell for that price a few years ago. $15K seemed to be a high quality truck purchase? Your photos show a good looking truck, I think it would need to be in pristine condition to be priced higher then others ..... Your photos do not show that. What do I know, I .... Just my opinion. I feel if it was a chebby or a Ferd, the $22k would be in line. They have every part available aftermarket & a big following for them. .... And they have sold for that price. A Dodge, they are not popular, there is not a huge line of aftermarket parts for them, used parts are hard to come by .... The value or popularity is not there ..... Just a personal opinion, A Dodge truck a couple years ago would not sell for $22k .... Maybe today they do.
-
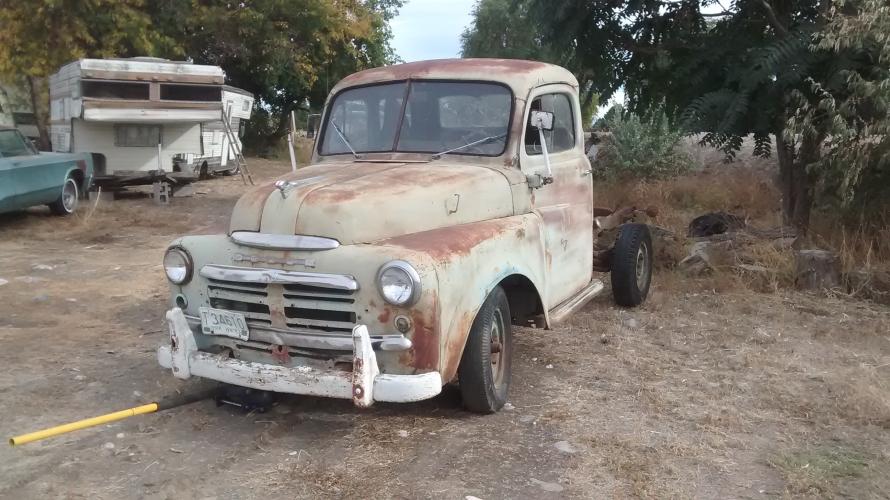
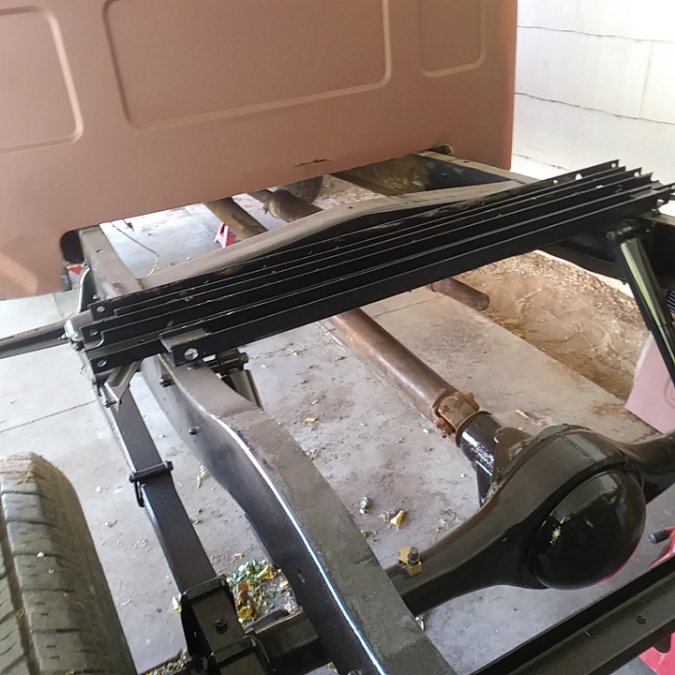
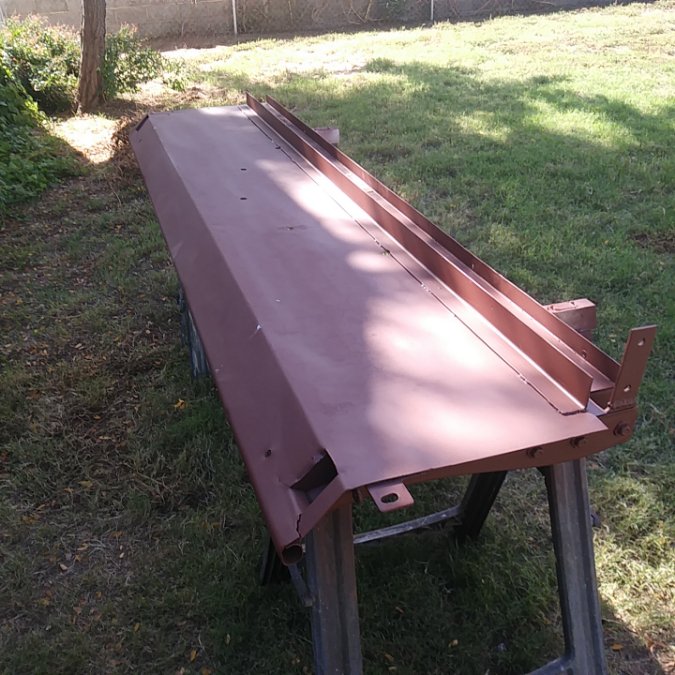
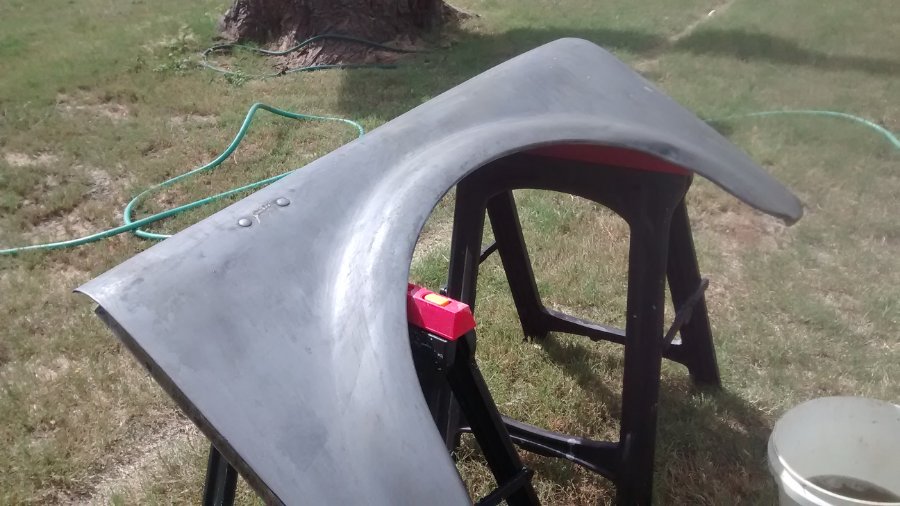
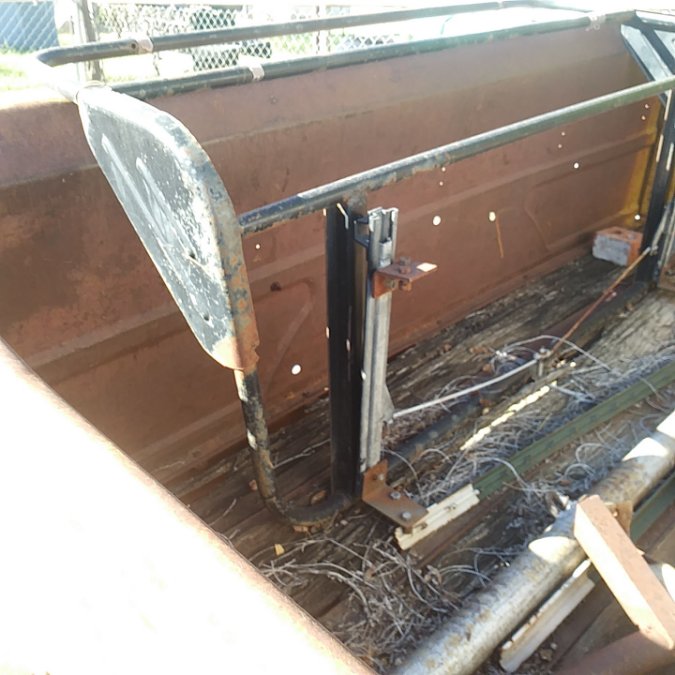
Past month I have been working some more on the truck. I feel like I was getting burned out with disassembly & painting. I needed to teach myself to weld to do the body patches ahead of me .... I blew up the engine in my wife car .... I think I took a year off working on the pilothouse ... Anyways back at it with a bit of a urgency to put it on the road as a 2nd vehicle. Most of the frame is painted & already dusty. Last part is under the cab. I have some welding to do on the floor before paint. I have a patch panel in the back of the cab to make .... easy stuff to do. ..... I just have so many pieces scattered around that need paint and put away out of my work space. ... So I have been concentrating on those pieces just to get them out of the way. I did the "farmer fix" on the side shovel strips. These are strips from a old bed frame the neighbor threw away. I did drill out the old spot welds on the bed side, I spot welded the new strip in place .... I did not feel comfortable with the installation. The angle iron is thicker, heavier, wider then the originals, I've already decided I'm going to run seam sealer down the edge. I went ahead & welded the edges also. Now I feel comfortable with the repair. In my defense I'm repairing junk. This is not a concourse restoration .... This truck took a hit of some sort on this side. The dent in the cab corner, the ripped & smooshed rear fender. the top rail on the bedside is bent, the running board is bent. We call the rust a "Texas suntan" While we can deal with the rust, I used acids. .... Yeah it sucks but works. Yet you are still left with pitted metal. .... Primer will fill most the pits .... why I'm using a few coats of primer. Just asking to not be beat up for farmer fixes. Just at a weird scheduling point right now. I need to start fitting the new gas tank to make the rear mount. I need to patch the floor before paint ..... getting ready for rear brake line, tail light wiring .... wood for the bed ... It is going together ... my wife is pushing me on it .... Just saying once I blew up the motor in her car. Then with current inflation I suggested to her it would be cheaper to fix the pilothouse since we already have the parts. She is pushing me to get it on the road because she wants her car in the shop next. ???
-
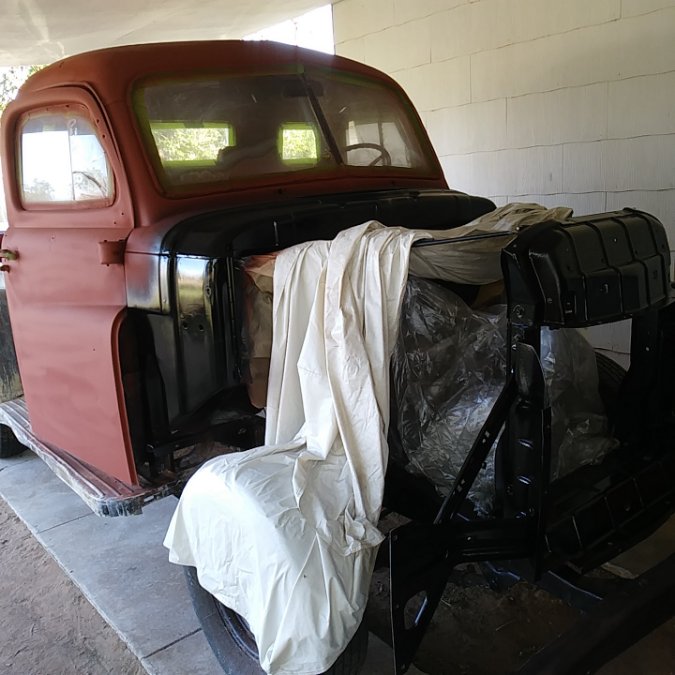
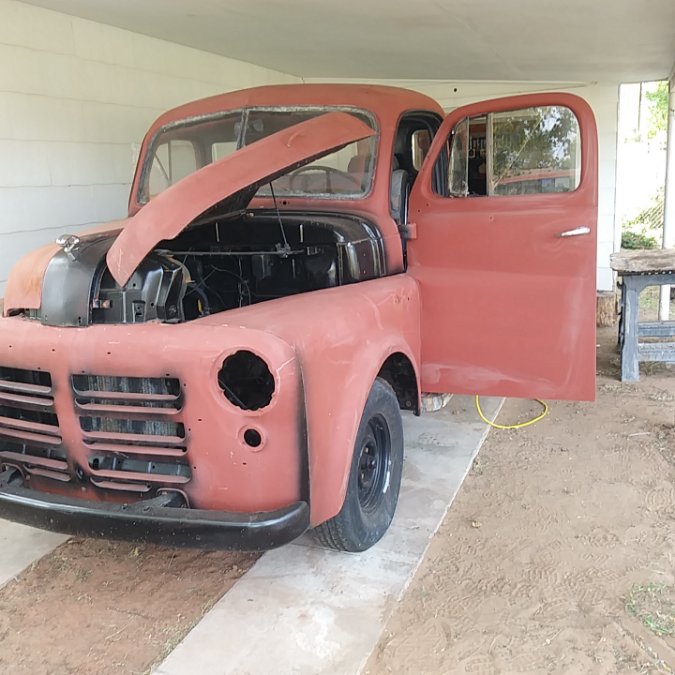
I have not made any post in this thread for quite some time (3 years). I have slowly been working on it. Nothing very exciting .... pretty boring stuff painting .... ? .... Just a few quick photos to bring it up to date. I took care of everything from the firewall forward. First paint, then new shocks, brake lines, wheel cylinders. All the sheet metal is final painted black underneath, while still primer on he exterior .... Since it will be a daily driver .... a hoopty, or you might call it a beater with a heater. I'm really not that concerned with the looks as I am with the mechanical parts. t I still need to do some body work, I can do this with the truck put back together .... I'm limited on space so happy to have the parts back where they belong & not laying out in the yard rusting. 3 years since adding to this thread for several reasons. I have made some progress though.
-
Stick around for more car storage tips
-
Borrow a photo from @Young Ed This is a good example for the starter side boards. Although it is a 1947 & different frame. I would first lay out all the boards, if any trimming needs done I would want to take equal amounts from each side. Now you can figure out where to put the kerf cut for the shovel strips on the side of the bed, also for the field strips. While there may be a .pdf out there, I know @ggdad1951 did a nice write up when he did his bed, you might check his profile for his build thread? I'm finding while I do my bed, I'm using a low side bed & also have a utility trailer with a standard bed for parts. I find the standard bed is ~3/4" wider then the low side bed. Then a 3/4 ton truck has a wider & longer bed. So none of the wood dimensions would be exactly the same between the 3 trucks. Then it depends on the shovel strips you are using. I'm using the original. They sell reproductions with the original profile & also some that have a different profile. I do not know if they are different widths? ..... Just thinking that the pdf will not work for everyone, you will need to measure what you have & systematically lay out the floor and cut where is needed.
-
Just a thought, I think the B1C 3/4 ton trucks have a longer & wider bed then a B1B 1/2 ton truck. Just something to think about when shopping for a tailgate. There is a guy on Facebook who buys pilothouse trucks and sells parts. Would be the first place I would check. His name is Douglass Crozier .... think the spelling is correct or close enough https://www.facebook.com/groups/pilothouse Considering the availability, this is not a terrible idea either.
-
I'm not sure how much room you have to work there. A good way would be to weld a nut on the end. The heat should break the rust loose, then can use a wrench or socket to turn it out. Could try to heat it up with a propane torch or using the yellow bottle map gas. Map burns hotter. Either way when you do try to remove it, try turning it both directions just to get loosen the rust. I had a broken bolt on my T-stat housing, I used my propane torch to heat it up then vise grips & it came right out. Good luck to you. For gaskets I use permatex shellac gasket compound. Probably better choices out there today. I have been using it since I was a 15 year old kid with good results. Use to be called Indian head, had a picture of a Indian chief on the bottle. I suppose to be politically correct they changed the name.
-

Redoing Bench seat/1952 Dodge 1/2 ton truck
Los_Control replied to NobbyofTexas's topic in Mopar Flathead Truck Forum
I'm thinking that is all you need with your photos. Naturally you want to spray with oil all moving pieces before installing. -
I love that attitude. ..... I'm going to do it now so I do not need to do it later.
-

Redoing Bench seat/1952 Dodge 1/2 ton truck
Los_Control replied to NobbyofTexas's topic in Mopar Flathead Truck Forum
Just curious what you have now? Here is a view of a lower seat section for your truck ... This sits on top of a pedestal that is brazed to the floor. Just hard to offer any advice without knowing where you are starting from. -
I kinda feel the same way on my daily drivers. .... I expect my B1B to be a daily driver when it hits the road. I really do not have a tool kit I carry in each vehicle. I feel bad about it, sometimes just a screwdriver or a pair of pliers could become handy. While rebuilding my tool supply I did tell my wife one day I needed a 10mm socket to complete a job. I came home with a suitcase full of tools. Just saying Ace Hardware had a combination set of tools in a case. It reminds me of a older sears craftsman starter set of tools. It was over $200. Same time it is like carrying a 20# suitcase around, takes up too much room .... I will throw it in a car for a trip, otherwise it sits in the garage. Just too awkward to keep in the vehicle. Probably be nice to see a thread on what everyone carries in their roadside tool kit.
-
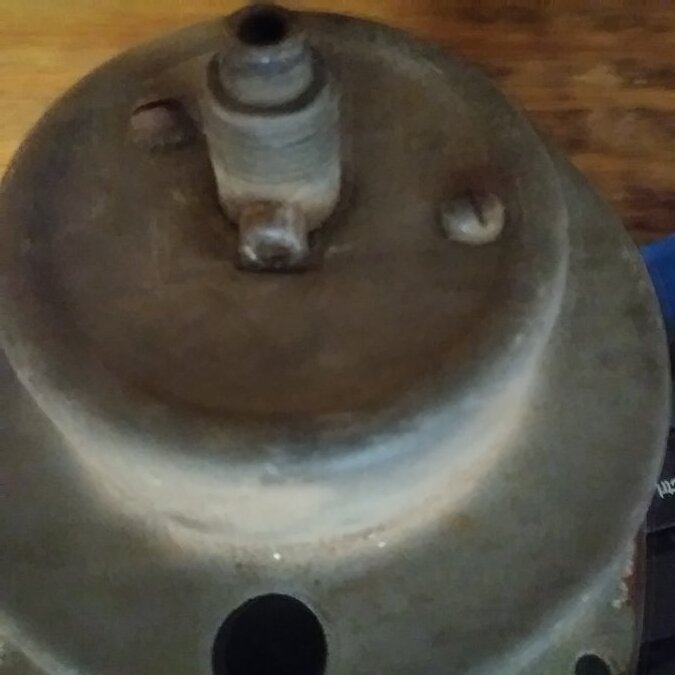
Well, I would think if you had one .... would be on the very top most point & most difficult to get too. Here is a shot of a spare speedo I have .... I think it is the original for a 1949 B1C truck. ..... Just saying it would be on the very top where difficult to see. The light bulb location would be different between a 38 car & 49 truck .... But you should be able to reach up there & feel it? Possible they did not have it in 1938, but will give you a idea what to look for.
-
I agree having the brake tool is nice, not expensive either. Simply one of the tools I never bothered to replace when I was buying my current tools. I honestly do not remember how I did mine on my truck. I usually just use a long flat blade screwdriver. hook the spring on the screwdriver then as a lever stretch the spring over into place. Once the screwdriver goes past center, the tension on the spring pulls it down off of the screwdriver & drops right into place. Sometimes this is awkward on some styles of brakes & use the vice grips or pliers.

