DJ194950
-
Posts
3,789 -
Joined
-
Last visited
-
Days Won
3
Content Type
Links Directory
Profiles
Articles
Forums
Downloads
Store
Gallery
Blogs
Events
Everything posted by DJ194950
-

So here is MY brake story....scratching my head.
DJ194950 replied to Bmartin's topic in P15-D24 Forum
Tod, question-how much pressure do you start with? Doug -
The best would be through the back of the seat and bolt to the floor. My belt set up on the inner side (fixed lenght ) was not long enough without passing tru the recently upholstered back side of the seat. My belt in 100% bolted to the seat base and not the cushion. Some downward deflection of the lower cushion was not avoidable when a good pull was put to the belt, but the pass through point of the belt was as far back and high as possible to minimize this as much as possible. My seat back extends down below the top of the bottom cushion when installed, therefore I the made the best compromise -I thought. I hope that I'm being a little clearer on the explanation this time. Doug
-
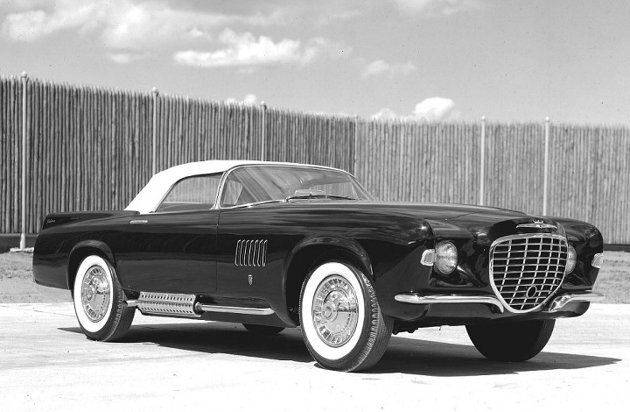
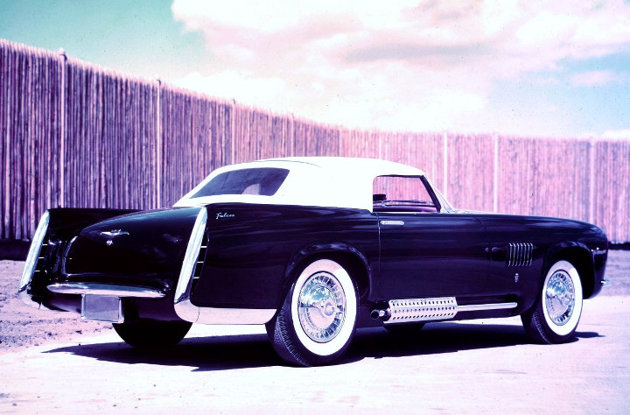
Have these pics been posted before? Don't remember seeing them. Named Falcon I believe it was?? From about 1955.


-
With 2 door cars the back flips forward and gives a space between front and back to slide a belt through and then bolt to floor with heavy washer. 4 door cars back are soild steel side to sideon the backs which your car seems to be. How to get belt behind upper seat part, I believe is what he's asking about. You can cut a hole through the steel back AND upholstery but if it's already in nice shape then what? I faced the same problem and decided to run it behind and under the front seat cushion at the back edge of the cushion and bolt to the seat lower frame metal below that. But to keep the seat cushion from rubbing in the seat belt material I cut a slot in the rear edge of the lower frame and passed the belt through that with some rubber edgeing in the hole and bolted the seat belt mounting point from the underside, making sure that the bolt mounting area was not in the way of where the back,lower edge of the seat frame would not sit/ hit it. 1 idea only perhaps others have come up with something else? Doug
-
The Phoenix is awakening / B3B Rises from the Ashes
DJ194950 replied to pflaming's topic in Mopar Flathead Truck Forum
I thought this was going to part of the drawing for a old truck at the BBQ? Heck I bought 10-$10 tickets from Tim, proceeds supposed to be given to you to buy a newer truck with paint! See ya there Paul! Doug -
1941 CHRYSLER ROYAL BUSINESS COUPE! OPPURTUNITY OF A LIFETIME??
DJ194950 replied to Lakermatt's topic in P15-D24 Forum
A quick check showed less than 7K were built VS the sedan at 51K made. Original cost $945 so if you can get it for that! Auction for nice one in 2012 estimated 30-40K sale price, not sold. 2013 auction for same one? sold 33K. I'm sure they are at least some what rare now! Good luck, Doug -
Have you looked at mounting to PS pump low on the other side? Weld or bolt on a fabricated thin size pulley to the front of the crank pulley. The PS lines will need to be longer but that is not any problem. You will just have have them made for you and this app.
-
And it sure beats having to remove the seat bottom to get at battery or undercar to use one of the big $$ drop down type battery holders! Just use a sealed type battery or put in a box with underbody vent. Doug
-
Back, Clutch & Pressure Plates, A Whole Lotta Shakin'
DJ194950 replied to JohnTeee's topic in P15-D24 Forum
Your chart shows the 10" pressure plate as special equip. use. Since your flywheel is drilled to fit it I see no reason the not use one if you want. The chart also shows to match the 10" pressure plate with A 10" disc. When you measure accross the press. plate face it should be equal sized to the dia. measure of the disc. plate! Doug -
The Phoenix is awakening / B3B Rises from the Ashes
DJ194950 replied to pflaming's topic in Mopar Flathead Truck Forum
Ask you daughters preference as she will Be the driver! Maybe a flattened clear coat as is!!! Sand and then clear, undercoating after some cleaning. Think of the stories she can tell about her dad's truck rebuild journey Now that's it's hers! Glad to see that the truck wiil make the BBQ after all! Doug -
Have you ever saw the mag. streetrodder- they did a build article on a 50 ply. bus. cpe. gasser. first article was in 2009. A search for- 1950 plymouth gasser brought up several, one of them was that article. there are 3 + articles done over time. Worth a look. They used a fatman stub but after while it was worse than homemade parts- My opinon but after 2nd or 3rd article install of rad. and flip front sheet metal setup seems best to build your own. check it out. Oh ya, they were using a hemi motor! Doug
-
Suggest you check out-- julianos.com. In the seat belt portion of the site they document install of 3 point seatbelts they sell on 16 differant vechicles in the -how to section. not any mopars but- the idea is the same. I have put their products in my 50 4 dr. and 50 suburban. Julianos were among the first to make their own aftermarket seat belts and all are certified materials and sewing to Fed. Spec. Many cheaper ONES ARE NOT! Not that hard to do. Doug
-
Dang, tim you're reading my thoughts! Was just going to type in that thought- with the suggestion that the starter be engaged by second person or held in start position by wiring down- Battery disconnected of course. Turned over from below by hand with prybar and flywheel to starter gear mesh observed. Should never get tight. Also a wire attached to a lower bolt with the wire bent close to an edge of the flywheel observed to check flywheel run out frt. to back and out of roundof flywheel rotation.
-
Source of info Bob? Doug
-
Tks for the reply, do you remember the measurement face to face at the axle-wheel flange. Still need to someday change the rear in the 50 suburban. What to keep out an eye would be nice. Doug
-
Anyone have pics of the correct jack and tire iron for a '52 Plymouth?
DJ194950 replied to Barsteel's topic in P15-D24 Forum
My 2 cents, since you have a good picture, now do an ebay search for a while and look for bumper jacks. If they ID them they almost want Way too much even when they are just guessing. Bought my 50 Ply. jack that way, complete w/no jack handle $35 w/ delivered. Looks close if not 100% to pics, looks good to me. Look for ones that look like what you want at reasonably prices That Do work. Sometimes best to buy as close as possible according to appearance? Doug -
Jus a littl' bit-a littl' bit more!
-
What is the rear end out of? Appears to be a disc brake rear and a good width fit. Posi or avail. in stock posi unit? Are those the wheels and tires you plan to run? Size & width? . More room for wider rims/tires? Good work! Looking great! Doug
-
Also more info: Check w/ hotheads.com - hemi's are their specialty - lots of parts choices and info egge machine- part and rebuild services wilcap.com - hemi to later trans adaptors and full flow oil filter adaptor See if you can find it - Street Rodder magazine article -Sept. 2008 was 2nd part of story on building a 331 hemi. Believe there was 3 part story. Part 2 was the one I could find on a google seach on chrysler 331 hemi build. I'm not the best at tracking at times. Prepare to spend $$$$. Love to it see done , Doug
-
So here is MY brake story....scratching my head.
DJ194950 replied to Bmartin's topic in P15-D24 Forum
Very detailed report back, expect it can others with their brake / master cyl. problem diagnosis when finally resolved, and Most likely get you an answer! Good work! Doug -
Black duct tape or balck silicone , after putting on silcione drive it to a med. speed and then park and let it sit and harden completely. Perfect for an older furd. DJ
-
Ya gotta go look at it! Maybe take the wife?? Gotta control myself- control myself-control Doug
-
Pictures ?? Doug
-
Most OD's are around .70 reduction, including the Mopar units that fit into your car with lilttle or no mods. 1st gear in a stock 3 sp. is plenty low for new driving conditions. Forget about slipping the clutch with the torque of a flat 6 motor, no need. You don't start out in 1st. OD engaged! With AC engaged-uphills, I'd suggest only a 3.73 rear gear. Without an AC on up a hill then 3.55 Seems to be great for most. Assuming a motor in top condition only for these ideas. Doug
-
So here is MY brake story....scratching my head.
DJ194950 replied to Bmartin's topic in P15-D24 Forum
Just a question on your using the ammco tool. After you measured the drum dia. with the tool say it was .040 over, did you adjust the micro. meter to .020 before you put it on the axle to adjust the shoes? The instructions tell to do this. Good luck, Doug