JBNeal
-
Posts
7,197 -
Joined
-
Last visited
-
Days Won
81
Content Type
Links Directory
Profiles
Articles
Forums
Downloads
Store
Gallery
Blogs
Events
Everything posted by JBNeal
-
I pulled the fuel line off the 1-ton, noticing a necked down section near the tank. I straightened that out, and a piece of sludge the size of an english pea fell out, along with some 4yr-old gas...so that was the root cause of this whole fiasco. An oddity that I noticed back in '04 but forgot about was the fuel line at the gas tank. On the '48 1/2 ton & the '51 flatbed dually, the tank has a port for the draw tube facing the front of the truck, near the bottom of the tank. On the '53, it's a completely different tank, with a draw-tube port at the top of the tank. This '49 had a port similar to the '53 at the top. The original fuel line S-shape at the tank was bent upwards, and a short tube was unioned to the top port. One of the bends in the S-shape was necked down and hung some goo. Anyhow, I'm gonna run new line inside the frame rail, over the rear engine mount, and inside the inner fender at the engine, as there is plenty of room for this route. The original routing puts the fuel line outside the frame rail, perilously close to that left front tire. The '49 had a few flat spots on its original fuel line, presumably from being struck by debris flung off that tire. And the '48 had a flat spot that had almost completely choked off the fuel supply, so replacing it way back when was a no-brainer. I'm still befuddled as to why I did not replace this fuel line back in '04, but I reckon I get to enjoy the experience now
-
Stock brakes on the '48 1/2 ton & '49 1-ton, both work decent but considering how many uninsured motorists are in the area, I drive below 45mph and give plenty of room for braking, planning ahead when I'm able. The 1-ton has bigger brakes and is rolling on radials, and it seems like it stops quicker than the 1/2 ton. But neither truck is used everyday, nor are they used to haul heavy loads. One of my pie-in-the-sky plans is to put disk brakes on a daily driver as that project would be able to cruise 60mph
-
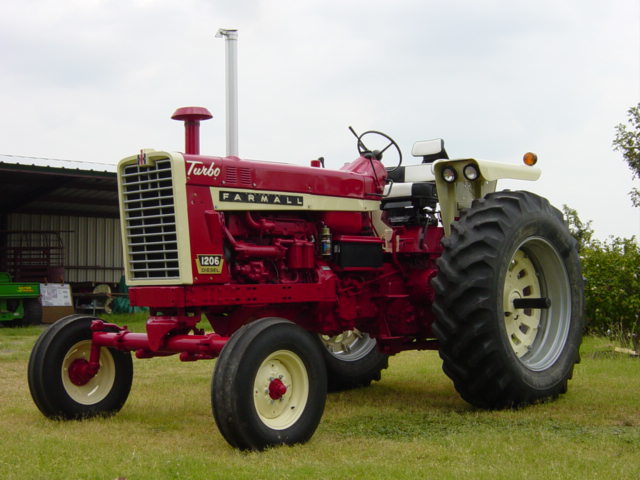
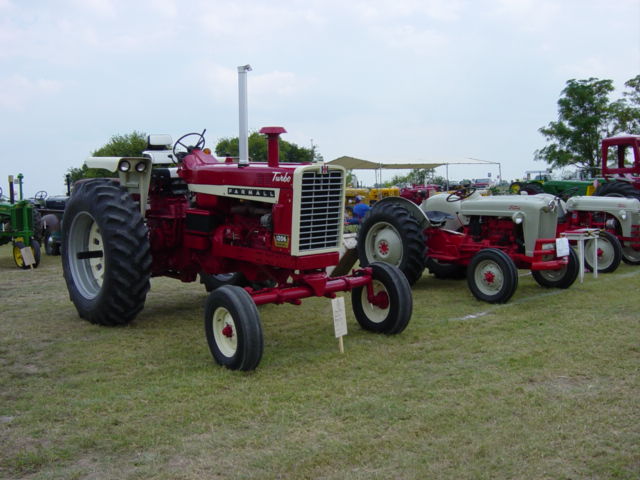
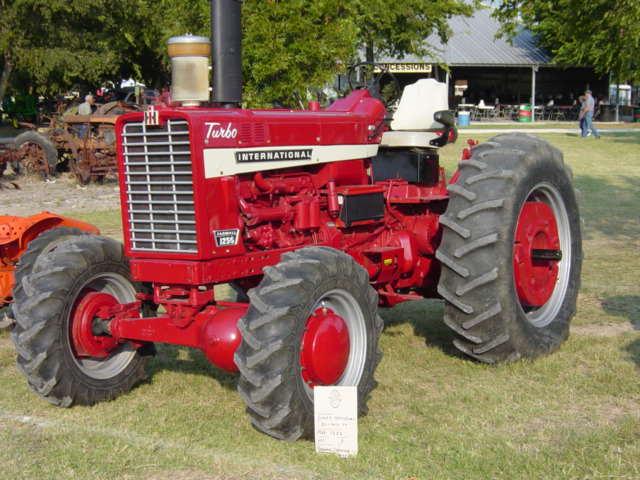
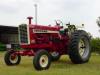
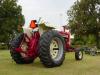
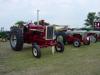
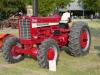
Dad's '66 Farmall 1206 blew out the original injector pump in '03, and while removing that, I noticed the turbocharger was split in two...so that tractor eventually was fixed up real nice for a spell. We took it to the local tractor show in '04; a neighbor's 4WD International 1266 is a very close relative
-
Among one of my eBay finds are an NOS D-O-D-G-E emblem, a NOS hubcap and a NOS hood ornament. The red color matches the Dodge Truck Red that on era-original paint chips. The red is used so that the individual letters stand out; in later D-series trucks, the individual letters are mounted to the hood rather than using an emblem.
-
there's a kink in yer cable somewhar and it's acting like a spring, probably near the firewall clamp. I recall years ago that my choke cable sheath popped out of the bracket under the dash, and taking the whole thing apart I found the cable to be sticky with crud and a kink about halfway down its length. As the truck hadn't run in 20+ yrs, I cleaned the cable real good, flattened the kink out, re-crimped the sheath and re-installed...problem solved
-
the oil bath filters I've worked with have a cellulose-looking stranded element, and I've soaked them in diesel to soften them up and to rinse out since I did not have kerosene as the shop manual suggests to use. The crankcase filters have a stranded-metal element (kinda like a brillo pad) that can be sparked up after soaking without too much damage. If ya want to make cleaning the filter more interesting, try lightly sandblasting it first to see how long it takes to shake all of the sand loose
-
one of the oddities I found on that '54 Plymouth motor in my '48 1/2 ton was at the heat riser. In its place were two short bolts & nuts in the shaft holes in the exhaust manifold. The heating chamber in the intake manifold was completely full of carbon. The truck ran OK, but after reading that there was a reason for the valve, I figgered I needed it. I drilled out & scraped out the carbon, found a NOS heat riser valve kit on eBay back in '99, and eventually found a counter-weight for the shaft. Long story short, I found that I do not need this valve here in TX, as when the weather is cool enough for the need for that valve, the weather is usually wet, and I do not like to drive my truck in the rain (one too many close calls from inattentive drivers). In the summer (which lasts from May to October), I've disconnected the spring and the motor runs fine. When it comes to sacrificial bolts, I go cheap Grade 0 variety as they are easy to cut off or drill out. One long bolt can be installed through the holes, but only snug up the nut to the manifold to keep from putting too much stress on the cast iron wall. On a similar application, I've snugged up a hex nut hand tight + 1/8 turn, then taken a punch to flatten the threads out, effectively locking the nut in place.
-
that B1FA looks SHARP
-
on more than one occasion that I've driven the '48 into town, I'll hear some kid on a sidewalk or parking lot be-bop the Sanford & Son song and when somebody pops off about the truck needing painting, I quip "awwww shucks all it needs is a good coat of wax, that'll slick it up real nice"
-
I reckon eBay has made some changes to their feedback system recently as I sold a few hundred odds & ends late last year and sure enough had to deal with about a dozen crackpots. I was gigged with negative feedback from a couple of guys who wanted next day delivery 2000 miles away before Thanksgiving but they did not want to pay for the extra shipping cost, so their feedback to me was "slow shipping, non-responsive to emails" BS. By late December, dealing on a few other transactions, the buyers dragged their feet on payment, a couple never paid nor responded to emails, and eBay did not allow me the option to post any negative or neutral feedback for those deadbeats. Since I'm not an everyday on-line merchant, I just put a period at the end of those ordeals after eBay refunded my listing fees. To openly "ban" buyers (also blocking them from doing business) from Old Plymouth Cafe or Vintage Auto Parts or whoever might be their only recourse. My guess is that eBay, after all these years of buyers & sellers flaming each other via the feedback system, has opted to make feedback flame-retardant, where only "positive" feedback can be posted, forcing those with negative feedback about a transaction to deal with returns/refunds, etc. behind the scenes.
-
I hope yer motor runs as good as it looks...it's good to see ya got the first half of the PCV system installed; however ya might have a problem down the road aways with oil condensation in that copper line. If the crankcase vapors drawn in the manifold at idle condense oil droplets, eventually that gooseneck will fill up with oil and choke off that vacuum source. Looking at the original drawings Chrysler did on the vacuumatic system and at other PCV systems I've encountered, the PCV lines allow for liquid drainback into the crankcase to keep the vapor passage open. Another potential problem is that fuel line's proximity to the exhaust manifold. A rule of thumb is to locate the fuel line so that the fuel line's distance at the fuel filter is maintained around the manifold to the fuel pump. This will maintain a consistent air gap along the length of the fuel line to reduce any radiant heat exchange from the exhaust manifold.
-
I have Firestone Transforce ATs on my '02 Ram 2500, and the rear tire psi rating lists 80psi for rated load capacity. I inflate to this rating when I pull a trailer or a full load, but most of the time I'm running errands only. I tried reducing to 70psi to smooth out the ride a tad, and it has helped significantly. Dropping to 65psi makes them tires start to bulge a little, and I assume this will drag down the fuel economy. I recall half ton tire pressure ratings to be at the 32-35 psi range on older trucks that ran 15s or 16s. However, since the Transforce is a heavier rated tire, 45psi might be a pressure to start with to see if the ride is smoother and the sidewall doesn't have too much of a bulge.
-
I had stalling issues on my '48, so I installed a heat shield sleeve on the fuel line from the fuel pump to the carburetor after routing a new fuel line, keeping as much distance from the manifold as the line is at the carburetor. To keep the sleeve in place, I used a long piece of aluminum electric fence wire I had laying around to tie it off at the carburetor, then coil it around the sleeve to make it look like a compression spring. The truck ran much better in the 90+ heat.
-
Yer finished product looks dandy...I bet ya were on cloud 9 during the whole cruise As for the ride, I'm afraid yer gonna be at the mercy of the limited tire choices we have for the factory rims. LT215/85R16s are usually E-rated, and that's mighty stiff for a 1/2 ton truck. Tires and leaf springs need to have very close spring rates so that the ride will be "controlled"...if the tires are stiffer than the leafs, then the ride has a whip-saw effect: instead of one bounce from an input, there are actually two, as the two springs are releasing at different rates. The tires that were on my '48, which my Dad said he put on back in the mid-70s, were 6.50-16s that were C-rated. When I did my first test drive, that truck rode smooth, but the tires were so hard & weather-checked that they needed replacement. Going to bias-ply 6.50-16s did not help the truck ride, as it tossed the truck around on the lumpy roads, but was decent on improved roads. If ya could find some P215/85R16s, I bet yer ride would smooth out enough that ya wouldn't have to mess with altering your spring package. Coker has some radial 6.50-16s listed, and I'm on the fence on whether to invest that kind of $$$ without knowing if that brand would be worth it.
-
Greybeard & Allan Parkhurst put together their notes for folks to cobble together their own harness awhile back. I've been working on an alternative wiring diagram with integrated turn signals & headlight power relays and was going to put together my results once tested. This would include a material list and dimensions for assembly. The relatively low cost of the wiring harness materials makes it more conducive to supply your own parts; the devil is in the details on putting all the parts in the right place.
-
HOLLYWOOD LoneStar did a video with a B-1 in the background...
-
HOLLYWOOD The last episode of Alcatraz aired a few weeks ago where they recreated the chase scene from Bullitt. I watched the original during a rain-delay, trying to name all of the cars, trucks & vans on the streets, not seeing one jap car, a whole bunch of Beetles, a '20s Chevy (?) parked on the street, a powder blue & white A100 van in traffic then later parked on a side street...then I noticed what looks like a '48 B-1-B-108 at the top of the hill:
-

Jr Member Seeking Transmission Advice
JBNeal replied to Ted1949B1B's topic in Mopar Flathead Truck Forum
the '49 was the 1st non-synchro truck I had driven, and with practice, I got a feel for how the gears were meshing. Double-clutching in low gears while climbing a hill, feathering the clutch shifting into high gear, easing the gearshift into lower gears while decelerating all have a feel in the gearshift that will become intuitive with enough time at the wheel. -
that flathead has carbon on the pistons and rust residue on the cylinder walls...at a minimum, take it apart and clean it real good, ya might have stuck rings and crud that might score up yer 'polished' surfaces. Check it inside & out for any other problems, slap it together for some testing, and ya might have a good replacement for the engine in yer truck.
-
I reckon the lowest point on these brake systems is the hydraulic line at the rear axle, so starting from the most distant point from the source is done to help flush contaminants in the hydraulic system, be it air or contaminated fluid, as from this hydraulic line the bleeding can be done by gravity then by pressurized fluid. With the brake pedal partially engaged to allow fluid to travel from the master cylinder to the circuit, the rear axle cylinders can be purged by gravity, especially if the vehicle is angled so that the master cylinder is slightly higher than the branch to the rear axle. Once air is purged from the rear axle cylinder circuit, the fluid acts as a barrier to prevent air from each front branch from travelling towards the reservoir. The front wheel cylinders have to be bled by pressure since they are higher than the reservoir. If bleeding is done by pressure alone, then you would want to start at the closest branch and work away from the reservoir. Of course, the reservoir cannot be allowed to go empty with either method.
-
take some jumper cables and ground the spark plug directly to your battery ground and see if the spark changes intensity. If it gets more intense, your engine head isn't grounded properly, possibly from rusty threads at the head bolts and block.
-
4 speed non syncro transmission question
JBNeal replied to DollyDodge's topic in Mopar Flathead Truck Forum
31 years dormant? ya might want to examine the bearings & races for any spalling...anything not submerged in oil could be susceptible to condensation. -
Ya might want to keep the cab bolts loose and loosely hang the fenders & grille panel and the hood. That way all the sheet metal can be moved around on the truck to get fender gaps the way ya want and especially to line up the grille panel over the frame rails. Once your fenders are lined up, then the door alignment can be fine tuned. My guess is that when the cab + doors were installed at the factory, there was an alignment jig used against the frame to speed things up on the line before the fenders & grille panel were installed. If the cab centerline is not parallel with the frame centerline, and the grille panel is centered over the frame rails, then the fenders will not be lined up to the doors with the same gaps. When I put the front sheet metal back on the '48 after I re-worked the motor, I centered the grille panel over the frame rails, but then the fenders didn't line up with the doors, and the hood was hard to unlatch on one side. So I went back and loosened everything to line up the fenders and the hood. But then the grille panel would only line up over one frame rail. After crawling up under the truck to see if I missed something, I found that the frame was tweaked in one of the accidents my great-grandfather had in the truck before Grandpa took the key away from him. So now all of the sheet metal has to come off to re-work the frame properly...yaay
-
4 speed non syncro transmission question
JBNeal replied to DollyDodge's topic in Mopar Flathead Truck Forum
Replace the gaskets & seals, clean it up real good inside & out, slap it together, slick it up real nice & hoist it back into place -
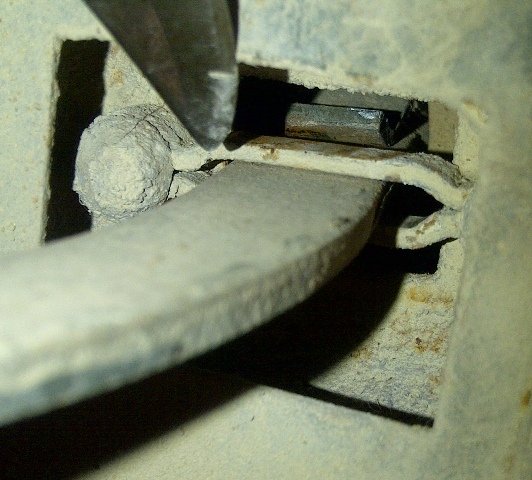
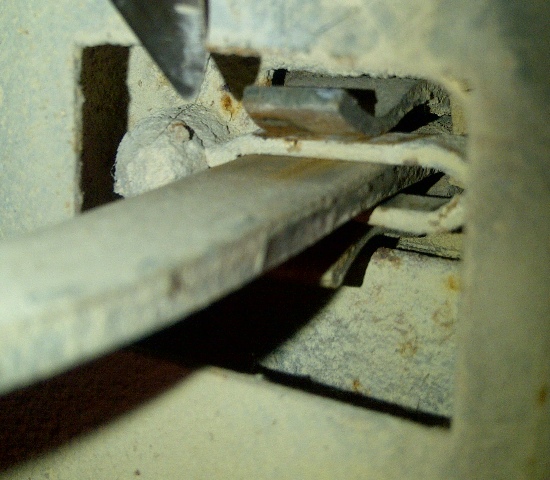
The door check with new rubber should keep the door from opening beyond 90 degrees. If you are using the rubber as a stop for the door, it sounds like there is something missing from the door itself. With a new rubber cushion installed to the check arm, the check arm is installed from inside the door through a clamping bracket that is riveted to the inside of the door. On my '48, this bracket is missing from the driver door so that when the door is opened beyond 90 degrees, it bounces around but does not hold the door open. The passenger door check is shown, and when the door reaches about 85 degrees, there is resistance to open it further as the clamping bracket engages the door check arm clamp. It takes a bit more effort to make the door open a full 90 degrees as the clamp springs are forced open while passing over the clamping bracket.