JBNeal
-
Posts
7,190 -
Joined
-
Last visited
-
Days Won
81
Content Type
Links Directory
Profiles
Articles
Forums
Downloads
Store
Gallery
Blogs
Events
Everything posted by JBNeal
-

A little info from the local tire shop
JBNeal replied to Standing Elk's topic in Mopar Flathead Truck Forum
Tire stores can be full of hooey at times...I've been told by one store that they will only install tires with sizes that came original to a vehicle, no exceptions; another store only spoke in "4-ply, 6-ply, 8-ply" when I was asking for a C-rated tire rather than an E-rated tire; when I told another store that I wanted a static balance on my wheels, the techs told me that was not legal; yet another store told me the lock-ring rims on the 1-ton were not legal for highway use so they wouldn't work on them...all I'm really hearing from these folks is a lot of baloney cuz they don't want to be held responsible for anything going wrong. Anyhow, I'm surprised that ya found someone who could patch a tire tube at all; the fact they slung that BS at ya is a real stumper. -
Very nice '50 Spring Special on eBay
JBNeal replied to B1B Keven's topic in Mopar Flathead Truck Forum
I found this awhile back that confirmed some info in Bunn's books...that one pic appears to show the black grille bars that Bunn wrote about for the '50 Spring Special he found...I didn't believe it at first glance, but after I thought about it for a good while, it made sense since Dodge had the park lamp doors painted black for '48-'50. -
wiper motor linkages and pivot locations are different on 48-50 and 51-53 models; I tried to make a '52 electric motor work in my '49 by making some new linkages, but I don't have the right tools to get the bushings right, so the wipers slop purt'near off the windshield. This truck shows the different locations on the cab for the wiper arm pivots...it also shows a car engine that has a rear sump, dipstick in the block, and throttle linkage parts mounted on the head...
-
well C-R-A-P ya got yerself one of them canuck RMP gauges [/FACEPALM] when I sent my '48 gauges off back in '99, I held my breath for 4 months, and got back ok work, the color was wrong and some of the numbers were a li'l sloppy, but they operate...the speedo gauge didn't get re-worked because the guy said he couldn't do the curved face, so I was glad about his honesty there. Maybe a fifth of Dr. JD can help ya deal with this episode, cuz I know I'm kinda grittin' my teeth for ya...the "P" on the AMP gauge sticks out to me for some reason...anyhow, if the gauges operate accurately, ya can tell folks that yer gonna fix the faces some day
-
1948 B-1-B-108 great grandfather's only new buggy that he drove for over 20 years Build Card B-1 horn button repair B-1 horn button assembly original style gas cap original tailgate lettering paint & location cab floor to fuel filler neck seal fuel line routing at B&B carburetor from fuel pump to improve hot-starting starter cable optional routing brake line routing at engine compartment carburetor throttle return spring cowl vent mechanism operation dipstick gasket, dimensions, etc. door check parts & function door check replacement windshield frame details windshield wiper blades door glass drawing (with vent window) dome light installation wiring diagram with turn signal & headlight relay 3 speed transmission speedometer cable pinion seal fuel gauge operation & troubleshooting fuel level sending unit upgrades early/late B-1 bed fender differences internal vs. external bypass water pump identification front hub dust cap front wheel bearings grey beard's steering box adjustments grey beard's reflooring project B-series brake drum replacement (11") partial bed removal 1949 B-1-D-126 1-ton rescued from The Panhandle / W. Oklahoma area (2001) Build Card steering gearbox overhaul steering gearbox dust seal steering gearbox and cross link installation floorboard bolt alternative B-series fuel tank comparison B-series fuel tank frame flex springs B-1 / B-2 shock absorber replacement B-1 park brake assembly (driver side) dual horn setup speedometer cable routing (4 spd spur gear) 4 spd spur gear output shaft seal 1-ton pinion seal 1-ton front wheel seals 1-ton rear wheel seals 1951 B-3-D-126 flatbed dually picked up in Oklahoma after being rescued from a barn in Kansas (2010) B-3 / B-4 shock absorber replacement B-3 / B-4 door seal info 1953 B-4-B-116 Spring Special rescued from within spitting distance of a crusher at a defunct salvage yard being cleared near Lancaster, TX (2011) Build Card B-4 bed hardware change after fuel tank redesigned B-series bed strip comparison: Midwest Military v. Mar-K Frankenstein projects: cobbled together buggies from a collection of rescued & abandoned projects, to reduce parts inventory and utilize complete rolling powertrains Pilot-House fluid drive general dimensions miscellaneous technical information grey beard's PCV valve installation & modifications + PCV theory Vacuumatic Crankcase Ventilation information grey beard's fuel pump testing for engine performance evaluation grey beard's distributor information grey beard's reflooring project grey beard's GM alternator information bullseye halogen conversion B-series wheel color B-series Dodge Truck Green B-series bed strip dimensions Chrysler Master Tech - Story of Valves flathead starter performance minor upgrade flathead fuel filter + gasket information flathead bypass oil filter operation DeLuxe Products Oil Filter information bypass spin-on oil filter + installing a spin-on bypass oil filter B-series battery tray information carburetor float pin retainer replacement flathead technical information flathead vacuum tuning column shifter adjustments radiator cap identification Gates molded rubber hose catalog flathead milling information + volume verification master catalog for engine bearings brake shoe installation Fluid Coupling Rebuilding Pilot-House rejuvenation checklist rear axle shaft end play Autolite HA-4032-D horn adjustments
-
How Many Pilot House Trucks Have Survived?
JBNeal replied to Bradley S.'s topic in Mopar Flathead Truck Forum
doing some Spring Special research, I found this...it's close, but ultimately a copy. -
1948 B-1-B-108 BUILD THREAD Papa's Dodge
JBNeal replied to JBNeal's topic in Mopar Flathead Truck Forum
I'm thinkin' the problem with poor horn performance could be rooted at sketchy ground continuity through the gearbox assembly. After the horn button is engaged to the wire contact, ground continuity has to pass through about a half dozen points before reaching the frame...if the battery is grounded to the transmission housing from the factory, and there is no ground strap added from the frame to the transmission, then ground continuity has to further pass through about another half dozen points through the rear motor mount area. Lots of opportunity for corrosion to have a cumulative effect on a good ground for the horn for the 6 volt systems. Using a two wire contact switch at the horn button and having a ground strap to the frame could greatly reduce this effect. -
1948 B-1-B-108 BUILD THREAD Papa's Dodge
JBNeal replied to JBNeal's topic in Mopar Flathead Truck Forum
Reading the posts about how much torque is required to turn a rebuilt engine has confirmed my suspicions on my 1st rebuild for this truck. The truck is confirmed as a '48, but the engine is a '55 Plymouth, and when I rebuilt the engine back in the mid-90s, I was focused on pulling old parts out & installing new parts, not measuring machined surfaces. My first inkling of a problem is that the '48 front & rear seals would not fit, so I ran the old ones until I could figure out the problem. Wellll they leak cuz they were dried out for a couple of decades, so running the engine now develops a nasty pair of puddles. But more worrisome is that after 10,250 miles, that engine is very hard to turn over by hand...my guess is that it's in the 120 ft-lb range instead of the 35-45 ft-lb range. So something is too tight or binding (possibly piston rings or bearings), which explains why the starter seems to drag more than the '49...that 230 would spin quick & fire right up just a few years ago (hopefully again soon). Doing some preliminary frame measurements showed that the front bumper is at an angle. But checking some of the fender parts makes me think that they aren't lined up straight either. When I get around to it, I'll have to verify all this before tearing the truck completely apart. Checking fit now is easier cuz I'm not too attached to the paint job as it is part original, part body work from the '60s that is crazed & flaking off in big chunks. I decided to address the horn problem that's been nagging since day one. Grounding the horn to the motor produces an eardrum rattling honk, but using the wiring I installed back in the 90s and ground through the horn button produces a cartoonish muted beep. Looking over the wiring I did in my teens, I recall doing the best I could with what I had, but even though it is still in decent shape, it will have to go as the wire gauges I used aren't correct. The bakelite(?) horn button broke, so I figgered I'd epoxy repair that before buying a new one. This kind of repair is similar to a butt weld, which ain't too strong by it's nature, but may be adequate for this application. I saw-toothed the failed areas to increase surface area bonding surface. I found some old weed-eater line that I tried as a molding surface for the epoxy, used some masking tape to complete the mold, then applied the epoxy. The next day I sawed off the excess material, filed down & cleaned up the surfaces, and test-fitted the button back on the truck...so far so good What I'm fiddling with now is the electrical switch inside the horn button. The idea was to replace the one-wire contact switch assembly at the horn button with a two-wire contact switch. The prototype I've put together looks like it may work, but until I get it bouncing on the road I won't know for sure how it will perform. The new switch plus wires costs less than $10 and requires minor modification to the wiring harness. I've opted to use two 14 AWG solid wires, which will fit through the floating bakelite(?) bushing, and a whittled down & modified Dorman horn contact. More info will follow after some road-testing...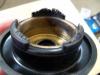

-
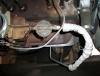
The original fuel lines are clamped to the frame in strategic places, but I've wondered why the lines were mounted outside the frame rail, where they would be prone to flying debris damage, while the fuel tank was mounted inside the frame rails. My only guess is that if the fuel lines are inside the frame rail, debris (e.g. road salt) can accumulate between the lines and the frame rails and not easily be cleaned off, leading to fuel line corrosion and failure. But on both the trucks I've worked on, the fuel line was beat up & pinched near the front left wheel (attached is the area with the fuel line removed). So one of the things I'll be working on is installing the fuel lines inside the frame rails with some sort of stand-offs to reduce any debris accumulation. The tricky area will be at the bell housing motor mounts as brake lines are going through there also. I think it's possible to make this work...it's on the to-do list
-
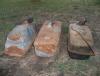
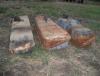
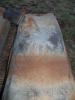
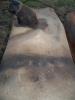
Out of curiosity, I pulled the empty fuel tank out to compare it to spare '52 & '53 fuel tanks. The '52 tank is a bit mashed on the bottom, so I couldn't do an effective side-by-side comparison. I eyeballed the '48 & '51 fuel tanks that are installed, and they look similar to the '52. the '53 tank is a different shape than the '48-'52, and its fuel line port is atop the tank rather than at the lower front. The '53 frames have a different cross-member to accommodate the tank, so putting a '53 tank in a '48-'52 is not a direct swap. The '53 spare tank has an aftermarket sending unit installed that will probably be converted to a plug. the original fuel line on my '49 matched that of my '48, but had been bent to attach to the short line I've shown pictured coming off the '49 tank. I had not handled this tank since '04, so my memory was a little fuzzy as all of my Polaroids of my work have been lost. Looking at the tank for the first time in years from above, I was stumped: this tank is similar but not the same as the '48-'52. I thought maybe the tank had been damaged and a '53 draw tube had been grafted to the tank top to repair it some years ago, but the entire top of the tank is a different shape than the '48-'52. Not only is there a factory installed boss for the draw tube, but there is a factory indentation in the top surface to strengthen this area. Also, there is a sloped section at the filler neck that reduces the cab seal contact area. whatever the differences are, the fuel tank fits and works, so I'll just clean it out, check the sending unit, replace that O-ring, and re-install. The Gas Tank Re-Nu treatment seems to be holding up well, as the fuel that was in there back in '08 didn't leak out but boiled out through the gas cap vent.
-
it took some finagling, but the gearbox was installed on Independence Day. Installation with the cast bracket mounted to the gearbox, the cab + front fenders on the frame, and the transmission + pedals mounted to the engine, is a real exercise in patience and holding one's tongue just the right way. It can be done, but I nicked up the shiny paint on the column a little bit. The gearbox slips easily between the pedals, but mounting the cast bracket with all that front sheet metal in place requires one to stand on one's head. The driver side inner fender would only release upwards about 10 inches before it hung up on the radio hump on the firewall, and I did not want to start disassembling the rusty sheet metal out in the dirt patch I was working on because the cracks in the ground had already swallowed up a few bolts and washers before. The cast bracket has one bolt to the gearbox that cannot be seen or accessed with the bracket mounted to the frame, so the whole thing was bolted up on the workbench (aka front porch) and worked into place, pressing the brake pedal in and wiggling around the master cylinder & the starter, as well as the oil filter & distributor. with the gearbox bolted to the frame, and the bearing collar removed at the steering wheel end of the steering shaft, the shaft rides towards the center of the cab instead of perfectly centered on the bearing. I'm not sure if the cab is off centered a tad, or if it's another design flaw with the steering. One thing I noticed with the cast bracket is that the mounting surfaces to the frame and to the gearbox do not lie on parallel planes. This can partially be seen in the first picture posted, as the frame mounting ears appear parallel, but the two gearbox mounting ears are different than the hidden mounting hole. Those two ears are proud of the casting by about 1/8", while the hidden mounting hole is flush. This kicks the steering shaft alignment towards the centerline of the frame instead of parallel to it. Is there a reason for this? My only guess is that it puts the slightly flexible steering shaft into a pre-loading condition on the bearing near the steering wheel. Of note is how much room is available to work on the engine with the frame jacked up & front wheels removed. This allows the front axle to drop out of the way enough to pull the oil pan. I've done this on the '48 & '49 engine rebuilds and brake overhauls. Once I get the engine running again, I'll drive this to a more work-friendly surface...while jostling around under there, I've had more than one big spider fall on my face, as well as a field mouse bouncing off my knee, causing me to bang my head on the grimy 4spd housing.
-
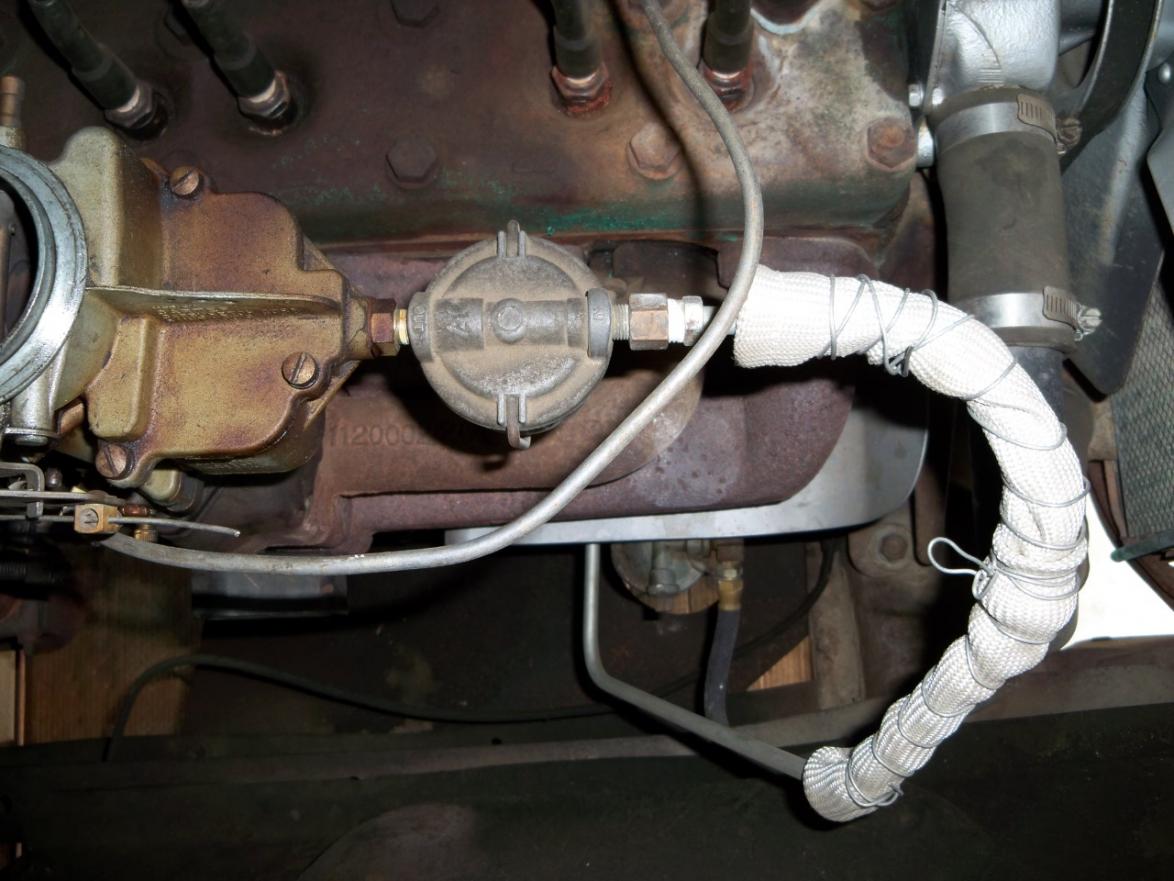
I have had hot starting problems on both the '48 (218 w/ Carter B&B ) & '49 (230 w/Stromberg), and assumed it was vapor lock. Daytime temps over 100, pavement temps well over that, with heat being shelled off by the radiator, and the engine compartment air temp can get hot enough to blister ya. Both had heat shields in place, with fuel lines routed away from the exhaust manifolds. The Carter carb was more prone to the heat as the fuel filter was over the manifold, and the fuel line is aimed towards the radiator before breaking towards the fuel pump. Installing a couple of spark plug boots spark plug wire sleeves helped, but on really hot days, hot starts were complicated by a very slow turning starter. New 6V batteries helped a little, but the starters would still turn much slower when heated up. Eventually, Ohm's law was considered, and it was determined that the original 2/0 battery cables were at fault. These cables, though appearing in good shape, had corrosion between the strands throughout their lengths, boosting resistance when hot, bogging down the starter motor as current was being impeded. New 2/0 cables, with chassis ground relocated from the transmission to one of the starter bolts, increased starter speeds, even on very hot days. This partially cured the hot starting problem. Checking the spark plugs, they appeared fuel-fouled. Once those were cleaned up, hot start-ups were a very rare problem that were often attributed to old gas. I recently tried the Coke bottle of water down the carb trick to steam clean the spark plugs: works like a charm! I had never heard of the clothes pin trick, but I had seen wadded up aluminum foil on old Chevrolets & Fords and was told it was to help with hot starting. Anyhow, clothes pins can act as a heat sink, the aluminum foil can act as a heat shield. As for the thermostat, the temperature rating is when the thermostat opens. Back when these flatheads were new, coolant with lower boiling temperatures than ethylene glycol were used. When ethylene glycol became readily available, cooling systems were redesigned to accommodate the 180 thermostats so that the hotter operating temps would boil out any condensation in the crankcase to reduce sludge buildup. Eventually, cooling systems were designed to accommodate 195 thermostats to combat sludge on tighter tolerance motors... As the flatheads have a great deal of mass to heat up, the coolant jackets would be much warmer than the oil in the lower end of the motor. As a check, I verified thermostat function at 180, then checked the oil temp...the oil had barely risen over ambient air temperature. So it takes several thermostat cycles for the block to heat up enough to raise the oil temperatures. At any rate, the hotter operating temperatures are beneficial to the internals of the flatheads to combat sludge. To offset the higher temps, insulating the fuel pump & lines from this extra heat can improve engine performance.
-
It sounds like your cab is slightly out of square with the frame...if you think you have frame issues, there is a procedure for checking in the shop manual. A quick visual inspection can yield the tell-tale sign of frame damage: flanges that are no longer true but have a wavy appearance. In a front-end collision on these trucks, this damage can appear between the front axle and the transmission. As for the horn, grounding beyond the horn button is a tricky problem. On the stock wiring harness, power is supplied to the horn, the horn button completes the circuit to ground. Unfortunately on these trucks, this is easier said than done. Pushing the horn button completes the circuit from the horn wire to the spring plate, to the spring plate retainer, to the steering wheel nut, to the steering tube threads, to the worm bearing rollers, to the bearing race, to the gearbox housing, to the gearbox mounting bolt threads, to the mounting bolt flat washer, then to the frame. The cumulative effect of resistance at any of these connections will mute that horn and many colorful metaphors will be uttered. One solution I've been thinkin'bout is to make a new insulator (or modify the exising one) at the steering wheel to accept two wires: one for power, one for ground. The $2 universal horn button that can be found at AutoZone, JC Whitney, etc. possibly could be modified to fit under the stock horn button. This setup would make for direct completion of the ground circuit, allowing more reliable (and louder) horn operation.
-
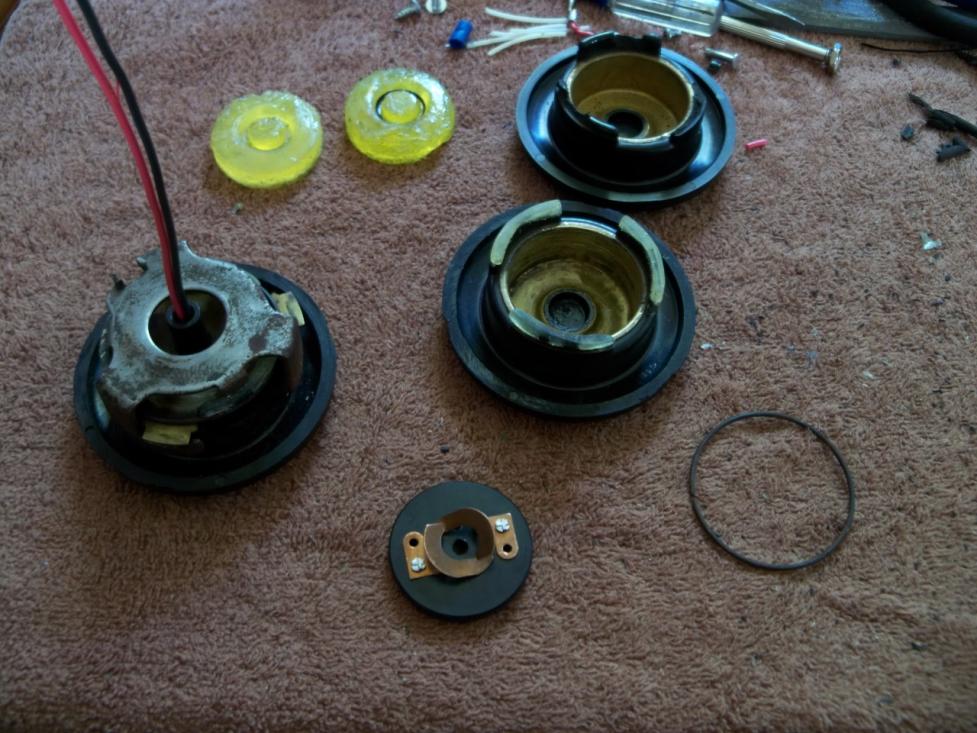
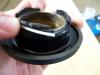
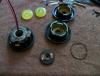
I've looked through the shop manual several times, in the steering section and the lubrication section, and could find no mention of how to service the dust seal shown in the steering column exploded view. From other dust seals I've encountered, this one was similar, as it is similar to a felt batter terminal washer, but more dense. I soaked that nasty seal in the parts cleaner for a few days, let it drain for a couple more, then wrapped it in a paper shop towel and placed a 10# weight on it to wring out any other fluids. The now nearly dry seal was soaked in light engine oil and re-installed to the steering column. During column assembly, attention was given to lining up the column weep hole and the gear box fill plug, so that the seal could be oiled while the column was in the truck. The dust cover was cleaned off and snapped back on the column.
-
Now that the major house repairs are done, I've been able to get back to work on this ol' beast. The steering column & gearbox parts were all cleaned up & treated with Rust Cure. The original column was bent, and the gearbox end was torn off. Its replacement was a pitted column that had the shifter brackets removed. The holes in the column were filled with JB Weld, and I figgered I'd try to smooth out the surface with the JB Weld also. All of these parts were foam brush painted with Rust-Oleum primer & semi-gloss black, wet sanding the non-cast pieces in-between coats. I only tried to smooth off the surface to the touch on the non-cast pieces, so brush marks are visible, but only from about a foot away...good enough for these parts. Assembly was waaay easier than disassembly...The gearbox seal I picked up from Roberts years ago, National 240151. I opted to use the John Deere corn head grease for lubricant, even though the fill plug is stamped "HEAVY OIL ONLY". I filled the chamber between the sector shaft bushings with grease before installing the sector shaft. With the gearbox held so that the sector shaft was vertical, the cavity was filled with grease, then the worm shaft was rotated about a dozen times back & forth to settle the grease out, as it does flow, especially when agitated. This movement allowed the grease to fill the roller bearings, around the worm gear, and through the sector shaft gear, as the gearbox became whisper-quiet and effort was greatly reduced after shaft cycling. Permatex black was used to make the gasket for the gearbox cover...I debated on making a paper gasket for this gearbox, but I had recently serviced the axles on my '02 Ram 4x4 CTD, where both axles use RTV for differential cover gaskets. So I figgered making a RTV gasket for this application would be just as acceptable. The adjustment was made per shop manual instructions for the sector shaft to find the high spot on the worm gear, and the assembly cover cap screws were torqued. Gearbox installation should be in the next few days, with all new bolts...then we'll see if that motor will fire after sitting for 4 years
-
paint "shines" depending on its surface smoothness: smooth paints look glossy, rough paints look dull or flat. One of the things I learned when tuning a paint spray gun was how to tune the nozzle for a smoother finish. If the gun is not set right or is partially clogged, if it is not held at the right distance or if it is held at the wrong angle, the paint droplets will land on the surface in irregular patterns, prohibiting the droplets from collapsing onto the surface at a constant rate. Another thing I learned was how to adjust my spray application speed for a glossier surface. Also, even application will promote a glossy finish, as thin spots in paint tend to look like a matte or semi-gloss finish. This all can carry over to rattle can applications. One way to practice technique on application is on cardboard. Painting on flat surfaces at first to develop methods for uniform coating thickness, then for glossiness. To further develop this skill, paint cardboard formed into a shape similar to the metal surface that is to be painted. Mocking up a cardboard wheel can be a cheap way to get some painting practice rather than actually painting the steel wheels. One way to offset these application problems is to wet-sand between coats in progressive grits to even out surface imperfections. This takes practice to be done well, as using too coarse of a grit will produce scratches in the finish; too fine of a grit will not remove enough material. I've recently painted a steering column with a foam brush, wet sanding between each primer & top coat. Looking at the column close up, and the occasional brush stroke can be seen, but from about three feet away, the column has a glossy finish that I can live with, especially since I used a semi-gloss paint. Painting wheels can be tricky where the hoop meets the hub, as trying to get good paint coverage here can easily produce runs. A trick I learned was to paint these areas first with light coats to build up paint thickness, allowing to dry to wet sand any b-bs between coats. Once these areas are adequately coated, the entire wheel can be painted with thin coats for buildup, then top coating for gloss. This can prolong the painting process, but the results can look quite good.
-
that ol' beast looks like it's in decent shape, maybe all it needs is some mechanical refurb and you'll be good to go fer awhile
-
one of the annoying li'l problems they didn't fix until '92 was the odometer would stop working. Also check the manifold heat control valve function; it's controlled by a vacuum switch under the air cleaner that is not marked clearly and can be installed backwards. I had a '90 Ramcharger that ran fine in the winter, but summer time it was a problematic slug. Long story short, that switch was installed backwards at the factory, the engine ran too hot & leaned out, causing the thermostat to break and the catalytic converter to melt, and most of the valves started to come apart...eventually I sold the truck for scrap The mpgs sounds about right; the '90 had a TBI system that was better in cold weather than the carb setup that it replaced...but if ya could find a '92 or later Dodge with a Magnum V6 or V8, you'll really get yer bang for the buck in the power department. I had a '92 Dakota longbed V6 that would really move, and there have been many times I wish I had it cuz it rode as smooth as a Diplomat, could haul a lot of stuff, and could get 22mpg on the highway
-
I pulled the fuel line off the 1-ton, noticing a necked down section near the tank. I straightened that out, and a piece of sludge the size of an english pea fell out, along with some 4yr-old gas...so that was the root cause of this whole fiasco. An oddity that I noticed back in '04 but forgot about was the fuel line at the gas tank. On the '48 1/2 ton & the '51 flatbed dually, the tank has a port for the draw tube facing the front of the truck, near the bottom of the tank. On the '53, it's a completely different tank, with a draw-tube port at the top of the tank. This '49 had a port similar to the '53 at the top. The original fuel line S-shape at the tank was bent upwards, and a short tube was unioned to the top port. One of the bends in the S-shape was necked down and hung some goo. Anyhow, I'm gonna run new line inside the frame rail, over the rear engine mount, and inside the inner fender at the engine, as there is plenty of room for this route. The original routing puts the fuel line outside the frame rail, perilously close to that left front tire. The '49 had a few flat spots on its original fuel line, presumably from being struck by debris flung off that tire. And the '48 had a flat spot that had almost completely choked off the fuel supply, so replacing it way back when was a no-brainer. I'm still befuddled as to why I did not replace this fuel line back in '04, but I reckon I get to enjoy the experience now
-
Stock brakes on the '48 1/2 ton & '49 1-ton, both work decent but considering how many uninsured motorists are in the area, I drive below 45mph and give plenty of room for braking, planning ahead when I'm able. The 1-ton has bigger brakes and is rolling on radials, and it seems like it stops quicker than the 1/2 ton. But neither truck is used everyday, nor are they used to haul heavy loads. One of my pie-in-the-sky plans is to put disk brakes on a daily driver as that project would be able to cruise 60mph
-
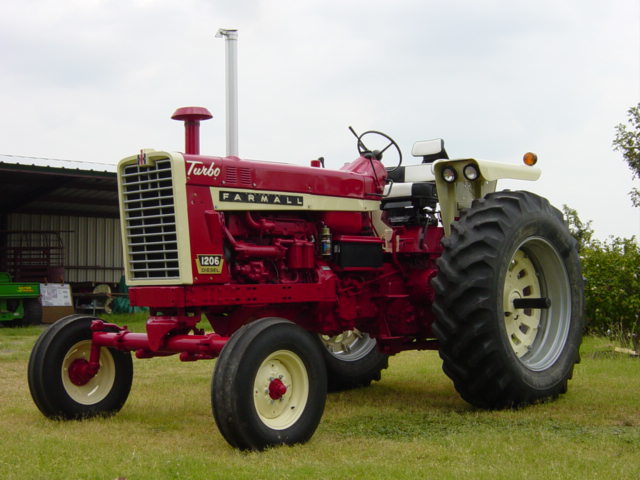
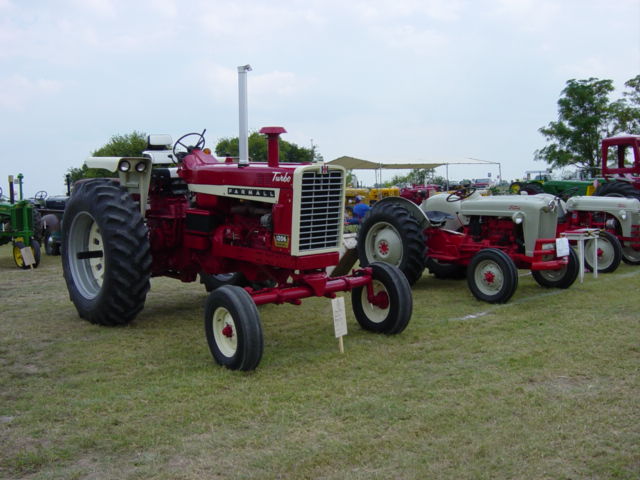
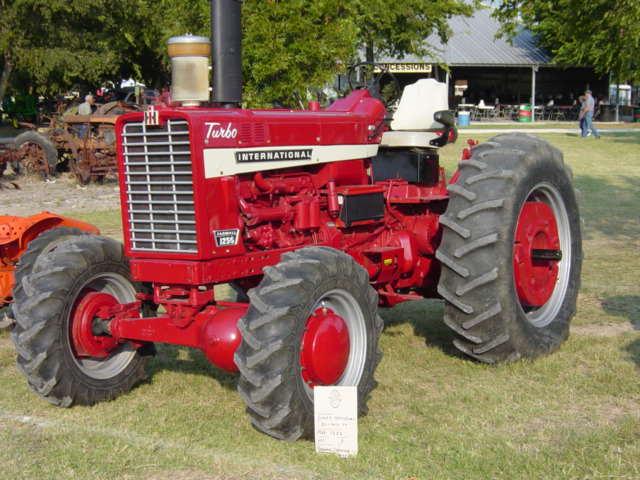
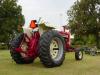
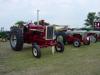
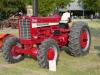
Dad's '66 Farmall 1206 blew out the original injector pump in '03, and while removing that, I noticed the turbocharger was split in two...so that tractor eventually was fixed up real nice for a spell. We took it to the local tractor show in '04; a neighbor's 4WD International 1266 is a very close relative
-
Among one of my eBay finds are an NOS D-O-D-G-E emblem, a NOS hubcap and a NOS hood ornament. The red color matches the Dodge Truck Red that on era-original paint chips. The red is used so that the individual letters stand out; in later D-series trucks, the individual letters are mounted to the hood rather than using an emblem.
-
there's a kink in yer cable somewhar and it's acting like a spring, probably near the firewall clamp. I recall years ago that my choke cable sheath popped out of the bracket under the dash, and taking the whole thing apart I found the cable to be sticky with crud and a kink about halfway down its length. As the truck hadn't run in 20+ yrs, I cleaned the cable real good, flattened the kink out, re-crimped the sheath and re-installed...problem solved
-
the oil bath filters I've worked with have a cellulose-looking stranded element, and I've soaked them in diesel to soften them up and to rinse out since I did not have kerosene as the shop manual suggests to use. The crankcase filters have a stranded-metal element (kinda like a brillo pad) that can be sparked up after soaking without too much damage. If ya want to make cleaning the filter more interesting, try lightly sandblasting it first to see how long it takes to shake all of the sand loose
-
one of the oddities I found on that '54 Plymouth motor in my '48 1/2 ton was at the heat riser. In its place were two short bolts & nuts in the shaft holes in the exhaust manifold. The heating chamber in the intake manifold was completely full of carbon. The truck ran OK, but after reading that there was a reason for the valve, I figgered I needed it. I drilled out & scraped out the carbon, found a NOS heat riser valve kit on eBay back in '99, and eventually found a counter-weight for the shaft. Long story short, I found that I do not need this valve here in TX, as when the weather is cool enough for the need for that valve, the weather is usually wet, and I do not like to drive my truck in the rain (one too many close calls from inattentive drivers). In the summer (which lasts from May to October), I've disconnected the spring and the motor runs fine. When it comes to sacrificial bolts, I go cheap Grade 0 variety as they are easy to cut off or drill out. One long bolt can be installed through the holes, but only snug up the nut to the manifold to keep from putting too much stress on the cast iron wall. On a similar application, I've snugged up a hex nut hand tight + 1/8 turn, then taken a punch to flatten the threads out, effectively locking the nut in place.