


Sniper
-
Posts
6,304 -
Joined
-
Last visited
-
Days Won
141
Content Type
Links Directory
Profiles
Articles
Forums
Downloads
Store
Gallery
Blogs
Events
Everything posted by Sniper
-
The rubber insulator appears to be nothing but a rubber washer. my 36-42 service manual makes no mention of it. https://www.moparmall.com/1939-48-Plymouth-6-piece-Engine-Mount-Set-p/364-003_b.htm
-

New facebook Group for buying and selling parts
Sniper replied to Robin (UK)'s topic in P15-D24 Forum
Joined, might be a good idea to remind people to put in a location. I see some prices in Euros and Pounds, pretty sure shipping would kill me on anything priced like that. Thanks. -
My suggestion on a muffler is to look at muffler sound videos on YouTube and listen to them. I will be shortly going thru my exhaust and plan to run a Dynomax Super Turbo muffler. I like the sound of those.
-
RockAuto lists both a replacement arm and wiper for the 51's. Wiper arm (adjustable length) ANCO 4102 Wiper blade (modern refills fit) ANCO 2012 Both worked on my 51 Cambridge. Pic of them installed.
-
Old school hot rod trick I went with these

-
Well, spent more time doing this http://www.im-creator.com/free/yourolddad/the-snipers-nest/carb-rebuild Than it took to do the carb. Had to do it three time basically, but it's mostly done. Any issues/typos let me know.
-
Got the page up, any typos are mine. Took way too long to make it. I'll proof read it tomorrow. never mind, the machinery threw up when it published the page.
-
The item in the DL section is the same as the one I linked too, so two sources which is good. I didn't rebuild my carb this weekend, my son and I did other things and this is my weekend with him. I try to save one/two day projects to do with him. I just finished the rebuild and will try to write it up today. Meanwhile I will attach the rebuild instructions from Walker, who made my kit. Note the date it was written, 1967. The float setting gauge it says to use wasn't in the sealed kit and that would have been real handy. Other than that basic hand tools. Walker BB instructions.pdf
-
I agree with what you say but would add that the nose dive my 51 takes when stopping is more noticeable than later ball joint era cars I have driven. Might be wore out springs contributing to it and I haven;t really gotten it up past 50 either. But I will also say it goes over speed bumps a lot smoother than any ball joint era car I have driven as well, till the rear axle hits that bump then it's the same or even a bit more noticeable. Is it enough to get me out there to do a bunch of measurements and math to relocate the control arm mounting points? Not at this point. Though I do plan to rebuild the front and I might take those measurements then.
-
Gauge cluster connections. Using above drawing as the source. Disclaimer here, the supplied drawing gets fuzzy when blow it up enough to see. Temp gauge - mechanical, no wiring. The one in this picture will have to be replaced because someone cut the probe tube. Oil pressure - mechanical, you should have a small metal tube with a nut that screws into this. Get it tight or it will leak oil. Light - you should have two sockets that snap into those, best time for new bulbs. Fuel gauge - top left blue wire top right black and yellow wire these two go back to the fuel sending unit. bottom blue (different blue from top left) You may need to sort out which blue goes to the sender Speedometer - big cable screws on to this, should have a square tipped inner cable that seats inside. Ammeter - left two brown wires and a black wire right one red wire

-
Proper anti dive is determined by the suspension design if you have none and are relying on spring rate for control it is a poor decision. In order for the spring rate to be able to control braking dive is would have to approach an infinite rate. Which is why our rides dive in braking, because it doesn't have an infinite spring rate and no anti dive. Not to mention the floaty feeling our rides have, a combination of soft springing and poor upper shock mount location. I suppose one could try to shim up on the front of the upper control arm inner pivot to instill some anti dive, but with the design of the uprights you will most likely side load the outer and/or inner pivots. Which is probably part of why they went to ball joints.
-
Load shifting under braking is handled by the anti dive built into the front suspension, not by spring rates. I linked to the specifications for the Aerostar spring in the third post in this thread.
-
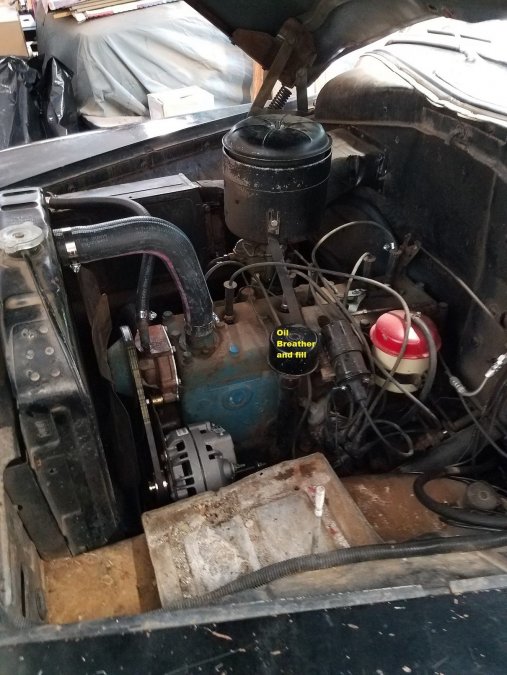
Oil fill is also the breather. The cap twists off.
-
Dipstick tube, best shot I have. It's labelled

-
I read the notes, I see the diagram. The diagram shows a negative case, positive output alternator in a positive ground system. In that specific circumstance if you just " reverse the battery connections" you will smoke something. The drawing is a poor one for a positive ground setup and is likely to lead to confusion when someone with minimal electrical experience tries to use it.
-
U rread the notes, I see the diagram. It shous a negative case, positive output alternator in a negative grouns syste, In that specific circumstance ig you just
-
Careful there, if you are putting a positive output negative case alternator in, like shown in the drawing, and you swap the battery connections you are likely to let the smoke out of something.
-
Another source for floor pans and such http://theplymouthdoctor.com/
-
I plan to rebuild my Carter BB this weekend. I'll document it on my webpage and post a link. Meanwhile, here's a link to a site with a bunch of carb manuals on it. Most of them appear to be scans of hard copy versions, but they are useable. https://www.carburetor-parts.com/Carburetor-Manuals_ep_274.html
-
Some food for thought. I plan to add AC to my 51 at some point and probably power steering. Going to go serpentine belt as it's real tight in the Cambridge for one belt, not sure two will fit adn no way will three. I found a neutral balance harmonic balancer that also incorporates a 6 rib pulley on it's outer shell. I figure it I can redrill the hub or the balancer to mate I can get a new hub made. Just food for thought. Link to the balancer https://www.rockauto.com/en/moreinfo.php?pk=1858862&cc=1432708&jsn=13
-
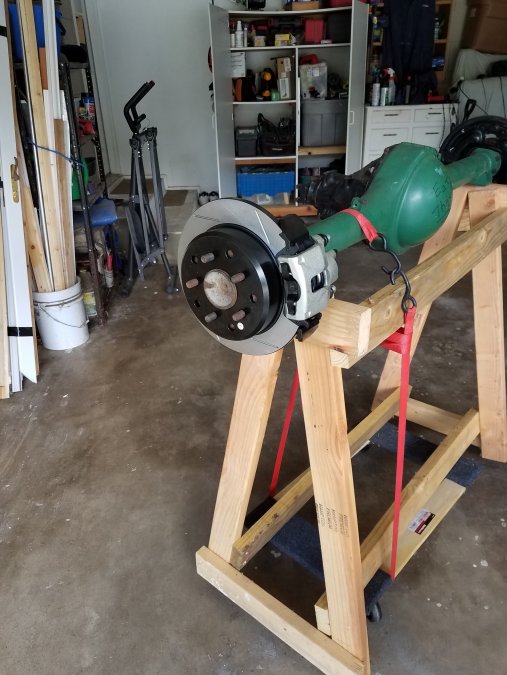
I did something sorta similar for the axle going in my 65 Cuda, but I don't weld. Tall enough to stand up while working on it. Let me tell you, picking it up and putting it on top was all I could do.
-
Did you learn the trick of taking off the drums without a puller? Or was it how to set the choke? Good luck.
-
Nice car. I look forward to your project, I have a 51 Cambridge and I hope my work can help you as well. Here's what I ducumented do far. http://www.im-creator.com/free/yourolddad/the-snipers-nest/cambridge
-
Man, as a sailor I am really conflicted, lol. Good idea on the tumbler, I could use one for other brass things I have as well. My daughter came down for Thanksgiving and was asking about an ultrasonic cleaner for her husband (he's a cop and had to work) for his stuff that goes boom. So we researched some of them and I ended up buying a small ultrasonic cleaner after she went back home for my .45. For Christmas my daughter got me a big ultrasonic cleaner. I still cannot pick up a clue. At least now I can do my AFB's in the one she got me.
-
I'm a natural pessimist, lol. This way I am never disappointed. I went out and looked at the hardware. Someone's been there before and reinstalled the stuff incorrectly, I believe. They have the conical castellated nuts installed on the four outer INTAKE manifold studs, with the cone facing out. The four outer EXHAUST studs have the washers in them, but regular nuts. If I understand correctly, the conical nuts and associated washers go together and on the four outer EXHAUST studs? I found an NOS source for the funky nuts, maybe. Frank Mitchell, fmmpr on Ebay. I sent a question asking if he had the washers, too. We shall see. Though to be honest i haven't heard good things about him over the years.
