Sam Buchanan
-
Posts
2,558 -
Joined
-
Last visited
-
Days Won
83
Everything posted by Sam Buchanan
-
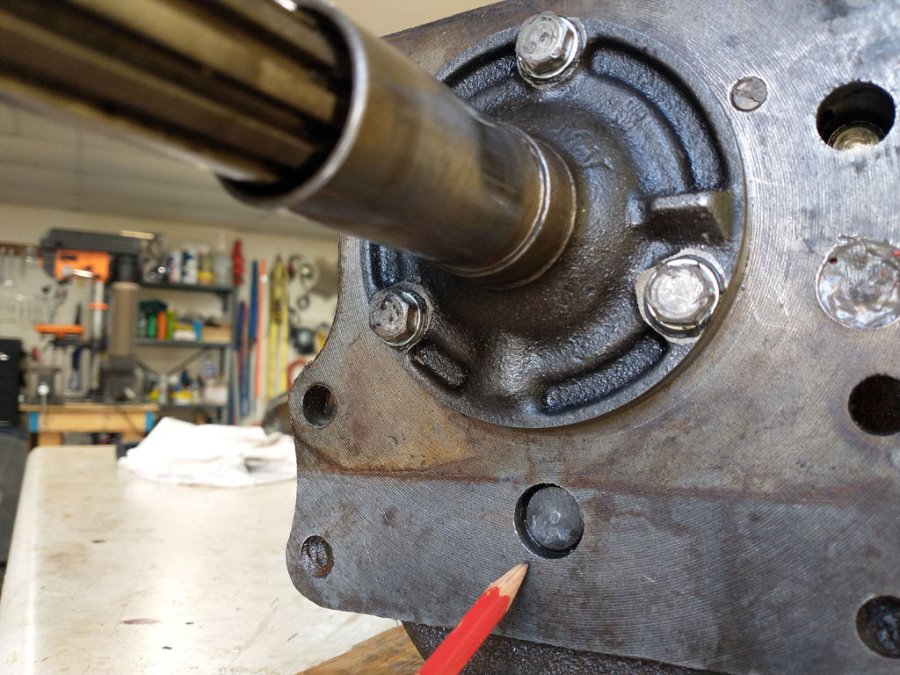
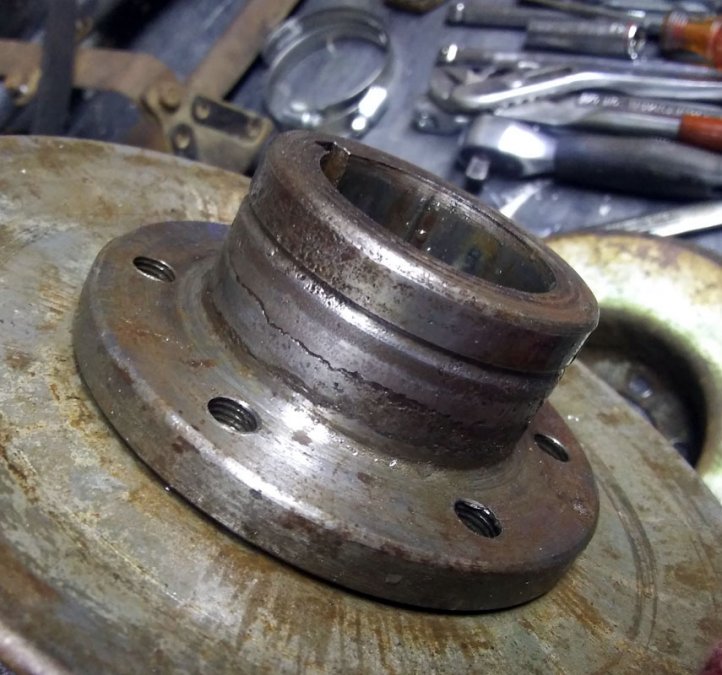
After removing the tranny (again...) to chase down a substantial leak I found it. The countershaft at the front of the transmission is leaking so badly that fluid drips from the bottom of the tranny. I'm tired of the mess not to mention topping up with $23/quart Redline MDL (great oil by the way, stops the crunchies). Here is the leak: I assume the shaft is supposed to be a drive fit in the case but in this instance there is enough clearance to pass trans fluid because the shaft is submerged in gear oil.. You can tell by the witness line on the case that the shaft is below the bellhousing gasket. Previously I plugged this hole with fuel tank sealant but it only held for a couple of years. How do I make a long-term repair?
-
The better to eat the electrons! ?
-
The aftermarket VR I bought was DOA....but I fixed it:
-
McMaster-Carr has a large variety of pins, some with cotter pins and some with circlips. Washers can be used to adjust the length of a pin that is a little long. https://www.mcmaster.com/pins/clevis-pins-with-retaining-ring-groove-6/
-
Just to close the loop, the frame is on the bench masked and ready for paint. The trick for an easy removal from the door is to pop out the front half of the frame followed by the rear half. For some reason I couldn't get it to work the other way, maybe the vent spring wasn't clearing if it didn't come out first. Anyway....problem solved.
-
Thank you, that confirms what I thought I remembered, just need to figure out why it didn't want to release near the vent. We'll figure it out.
-
I just need to remove the frame from the door for repaint, either with the vent removed or still in place. I prefer to not disturb the rubber seal.
-
That’s how I remembered it but it was getting hung up around the vent. I’ll try it again, thanks for the info.
-
Pretty sure that is what I did the first time, I'll look for the screws at the top of the vent and give it another go. I hate forgetting how I did something earlier.......but at least I don't have to buy any new books...........
-
So does this mean the Castrol is working superbly by keeping more contaminants in suspension?
-
That is helpful, thanks! I was pretty sure there were some fasteners that had to be removed, looks like the door panel is coming off, too.
-
I replaced the glass in this door a couple of years ago and now want to remove the metal surround for repaint. But for the life of me I can't recall how I got the frame off the door. Something about the vent window is keeping the front half of the frame from coming out of the door. Is the vent window attached to the frame and comes out with it or does the vent need to be removed first? I have recent vent rubber and want to avoid disturbing it if possible but I think I recall a screw under the vent rubber seal. If someone can offer insight it will be appreciated!
-

Castrol GTX classic Motor oil 20-50 weight
Sam Buchanan replied to desoto1939's topic in P15-D24 Forum
I would buy that just to get the can! ? -
"rebuilt brakes" may have meant new shoes.......
-
Now the question is........where did the brake fluid go?
-
The NOS gauges are probably going to be your only choice if you want a gauge that works properly. A fuel gauge that isn't accurate is worse than a gauge that doesn't work.? Here is an example of what is available for vintage 6v cars, but I have no idea if it is compatible with our sender. https://www.speedwaymotors.com/Dynacorn-G02-Fuel-Gauge-47-49-6-Volt-Chevy,401051.html If your odometer works you can use that as a semi-gauge. Top up the tank, then calculate how many miles you can go until you get to 1/4 tank. Then top up again. That's the way I kept up with fuel in my kit car.
-
https://www.ebay.com/itm/183305459546?hash=item2aaddb575a:g:1jAAAOSwjMJXDFbx&amdata=enc%3AAQAHAAAAsDeAmfa7P0%2B7yghQrizkxQHIltE%2BjdMVcG5tQ4142ujMSFF%2B%2F66MFj2oP%2BVJQ1ZHJMQ2%2Bp5Sz0SfTXNX6s2FvTYDdp5thwTV8RoP0HdKgfZlUuwgnJnNzMrsY1hxmyfIKt4z6siypVdb45f5rzDm4BqSiyb5AoAazP6qSAnQAG%2BrX9Z5XA%2FDDpoiDi%2FT20Gv%2BU6%2FGPgtD1xv9FiqCLCYdo3c9n%2Fmh9jP7gbx3jxgMR6f|tkp%3ABk9SR_SRyaPkYA https://www.ebay.com/itm/175259831154?hash=item28ce4ccb72:g:~PYAAOSwdtxiaZqn&amdata=enc%3AAQAHAAAAsGTsHpVs2cjd7nkifCHm30BSHBBVAaZIdR9sGdOIKBIM8pgr9UlsAW80qrQGW%2BklhIRbUEAnOaPNZieWbp4faS8P83UzI0iBjmM%2FDbpy6cI2VKtRLq1JJ9awf8yi5LwSrbC%2FXhBmbmTEiF%2FUuS24ywyz4JxiAblq2dE3HUOTSO1ohc8Ru%2FFpv7WS3vUbQ2MmK1mG%2FMozlytjn54GNX8TAx02nYVeVUlTTxZ%2Fyf8cdYlu|tkp%3ABk9SR_SRyaPkYA
-
I have two of each. I keep each matching pair on the same side so nobody could ever tell I have two sizes. ?
-
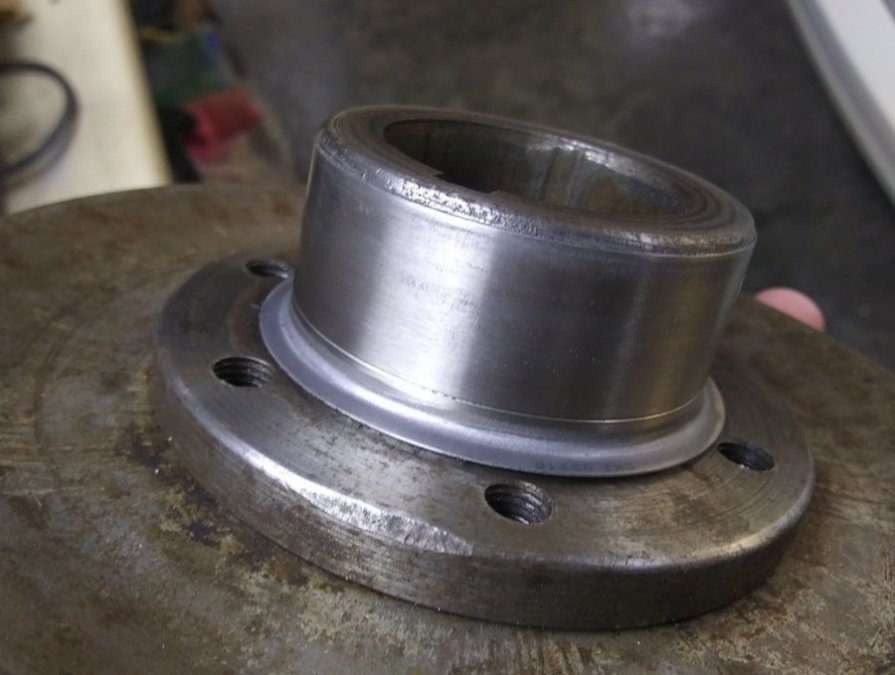
It's unlikely oil is coming out of the vent but if it is plugged the pressure that can build up in the diff can push oil past the seals. Find the vent (on top surface of the housing on my P15) and make sure the cotter pin in it is free to allowing venting. Many times the leak is at the pinion shaft near the universal joint. The seal can wear a groove in the drive flange which then passes oil....along with the old seal being hardened. Sometimes a Speedi-Sleeve is installed on the flange to allow the new seal to function properly. https://www.skf.com/us/products/industrial-seals/power-transmission-seals/wear-sleeves/skf-speedi-sleeve Here are photos showing how the sleeve works, in this case on the crankshaft pulley. The worn seal surface: And the renewed surface after the sleeve is installed.
-
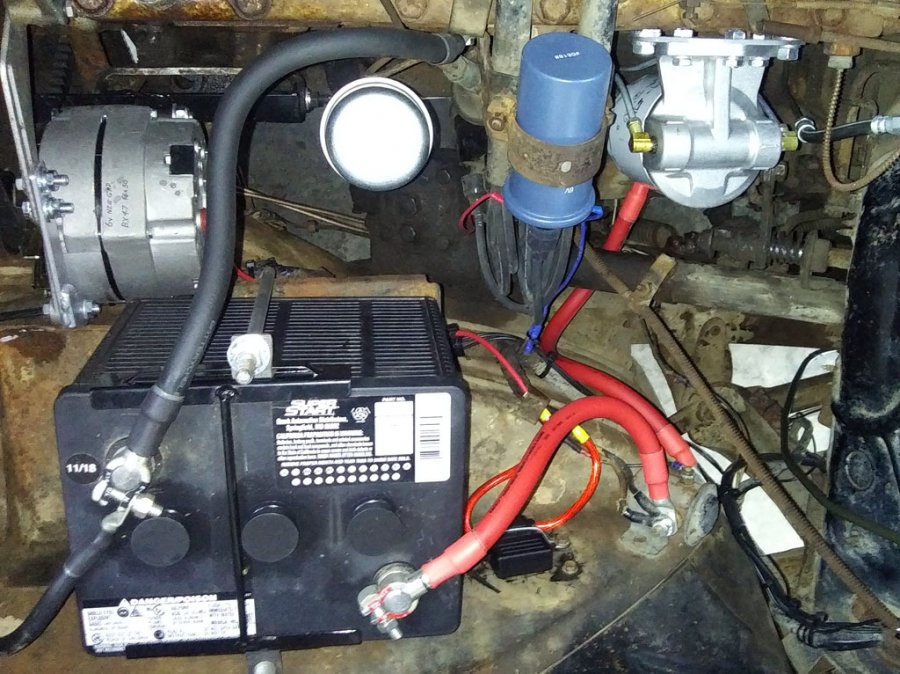
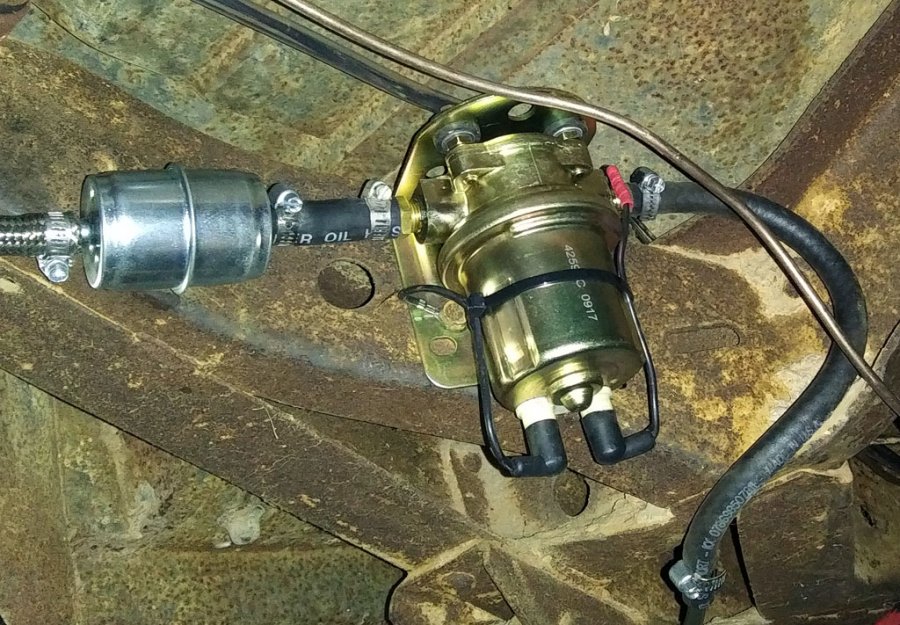
I replaced the tank and all fuel lines. The new tank doesn't have built-in filtration so I installed a filter between the tank and full-time electric fuel pump (I removed the mechanical pump on the engine). There is no filter at the carb since all lines are new but if the old lines were still in place I would install one there as well.
-
My First Car -- P15 1947 Plymouth Deluxe
Sam Buchanan replied to NickPickToo's topic in P15-D24 Forum
Hey Nick, great to hear from you again! Hope you had a good freshman year. Yep, that pedal will break when you try to mash it to the floor all the time. ? -
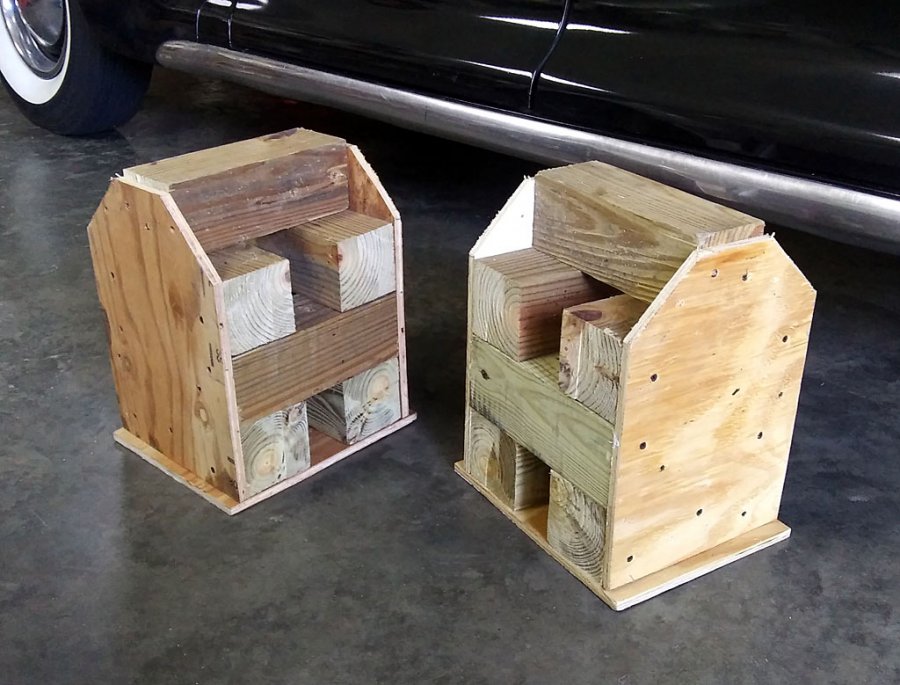
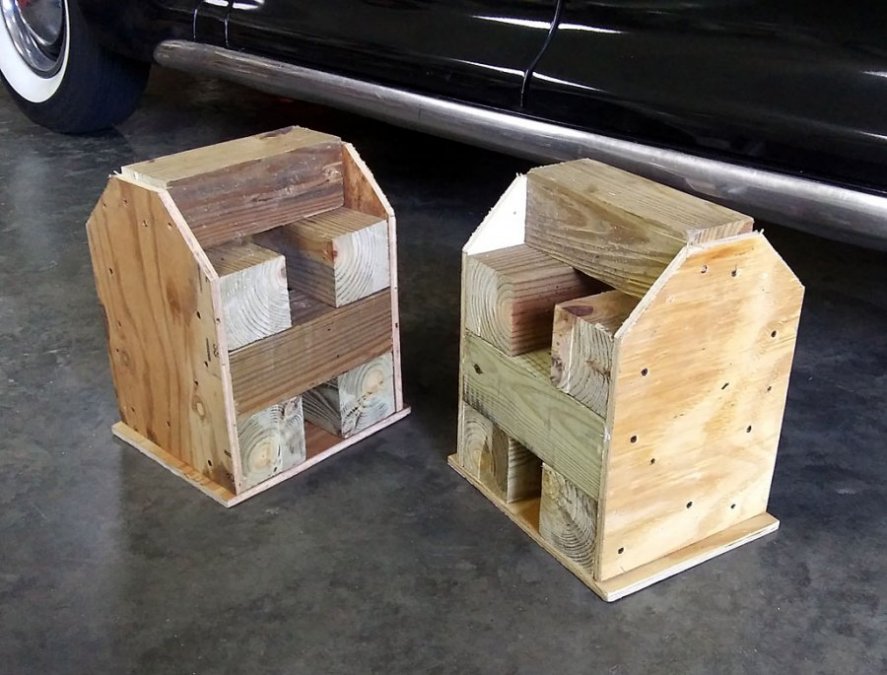
And some jack stands you can trust!
-
How Do You Bench Test A Rebuilt Fuel Pump?
Sam Buchanan replied to Bingster's topic in P15-D24 Forum
I wonder if just installing the pump and running the engine would be less time and hassle than figuring out how to bench test it........... ? -
I've done it a couple of times but it is quite the ordeal, kinda like giving birth in reverse pushing the boot through the housing. Wish I had some good tips for you but it is a matter of patience, lube, luck, and more patience....and hoping the boot doesn't split. I give the boots a hot water soak, maybe that helps.
-
I couldn't see a way to make the short arm longer without taking the assembly apart, welding some extra length and redrilling. Certainly doable, but hoping this will never be an issue. The lack of full travel is there, I just don't know the real-world implications.....hopefully not any for our low-performance/speed cars. Thinking through this....if a rear wheel cylinder let go and loss of pressure in the rear brakes occurred, the master cylinder chamber for the front brakes would still have the same volume of fluid as before. So while total vehicle braking efficiency would be reduced, the front brakes should still function. Reduced braking is better than no braking as would be the case if something pops in a single-chamber master cylinder system.