


keithb7
-
Posts
3,462 -
Joined
-
Last visited
-
Days Won
193
Content Type
Links Directory
Profiles
Articles
Forums
Downloads
Store
Gallery
Blogs
Events
Everything posted by keithb7
-
To see an example of a parts book click here: http://www.1948plymouth.info/1948p15/DocumentWeb/default.php Enter "password" to get access. Cruise around, see what you get from a decent parts book.
-
I have been growing my collection of manuals to support my 2 cars. What have I learned? A ton of info is shared across a wide range of years. These old Mopars are sorta like decades of in-bred relatives. All very closely related. Initially I bought the original shop manual for my cars. Good stuff. Then I bought a Motors Manual each of my cars. More great info! Extra stuff that may have been overlooked in the original shop manual. The original shop manual, I believe was written for dealer mechanics. They assume you should have a good grasp of mechanical work. The Motors Manual seems is a little more stripped down for home grease monkey type folks? A friend found a 1949 original DPCD manual. He gave it to me. I figured I would have no need for it as I have no 1949 cars. I was surprised to see lots of good info I totally could use! Different and in some ways better illustrations from other my other manuals. The 1949 turned out to be a great resource that I often reference. I also located a 1953 and 1938 original parts manuals for my cars. Good for finding NOS parts on E-Bay. The illustrations are handy too. When I decided to replace the Synchro in my 1938 tranny, I looked up the original 1938 part number. Then searched it on E-bay. $80 shipped! Brand new. That one purchase made that parts manual well worth the price. The synchro was not listed by what cars it fit. Just the old original part number. Without it I would have never found it. A perfect OEM brand new part from my 1938! So, shop manual, or service manual, or parts manual?...The answer is yes. All provide info you can and will use if you want to take care of your car yourself.
-
The old switch was done. Even when removed it was making continuity. Thanks for the tips though. I will be sure to double check everything else. Brakes do release properly. All new hoses. MC rebuilt. Jacked, up the wheels turn nicely.
-
Note to future self: Single wire in-series light circuits, all circuits after the switch go to ground. Its when they don’t go to ground is when there’s a problem! If said circuits go to ground before the switch, there’s a problem! Turned out to be a failing brake light switch. All my harness wiring seems to be fine. Hydraulic actuated brake switch was making contact at switch when the brakes were released. Brakes lights are wired directly to the battery circuit. Battery was draining. Replaced switch all seems good. I think! I may be back to ask for help...

-
I experienced a couple of weird symptoms recently in my ‘38 Plymouth. Twice I noticed the tail lights on, when the car parked and off. Hmm. I know this can be attributed to stuck-on brakes, but no that wasn’t it. Brakes were just overhauled. Then I noticed a dead battery after a few days parked. Hmm. I disconnected negative cable and charged it up. Next day reinstalled cable. Car started fine. Raining so no test drive. I left the battery on a .75 amp trickle charger over night. Left both battery cables installed. Next morning no go-juice. The battery measures at 2V. Hmm. Time to dig in with the multi-meter and see whats going on. I ground a lead to a spark plug metal nut at the base. (great solid ground by the way). I began poking around for continuity to ground. Right off the starter lug! Ground. What the heck? I get poking around under the dash and find grounded circuits for my fog lamps, brake lamps, running lamps. What the heck? I must be doing something wrong. I break things down in my head and remove any wires at the starter lug. Hmm. Ok just the one 6-or so gauge wire is grounding. It goes up into the dash. Right to the ammeter. The lug on the ammeter is grounding. Hmm. There are multiple wires pulled off that one ammeter lug. So each one of those circuits are now being grounded. I remove all connections at ammeter and start checking each one. Now I’m down to only 1 wire that is grounding. Hmm. Where does it go? I’m thinking about the brake lights coming on a few weeks ago. Likely to the brake lights I figure. Sure enough. Indeed it does go to the brake lights. I check continuity at the brake switch, affirmative. Remove wire after switch that goes to the brake lamps. Continuity test wire from ammeter to brake switch connection, all good. No grounding. Remove wire at brake switch that goes to brake lights. Bingo! Its grounding. This is fun. Making progress. Yet now its time to get under the car. Maybe even drop the fuel tank to see what I’ve done. I built the rear harness from scratch. I screwed something up. Time to don the coveralls and get under there. I’ll report back my findings. I think I'm getting close. I am grateful how simple these old cars are. I was amused and reminded how tricky electrons and wiring can be. 1 simple wire was pulling down everything else that it touched. Where it gathered at the shared lug on the rear of the ammeter. A few years ago I would have been on a wild goose chase after I found several different circuits grounding. Sometimes aging is not so bad. I've learned to slow down and think. Lol.

-
Great to hear. Congrats on getting it home. Now you can work on it at your convenience.
-
Any luck getting it running Worden?
-
Some fuel pumps today are priced near the price of a rebuild kit. Folks may choose to replace versus rebuilding these pumps. I decided to mix up some 2-part JB Weld and put liberal coatings (3 light layers over 3 days) over both ends of the fulcrum pin ends. It’s not coming out any time soon.
-
For a hint. Put a finger over the intake hole. Pump it a couple times. You’ll feel a vacuum. You could attach a piece of rubber fuel line to the intake side as well. Dip it in some gas. Pump it a few times. Should pump gas.
-
I bought one recently, but darned if I can remember the size. This help?

-
When you hold open the throttle you are sucking fuel through a main jet in the carb. Fuel is introduced up in the main carb venturi when the throttle valve is held open. At idle with the throttle valve closed, you are sucking fuel through the idle circuit jet. At idle, fuel is introduced down low in the carb. Near the base I believe. The idle mixture screw allows for air/fuel mixture adjustment here. Your latest problem of no idle; could your carb need a good cleaning? Clearing up the idle circuit? Did you by chance play with the A/F mixture screw recently? If you had a friend work the throttle to keep the engine running, then your helper let off the throttle. Standing by & ready, what if you quickly, manually sprayed gas in the carb venturi at idle. Would the engine then run? Only while you manually introduced fuel at idle?
-
Consider that the pump you removed was likely cast and made in North America. The quality was good. Especially compared to the off-shore cheap pumps you may be pricing out today. You may be better off rebuilding your USA pump with the kit, compared to buying a new off-shore pump this is priced lower than the rebuild kit.
-
A 6V electric pump is a pretty easy, worthwhile project. A power wire fused from key switch works. Wire it to the negative wire of the 6V pump. Put the positive wire of the pump to ground. That's it. I wired mine up to a toggle switch on the dash. I use the stock type mechanical pump mainly. I use electric for pre-start priming, vapor lock, or if needed on long full-throttle hill climbs. The electric assists the mechanical pump in my scenario. The pump will have an inlet and outlet side. Plumb it up accordingly. Suggest having a filter before the electric pump. Change it out every year or two to keep the pump with a good free supply of fuel from the tank. Best practice seems to be to mount it near the fuel tank. You can choose to mount it before the mechanical pump, or after. Both positions work in my experience. Currently my 6V pump is after the mechanical pump. It pulls fuel through no problem.
-
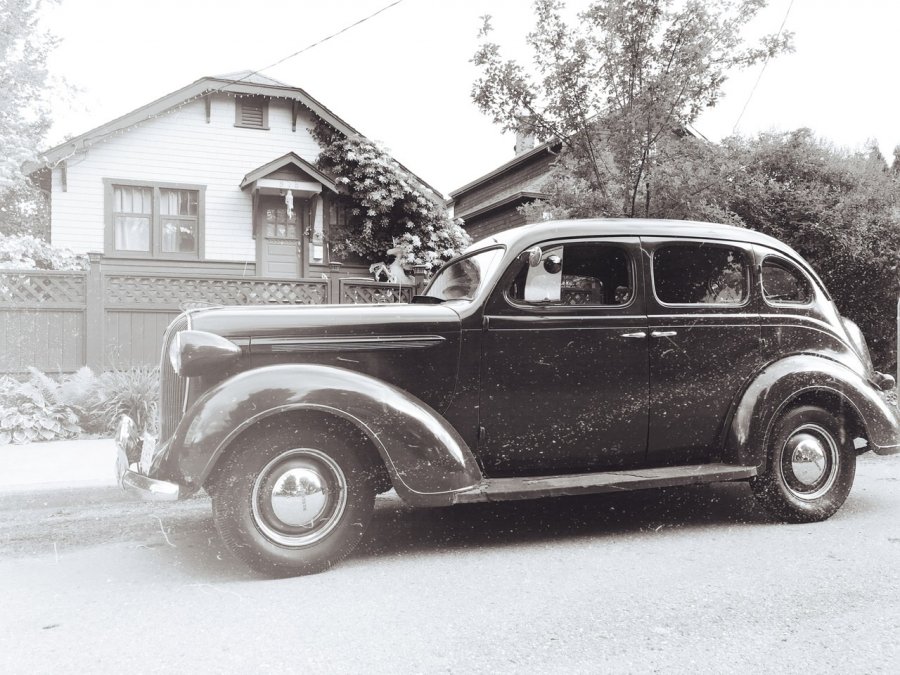
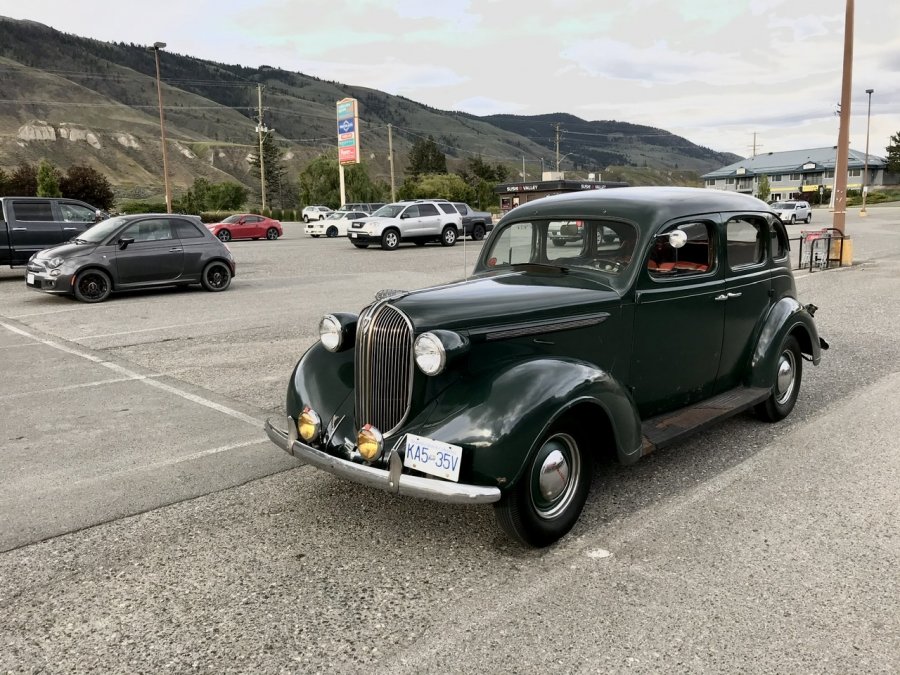
Proceeded to cruise around town. Car is running spectacular and feeling great tonight. Sometimes I entertain myself spotting photo opportunities in front of old houses.
-
Ran to the pharmacy tonight. I never made it 10 feet from my car before I was approached. The questions began. Then in the store a security guard and 2 more people asked me about my old car. I make them try and guess the year. They figured I should have stepped out with a Tommy gun. Lol. They love it. A great reminder why we love to maintain and drive these old cars.
-
I fired up my car tonight to test drive after my recent new clutch gear replacement. The tranny feels great. No grinding at all. Smooth clean tight shifts up and down between 2nd and 3rd gear. I can hardly believe how good this '38 car feels as it keeps improving. Tranny countershaft was sealed up with anaerobic sealant at the rearward end. Been full of oil for 4 days no leaks yet. Seems good. Finger crossed. All the talk recently about different oils to use in the tranny. We know that Redline MTL works really well in these old 3 speeds. I did a little more reading and researching. I decided to try Caterpillar TDTO (Transmission Drive Train Oil). SAE 50. I work at the local Caterpillar dealer. The old timers here tell me it's a great oil for my needs. Cat tells us to use it many applications for axles, final drives, transmissions. So I figured I'd give it a try and report my findings. Early indications so far are I have nice smooth shifts. I also placed a very strong magnet inside the gearbox. Max distance from any moving parts. It is submersed in oil. It will collect any future metal wear particles and help keep my tranny oil clean. So, the question remains did my shifts improve from the new clutch gear? Or from removing the GL-5 and putting in a better suited oil? I'm not sure I'll ever know as I did both. I had some odd other noises going on that I seem to have quelled as well. I installed a new pilot bushing, I trimmed up the rear motor mounts so they fit properly, and I found & replaced a broken spring in the trunnion at the front of my drive shaft. I am happy with the results.
-
There are just so many quirky little things with these old cars. The fuel pump fulcrum pin backing out is another one of these little annoyances we have to learn about the hard way. LOL. Sometimes it feels like keeping these old cars reliable and roadworthy, is like herding cats. It's fun though. Enjoy all the humbling experiences. Get AAA premiere. With it I can wonder recklessly all over my region and get towed home up to 200 or so miles away!
-
Pigeon, hmm... Homing Pigeon. Homer! A good name? Cool truck have fun learning. These old vehicles are awesome to work on. There's lots of support here in this forum. You can do pretty well anything yourself working these. This past winter I rebuilt my first ever transmission. I'm still sorta shocked I can say this this, but now I know I can also say its not hard. Clutch, axles, chassis wiring, brakes, ignition, valve grind, driveshaft, radiator, carb rebuild, differential, wheel bearings, major engine work, valve set, and more. All done right here at home. And I"m a rookie when it comes to this stuff. My baby went to a formal garage only once, to get a new hand shaped exhaust system built. That's it. With the desire, patience, ingenuity, and a little pocket money flowing in, it can be done at a reasonable price. I'm building a driver, as opposed to a show winner.
-
That'll raise a few feathers. LOL. Do as you please. Everyone has their own individual reasons for not having the desire to drive a 1937 Desoto at 80 mph all day. Nor jumping out of airplanes. Or free climbing El Capitan. It's not because we are scared. We've all done dumber things at different times in our lives. It's more likely due to experience and common sense that we develop as we age. Risk versus reward. I like my teeth and brains inside my skull. It's not worth the risk to me, at this point in my life. When I was younger, you bet. I was invincible. Scared, no. Smarter as I've aged? I like to think so. Reminds me of a saying I once heard about a father and son buffalo out on the big prairie. Staring at a pasture full of cows off in the distance. The sons says, "hey dad what say we run down there real fast and bag a cow each?"..Dad says, "how about we walk down there and bag 'em all?"....That's experience. LOL.
-
Old gear assy here. The teeth appear to be a little thinner here. Maybe. I hope to have a nice smooth, easy shifting tranny when I reassemble it soon.
-
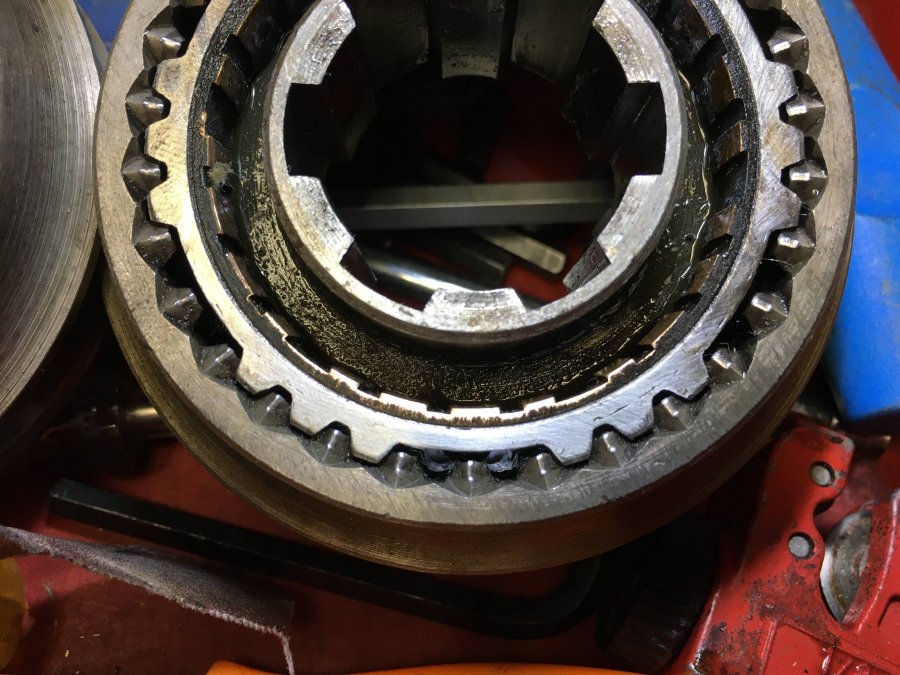
A few more pics of the old and new clutch gears for comparison. This is the new clutch gear. That's vintage, dark anti-rust grease still on there in places.
-
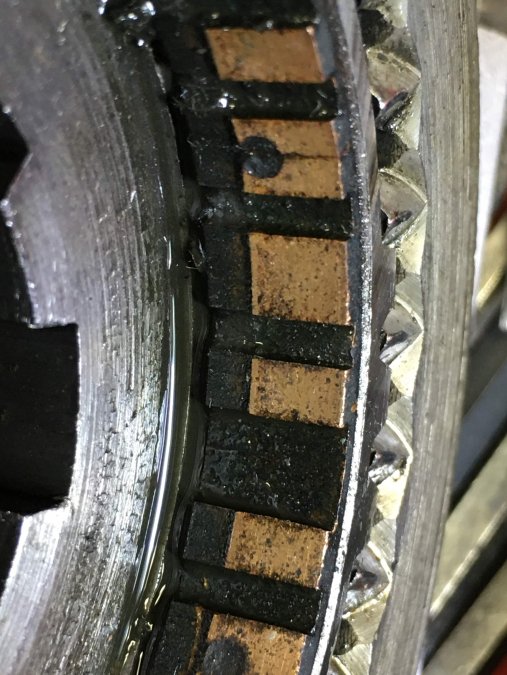
-
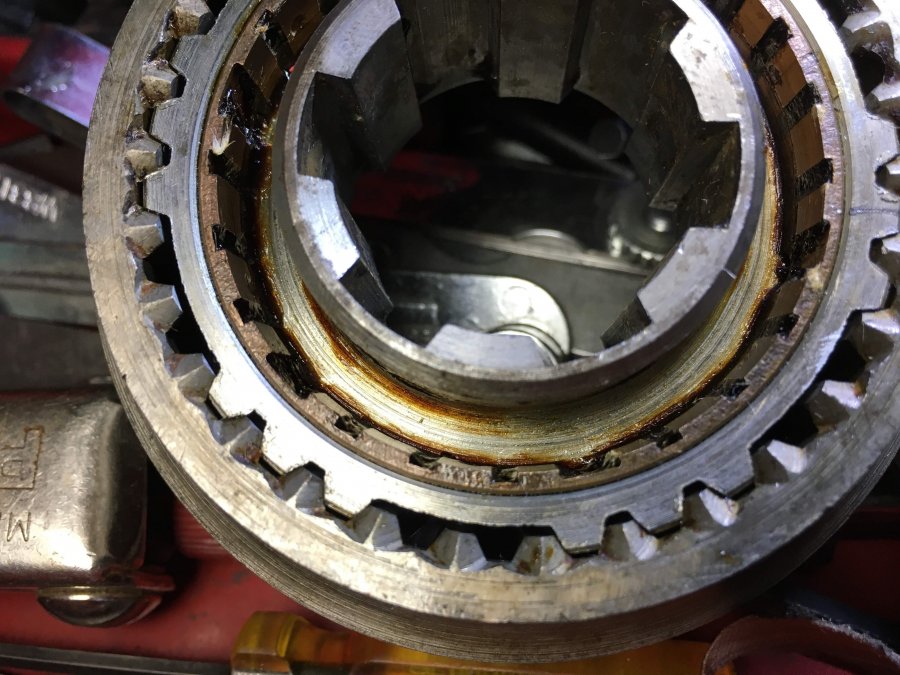
Today my new NOS Chrysler clutch gear (aka synchromesh) arrived. I took a little time to study the new one, comparing to the old one. In my quest for understanding, I thought I would post my findings here and see what you folks think. Looking at the inner contact teeth of the gear, this seems to be a wearing surface to me. I'll go out on a limb and say, maybe the highest wearing area of the clutch gear? This area contacts a ramp/cone shaped ring on an adjacent gear. When we shift between 2nd & 3rd we push this clutch gear, the brass teeth bite the adjacent gear ramp, and that action speeds up the clutch gear. The two adjacent gears speed match and mate together nicely. The new gear assy here you can see nice fine lines cut into the brass teeth surface. I'm not sure but I think this material is some type of brass/bronze alloy. Pic 1 here is an example of nice clean, new teeth with lines cut in them, to cause friction I believe. This is all coated in oil when in use inside the tranny. Special oil is specified for use that is not too slippery as I understand it. Modern GL-5 and GL-4 gear oil is not ideal for use in our old manual transmissions. I read that GL-4 is easier on brass parts, however GL-5 can cause brass parts to wear prematurely. These oils are recommended for extreme pressures conditions as found in a hypoid crown & pinion gear set. For our old Mopar trannies GL-1 oil is often recommended and available at Napa (USA, not available in Canada). Oil that is too slippery, (too high lubricity?) may not allow the clutch gear here to speed up or slow down quick enough as we force it into place with the stick shift. Causing a grind. The next photo shows my old pitted and worn clutch gear internal teeth. They are pretty smooth. The brass looks a little beat up. Perhaps small particles of dirt, or bearing steel, embedded in it. It probably had years of use, running around with bearings that are wearing out. The pinion bearing in this tranny was found to be particularly worn and rough upon disassembly. So were the metal thrust washers on the counter shaft. This worn material, steel, goes somewhere. Likely suspended in the oil, and travels throughout the tranny during service. I'd wager it gets crushed into, and embeds itself into softer brass alloy metals, like these inner clutch gear teeth, when they contact the adjacent ramp ring and are forced to mate. The friction lines are long gone. Worn away. Imagine tiny metal particles of steel in the oil, working like sandpaper on these softer brass parts. Wearing them away. Keep your tranny oil clean folks! I did try to measure the inside diameter of the old gear versus the new one. These teeth appear to wear on a taper so an accurate measurement is challenging with a snap-T gauge and a micrometer.

-
Pretty sure when either a regulator or genny goes south it’ll stay there. The alternate will step right in. 6V? I can’t come up with a good reason to change it. It’ll stay.
-
My 1953 Chrysler Windsor 265 L6 does not have "Spitfire" labeling. Perhaps it's a replacement head? I can't say. A lot can happen over 67 years.


