Leaderboard


Popular Content
Showing content with the highest reputation on 01/18/2023 in all areas
-
This car has been garaged for most of that 40 year span. What was done on the rebuild? Everything about. Machine shop work: crank and cam reground, engine bored out .030. New rings. New pistons .030 over. I reground the valves according to manual. New bearings. New valve springs. The cooling system is working. Smoke is coming out of the exhaust pipe to exhaust manifold connection. Spark plug electrodes are turning black quickly. Does this engine start look normal?2 points
-
I thought it was rust in the cylinders that was stopping the engine from completing full revolutions, but as it turns out it's the valves. Some appear to be stuck open. I tapped very lightly with a rubber mallet on a few valves and the heads broke off (ugh). The crankshaft, rods, and bearings all appear to be in great condition. Oil had some sludge and I found one miscellaneous spring. I don't know if it came from the fuel pump, oil pump, oil filter, or some other part. I'll have to refer to an exploded diagram. Got to say, it's equal parts frustration, fun, and education. I'm really enjoying it... though my fingers and knuckles would tend to disagree.2 points
-
Tell us about the engine overhaul. You've stated it was rebuilt 30+ years ago.....what did this overhaul involve? Did you do the work or was it farmed out? How has the engine been stored for the past thirty years? Also, throttle tip-in stumble could also be due to the distributor advance not working properly.2 points
-
Regarding the smoke, you should determine why and correct that first. 1. White smoke - burning antifreeze. 2. Blue smoke - burning oil 3. Black sooty smoke - running too rich. As far as acceleration, check all the basics. 1. Plugs are not fouled, see 3 above. 2. You have good spark on all cylinders, especially if only running on a battery. You should use a battery and a manual charger to run with to ensure a strong spark. 3. Make sure your point gap is correct. 4. Set your timing and then re-adjust your carb/idle. 5. Make sure you have no air leaks, carb base or intake manifold. You can read your plugs as well to get some hint as to what the problem may be.2 points
-
That's strange, when I take off too many layers they just point and laugh uncontrollably. No cops just side cramps.?2 points
-
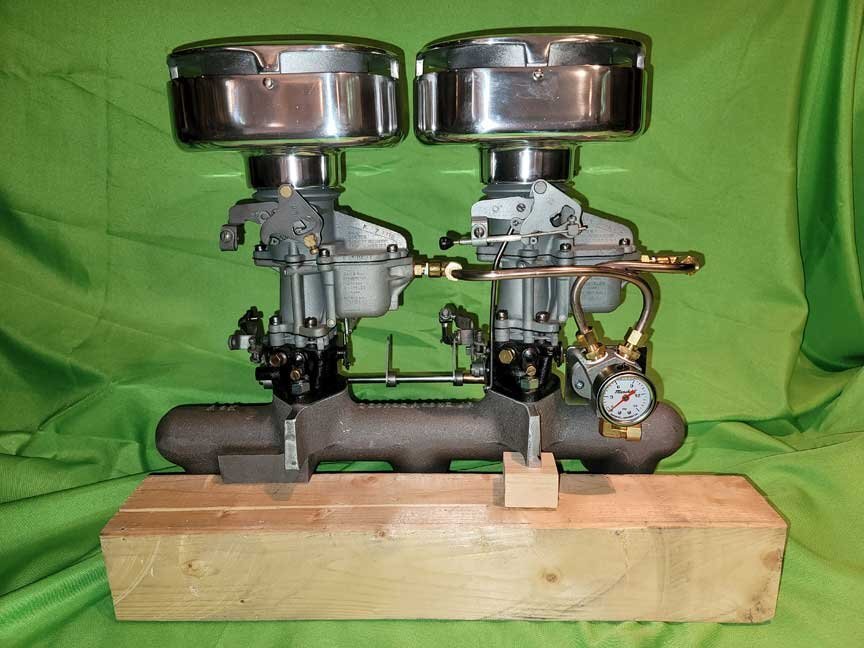
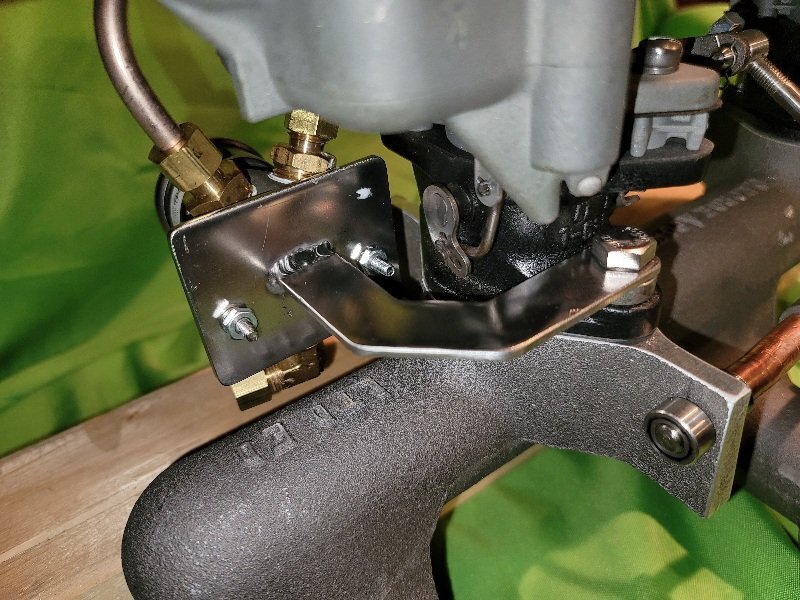
Some may remember awhile back I started a thread to ask the general readership here about sourcing, setting up and the what the observed performance gains of Speed Equipment on an early Dodge straight 6 might actually be. I asked these questions after leaning into the search abilities of this site for all the information I could wean out. I very much appreciated the responses of those that had thoughts on the subject and, perhaps like others, was surprised that the articles posted (all vintage) during the day stated performance on the Speed Parts mentioned are “not known.” As much as one would want to think otherwise, the available vintage products are either very expensive, if in reasonable shape, but much of the vintage material is pretty rough shape and modified. Modified parts tell an experience eye something, there is not much to suggest it worked well back in the day. Bright exceptions exist for newly produced Speed Parts and that is what I am going to touch on in this thread. Folks, it doesn’t take an Elon to tell us that available speed parts are in freefall for anything other than Ford. Enter my own project and a discussion on Speed Parts. Speed Parts for Dodge (et al.) Straight 6’s is poor. While understandable; with close to a 100 years since new, what can one really expect to find for Speed Parts for the early MOPAR models? Well, with the exception of George Asche and Son the supply is close to zilch and if you are thinking about the Montana Boys actually coming back and being a force in the next number of years and concentrating on Speed Parts as opposed to bling, after holding my breath, I have fully exhaled and gotten on with it. Want broadly supported early Speed Parts? Do what most people do and buy an early Ford and have reasonable/typical access, even new and sometimes improved new blocks. If you are a Dodge owner and want to begin the process read on. Most likely you will end up talking to George Asche. I would also suggest you know or be a machinist with good mechanic skills and performance builds under your belt. Swapping out the Straight 6 and dropping in a V8 is what most do and the lack of Speed Parts is partly why. No news there either. I have a Dodge and I am keeping the 6. Some background, I have been working on a Dodge heavy horsepower beast for decades. I wrote technical pieces for years on mechanically supercharging the V10 and was “mapping” in a car when most thought that meant going from point A to B. Injection, atmospheres, compression, ignition, flow and lambda all day long for years. Having said that, the majority of that work has absolutely nothing to do with actually deriving any significant improvements in performance in an early 1930 Dodge straight 6. With one exception, knowing that these engines are air breathing flow machines. Knowing what a proper breathing engine actually means and how to get there and having worked towards lambda for longer than many have been alive is an advantage. To the extent that a 1930 engine can be improved, it is to a very large part going to be all about flow and, to a much larger extent, keeping the engine in one piece. Have reasonable expectations for a 30’s modified stock straight 6 engine that is going to be registered for the road and still look and sound “reasonably” like a stock car as opposed to a hot rod. The actual improvements that would be felt in the seat of your pants are going to require a very broad combination of applied work and parts to achieve anything truly measurable and noticeably faster. Here let me sum this up for you, in the case of 1934 straight 6, improve the restriction in the exhaust manifold, tuning your carb, increase the compression safely, improve the pistons (overbore), use the highest test gas you can, consider a performance crank and you are close to done. Take note; with the exception of the exhaust manifold all of those changes cannot be seen when finished. Louder is not what I am talking about here, nor is fuel efficiency, I am talking about flow that creates horsepower that makes a measurable speed difference. I am confident that, with a stock transmission, the whole of that performance upgrade will best be felt when you are able to accelerate up a steep incline to a noticeable extent faster. As a result of being able to build rpms faster, you can move through the stock gears faster or swap out gears and actually achieve higher speeds. Also, never discount the remarkable effect of fresh, balanced tires. That is what many want and that is what they will most likely achieve if they are realistic. And so.....we begin with the following.... The engine has been completely rebuilt again (third time) and is currently running like a top. Everything mentioned has been done with the exception of a new grind on the crank. Why? Well because I might cross that bridge when I come across a resource for one. Exhale. What you see here is single Stromberg, and it is true that I did not list out dual carbs on my short list of things mentioned above, right? Right. So why is George's dually here? The answer is because George Asche represents exactly what a healthy Speed build hobby should have, a deeply experienced, knowledgeable and committed Speed Parts contributor. This gentleman is a pleasure to deal with, so I did. George has provided dual and triples for 6s, depending on the block, and he provided the superior intake you see here. I would have bought his intake and put it on a shelf just to thank people like him. What I am getting is better intake flow because of the raised nature of the manifold, its superior internal surfaces and the opportunity for better fuel efficiency. Swapping out to the duals is where a good amount of thoughtful work begins. There are some major changes that will occur if we actually change out the intake manifold, among them are; - We will be separating the intake from the exhaust manifold as it relates to the warm-up heat exchanger that Dodge provided. This allows for the heat from the exhaust manifold to warm up the air/gas mixture in the intake initially. Once warmed enough, a spring loaded thermal coil spring will close a gate separating the two. It works perfectly as long as the spring is in good shape and the gate is free. It should also be noted that the intake will warm up perfectly without it in about 4 minutes longer. When you unbolt the stock manifold, you are left with a gapping hole in the top of the exhaust manifold. More on that later. - That hole means no heat to the intake. Now it get down right weird. The Hatfields and McCoys had nothing on those that engage in the notorious “icing” issue that has somehow come about around "unheated" intake manifolds. Perhaps you have heard that, in the absence of the aforementioned heat exchanger, that the intake acts as a “natural refrigerator” and will ice up your intake? And the solution? Pumping hot radiator fluid through a sealed galley in the intake to insure that your intake won’t turn into an icicle. Let me help, no it won’t. If it did this Ford Model B made by George Riley for Henry Ford himself, which ran alcohol under hand pump pressure and was no where near the exhaust manifold, would be an ice cube. It didn't, wasn’t and won't. Maybe at the arctic in the winter, but the track there is seasonal. In fact, the issue is not cold but rather over heating the intake manifolds as the vast majority of Dodge 6’s did not really have functioning thermal gates and the intakes ran hot to the point of vaporizing gas in the float bowl and other forms of fuel heat saturation . The vast majority of electric pump installations are for heat soak, not the “Ice Box” physics. When someone tells you the “science is settled,” smile and remember alcohol in dual Winfields. - The whole linkage issue surfaces immediately. Buckle up, here we go. As most of us know, these early Dodge break down into essentially three major categories, those carbs that are actuated by the stock throttle and choke assembly crossing over the head from the driver side, those that travel along the fire wall to the passenger side and then attach to the intake side of the engine, and lastly those Dodges that have the “special feature” throttle/choke/cruise control capabilities. In the case of the 1934 Dodge DR convertible coupe, we are confronted with all three; there is a full firewall pass to the passenger side and a single marvel of an actuator that incorporates in a single design; the throttle and a speed adjustable feature. The choke is a typical separate run, more on this below. It does all this while working with the stock carb by moving the carb mounted accelerator UP, not down. I am going to use the whole stock shooting match, so that means that I will need to reverse the original actuator to operate. I will do that by keeping George’s linkage work on the head side and building an intake side assembly that engages with his dual accelerators. Now remember that George’s intake importantly adds height to the primitive original stock intakes, so that my work will need to potentially address the rod that is attached to the firewall transit bar and run to the newly placed original actuator. That work I am modeling and, if there is interest, I will post the final design in regard to location, attachment, reversal of motion etc. If yu are wondering what and where those air filters came from, they are from a great East Coast resource "O'Brians Truckers" https://www.obrientruckers.com/ and are a recreation of the early oil bath customs except with a high flow cleanable air filter element. They are mounted on the carbs with an adapter ring made out of aluminum as I have had no luck with the plastic ones. - Low pressure gas runs will have to be made and run to the duals. Low pressure hard lines have many advantages around not needing to do flair work. Why is that important? Because we can avoid the impactful extended lengths required to make flairs that interrupt tight radius bends. Flair tools need to be set behind the work and with the exception of those that have a Canter flair tool(1940s) and that required length is too long. Equally true, when flared, that flare requires the lead-in into a tight radius bender tool to be too long. If you think that using the wonderful copper/nickel hard line (seen here) is going to make that all better with flares, it won’t. What does work, is using low pressure compression fittings that utilize the bead/pit. Just be sure to tighten them gently as you can always make them tighter. Yes you can barb and run flex tubing but the barb itself is too long for a compact flex bend and, well, it’s a Dodge not a Tecumseh. Why the gauge? Four cases, first is that these carbs are sensitive to over pressure. Over pressure will flood the bowel. Second is that the mechanical fuel pumps are known to quit and you can instantly see the deterioration if that is the case (carry a spare). Thirdly, there are any number of available fuel logs that make running one easy. Fourth, fuel gauges, especially the rarer low pressure type send an important message that the builder is fully susceptible to using any excuse to mount yet another gauge, if only to draw the eye to the well set out hard line runs. In short (pun intended), if you want to really run a single clean line from a Dodge original mechanical pump to a dually set and want to onboard both a fuel log and gauge, you can. And the runs are so well supported that the whole rig is a marvel of anti vibration. But you are going to need an onboard backing plate. I came with and tested a ton of designs, both on the duals and/or the head or the firewall. Every possible hold down nut was tried and I ended up with what you see here, a simple one access point that is firm as can be especially with the hard line. My son in law made it up in stainless but one of the exact test plates can be seen in raw steel on the top right near the wood. The pic below all the test plates shows how it wraps around and attached to the right hand carb's main mounting bolt. - Two carbs, two chokes. You only will ever really need to choke one to make a well tuned car run so what about the 2nd carb's choke. While many just wire or short pipe them statically closed, one can always just make a tiny manual choke linkage. - Remember the part about separating the intake from the exhaust manifold and therefor opening up a center hole where the heat transfer took place. Lets talk about flow and exhaust manifold. This subject can create friction, but nowhere near the “refrigerator conundrum.” Flow is not satisfied by cutting the original cast iron Dodge exhaust header in two, boxing both ends while adding a flange to the forward threesome. It attends to the over pressure issue of the front 3 exhaust ports, but laterally cross flowing exhaust in a box that sits right on the block and exits stage rear is a nominal improvement. Will it help? Of course. It also commits you to running dual exhaust pipes and mufflers that would most likely need to be crossed closer, not farther, down the run. What good headers do is allow the exhaust to travel as far away from the block as possible directly out from the block and then the bend route begins along its final path. None of the lateral boxes do this as well as a smooth direct exit should. Fentons? Better, as the exit has much better outflow than the original and smooth pipes are better than any of the boxed variants. But, and its a real big but, the Fentons were never designed properly as they come way too close to the stock fuel pump. How close? Close enough that anyone would have know if and when the Fenton design was to be copied, that should be immediately fixed by simply moving the forward three inches ...away ...from ...the ...fuel ...pump. Wait...it was copied. Sorry. At least that copy, unlike the original comes with verbiage that goes something like this “now that you mentioned it, you need to run an electric fuel pump as these header...(wait for it)...run way too close to the original fuel pump.” With an electric fuel pump, the original and copied Fentons will work. I am not running an electric fuel pump and I wont be using Fentons or their copy. So what comes next? Folks, the answer is real headers. Simply put, good exhaust flow on the straight 6 is the vast majority of a performance build in the absence of a hot crank. Re-read that last sentence please. I am exploring properly made steel headers that properly allow for flow and are away from the fuel pump. Are they made? Yes, but unfortunately not out of stainless and would therefor need Jet Hot or some coating to actually last long enough to be worth the money. And, as we all know cast iron is much quieter that any steel build so I will lament the day somebody decided to redo the Fentons and not attend to the obvious flaws. If you read this far, thanks. Let me know if you want to see this all unfold. The assembly will be done this winter.

 1 point
 -
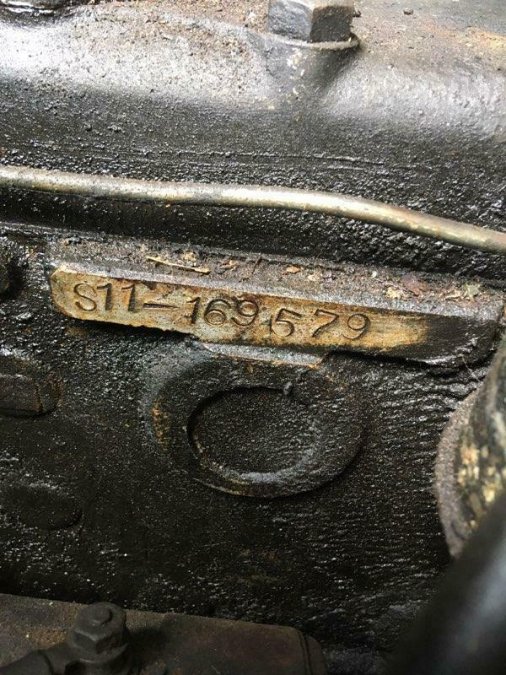
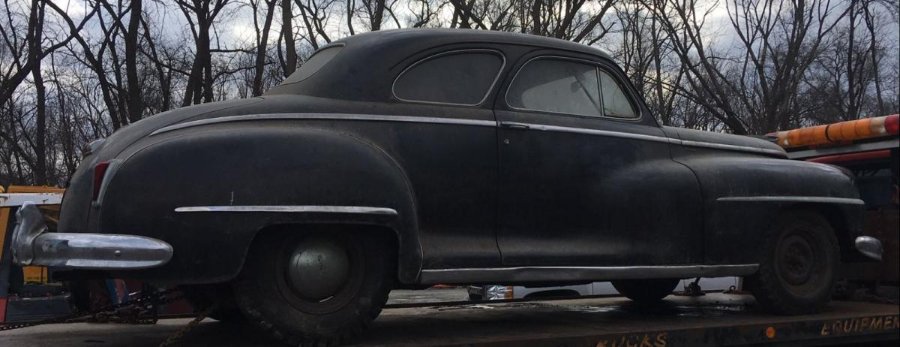
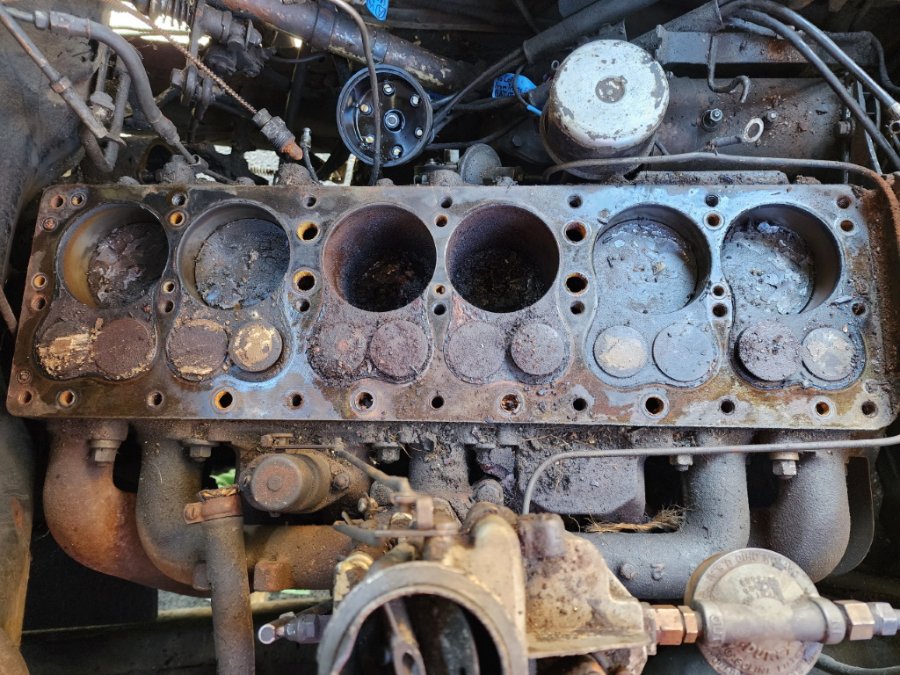
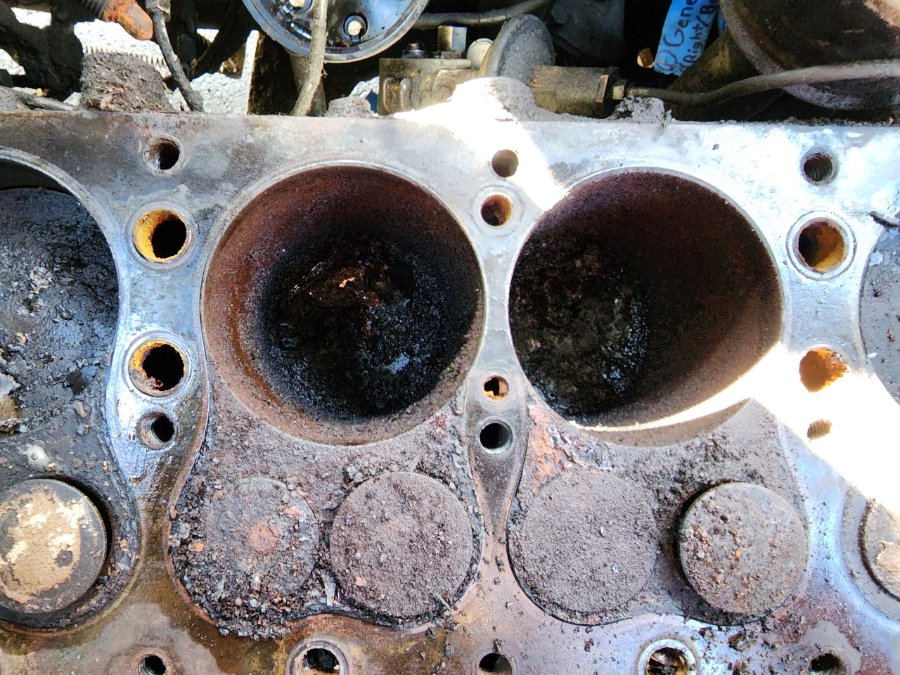
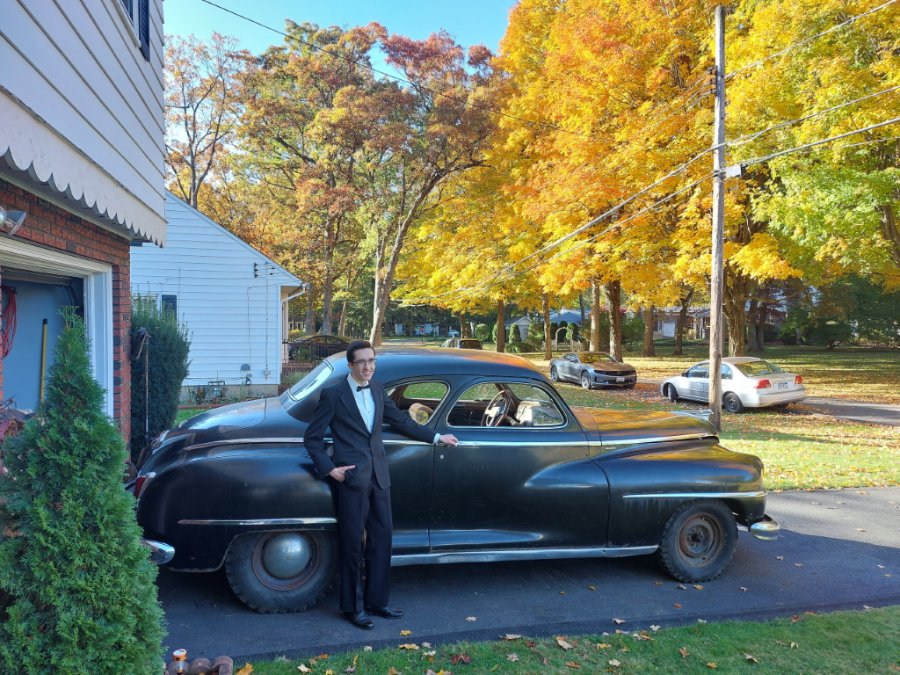
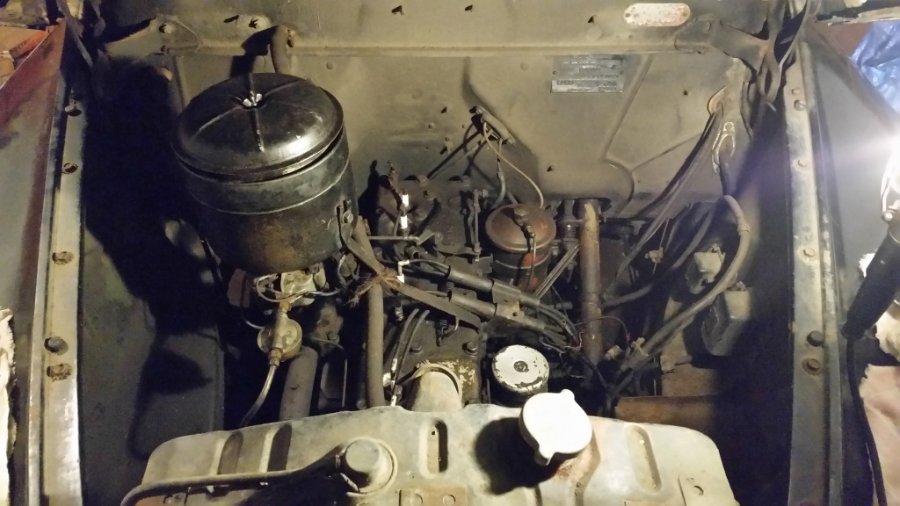
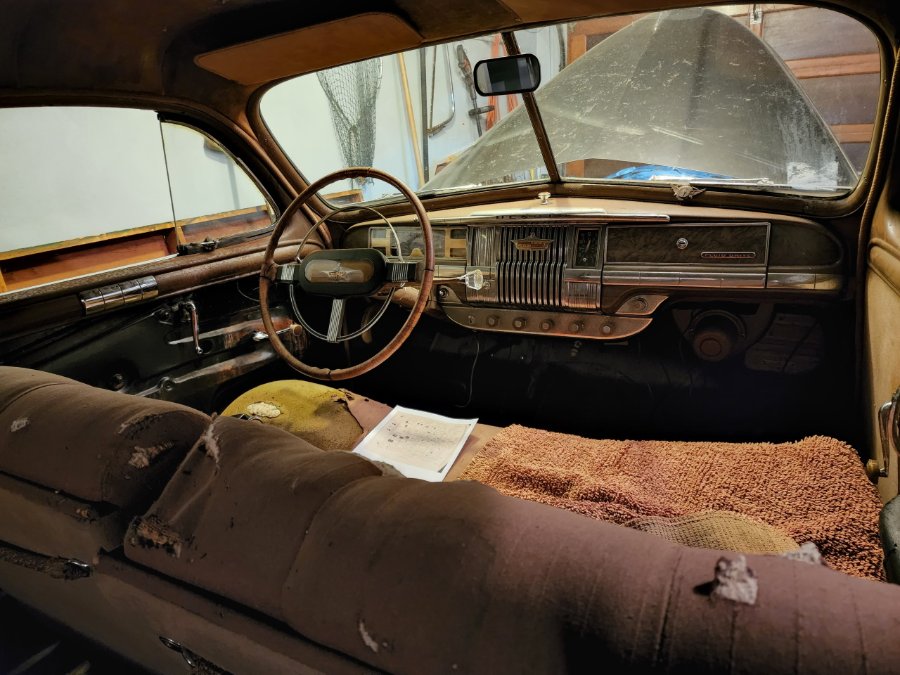
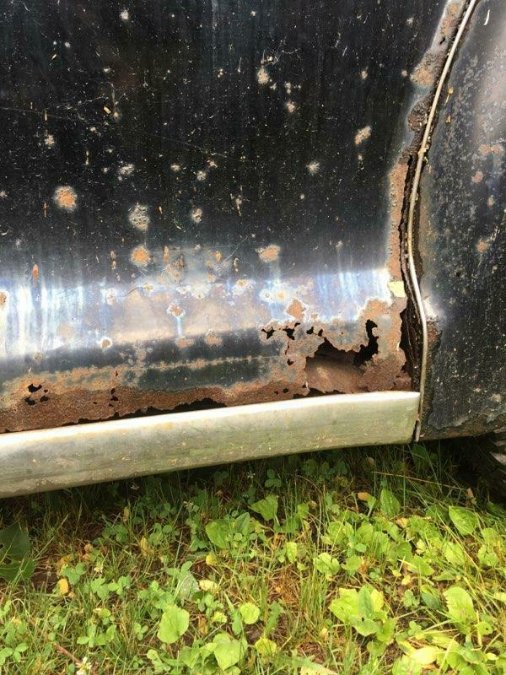
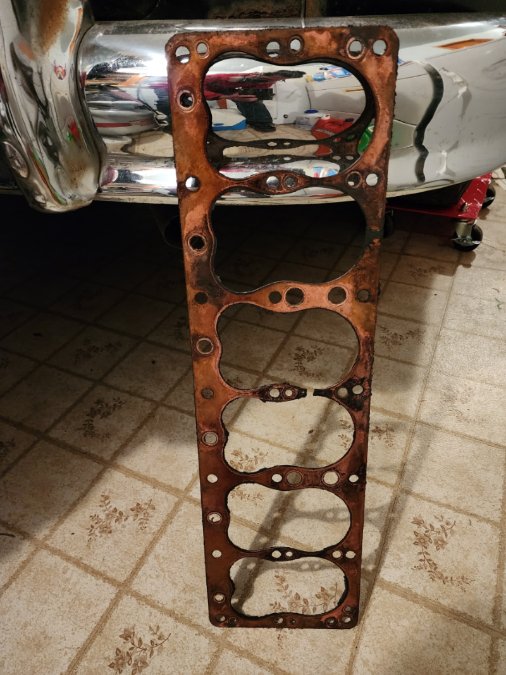
Hello All, I own a 1948 DeSoto S-11 Custom Club Coupe. I purchased it in September 2020, it is my first project car & first pre model year 2000 car I've ever owned! Now is a good time to say I'm probably one of the youngest members on here (22-years old), but have a great respect for these old cars and want to keep my 48' DeSoto as stock as sensibly possible. While I've had the car for about 2-1/2 years, I haven't physically done a ton of work to it. I am a read the manual cover-to-cover type of guy. So out of principal, I've taken the last 2 years to study books, forum threads, and videos on these old Mopars before barreling in. Opposed to taking things apart, have no idea what I am looking at, and then end up with a pile of parts and me scratching my head! As such, in these past 2 years, I've learnt ton about flathead engines, or L-head if we're being technical, Lockheed drum brakes, the Tip-Toe shift transmission (My DeSoto has the M5), the difference between the semi-auto shifting transmission and Fluid Drive coupling, and how to properly repair and maintain a 6-Volt positive ground electrical system. Now I feel decently prepared to finally get my hands dirty and work towards getting my 1948 DeSoto back on the road! A little background on my car. It spent most of it's life, both active and while it sat for several decades, in Worcester, MA. It is now in NEPA (Northeastern Pennsylvania). It has 118,700 miles on the odometer. It was last on the road/inspected in April 1960. The black paint is original as far as I can tell. It has the original 237ci flathead engine in it, including the "S11" stamp on the side of the block! It has the M5 Tip-Toe shift transmission with Fluid Drive coupling. The wiring harness....exists, but I would not dare to put a 6-Volt battery in to even "see what works". All the wires in the engine bay, under the dash, and in the trunk are crusty, corroded, and the cloth insulation crumbles at the slightest movement. On a positive note, none of the wheels are locked up, so hopefully when I go to pull the drums off it won't be a nightmare. Unfortunately, said original S11 engine is locked up. Before everyone types-up all of their remedies to freeing up a stuck engine, I already know what the cylinder walls look like....it would do serious damage if I did manage to free it up. Two members from the Maryland Chapter of the National DeSoto Club graciously made a house call this past October 2022 and helped pull the cylinder head....the diagnosis is not good. A broken head gasket right between cylinders 3 and 4. Those two cylinders must have sat full of coolant for decades and rusted the cylinder walls and pistons in place. As long as the block is not cracked, I do intend on reusing the original block, but it will definitely have to be bored-over .030, .040, .060..?? What are my plans: A full mechanical and electrical restoration, but keep the body work to a minimum. I don't want to create a show car with perfect paint, I would never drive it if I did. There are definitely some rust issues that need to be addressed. The chrome rocker panels are hiding the majority of the rust. It needs both inner and outer rocker panels on both sides. Also, the trunk pan is quite thin on the driver's side, so much so, the seem running along the inner wheel well has separated! Currently, I am planning and gearing up for an engine pull in the next month or two. I already have an engine puller, load leveler, and engine stand. I plan to do the complete disassembly myself: intake and exhaust manifolds, valves, tappets, camshaft, pistons, crankshaft, etc. Then I will take it to a machine shop and have it boiled out (get that rust, scale, and sludge out!). Have it checked for cracks, and if it passes, then have them tell me how much it needs to be bored-out to get to all clean/fresh metal. Aside from the boring-over, I'll have the machine shop deck the top of the block, install new valve guides, and maybe have them install new valves and lap them. I am definitely getting all new valves, just not sure yet if I'm going to lap them or have the machine shop do it. All other reassembly I plan to do myself. As I've said, I've spent the past 2 years researching. I've actually read through many threads on here as a guest for over a year! I figured it might be fun/helpful to create an account now that the work is starting so I can post my progress updates! Thanks for reading! Carl I know you all love photos, so here are a few, and so you can see the unfortunate state of my engine! Obligatory photo when I rolled it out of the garage this past Fall 2022: A photo I found of my DeSoto at an auction before I purchased it: Driver's side rear quarter panel. Worst of the visual body panel rust. But the rocker panels are hiding the nasty reality...: Current state of the interior: How the engine bay looked when I first got the car: Original S11 stamping!: Immediately after removing the cylinder head, prior to any vacuuming/clean-up - October 2022: Cylinder 3 & 4 Close-up...Yikes!: Broken head gasket:
 1 point
 -
It sounds pretty decent to me. Congrats on getting it running. Tell us what you sealed the joint with, between the exhaust pipe and the exhaust manifold flange. How long ago did you assemble this joint? Are the bolts tight? Does it have a gasket? Or some type of goop? Are both iron mating surfaces of the joint true and square? If you have good engine oil pressure, I’d plan to move forward with car reassembly. Break the engine in later. If the engine has to come back out after extensive break-in time, so be it. You won’t need to take the body off the frame to do so. ? How’s your coolant look? Any air bubbles? Any oil in coolant?1 point
-
You want to look at the draft tube .... whats coming out there? .... Just let it run it looks fine. When you put oil in the cylinders it gets pushed out into the exhaust pipe. One forum member ran so much oil through the engine into the muffler, took 2 hours driving to clear it out. Also metal will absorb moisture from the air ... this includes your engine block that has been stored for 40 years. You will get white steam from the engine as it warms up. I recently bought a used engine that sat for 8 years. Took 1 hour before all the white steam...smoke went away from the tail pipe. JMHO, I would let the engine clear itself, then I would dump the oil & add fresh .... treating it like a "break in oil" What is coming from your road draft tube imho is what you should be concerned about ... If your rings were leaky you would get a lot of blue smoke from the tube. A modern PCV system eliminates the road draft tube and runs the stoofs back through the tail pipe. Your road draft tube will tell you the story on your engine.1 point
-
Driving this car now is going to be kinda breezy!! ?1 point
-
That sounds pretty good! The stumble may very well have been due to not giving the engine time to come up to temperature. Fine tuning the choke should make it run smoother when cold. The new rings are going to need some time to seat, the tailpipe smoke doesn't alarm me on first starts with fresh rings. Did you replace the valve guides? Idle that thing down to about 450 rpm and let us hear it tick over. Congratulations on turning gasoline into noise!1 point
-
I was just thinking this thread started 7 pages ago with a dead battery @MarcDeSoto One thing I'm not clear on .... Is your cooling system operational? Can you let the engine get up to operating temperature & run for awhile? I have no experience with starting up a old school rebuild. I know modern rings will seal almost immediately. While I think older cast iron rings will need some time to seat. I think it is good to get the bugs worked out & know it runs. Now If it was my rebuilt engine, I would next want to start it & run it for 45 miniutes-1 hour? Give it time to heat up, gaskets, seals,rings to get set in place. I would try to avoid a bunch of 2 or 5 minute runs before the engine has had time to get settled in. The poor acceleration sounds like a bad accelerator pump. Or it could be the rings are not set, you are a little low on compression, burning some oil .... Too early to troubleshoot yet. Is even better if you can take the car out & drive it to break in the engine proper. At least get a cooling system working on it and let it go through some heat cycles before troubleshooting little issues. My 2 cents.1 point
-
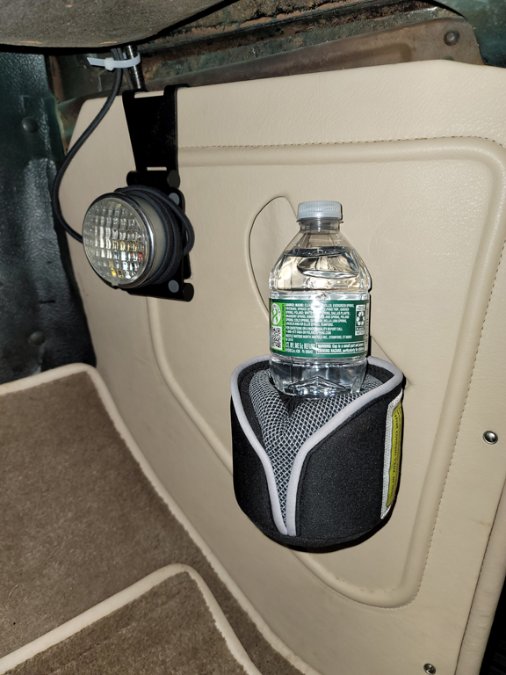
Here is how I went about solving the problem of providing light in the case of a night time emergency. The result allows me to be able to payout enough cord to reach all four wheels and a just about everywhere else. When not in use it provides a very warm and diffused interior floor light. The finished unit hangs off of the passenger side interior panel and cant be see without getting down and looking under the dash. The light holds all the payout wire perfectly and is very stable. The main light head is a small round chromed utility light with a real early faceted glass lens that looks about right and take a standard bulb that provides enough light without blinding me, something that I can't stand about LEDs. I found it on Ebay an early 3" mercury switch light that would most likely have come out from under a hood as motion fired off the on switch. The mercury switch was removed and I replaced the old bulb mount with a new version that could take modern incandescent or LED bulbs. The.piece that makes this all possible is also readily available on ebay. It is a modern, small aluminum cell phone holder that has the unique characteristic of folding flat and still having two hooks to hang it up. I am confident those hooks were not there to do what I needed, but what a find. The hinge is excellent and remain quite stiff. Buy the one that looks exactly like this. Fresh cloth wire to reach everywhere on the car and couple of new holes and bolts and it was all to together. This light can also hang from the Rumble Seat side wall giving that area great light as well. I finally attended to a rats nest of wire stretching back 3 generations and wire up a new toggle switch just in the series just for this light. Nice, easy and fast project.


 1 point
 -
Seems we are always going in circles1 point
-
Looks like that is an ECI kit. https://www.ecihotrodbrakes.com/dodge_plymouth_discbrake_conversions1 point
-
There is not much head snap in any of this, but there may very well be some strong pull up a hill that would simply not be there prior to some or all of the mods mentioned. I would agree with the idea that compression leads the parade. As I had mentioned elsewhere, IMO the next in line would be fixing the known design or production limiters that impact the stock engine. One would want to follow the flow. There we would find the exhaust manifold of the earlier 6's, mine certainly is there. Whether one exhaust pipe or two is, as Sniper points out, dependent on diameter of those pipes, muffler, etc. etc. Both the original fuel pump and the single carbs on many are all one would need at one atmosphere. The case for two or three might come into play for efficiency or response. As has been proven in countless multicarb Static Racing event, there is little doubt that attributable horsepower gains appear to be proportional to three important things. First, if the hood is up. Second the number of people looking at the engine under that hood and lastly the alcohol content or anyone speaking. But, when we add additional atmospheres, carburation is imperative. Probably the best case Fi or a new crank and ignition starts about there too. And then Octane says hello. And only then, when all that is accomplished is one really in a position to answer the Big Question, namely "Is Using a Stand Alone Intake without Exhaust Heat responsible for the Ice Typhoon Winter Storms we now see?" I know a couple of people who if given enough time can make a pretty compelling argument that the answer is YES! How do I know about all this and speak with such authority? I read it in a magazine or maybe it was here...honestly I really don't remember. Aside from that.....whatever Loren says is OK by me.1 point
-
All this technical information is very interesting and useful, but is silent on the overriding reason for installing multiple carburetion: it just plain looks cool! Can’t see the squeeze….1 point
-
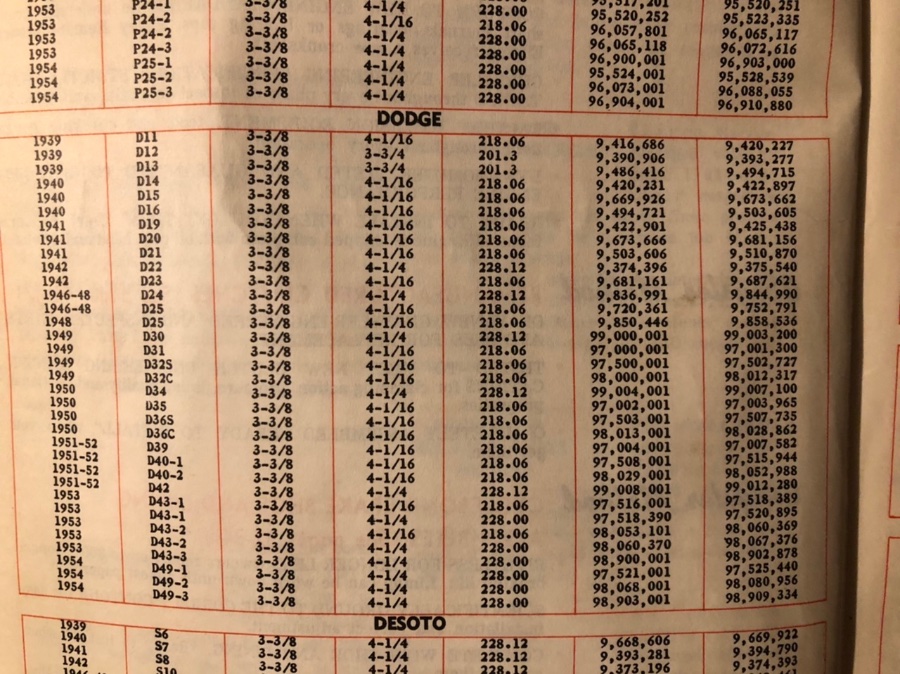
Canadian car. I posted this info from a 1954 Canadian parts manual in a previous post. Check his car’s serial number. His engine serial number starts with D24 so is likely original to the car and according to the car’s serial number would be a 228 CID. It’s always good to read previous posts and look at the information provided.
 1 point
 -
Do you have the gas pedal hooked up? These carburetors are at full throttle at rest. you need the throttle spring to pull it to idle. Totally backwards from a modern carburetor & dangerous when a throttle spring breaks .... just the way our Grandparents rolled back in the day.1 point
-
He had a pencil in his shirt pocket so how could I say no...
 1 point
 -
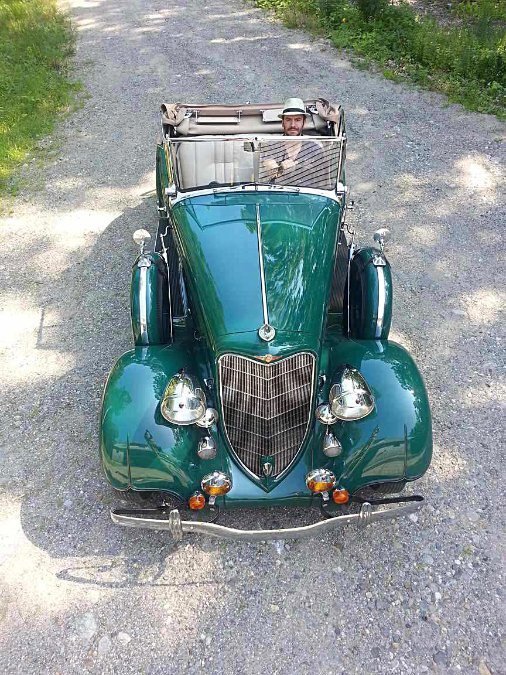
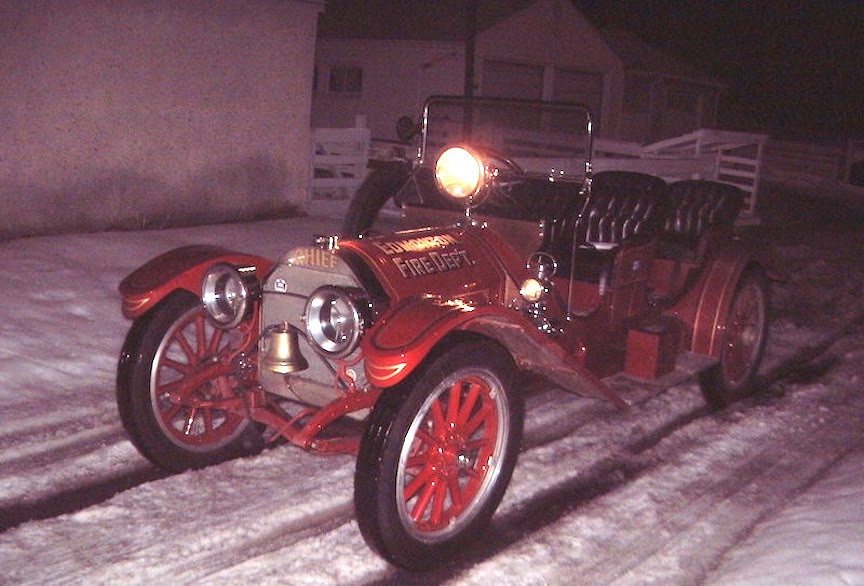
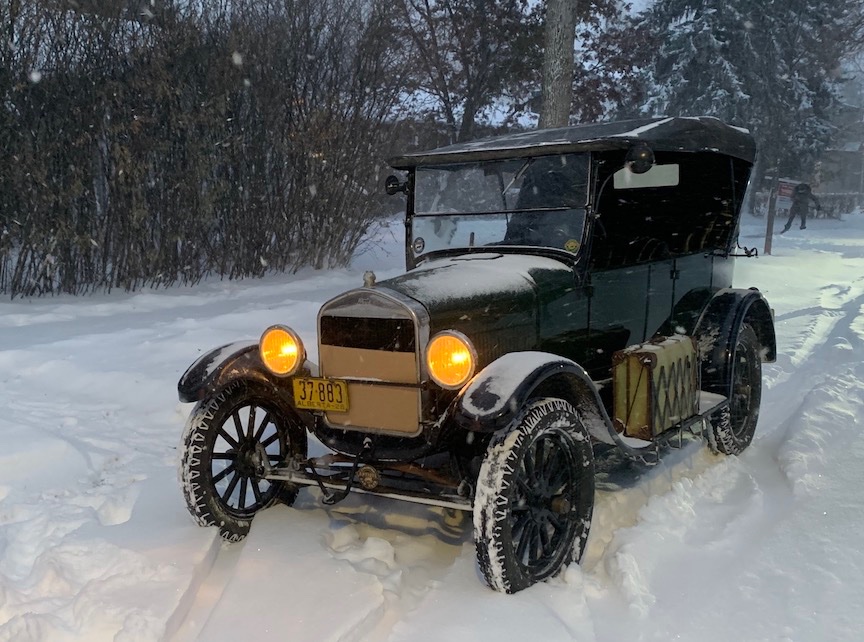
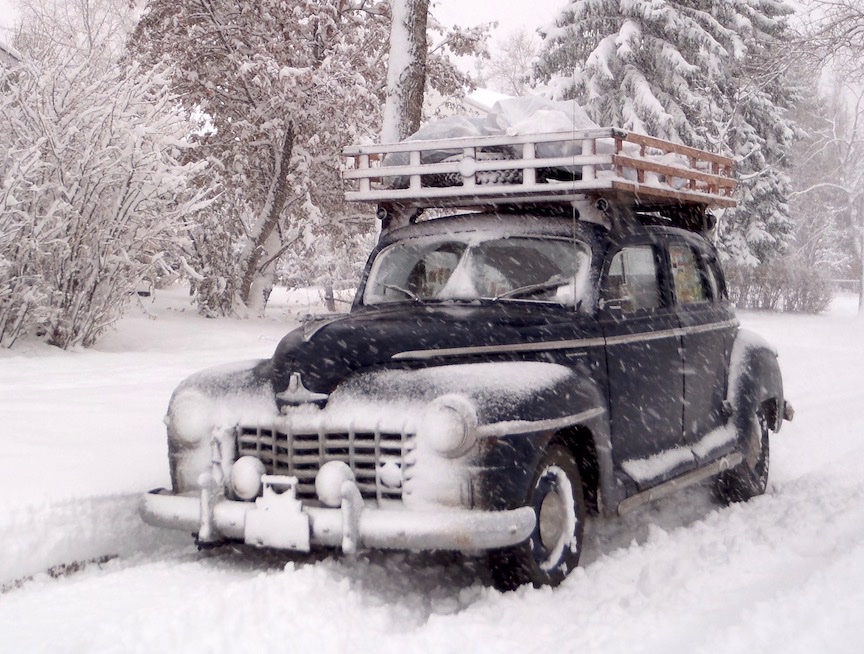
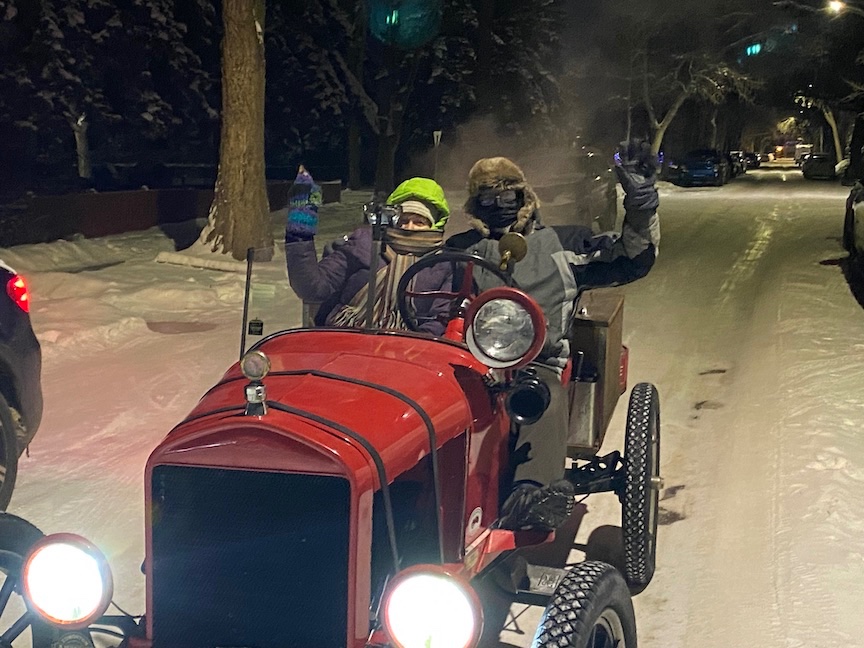
Sometimes winter just seems awfully long to go without driving the oldies...
 1 point
 -
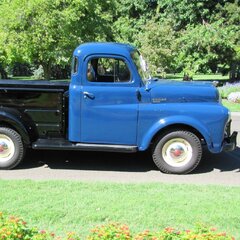
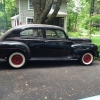
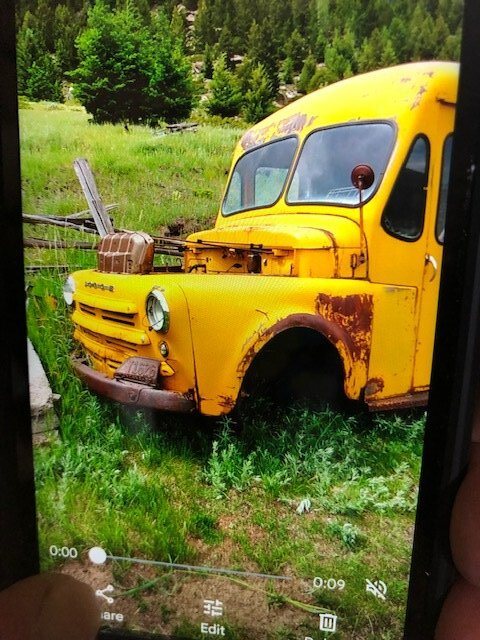
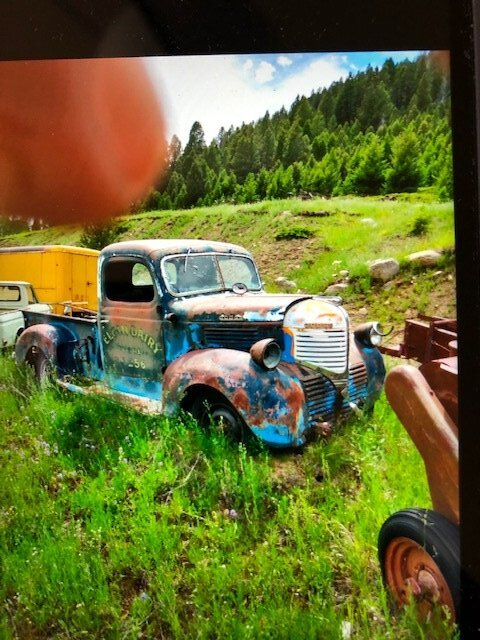
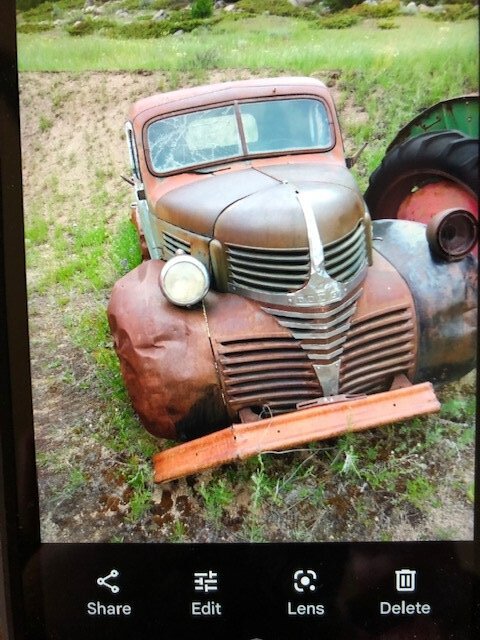
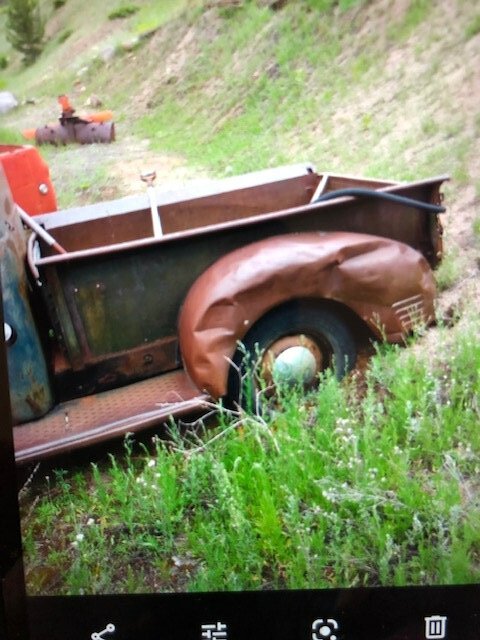
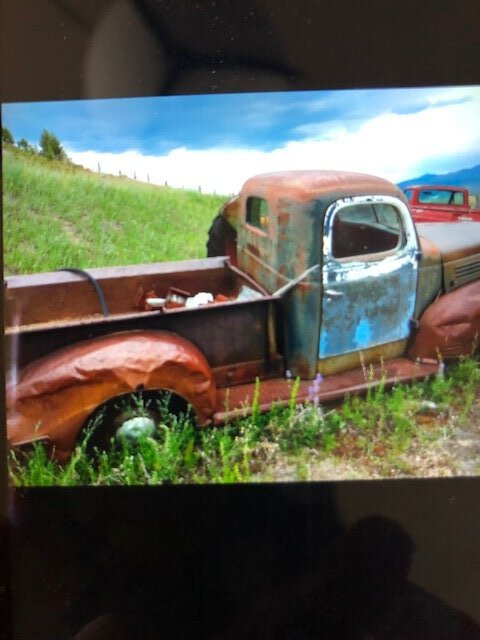
Here are three more project trucks. I have some more talking to do. The daughter said she learned how to drive in the 39, which is a bad reason to let them deteriorate anymore. I found a 50 cent Disneyland parking stub with a note to her dad on the back and a pair of pliers in what was left of the glove box. I'm going to give them to the woman as keepsakes.
 1 point