Leaderboard
Popular Content
Showing content with the highest reputation on 10/29/2024 in all areas
-
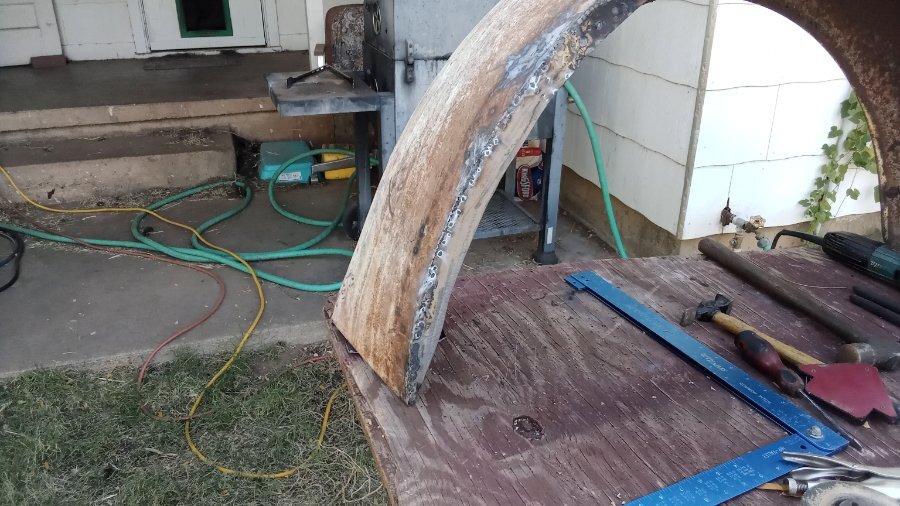
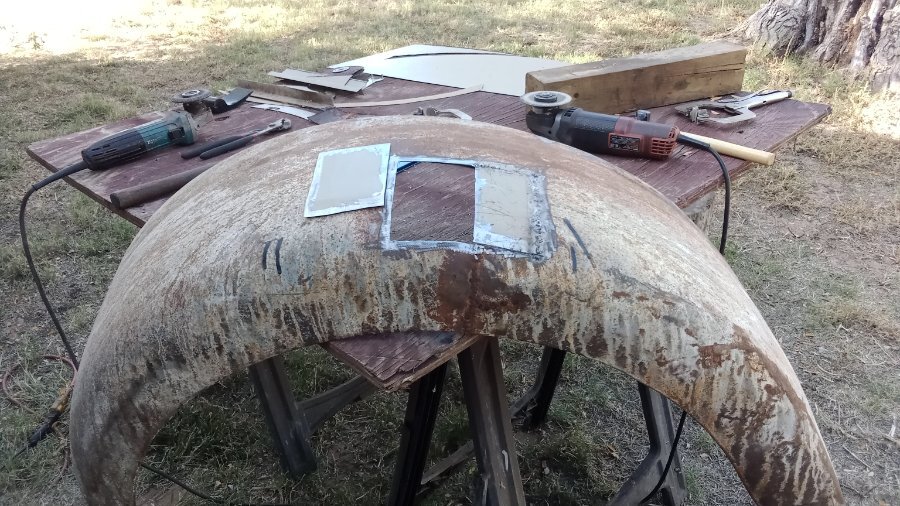
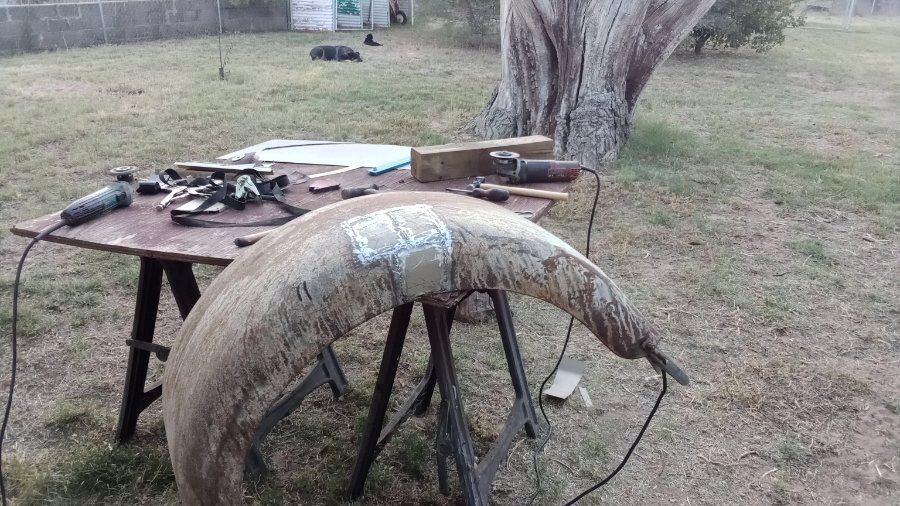
Making progress .... first I rebuilt the mounting flange. I specifically rebuilt the better fender first, so I could use it to make templates from. Then I rebuilt the mounting flange on the fender. It was pretty crazy at first, I could not believe the fender was that far off from the template .... I spent the rest of the day just getting the fender to match the new patch panel. I then spent a few hours the next day making a 1.5" flat strip to follow the fender and welded it in as a L shape patch. Then I made a longer piece shorter then the original and doubled up the mounting .... Way over kill but the bracket will not break off again. Today welding in a complicated patch went a lot easier, knowing today what I did not know before, I made the patch in 3 pieces. So it is going a lot smoother then the first fender patch. When I look at this photo .... I just wonder how many beers it will take to get this to paint. What was a solid mess and should be called scrap metal .... will be put back into service. For over 5 years I have been having nightmares about fixing these fenders. I find that once the rear mounting bracket of the fender is put back into shape, then the middle section repaired. The rear tail that was smashed flat wants to come back to original shape. So thats two fenders roughed in, they will never be perfect, but good enough.3 points
-
Last year the weather cooperated and I was able to take a ride on Christmas Eve with no snow and mild temperatures. (-3 Celcius) This year I am not so sure as we have already had a skiff of snow that has thankfully gone and some colder temperatures. I try to run the car right up to snow so will have to keep a close eye on the weather. Today was around 6 degrees with only a light breeze so I headed out to inspect some of the SPOOKTACULAR creations around town. Caught this one as it was being set up so hopefully the halloween weather on Thursday does not include the rain scheduled for 4:30 local time. Happy Halloween everyone.2 points
-
Hey fellas, I'm new to the group and figured I'd introduce myself. I recently got this 1948 deluxe coupe. Someone put a 318 and 727 in it at some point and decided to tear it down to paint and never got around to actually painting it. I tossed the rear fenders and front clip on real quick just to see what it looked like1 point
-
9 foot box nice job ! I just removed the transmission Inspection plate in the cab well I discovered that the top slector for reverse an first was not moving just the lever was spinning free . Going to fix it an that should do the trick. Great pic shows 53 is different the 49 Thank you all ! Still a work in progress!1 point
-
1949 was the first year of the M-6 ....1949 to early 1950 used an external brake band. Mid 1950 used internal brake shoes and drum for the E-Brake. Late 1950 to 53 had other minor misc changes too.1 point
-
This is a column from a 53 B4B. The shifter support had broken off and was separate. I put it together today according to the three spot welds that had broke. All correction should be done with the gear shift in a neutral position. I would loosen the lock nut, pull the retainer clip and turn the threaded adjuster down to remove any free play in the selector link. When the adjuster pin fits into the lever, with the slack removed, you should be able to get 1st and reverse. Any engine or body mount changes will effect shift linkage on a column shift.1 point
-
And, the one linkage that goes under the clutch fork looks like someone "made" it by welding it together.1 point
-
Looks like somebody got impatient when installing it. The broken mounting ears on the top are probably from 'helping' it slide in when it wasn't lined up well. It's just a normal standard shift.1 point
-
Please don’t start any ugly contests. 🤪 Well I burned through the rest of my Argon today. I got the floor plug welded in six places where it was still needed, and I made some little gussets & tacked them in on the frame rails. I welded the top of the tunnel to the crossmember, and now I need to roll the frame twice, so I can continue welding the vertical part in a flat position. I’m gonna take tomorrow off & avoid welding. Then Monday, it’s back to the welding shop for more gas.1 point
-
1 point
-
It's a late 1950-1953 Dodge, DeSoto or Chrysler M-6 because of the internal shoe E-brake. The date of manufacture and model of car can be found stamped into the case next to the shift cover. I could tell you make of car by looking at the end of the E-brake drum.1 point
-
Looks like a M5 Fluid Drive Transmission Typical of the 1946 - 1948 Chrysler and DeSoto Automobiles. Is there one or two wires going to the Kickdown Switch (At the Top of The Tranny in the first Picture) Typically One Wire to the Kickdown was a M5. Two wires to the kickdown was a M6, Typically the M6 came Later in 1948 - 1953. I am not totally sure but I believe they would function alike. The second wire in the later M6 was just grounded to the Governor. Maybe someone with more knowledge can chime in here.1 point
-
My 47 DeSoto had a "Handbrake On!" light somewhere, where I wouldn't notice it. I made an auxiliary instrument panel, with a large "Handbrake ON, Dummy!" light. Quite visible, but still not noticed. So I put a flasher in the circuit. Now I notice the Blinking Light. Only thing, the flasher needs a a few seconds to warm up. Just enough time to take off, with the parking brake still on. .1 point
-
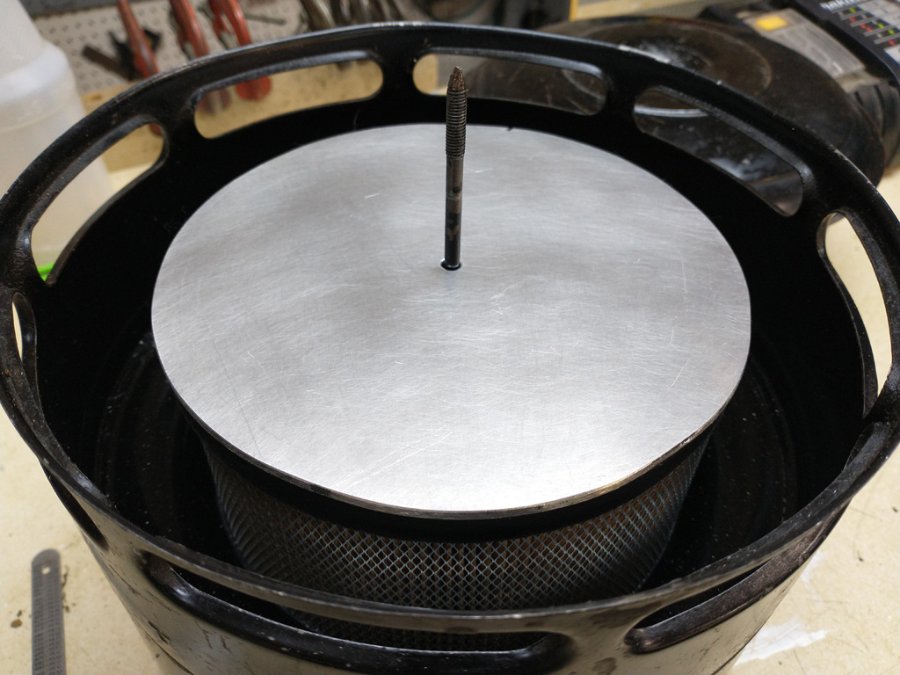
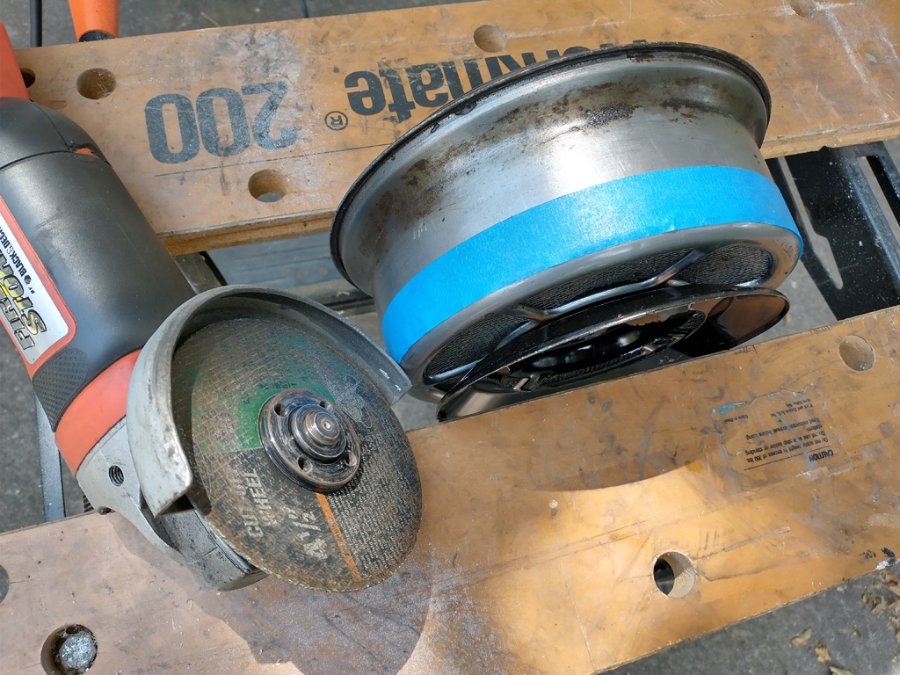
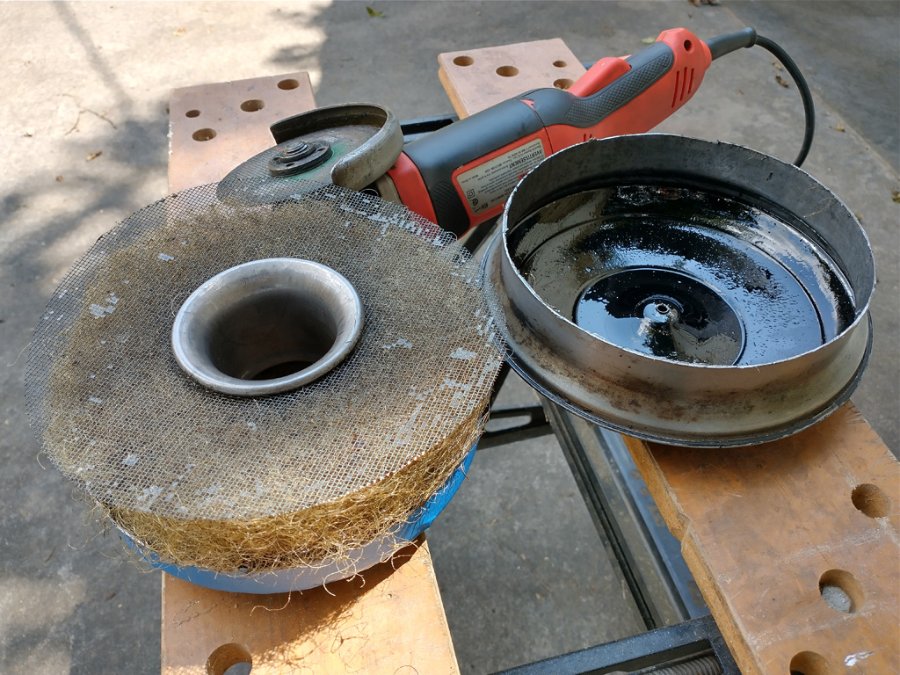
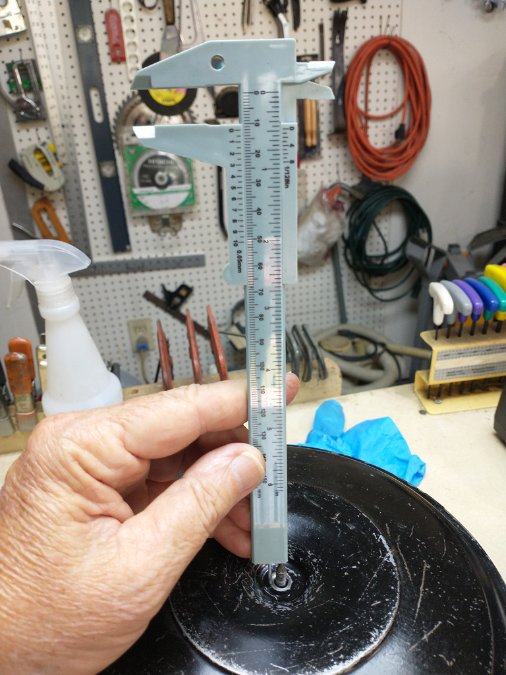
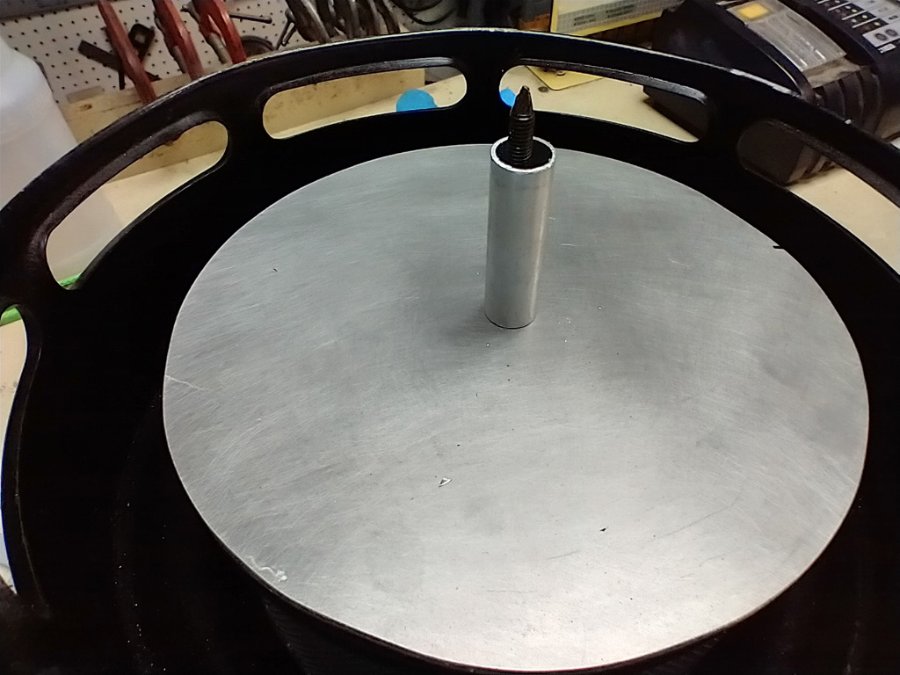
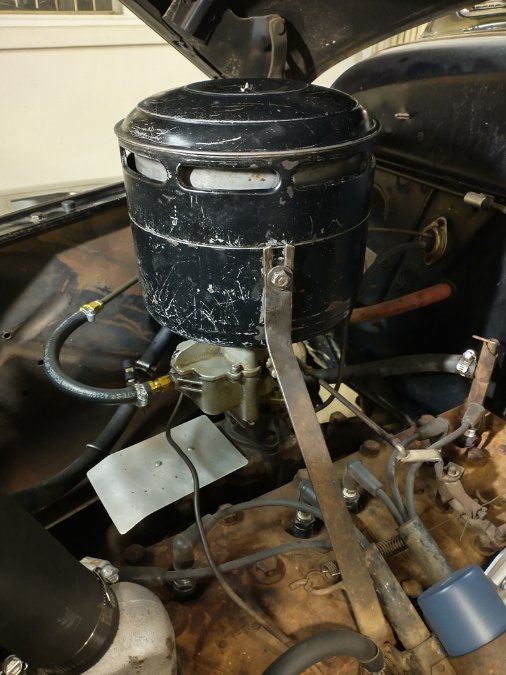
Since my P15 doesn't spend any time on dirt roads, and the oil-bath filter is sort of a pain to service, I decided to convert it to a paper filter. I did a lot of searching in the forum archives but the threads I found were several years old and most of the photos can no longer be accessed. I took photos of the method I used in the conversion so current and future members will be able to get ideas about how to do the conversion. We need a filter element that has the proper diameter to drop into the recess in the bottom of the lower filter bowl. The height of the element isn't critical, I suspect if it is at least three inches high it can accomodate the torrent of air roaring down the throat of the one-inch bore of the carb. ? At my local family-owned auto parts/lawn equipment dealer I found a Kohler filter for some sort of lawn machine that was a perfect fit. A cap for the filter was cut from 1/8" aluminum, but any metalic stock would be fine if it is fairly stiff. The top half of the old filter must be modified to accomodate the new paper filter. I used tape to establish a cut line on the upper bowl. The cut-off wheel easily cut the bowl and the old fiber element was set aside. I put the modified top back on the lower bowl, made sure it was fully seated and took a measurement of the protruding end of the stud. The top was removed, the wing nut run down to the measurement I had taken, and another measurement was taken of the space between the bottom of the nut and the filter cap. This indicates how long a spacer is needed to fill the gap between the cap and filter lid. The top lid was placed in position, the wing nut run down snug and the new, oil-less filter assembly installed back on the carb. This mod retains the original appearance of the filter, nobody can tell there is a modern paper element inside. A test drive proved the P15 is happy with its new filter and it should be good for many years of maintenence-free filtering.1 point
-
docrock, It doesn't look like my M5 Fluid Drive, after additional pictures. I really don't know what you have there Tom0 points


