Leaderboard


Popular Content
Showing content with the highest reputation on 07/14/2023 in all areas
-
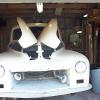
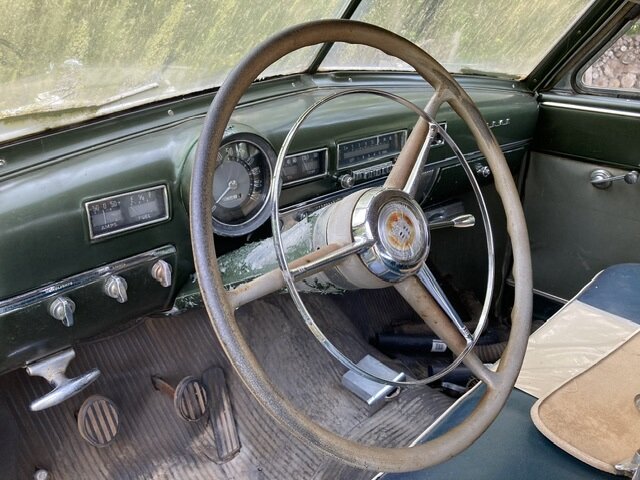
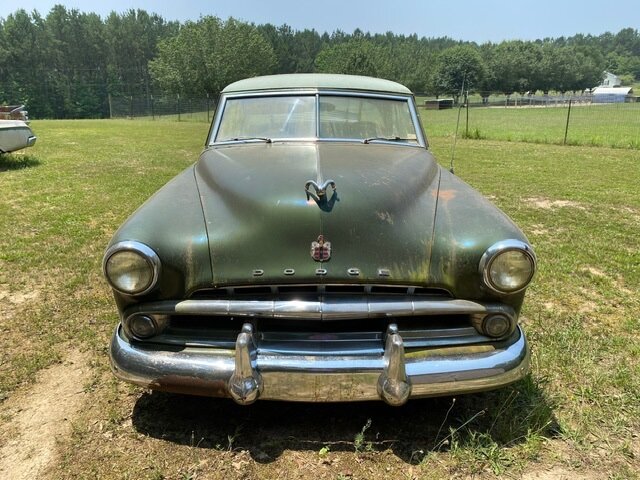
I just wanted to show you fellow flathead Dodge brothers and sisters our new addition to the family. It needs a good cleaning. 66k original miles. Gotta redo the brakes it’s a one owner car. Car has all the original paper work and hang tags from when it was new.. it has its original hub caps. We just have them off.


 8 points
 -
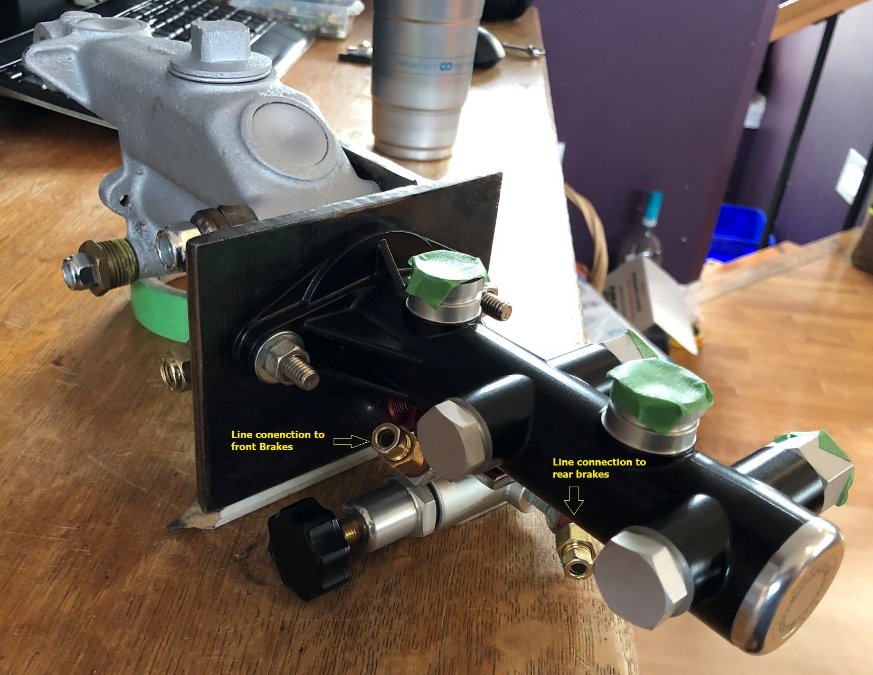
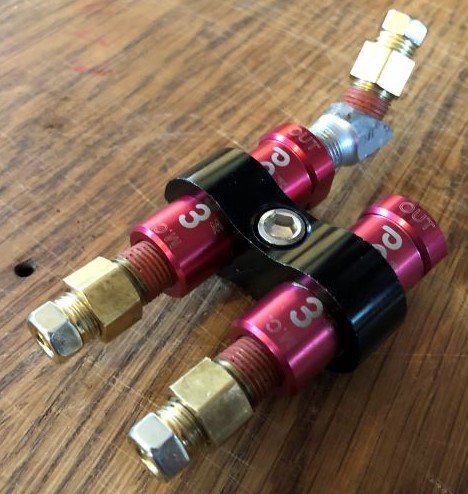
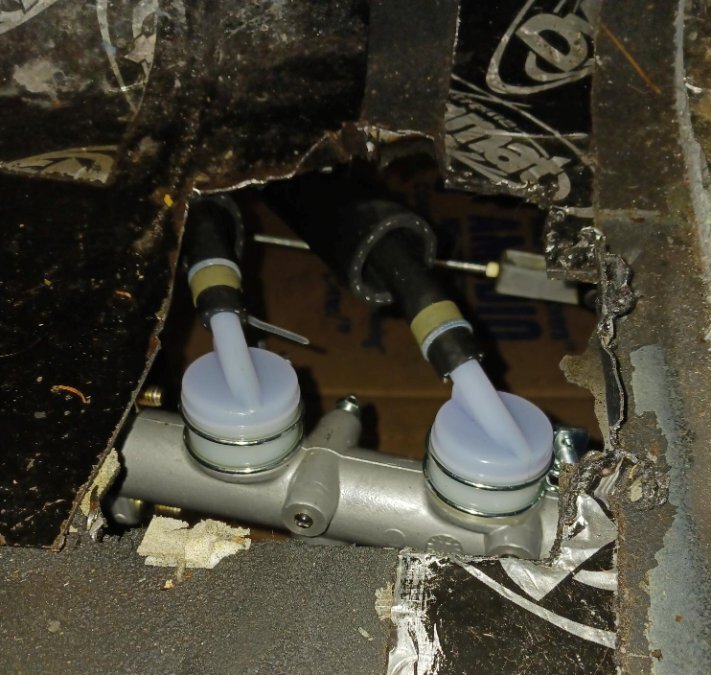
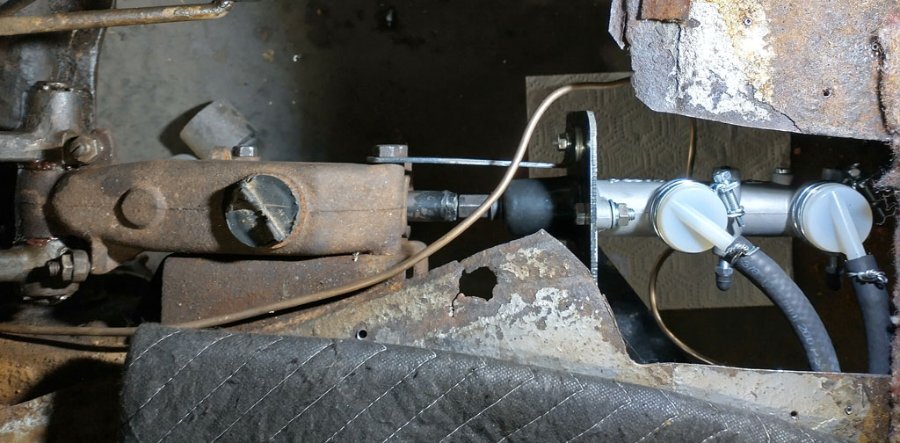
Thanks for all the help and ideas in my previous posts guys, A little progress in the project. I now have a bracket made up, 1/4" plate. Drilling the 1.5" hole in the face was a challenge, but this cheap carbide metal hole saw made quick work of it in the drill press. Be sure to adjust your speed to around 300, and keep steady pressure on it with light oil. Amazon part. Now Mocking up the mount position of the adjustable valve and residuals, trying to find the best spot to allow easy connection to existing (or new if Req.) main lines. I'll mount the adjustable valve knob inboard, thinking for protection and ease of adjustment from the down on the lawn lol. The idea is to use a good existing stock front bellows seal, and drill a drain hole in the bottom of the old core as a drain should water get in. Not likely as the car is dry driven only. Using a fancy little 8an hose separator to mount the checks. A little nicer that having them hanging free I figure. A tiny bit of tape on the Wilwood valve and they clamp in tight. Amazon part. The entire main bracket can be moved forward and back on the original master, as all 3 bolt holes in the side plate are slotted. This movement should easily allow the faceplate to meet and bolt to that frame box back surface as required. Again, I we had the car here, this wouldn't be an issue. As a bonus, we'll be able to pull the new master forward into close contact with the old, and should allow us to place some kind of simple DIY rubber seal between the two. The provided Wilwood pushrod comes way forward into the old core, so not much of an extension bar will need to be made. Maybe 4.5". Nice. Cheers, Mark.


 1 point
 -
IMHO, it is the thin leading edge of the seal that does 90% of the work. Good job on finding it, sure a new seal will make a difference.1 point
-
My guess is that it's an accessory tissue dispenser. Super-nice car. Hope you get it on the road soon.1 point
-
That's a positive friendly comment...1 point
-
Possible fuel pick up screen plugged in the tank?1 point
-
Take your screwdriver and place the tip in the slot and hit the top of the screwdriver with a hammer. Sometime this will jar the rusted threads loose. Also try tightening the screw then loosening it.1 point
-
Is exactly what I'm saying. I'm no expert, I will use a 1" diameter water pipe 3" long. Then use my 3 pound sledge hammer to give it one mighty smack & invert the welsh plug. They are often called expansion plugs ..... when you invert them they expand. ...... These were the very first examples & the newer models changed over the years. Smack that Biotch with a hammer.1 point
-
Mopar certainly wasn’t thinking that nuts like us would be wrenching on their stuff 70 years later or they would have used different fasteners. Try heating them if possible. I know they’re for a boot so be careful. Let them cool down. Try tightening with your impact first then loosen. Slotted screws are a bear when they get stuck.1 point
-
Can we asumme that when the engine was rebuilt they dipped the engine and cooked the engine block and also took out the old original welsh plugs? If they did not cook the engine block then there still could be old crud in the block and scale. This can also cause the engine temp to increase. So when you replace each welsh plug do you ever try to see if there is any crud in the holes with a coat hanger? Do not use the welsh plugs that look like a cup you need the flat plugs like the other poster put a picture on his reply. I would also recheck the timing. Get the factory timing back to see if that also solves the heating issue. My 39 Desoto with the big 6 block is set at 2 degrees before TDC. Check your service manual. Just some suggestions. Rich Hartung1 point
-
Just a datapoint.....the bolts attaching the old master cylinder/pedal support to the bracket are too short. If nyloc nuts are used for locking purposes there should always be at least one, and preferably two or three threads protruding beyond the elastic lock. This is a critical area but something that is easily fixed.1 point
-
These look great ! Mine is working fine, but looks like a Ham & Egg job compared to these. Nice work !

 1 point
 -
are you talking about a plastic spacer that would mount on the top of the intake manifold and the base of the carb that is bolted down. If you do not have a governor on the car then the current spacer would have four slots and one of the slots would line up with a tiny hole in the top of the intake manifold. The slot is there so that air can pass through the hole and into the carb. When you mentioned slight decrease in performance when engine is hot please explain in more detail. It is hard to diagnose an issue with out a lot of information. Maybe you have a fast idle or the carb is out of adjustment, or the timing is to advanced. Rich Hartung desoto1939@aol.com1 point
-
I use a 4" Rigid pipe wrench on the flare nuts to break them loose. Never had any luck with vise grips.1 point
-
As mentioned above by @Dave72dt cutting the line and using a 6 point socket to remove the tube nut is a good way to go. One thing I didn’t notice in the other replies: conventional brake fluid absorbs water and as a result steel brake lines can rust from the inside out. If there is enough external corrosion to freeze up the tube nuts then it is very likely that the steel tubing is also unsafe due to thin spots from internal rusting. Making your own brake lines is not that difficult even with an average flaring tool and a little practice. I used the copper-nickel alloy tubing mentioned above by others, it is pretty easy to work with.1 point
-
It sure is! You can also buy/borrow the flaring tool and cut your own lines exactly to OEM specs1 point
-
I noticed the same thing but didn't mention it because I didn't know if maybe the 1/4" steel might be stiff enough and it isn't cantilevered very much. But I had the same concern with the mount I built from lighter material and could detect a minute amount of flex. I added a brace to remove the possibility of fatigue of the bracket. A gusset on top of your bracket would do the trick.
 1 point
 -
Isn't the idea to pound them towards flat not make them concave the other direction?0 points

Rescaled.thumb.jpg.72b30067313ca448ec104f87d35a8215.jpg)