-
Posts
4,731 -
Joined
-
Last visited
-
Days Won
37
Content Type
Links Directory
Profiles
Articles
Forums
Downloads
Store
Gallery
Blogs
Events
Everything posted by Los_Control
-

Carb questions on a '54 Savoy with factory flathead six
Los_Control replied to C6 Modellsport's topic in P15-D24 Forum
Sounds perfect, except for 1 minor flaw .... 3600 rpm is max for these engines before you wipe out the bearings .... You would not want to run 3600 rpm for extended periods of times. The performance of the engine you describe .... Sounds like it possibly just needs to be ran. Often these old cars sit around for extended periods of time .... they have old gas in them, condensation builds up in the fuel tank .... The car just needs to be taken for a nice long drive with fresh gas. .... And drive it often. There is a whole lot more to just drive it. Maintenance schedule you need to crawl under it and .... I bet these older cars have at least 30 lubrication points .... When is the last time you greased your water pump or added oil to your generator? Have you Lubed your speedometer lately? Many people let the maintenance get behind .... I imagine if you bought the car, started driving it ran some sea foam through the gas ... I like a bottle of heet in the gas tank. I imagine you would have different questions, replacing the carburetor would not be on top of the list. -

Introduction To My 1948 Desoto & A Young Vintage Mopar Owner
Los_Control replied to CarlN-NDC's topic in P15-D24 Forum
Welcome aboard, nice project to start with .... Sounds like you have done your homework. Just remember it is not a running race. To see who finishes first. Suppose to be a learning process, that you enjoy & do for fun. ..... Some of us old farts do it for mental health reasons. It is a process & enjoy it .....- 23 replies
-
- 3
-

-
- tip-toe shift gyromatic
- desoto
-
(and 1 more)
Tagged with:
-
I'm so jelly ..... "I hear on a radio commercial jelly is the new kids word for jealous. " I am on a yearly contract, this year am paying 13.3 cents per kwh .... as long as I stay under X amount of kwh per month. I only stay under the limit 8 months of the year, so 4 months am paying over 19 cents kwh Just saying, I am so jelly of your 5.9 .... not trying to change the subject of the thread. .... Just amazed at seeing 5.9 .... thats like seeing gasoline for 75 cents a gallon.
-

Carb questions on a '54 Savoy with factory flathead six
Los_Control replied to C6 Modellsport's topic in P15-D24 Forum
Just my humble opinion and worth what you paid for it. If your stock carburetor is in good condition, they work fine. The Carter B&B is a very simple design, easy to work on, rebuild kits are available. "cheap" The flathead engine is a very simple design & very reliable ... Mopar built the flathead 6 all the way up into early 1970's because they were so reliable. My 218 claims to have 95 HP .... They just suck at airflow. By design the intake/exhaust has to move sideways .... very poor way for a air pump to operate. So that creates my opinion, there is a lot of things that can be done to improve airflow on a flathead 6. Port the heads, Cam, pistons, rods ... custom intake & exhaust .... then match a carburetor to the engine. Slapping a aftermarket carburetor on a stock engine .... whats your goal ... 96 HP? You may end up losing performance instead. I have no idea what a YF is or what CFM it is classified as. If you bought it for your 1985 Ford .... It is too big for your stock flathead. Same time the Carter B&B is too small to put on your Ford. My engine I need to pull the choke out for a cold engine, Its starts very easy. Then it is a race to open the choke back up & it sits and idles fine cold. It simply does not like to run with the choke on. -
I have in the past used atf mixed with the engine oil, did a great job cleaning a engine .... I would imagine it would do good for a gear box or rear end? I may have to try that myself Is amazing the things we think of as so simple can be a real pita to find ..... I just ran into the problem hunting down a half moon key. Just a item not been used in automobiles for decades. I'm have a local ace hardware store a few blocks down the street .... they have a pretty decent selection of hard to find screws & fasteners .... might be worth a look.
-
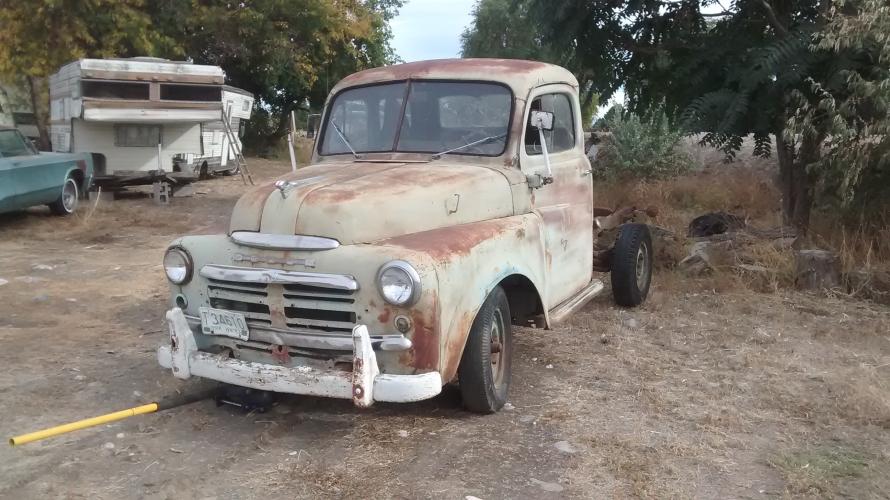
Is it possible you have a 1936 & up clutch disk installed when you need a 1935 & earlier?
-
I think you are correct ... the question is why? My first 1949 truck the farmer installed a 1938 engine into it .... That caused me to do some reading. Seems that in 1935 they moved the starer outwards ... This involved changing the bell housing, flywheel & clutch. So if you were going to swap parts .... 1935 was the year you needed to pay attention. You needed to swap parts 1935 & older ... or 1936 & newer.... Or was it 1934 & older or 1935 newer? .... This is your challenge. Never really affected me so I never really followed up on it .... 1935 was the key year though. Why I suggest mix matched parts & why you should research.
-
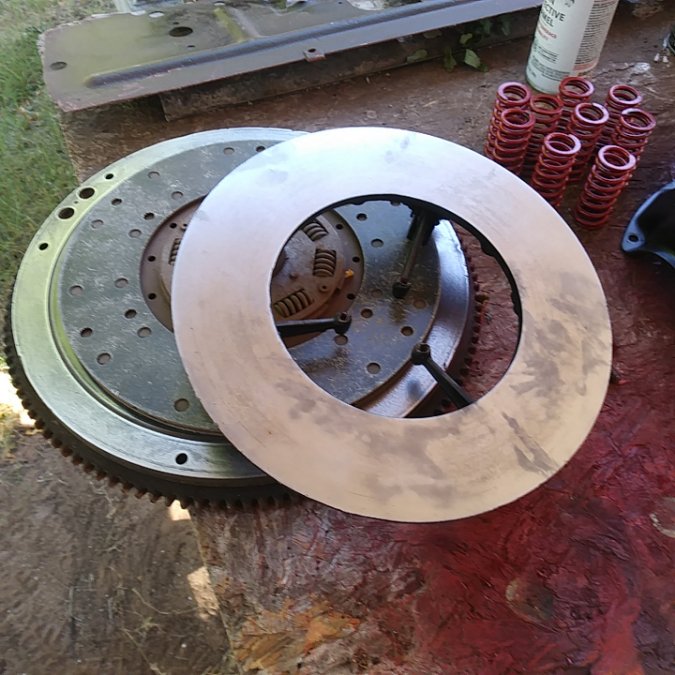
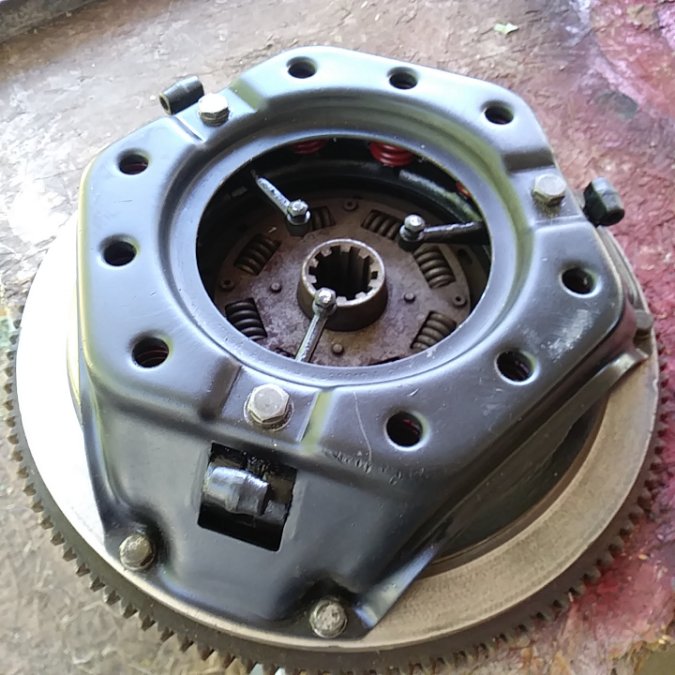
I'm no expert. Just saying I have taken a pressure plate apart. I checked the spring heights and the surface was in good shape .... I figure the mechanical parts including the clutch disk are good enough to put back into service. The bearings & bushing I'm concerned with old dried up grease. Of course this is a Ford, but the principle is the same .... This Ford pressure plate is ready to go back into service. Your Dodge has some issues, you will need to look closely to figure out what is rubbing where & why.
-
Myself the pilot shaft bearing & the bushing in the end of the crank would be a given .... replace. While the disk looks good & seems to have a lot of meat left before hitting the rivets .... could be better to use it then new china re-pops? The pressure plate does make you wonder. I have taken one apart before ... you measure the springs to see they are still in specs .... you can even change springs for performance use. You rebuild them or re-use them. the damage on the center of the pressure plate .... the shiny metal seems fresh. Around the shiny is rusted metal, I would suspect all damage to be rusted equally. IMHO, that shiny metal is a on going issue, not something that happened many years ago. Possibly you have a mis match of parts going on, you do need to dig further into this.
-
I'm with you ... move! It is 59F today. I'm in the shop, have my long johns & a sweatshirt & the propane heater running ??? I got no business joining this convo.
-

Replacing clutch pedal bushing.
Los_Control replied to Los_Control's topic in Mopar Flathead Truck Forum
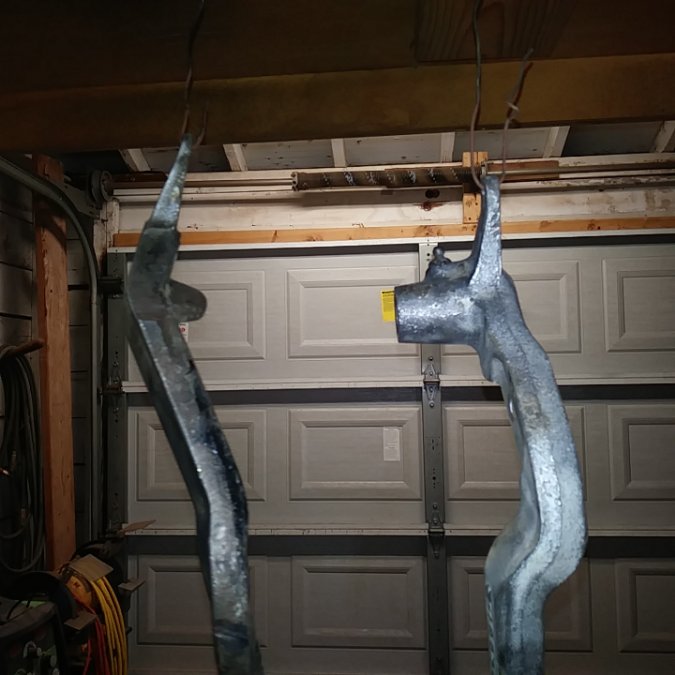
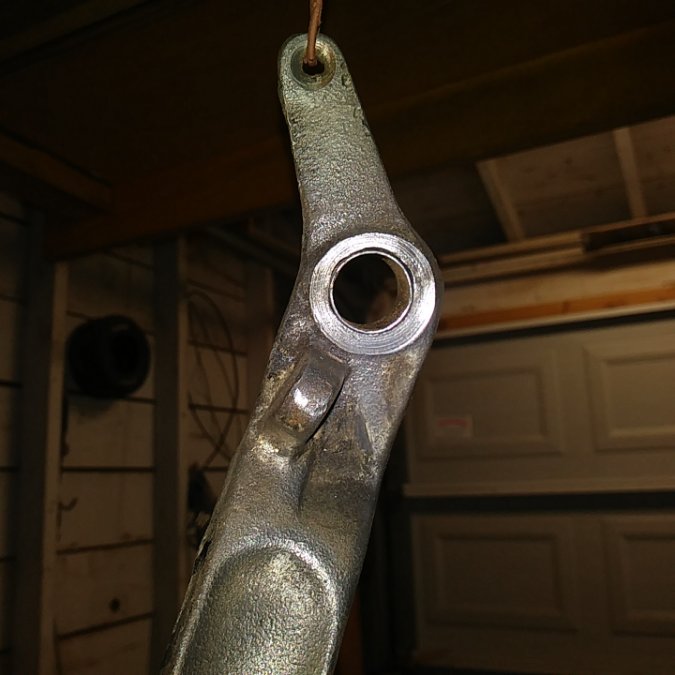
I can not speak for the 1938 model. I too thought there was a bushing installed on my 1949. I now see there is no bushing &never was .... I would imagine 1938 never had a bushing either. The pedals are simply a machined fit to ride on the shaft. The brake pedal on the right is wider has more surface contact riding on the shaft. Also the brake pedal has a grease fitting ... the idea is you grease the brake pedal, the excess dribbles out to the clutch pedal to grease it. I figure the clutch gets 4X the use as the brakes. The clutch pedal never gets greased properly. Just natural we never hear brake pedal issues, always the clutch pedal is worn out. Here with my new bushing installed, you can see the clutch pedal is not round ... is warbled out on the edges. While pretty round in the middle yet. Same time the shaft has wear, where the pedal rides on it. There is no way this is considered a perfect fix for a 100 point restoration vehicle. I expect to get many years out of it with it properly greased. I paid less then $20 for the bushing & have enough left over to do the job again, when this bushing is worn out in 20 years. If you have a drill bit close to 1" you can bore out the pedal properly, get a larger bushing .... you still have the worn shaft to deal with. I see the other options is to take the pedal and shaft to a machine shop & let them deal with it for a few hundred $$ This is simply a $10 fix that should last for quite awhile. The next time I simply need to remove the clutch pedal to replace the bushing. Not the whole assembly to remove 75 year old grease. -

Size of battery cables 1946 WC Dodge Pickup
Los_Control replied to Mark G's topic in Mopar Flathead Truck Forum
Yes the .00 or .01 is recommended. My project truck I have .02 for + ground, then a small 12 volt cable for power. This works fine for 2 years starting it up & moving it around. When I re-wire it I will install correct cables .... going 12 volt so does not matter. -

Optima battery suddenly too weak to crank on 48 DeSoto!
Los_Control replied to MarcDeSoto's topic in P15-D24 Forum
Do you have the gas pedal hooked up? These carburetors are at full throttle at rest. you need the throttle spring to pull it to idle. Totally backwards from a modern carburetor & dangerous when a throttle spring breaks .... just the way our Grandparents rolled back in the day. -

Replacing clutch pedal bushing.
Los_Control replied to Los_Control's topic in Mopar Flathead Truck Forum
Got mine from https://dcmclassics.com/suspension-parts/304-br-563-brake-clutch-pedal-bushing.html?search_query=clutch+pedal+bushing&results=1 The title "replacing clutch pedal bushing" is wrong though. Is common for the pedal to wear on the shaft & wobble then squeak as it rubs on the toe boards. I thought the fix is to replace the bushing .... now that I'm in there, the factory did not have a bushing installed. You need to create & install a bushing. Mine was just a bit loose on the shaft. I took a very thin cutting wheel for a dremel & took a cut out of the length of bushing so it would be smaller/tighter on shaft. Then I reamed out the pedal very slowly until I could tap the bushing into place. .... Then I cut the length of the bushing flush with the width of pedal. Was pretty simple, not sure if it is the correct way to do the job. I will need to lightly tap the pedal back onto the shaft ... when I slide it into position, I suspect the shaft will have wear & be a little loose. But 100 times better then it was. Waiting for paint to dry before reassemble it. -
What helps is to use the " in your search... such as "fuel gauge wiring" Wont fix all your issues but may help. I recently searched replacing the bushing for my clutch pedal. Been discussed 1 thousand times but nothing to really help me. You may want to concentrate on "fuel gauge"
-
I want to follow along here @dgrinnan ... I am curious because I know all horns have relays from the factory? Here in Texas you need a working horn to pass safety inspection. I helped a friend awhile back to get his horn working on a chebby silvarado truck for inspection. I bought a $3 plastic horn, a $3 push button to mount to the dash. I asked Charlie at my parts store ... "Do I need a relay?" ... Nah will be fine he said. 4 years later the horn still works fine with no relay. ..... How often & how long do you use a horn? Is the relay a 6 volt thing? I know modern 12 volt also uses a relay .... is it really needed? Last time I used the horn on my chebby truck was to pass safety inspection ... a short 1 second blast to show it works. 1 year ago. I do need to go in for my annual safety inspection this January "now" Give my horn the usual 1 second blast .... At what point does a horn relay become required? Normal use on a 12 volt vehicle they work fine. ..... I'm thinking if you actually need a relay to cover the horn circuit .... you may also need good combat training if you plan to lay on the horn long enough to burn it out?
-

Replacing clutch pedal bushing.
Los_Control replied to Los_Control's topic in Mopar Flathead Truck Forum
That little booger was tough. I did heat it up with map gas .... not sure how much that helped. I took a round flat punch & drove down the right side of the key forcing the left side up. Then drove down the left side forcing the right side up. .... Rinse & repeat a few times & got it moving kinda good ... still could not pull it out with vise grips. Then I cut myself & got some blood dripping onto it .... came right out. I started mowing lawns when I was 12 years old, I bent a lot of keys & replaced them over the years .... This was the toughest one in my 60 years on earth. -
Just do not pull a Fred when cleaning the threads. I had a 218 engine given to me, was rebuilt & stored with the head removed for many years. I cleaned up the light surface rust on the cylinders, then ran a tap through the threads to clean them up. Then later I read that the thread pitch on head bolts is not course or fine ... they have a specific pitch. Is this true? I read it on the internet. Only suggesting to check the thread pitch before running a tap to clean them up. I think this is what Ken is saying also
-
I know it could be converted to use a dual filament bulb. Just not sure that is what I want though. I do like the idea of mounting lights on the frame horn .... just depends on what style you are looking for. For a custom or street rod, even a simple upgrade to original ... they look fine. Just small & maybe hard to see. Since I'm going for the larger mirrors, cab lights, mud flaps, cb antenna, 4 tail lights .... I want more cow bell for front turn signals
-

Replacing clutch pedal bushing.
Los_Control replied to Los_Control's topic in Mopar Flathead Truck Forum
Is a awkward spot to get to with a chisel. I have a angled pry bar with a chisel end. I keep it sharp and makes a good gasket scraper. It was starting to cut the key. I would think It would have come free at this point .... So I decided to walk away & think about it. Glad I asked .... I have map gas I can use to heat it with. -

Replacing clutch pedal bushing.
Los_Control replied to Los_Control's topic in Mopar Flathead Truck Forum
Thanks Merle, it sure does show it as a separate piece .... I just pulled out my book again and it does not show it. I will continue working on the key then. Using the chisel I started to cut into the softer metal & it still did not budge. Maybe if I soak it in oil then apply some heat ..... I have to drive to town to get a bottle of argon gas, will spray it before I leave. -
Trying to replace the bushing & a bit unsure of the procedure. I have 2 books that show a exploded view of the pedal assembly .... no instructions to replace bushing. When I remove the end piece which is the clutch pedal adjustment, appears to be a half moon key in the shaft. I tried to remove the key with no luck .... I do not see a corresponding slot on the clutch pedal to slide over the key. Now I'm thinking I need to remove the pedal assembly from the transmission & remove the pedals from that end? Not trying to over think it, I tried with a chisel to remove the key & will not budge .... I do not want to damage the shaft if it is not a removable key. Probably easier to clean & paint if whole assembly was removed anyways . Any hints on proper way to replace bushing?
-

Optima battery suddenly too weak to crank on 48 DeSoto!
Los_Control replied to MarcDeSoto's topic in P15-D24 Forum
Not saying it is the best way, I just got on Rockauto and ordered individual plug & coil wires at a length that would work. So they were all ready made. I did not need to crimp them myself. They were really cheap, but seem to work fine. My thoughts were to just get the engine to run ... then later I would want to get high quality wires & crimps to make a custom set .... I wanted to use the cloth covered wire With quality ends. Like in the photo but different colored wire. The end you show in your picture you can mess with it & get it to work .... for $5 you can just buy a good wire from local parts store. -
I will be honest & never owned a ultra sonic cleaner or used one. I watch a youtube video every Sunday for a few years. The mechanic is pretty knowledgeable & works on anything from Diesel back hoes to lawn mowers .... 1930 Dodge, Lots of variety. They use a ultra sonic cleaner & started out with the suggested cleaners, simple green, pinesol, vinegar .... After a year he uses Berrymans carburetor cleaner in the new large ultra sonic cleaner. For car parts. The original small cleaner he bought, he uses a simple household cleaner in it for things like jewelry or chrome pieces ... Makes sense to me. A different product for different jobs.
-
The staring fluid to air up the tires is a real deal. It causes no damage to a tire .... such a quick & short blast. I have only seen it done on tubeless semi truck tires ... works just as well on passenger tires though. When I was retreading truck tires we naturally had a service department to change tires. .... We got paid piece work for what we did, not by the hour. This was in Seattle, We were called Puget Sound Tire. I remember talking to the owner one day about something, Up in the 2nd floor office, & he was talking to a customer on the phone ... So I'm being quiet & wait my turn. Downstairs Tony has a order for 48 tires & wheels .... He is using starter fluid to air them up .... POW! POW! POW! .... I felt so sorry for my employer as he was doing a face palm trying to talk to a customer .... Tony was doing no wrong, this is a working shop & he was earning more money in one day then others make in 2 days.

