-
Posts
4,692 -
Joined
-
Last visited
-
Days Won
35
Content Type
Links Directory
Profiles
Articles
Forums
Downloads
Store
Gallery
Blogs
Events
Everything posted by Los_Control
-
I just set the size on my phone, so it creates smaller pics in the first place. For future photos. I forget what makes the .heic prefix. I just opened the photo with my editor and save it as a .jpeg file. I did not need to resize that photo though?
-
I'm not sure on the 1946. 48-50 have metal cross members that go cross the frame ....5 I think. They bolt to the frame then the wood floor bolts to the cross members. Same with the bed sides. Then I have 6 long bolts that go through the wood, cross members that bolt to the frame of the truck. I think the WC trucks had 2"x4" wood cross members instead of metal .... I have never seen one apart. @Young Ed knows and also @dgrinnan maybe they will chime in if they see the post.
-
-
I agree 100%, I want a volt meter .... same time for aesthetics I'm not happy about a dummy gauge in the dash ..... volt meter is the way to go .... I'm wondering if I can have both. I guarantee I will have a volt meter .... just not sure if I can figure out how to use both amp & volt gauges at the same time or worth the trouble. I hope @OUTFXD does not mind this conversation in his post ..... we are both going through kinda the same thing with charging & wiring questions. I looked on Amazon today for a 1976 camaro alternator .... The same alternator I bought came up. .... We know it is wrong .... Amazon does not have good support. While on Rockauto they have a wide selection of choices all internally regulated starting at $28. The ACDELCO is $68 .... but it is brand new & not rebuilt .....choices.
-
I sure wish I knew automotive electrics better then I do. Only what I have been reading & researching ... I'm just guessing factory wiring runs everything through the amp gauge? I do a lot of researching over on the hamb. There is always more then one way to do things. Some say that once you convert to 12 volt alternator, the original amp gauge is no longer accurate & reads too high anyways. So some people add a shunt wire between the two post on the amp gauge ... depending on the resistance of your shunt wire .... 1/2 the power passes through the gauge, the rest goes through the shunt wire .... now the gauge is protected and actually reads closer to normal. Then other people are more like @sniper, they send the higher amp items like AC or fans etc... away from the amp gauge. Simply end of problem. Makes sense to me. I'm just saying when you have 2 car builders & they wire their cars differently, I can not say one way is right while the other is wrong. Like 2 chefs baking a cake, 2 different recipe but both work. Here is a diagram showing a 1 wire 12 volt alternator conversion. The wire goes straight to the amp gauge. Then the battery goes straight to the starter > amp gauge. Everything is running through the amp gauge. So a novice like me ... I need pictures to complete my wiring. This would be a typical diagram available. Sniper is a professional electronics expert ..... I get it, they will do things different. For those of us who need pictures .... this is what we get.
-
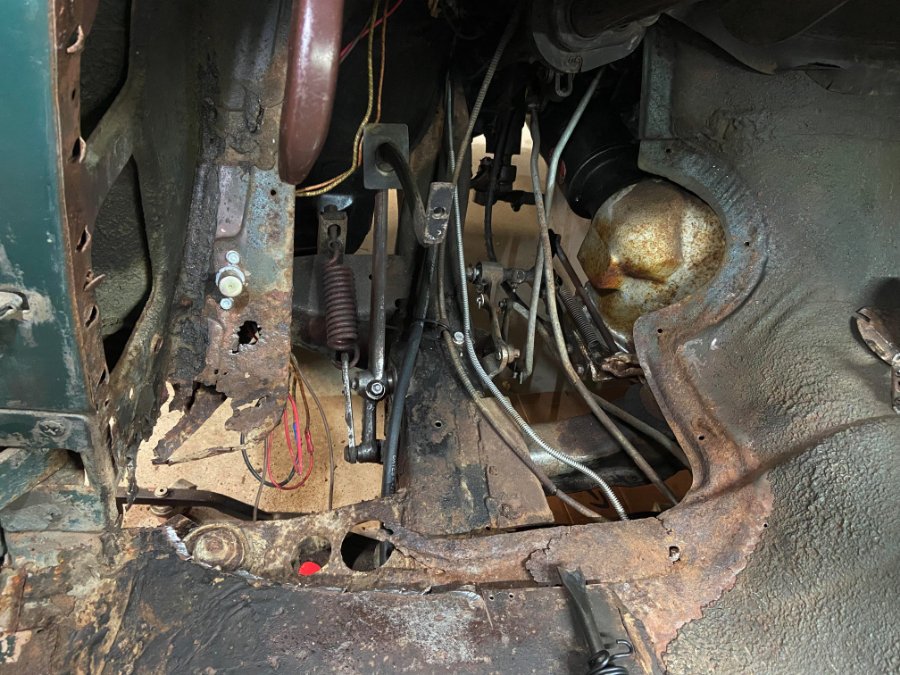
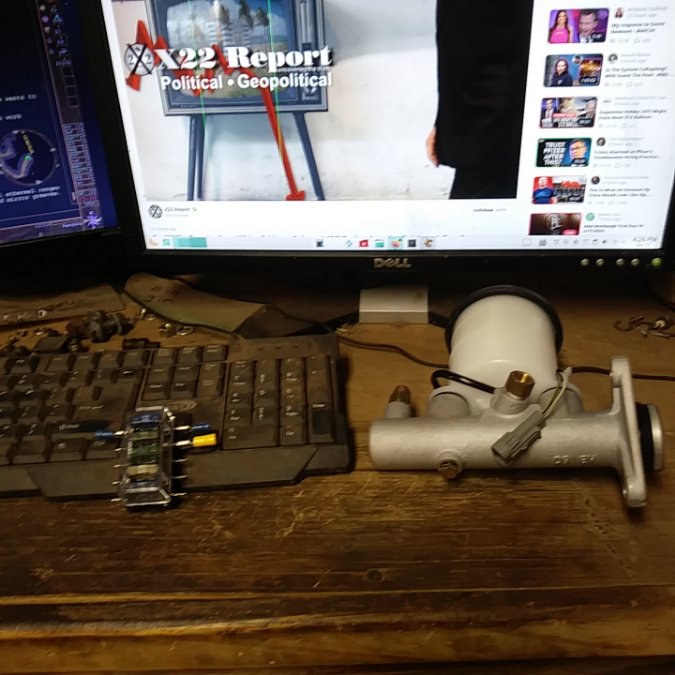
Welll this old hillbilly .... What I did is adjust the rod as short as it would go. Once the MC was mounted .... was obvious the rod was too long ..... The brakes would be applied if you ever got it installed. So I cut a 1/4" off the rod ... still too long ... I cut another 1/4" off ... nope .... another 1/4" I was able to slide the rod in position. It was tight, but able to fit it. Satisfied I then took the rod to my bench grinder and created the original bullet shaped tip on it. .... The rod is wider then the hole on the MC. So when I created the bullet shape point on the rod, it now fits into the MC & I have 3/8" of slop .... 2" of adjustment. Just saying I snuck up on it and a little at a time. .... Just a informal guide on installing the master cylinder .... If you are going to use disk brakes and require a proportioning valve. You still need a MC, the lines and proportioning valves are out of my scope here.
-
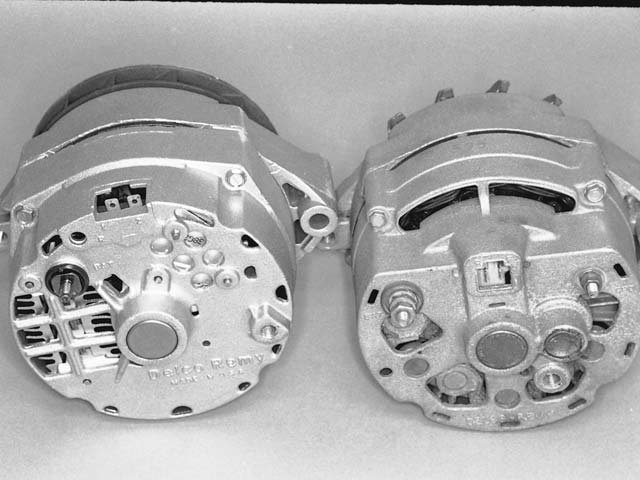
Smarty pants You are 100% correct. The one on the left is a 10SI & internally regulated. The one on the right is a 10DN .... Externally regulated & what I have. @Sam Buchanan is 100% correct. I'm told if you search for a 1976 camaro you will find the 10SI & what you would want. Sometimes we take our wins & losses ..... I did not get what I thought I wanted. I do happen to have a 12 volt regulator in my stash pile. .... Will have to think about it and use it or just order a different alternator.
-
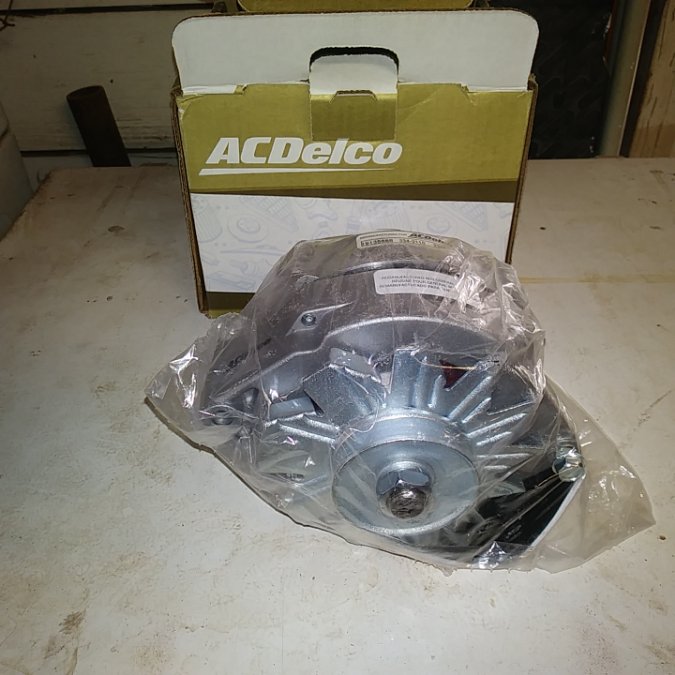
Thanks @Sam Buchanan I really do trust & appreciate your electrical knowledge ..... You sure schooled me on proper wire connections crimp vrs solder. What I was searching for is a 1 wire GM alternator to make the installation simple. .... Think I used 1975 chevrolet truck in the search engine. I do not remember. There is a bit of a feud going on about that in other forums. A 1 wire GM alternator does not charge at idle. The old ones did not .... today they do .... you might be getting into a serpentine belt though. With the research I have done .... This is a internally regulated alternator. The main power wire on the left. The two wire plug in the middle. the left is called a exciter wire .... just loops back to the main wire so it charges at idle. The right plug is for a idiot light in the dash .... not needed on a old dodge but is a option. Far right appears to be external ground .... I have not taken it out of the wrapping yet . It is suppose to be internally regulated old school chebby alternator available at any parts store. I do not expect to need a external regulator .... I have been wrong before.
-
We all know you should replace the wiring harness for the above reasons that you say. Buuuut.... if it not causing break downs, or fires .... you can squeak by a little longer ..... sooner or later you will need to change it. If you go alternator you will need to modify existing wiring .... no way around it, removing the voltage regulator .... you can modify your existing wiring ..... What I plan to do, I bought a wire harness from amazon. $38. My review on it .... it will work. I do not like the setup for the turn signals & 4 way flashers .... Will not work for my sigstat 900 turn signal switch. This is a 12 circuit fuse box, I can not use the flashers .... too many circuits for my old truck .... the fuses are so cheaply made, I have pulled fuses and the plastic comes off the metal contacts stay in the fuse box ??? My plan was to de-pin the extra wires from the box ... use what I need get rid of the clutter .... can always add wires back to it if needed. I have tried every pick, probe, wire, I can not properly remove or modify the box ..... really not satisfied with it for my purposes .... The wires are well connected & will work as advertised. While it would be fine to just use it as is ..... I plan to use the wire & trash the box. It is true automotive wire, soft, flexible,proper gauge .... I have enough different colors to wire my truck & kinda sorta make it look correct? Not to mention I have been collecting rolls of radio shack wire for a couple years. I will use a inline fuse for my turn signals, another for the headlights I bought this small 6 fuse holder box. While I'm not happy with the Amazon fuse box arrangement, I'm tickled pink for $38 to have all the wire of different colors to wire my truck. A few more $$ for inline fuses and a small fuse block ..... $50 & labor have a new wiring harness.
-
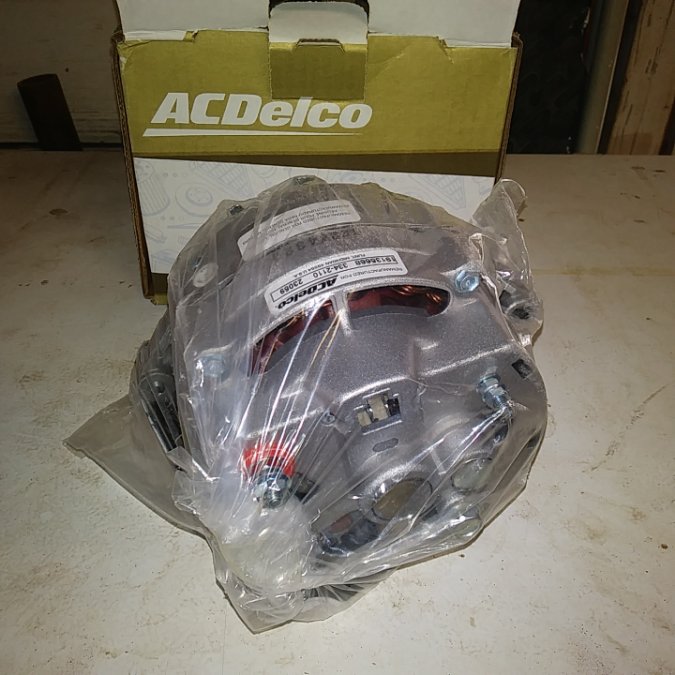
Just thinking if your existing wiring is good enough for 6 volt, 12 volt will be fine. 6 volt you need twice the wire size to handle the load. So going 12 volt does not demand a new wire harness at this time ..... you could still do that later. 12 volt puts less load on your existing wires. I understand this totally. I only have my social security check to live on ..... I do not feel I can afford to go 6 volt. I need to be as cheap as I can to get by. But I do want 12 volt anyways. I just got this delivered the other day, no time to work on the truck this week though. $46 + $10 shipping, no core needed. It is a acdelco remanufactered Used rebuilt Can you see how cheap I am acdelco has a very good reputation ... has a 1 year warranty Looks like it is brand new. Thinking I will paint it satin black, spray it with WD40 then throw some dirt on it .... Will then match my truck So $56 takes care of generator/voltage regulator. ..... you will need to change all your bulbs. You will need a 12 volt battery. I wonder what else is a problem .... Do you have electric wipers? .... Dont drive in the rain until you get a reducer. Same with heater, it will run on 12 volts, just really fast ... do not use it til you get it reduced. I do not understand the gas gauge. When I ordered my new tank & sending unit I specified 6 volt .... the kind lady said the sending unit does not care .... I dunno. Do you have any wires going to your transmission? It just might not be as big of a job as you are thinking. .... The most expensive item will probably be a new battery. You can still replace it with a 12 volt generator later https://www.amazon.com/gp/product/B000C9M40S?ref=ppx_pt2_dt_b_prod_image
-
@Sam Buchanan I'm kinda under the impression that @OUTFXD wants to keep their car as stock as possible. Going with a 6volt alternator is like a sign of defeat .... while working out a new generator. I could be wrong, just the way I read the situation ..... They do not want to rewire the whole car. I personally had big choices to make to decide 6 volt or 12 volt. Once you decide to go to a alternator, 6 or 12 volt you are not original. What is the point of staying 6 volt positive ground .... If going to a alternator. ...... To me that makes no sense at all. I think of it as I want to keep it original, but I've already made it not original .... I will pretend it is cool. And spend lots of $$ keeping it 6 volt + ground to tell others how these old cars worked. @OUTFXD you do you. Either replace the generator or go alternator .... I personally see no advantage to use a 6 volt Alternator. A 12 volt alternator opens many doors & makes your old cruiser more enjoyable. If you are going to modify your electrical system .... why not use the best pieces available? IMHO, a 6 volt alternator is cute .... nothing I would ever spend money on ...... Some do.
-
Story time I was reading some information the other day .... Not important who it was .... Thinking maybe it was Freiberger on motor trend. I dunno. Him & his wife were cruising in the Hot Rod on the way home. The Amp gauge lit up like a Christmas tree on the way home. .... They were close enough to make it too their driveway. When the amp gauge lit up, the wiring started burning .... when he got out he used a fire extinguisher on the fire .... His wife got out & pulled the ground cable off the battery. She stated this is not our first rodeo ..... what a keeper Just saying, while some will claim too never had a issue running a high amp alternator through the stock amp gauge .... there are stories of those who did. Maybe it should not happen .... plenty of rumors going around that it does happen
-
I'm really surprised Where @sniper showed the Amp draw on a electric radiator fan .... I'm thinking 5 or 10 amps .... he is showing 25 amps. If you have aftermarket AC that would be a huge draw of Amps. For your basic car with headlights, heater, radio, tail lights, wipers ..... A 60 amp should be more then enough. The 100 amp would be better used on cars with AC, electric fans etc... Same time while it should never happen, is possible with a spike in electric usage, 100 amps through your stock amp gauge would fry it. There are ways to wire your car & avoid that .... A 60 amp alternator would never cause a issue in the first place. IMHO, if you need 100 amps then get it! Then take care of the future possibilities of potential problems in the current wiring to avoid them. Or run the 60 amp alternator that will do what you need, not harm a flea .... get on with your project. I'm going 12 volt GM alternator .... I chose the small 65 amp version for a reason.
-
Wow that looks great. Makes a great ice cream fetcher I imagine the radio would not be too difficult to fix for the right person .... Not me but there are some pretty knowledgeable people here who could help you with it .... or suggest where to send it. I once restored the wooden case on a old house radio from the 40's. I honestly pulled it out of a pile of junk covered in snow. When it dried out I plugged it in & turned it on. It started to work. There was one tube in it made from cardboard. So when the radio started to work and the tubes warmed up, I watched the one cardboard tube disintegrate & it quit working. So when you say it came on once .... I think about a old tube failing as it warms up .... should be a easy fix. Welcome to the forum .... I love trucks, seems all my working career I drove Fords at 8mpg .... while always secretly wanting a chebby .... just the way the dice rolled. Today I'm retired and have a 1991 chebby SWB 350/5spd & get a whopping 16mpg
-

51 B3B build thread - after all these years
Los_Control replied to bkahler's topic in Mopar Flathead Truck Forum
I understand. I also bought a used replacement T-stat housing for my truck. My problem was the hose would leak because of all the corrosion on the neck. While I could mess with it & get it to seal, I replaced it first chance when something came available. -

51 B3B build thread - after all these years
Los_Control replied to bkahler's topic in Mopar Flathead Truck Forum
Wow! Just incredibly beautiful. And a lot of work to maintain. I have enough problems taking care of my city lot The photo reminds me of my childhood. My family rented a house on 75 acres. There were 2 houses, Grandmother & Uncle rented the other house. My father had a large 1/4 acre garden, we had use of the barn and had pigs, chickens, cows. The majority of the property the owner was retired and he worked everyday on it keeping it up like a park. A 30 acre field could have raised crops, He had it planted in grass and trees completely surrounding it in a circle .... The driveway was a mile long .... had to walk it to catch the bus for school The driveway followed the river that surrounded the property on 2 sides. .... The property owner did a great job taking care of it ... I wonder why he never lived there himself? ..... Today It is a commercial resort where people pay good money to stay for the weekend. What a great place to grow up ..... A incredible amount of labor goes into taking care of a place like that. -
Thanks for clearing that up Ed. I just saw no mention of the pad in @dgrinnanpost above ..... Might be confusing why there is so much slop if not aware of the pad.
-
Not sure if I'm correct .... My experience with my 49 low side bed, and my 49 utility trailer that is a standard bed. The widths are different in the bed & the boards. Just saying while I thought the beds were the same, one has lower sides then the others ..... A quick comparison & there are 6 or 8 things different .... the more you look the more there is. So for the manual to show diagrams for all the different beds, short bed, long bed, 9' box, flat beds .... Would be a complete book all by itself. Your diagram looks correct to me. Is your corner strip not pre drilled? For proper bolt placement. Mine is not as I made my corner strip, I'm just going to line up the bolts with my bed strips ..... so they are lined up all the way across like in the photo you just posted. Also on my 49, I do not know if 47 is the same. There is a aprox 3/16" piece of rubber that the cross members sit on when bolting to the frame. So I will need to add the rubber between the bed side & the cross member .... leaving just 3/4" for the wood to slide in. If I do not add the rubber, I will have a 3/16" gap between the wood & corner strip. At least that is how I setup my 49 trying to copy the original. I do not know if the 47 has the same ..... are all your cross members wood?
-

New engine for the 1948 Deluxe.. Will it fit?
Los_Control replied to rcl700's topic in P15-D24 Forum
As far as I know the 23" 218 & 230 will swap out with no problems. There are differences on the 230 crank where it will have 6 or 8 bolt holes for the fluid drive transmissions .... so if this makes sense. You can pull a 218 & install a 230 in it's place. Same time depending on your transmission .... You can not pull a 230 & replace it with a 218. Now if you have a straight up manual transmission, they do not care if it is a 218 or 230. The 218/230 share the same block & pistons, head. The crank & rods are different ..... A 230 is a stroked 218. The 230 just simply offered another mounting option for transmissions that the 218 did not offer. Or you could say, the larger cars with the fancy transmissions, only came with a 230 .... 218 was not a option in those cars. The 230 will be a fine replacement for your 218. -
I just wanted to add my experience to wrap up my questions. Fitting the master cylinder was very easy. .... some say you wobble out 1 hole .... I wobbled out all 3 holes a little bit. Room for adjustment. I did shorten my brake pedal rod as short as it would go .... I still needed to cut off aprox 3/4" .... then it fit comfortably. Then I ground the end to replicate the original bullet shaped end ..... Now it fits inside the dimple on the master cylinder & needs to be adjusted 1/4" to take up the slop. To me that is perfect .... plenty of adjustment available on the rod. The real trick to the conversion is the metric sized lines for the MC. I found some bushings that are American thread, they are a little sloppy threading them in to the metric MC. But when the seal in the center hits, they tighten right up fine. .... I used teflon tape on the threads to tighten it up when installing .... once seated I gave 3/4 of a turn to cinch them down tight .... no issues. ..... They are now converted to 1/4" NPT threads for standard brake lines. Again I'm running drum brakes all 4 corners. No proportioning valve. ..... I suspect disk brakes you would need to add the valve. As is, my pedal is rock solid & locks up the brakes when wanted ...... still not highway driving though for a more accurate report. I'm very pleased how simple & easy it was to add a dual stage MC to our old trucks.
-
There is a old familiar image of winnie the pooh bent over with his head stuck in a honey jar. Then another layer of fabric where winnie is standing behind the bear who's head is stuck in the honey jar ..... looks like they are doing you know what. There is a lot of artistic ability in sewing upholstery. Lining up a pattern on a seam .... sewing straight lines .... creating a diamond shape pattern. A simple seat insert with straight lines & the side skirts with a rolled edge separating the pieces. Truly is artistic ability to do it correctly. I see others looking and saying the interior looks nice, I doubt they know how many hours went into creating it. ..... some do. I do not know all the correct terminology for the different pieces ..... I do not care to learn ..... Just a area I will never be able to compete in. I have a old singer machine I hope to complete 1 truck interior with .... then toss it out. I have no use for a true walking foot machine that would only use once. I have a lot of respect for a old Mexican blanket for a seat cover.
-

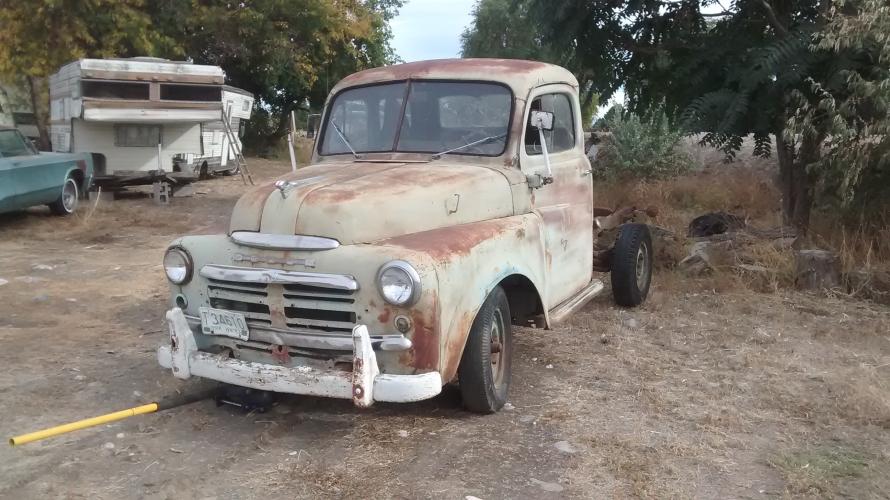
So if I wanted to rebuild a Pilothouse
Los_Control replied to Mikec4193's topic in Mopar Flathead Truck Forum
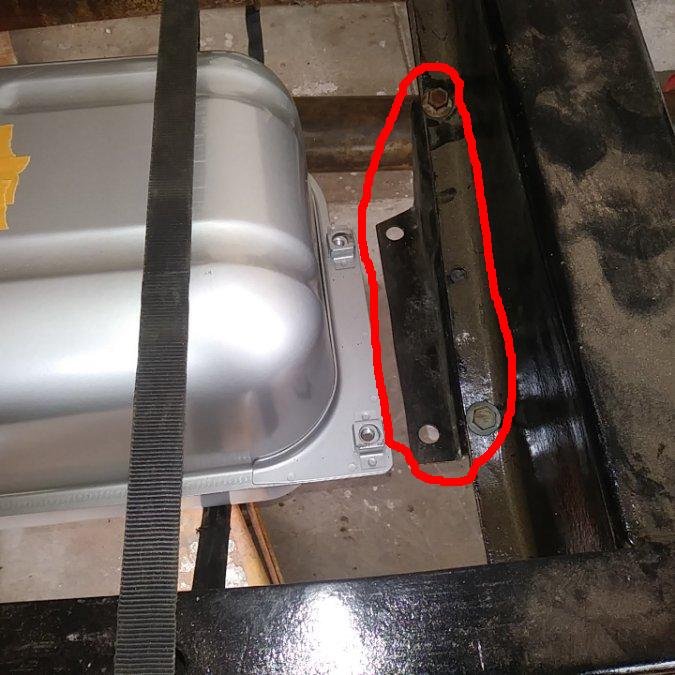
Actually you would want this tank .... From Tanks .... https://www.tanksinc.com/index.cfm/page/ptype=product/product_id=349/category_id=68/mode=prod/prd349.htm Is the tank I am using, they claim it fits 48-53 trucks with minor mods .... I have a thread here showing the mods or options needed. The front bolts in place and it lines up with the filler neck, just the rear mount needs modification .... Here is the challenge. Not difficult to work out .... 48-53 they moved the rear cross member. When I bought my tank it was $250 .... now they are $315. There are other dealers that claim a direct bolt in fit for $800 ..... I have a thread on it here ... called hound dog hauler. I gave this one away for free, B1C 3/4 ton factory flatbed, engine would run .... Just not worth trailer it 1200 miles to Texas. This truck needed everything mechanically. Then I paid $1800 for my hound dog hauler, $200 to have it delivered, another $100 for a tip so the delivery crew could get a decent lunch on me. So $2100 into my current project, 5 years ago. Probably too much, but it is exactly what I wanted. 1/2 ton with the low side bed. Body sucks but the exceptionally good running gear was a surprise and saves lots of money. ...... Painting just sucks. You too can easily over pay for a vehicle. .... When you see exactly what you want ... A few $$$ one way or the other does not matter. Last week I saw a crack dealer offering a stripped out cab for $1200. Fun & cool trucks, they should be driven or restored & looked at. -
Seems my alternator is a rock star. Took 2 weeks before it was ever shipped. Then first stop was Lubbock TX .... ready for next day delivery. It took a ride to Kentucky, then flew to Dallas airport, then returned back to Lubbock .... 3 weeks later it finally arrived. Not exactly a 1 wire GM alternator. It is 65 amps. More then I need. It is a rebuilt / refurbished ACDelco ..... 1 year warranty,$46 but $56 with shipping. No core required. I have to do more research before installing it .... I understand that the 2 male plugs, the one on the right is for a idiot light ... not needed. The plug on the left is a exciter wire .... just loops back to the main battery lug .... looks like a grounding lug far right. I need to do more research, seems like this is the alternator I want. I do not expect too much issue with mounting .... I think spacers will cure all. It does have a narrow pulley on it. ..... My existing non stock generator also has a narrow pulley. The narrow belt works fine on wider pulleys, just sits deeper & impossible to jump off .... Just not as cool as a wide 3/4" belt. While it is a used rebuilt alternator ...... just too shiny & new looking. I'm thinking some satin black paint, oil & dirt .... could look like it belongs there buried at the bottom of the engine bay.
-
Just a opinion or observation .... Thinking of the quality or size of the jumper pack battery. I have a old school shumaker battery charger with option of 6 amp or 2 amp trickle charger. I would think on 2 amp trickle charge it would be fine ..... if not then I probably did not want it anyways. Maybe 6 amps would be to much charge for the smaller battery? I wonder what the recharge time was when you had the original charger & good battery. How many amps the original charger was pushing? I would guess it took a couple hours for full charge .... A trickle charge should work. Today my Makita 20 volt Lithium battery for cordless tools recharge in 15 minutes. My older Dewalt tools with old school batteries took 45 minutes. No idea what battery you have, I think a slow 2 amp charger may take longer, but not overheat or damage your new replacement battery.
-

51 B3B build thread - after all these years
Los_Control replied to bkahler's topic in Mopar Flathead Truck Forum
I have had problems with T-stat housings sealing on various vehicles in the past. You clean the surfaces, the head should be flat. The housing run a straight edge on them to be sure not warped. I use permatex gasket shelac compound for a sealer. Sometimes still end up with a little weeping like yours. ..... Double check the bolts are still torqued correctly ... not over tightened, run it through a few heat cycles and would disappear. Just saying my daily driver work truck, drive it a day or two & would seal up & never return. Me a old hack, I would leave it as is for a short time & see if it goes away .... If installed correctly it should. No guarantee you put the new one on and will not have same issue. As a kid they leaked every time on me, I never got the surfaces clean & down to bare metal. Or had a housing that was warped, cracked, badly pitted... So after redoing my work many times, I now feel pretty confident in replacing my T-stats. There are still a few that weep for a short period & then quit.

