-
Posts
4,729 -
Joined
-
Last visited
-
Days Won
37
Content Type
Links Directory
Profiles
Articles
Forums
Downloads
Store
Gallery
Blogs
Events
Everything posted by Los_Control
-

51 B3B build thread - after all these years
Los_Control replied to bkahler's topic in Mopar Flathead Truck Forum
OH MY! -
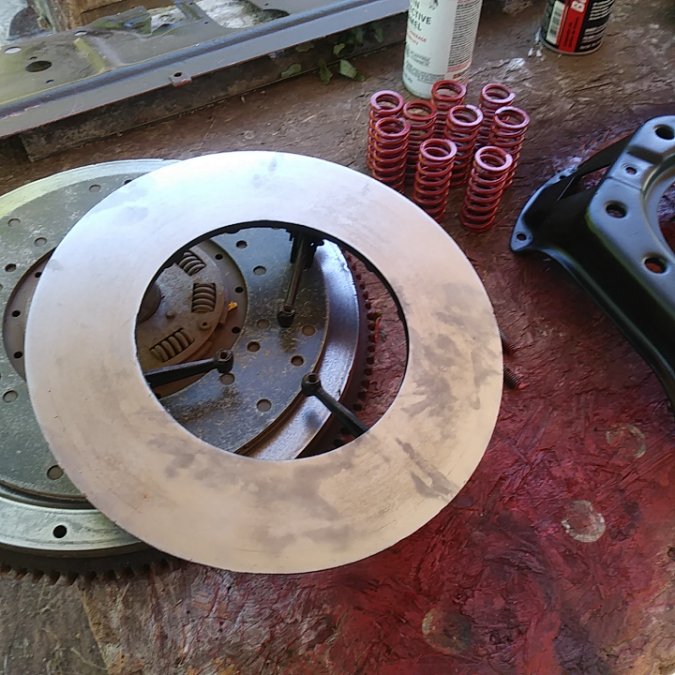
Just thinking with my fingers here ..... you really need to take it apart to inspect what you have first. These older pressure plates can be rebuilt. This is a unfair comparison, this is a 1951 Ford flywheel, clutch disk, pressure plate. It would not bolt to your mopar, but the mechanics are the same. Looking at the clutch disk you can see it is riveted together. If you wear the disk too thin, the rivets will grind grooves into the flywheel or the pressure plate or both. The 2 concerns of the pressure plate is the smooth disk surface & the spring length. I lined my springs up in a row and used a straight edge to check they were all same length. .... Just saying it is not rocket science to go through a pressure plate. Same with the flywheel, you want to check your ring gear & that you have a flat surface ..... any shop that can turn the flywheel can also turn the pressure plate. Looking at the clutch disk, I have had a spring break & fail .... part of the spring tore up the disk & grooved the flywheel, but the pressure plate side was fine. Just another point of failure. While in there looking, a new pilot shaft bushing , throw out bearing, clutch disk is always a good idea. Pressure plate & flywheel depends on inspection.
-
You are 100% correct, best example I have ever seen was a 1951 Suburban that ran the tail light wires up in the head liner. Was cloth covered wires with a tracer color on it & looked brand new because it had been protected over the years. I was just being sarcastic because the "Wire looked like Radio Shack quality and only 4 colors" A guy could spend $5 & buy 1 roll of wire & fix the problem back in the 70's-80's .... Or go big time & spend $20 for 4 rolls of different colored wires. I would be the guy to spend $5. ...... @OUTFXD got lucky because previous owner did things first class.
-
@andyd you just need to drive a truck .... they did not have a bushing.... I was going to report this in this thread ..... those rascally Chrysler fellas did add a clutch pedal bushing. Andy just sell your car & get a truck, you will be a happy camper.
-
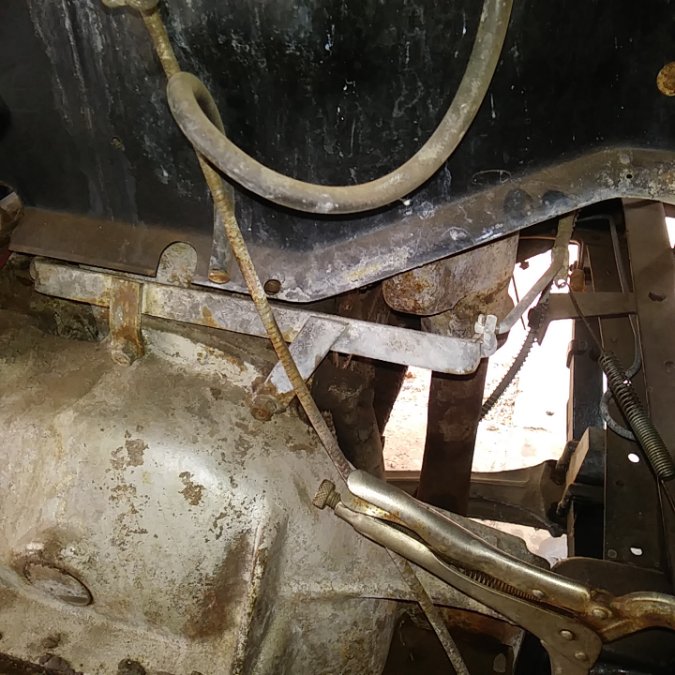
I agree 110% with that. I always think of a leak as pushing fluid out when stepping on the pedal .... sucking air in as you release the pedal. I'm thinking when I weld in the new floor pan, I can fabricate a bracket for a mechanical switch under the floor. Right now I have a option to go pressure or mechanical. Choices are good. I am hoping to use the original switch. Just might not happen .... I would much rather have a mechanical switch fail then a pressure switch fail. Good point Ken, thanks for reminding me of the quality of after market parts available. While I did swap around the clutch adjuster today on the shaft ..... A closer look at it and it is pretty neutral any way you put it on. ..... I honestly look at it, the adjuster bolts are in the middle & do not think it ever has been adjusted. While my real issue was the linkage rods, I took them apart and cleaned/greased them .... they needed a adjustment to get into 1rst - reverse. Now the rod is at the end of it's adjustment ... there is no more. The pedal still has plenty of adjustment. So I can get some more from adjusting it there. .... probably where I should have adjusted it in the first place. Clutch is approaching the end of it's life cycle. Just saying, let the clutch pedal 1" off the floor & is fully engaged. Not slipping, she likes to spin them tires. Just difficult to manage with no floor or gas pedal. Only thing I'm missing is a 5 gallon bucket for a seat. Only job for today is to clean up my mess.. Seems like that did not happen Just one of those days .... I had to rest up before going to walmart for shopping. I did get walmart done yesterday. Typically I need at least 1 day to recover from walking around the store. Sometimes 2 days. I did manage to weed eat & mow the front lawn today. March 11 .... earliest time I ever mowed the lawn ... wonder how the rest of year will go. .... I have the garden to work on .... just not sure when will be back on the truck. There is a swap meet close by, Fri, Sat, Sun .... While I physically could not make it today .... We will go tomorrow morning early. I figure whatever is left they will want to sell cheap just so they won't have to bring it home.
-
Thats pretty custom to have 4 colors ..... usually back in the day they used one color with one size. I'm impressed they actually used 4 colors ??? You know what you need to do to make yourself happy. ..... Honestly there is no other way to make it correct. While at the same time ....I might use the existing wire if it worked ..... Yeah I doubt it. Yeah while it sucks, just not unexpected.
-
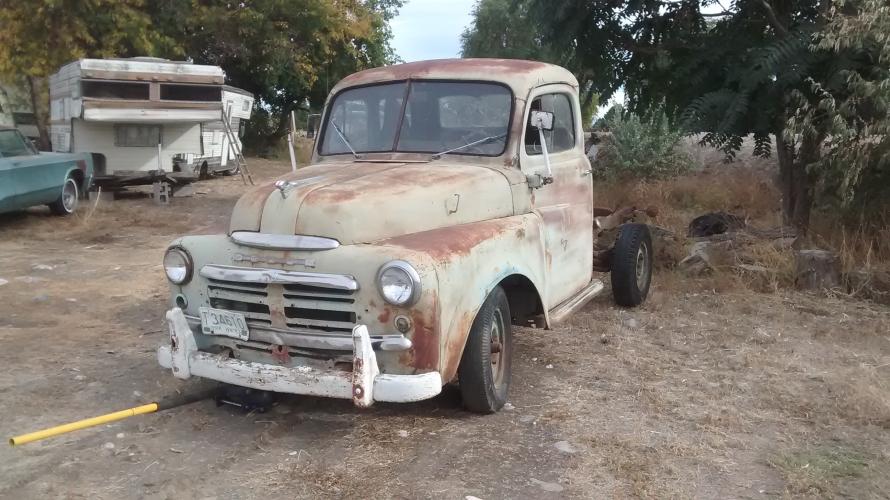
I once had a 1949 chebby truck that color. I loved that truck .... I never did drive it. What I thought was cool, I bought it from a Boy Scout troop leader. It was a official Boy scout project where they had painted it and used it to go camping with or other projects. ..... When the old tired 216 engine spun a bearing. The troop with guidance of the leader .... pulled the head and removed that piston & rod. They continued to drive the truck on 5 cylinders until the valves needed attention. Then I bought it for $50 .... Back then you drop a head off at Napa for a valve job was maybe $75 .... + gaskets. I sold it to a mechanic as a running 5 cylinder engine .... it ran smooth. I think as a 18 year old kid I made $100 off the deal. That sumbbeach was pumpkin orange with black fenders .... just like @Young Ed truck.
-

Another example of my auto electrics knowledge
Los_Control replied to harmony's topic in P15-D24 Forum
I know enough about automotive electrics to get into trouble. I think you already got your answer. I do not see any reason why you could not run the engine 6 volt negative ground. Take away any guess work. Same time if you did have a spare 12 volt battery you could run the engine 12 volt negative ground. Only advantage is when you do find a home for your spare engine ... you know you are shopping for another project Your engine run stand will be more versatile for the next engine you set on it. -

Way off topic 1993 caravan transmission
Los_Control replied to Los_Control's topic in Off Topic (OT)
Possibly it did not damage the rod. .... I'm guessing the bearing did spin. Speed limit on the freeway is 75mph ... so imagine driving 80 mph down the freeway and everything is perfect. Just barely have the foot on the gas pedal .... plenty of power. No engine noise, no warning lights. Then the engine starts to lose power, you need to press on the gas pedal to maintain speed, then the oil light comes on & next a rod starts tapping. Seems like the bearing failed or spun on the rod first. Acting like a clamp on the crank shaft causing the engine to work harder to maintain speed. ... then 1 mile down the road the oil light came on, another 1/2 mile the rod started tapping. At 80 mph, 1.5 miles goes by pretty fast when you are wondering if you have a fuel delivery or spark issue. I just can not see a cam or valve train issue causing it .... I have been wrong before. I probably should wait till I have the engine torn part on the stand. -
Mine did not have a radio .... I did buy one for it a few years ago ..... Then decided to go 12 volt. Now I'm not decided if I will install it non working & just for looks .... or just pass it on. Thing about my truck is it's special ??? The serial # ends with a X, that means it is a 1949 truck that was built for Dealers to put on the show room floor to display next years model. 1950 .... was a lot of changes. I have the air ride seat, wing windows with the chrome strip attached to the door windows, the low side bed for delivery trucks. There is no question it is a 1949 ....I have the 3 on the tree & E-brake under the dash .... A 1950 engine/trans ..... Just a floor model too show off next years trucks .... Not special, just rare. ..... It did not come with a radio. They did not think in 1949 that a radio was a worthy option in a truck to include in a floor model.
-
I'm with Ken .... never heard of a solution other then sending your radio off to be rebuilt with all new modern components. Looks stock, but is modern. One regret I have going to 12 volt is losing the original radio. I figure that is ok considering all the other benefits I will get from 12 volts .... All a matter of opinion though.
-

Way off topic 1993 caravan transmission
Los_Control replied to Los_Control's topic in Off Topic (OT)
Good question. I have looked in the past at a few different suppliers .... I thought it was a new crank. Same time I swear Rockauto had more then 1 choice with different prices. .... I thought I was getting a brand new one. I see it is a reman from RA for $247 includes bearings & no core required. I actually need to put it in the cart to see what shipping will be. May be cheaper to get it from a local store. I'm still guessing A reman crank & bearings would work in a block with no machine work .... assuming the block is good. Or does the block need to be machined to match the crank? ..... I'm guessing the crank & bearings are matched to work with the block. ..... Also to work with stock rods. For the rod replacement .... I'm not sure how the wrist pins are installed ..... I think they are press fit .... I'm not qualified to remove a piston from this engine and press it onto a new rod .... I do not have the equipment. I do have 5 good rods/pistons from the old engine .... measure & inspect, pick the best good one & use it with new rings/bearings. My worst fear right now is opening the engine up, dissecting it like a detective at a crime scene and not find the cause of the bearing failure. My first thoughts was sand blown into the engine while sitting .... I think that is wrong. Now I'm leaning to crap in the oil & plugging the oil pump ...... Just hoping at some point I can find the failure and feel confident when putting it back together ..... A new oil pump is a must. -
Awhile back I walked down the street to the auto parts store. I found a piece of rubber on the road. 2'x2' heavy 3/8" ... brand new cut off from a larger piece. ... Must have been on someones flatbed work truck & fell off. I was so tickled pink about finding this great piece of treasure 2 blocks from my home .... wife thinks I'm a lunatic @joecoozie thanks for the link!
-
The T is 5/16" NPT. .... The reason being is the OEM block was a combination of 5/16" & 1/4". Local parts store could not match that, they had 5/16" T & 1/4" bushings to adapt the holes I needed to 1/4". Thats how I plumbed in my old master cylinder. The new master cylinder, everything is 1/4" I bought 1 new 1/4" T for the front. The single line going to the rear, I broke it & installed the 5/16" T using 1/4" bushings .... they were new and I had them. So I currently have the option of 5/16" & 1/4" NPT. I have been laid up the past 2 days binge watching old movies letting my body heal from working on the truck ... So I have not bothered searching yet, sure I can come up with something. If they sell 1/8" npt switches, I might find one that is 1/4" or a bushing to reduce the size to 1/8".
-

51 B3B build thread - after all these years
Los_Control replied to bkahler's topic in Mopar Flathead Truck Forum
Thats why I said earlier .... I probably would not be happy with a 1/4" clearance on a brand new setup .... I would expect it to settle some over a few years. If you start with a 1/4", then it settles 1/8" .... you are getting close. I was curious about @ggdad1951age of their mounts .... I'm guessing a few years & all the settling is done? So 1/4" is fine. While working on the throttle linkage, you might go with dual springs. a larger diameter, then a smaller one the same length. just slide it through the larger one & connect both. Now if one does break, you will feel the change in the pedal stiffness, but the engine won't run away. -
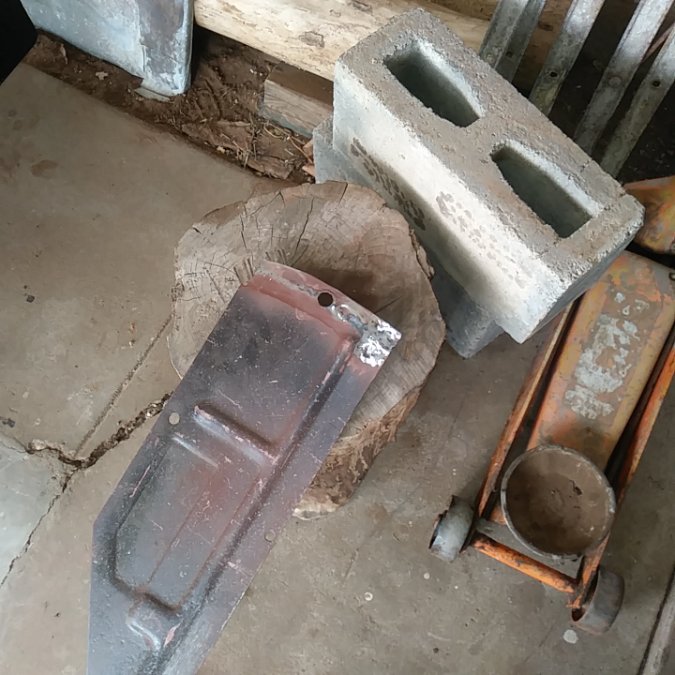
Well I finally have brakes The Toyota MC swap was pretty easy .... wobble the holes out a little & shorten the rod ... tough to measure, I just took a little snip at at time and snuck up on it. Naturally I had to redo the the new brake lines. One issue is the brake light switch, the new MC does not have a place to put one. I installed a brass 5/16" T then I put a plug in it. Going to have to get online and search for a brake light switch with correct thread pitch, or a fitting to adapt my fine thread switch to work with the brake fittings .... I dunno what I will come up with. Could always go with a electric switch if needed. Anyways the pedal feels nice & firm, has too much travel, now the shoes need adjusted & also adjust the rod. No idea why I was having problems with the RF wheel cylinder, Working fine now Yesterday was nice weather, I was going to pull it out in to the driveway test the brakes, pressure wash my messy work area. .... installed the battery and started it up ..... clutch is not working. When I installed the clutch pedal bushing awhile back, I must have installed the adjuster backwards. It can go either way & is offset to give more throw .... I guessed wrong ... is a 5 min fix. Next will be the radiator. Should be a simple install. Need to make angle iron brackets. I plan to change the transmission/rear end oils. I think I want to set it up on jack stands & add transmission fluid to them & run it in gear for awhile. Use the ATF as a cleaner .... dunno if it will help, but wont hurt and I have plenty of it. I also need to drop the driveline before running it. The Cleveland U-joints appear fine, I want to go through them & clean all the old grease out and add fresh. Also the zirk fittings on them look strange, like a skinny needle. I do not think my grease gun will work on them. Not sure if I can change them, will look at it.
-
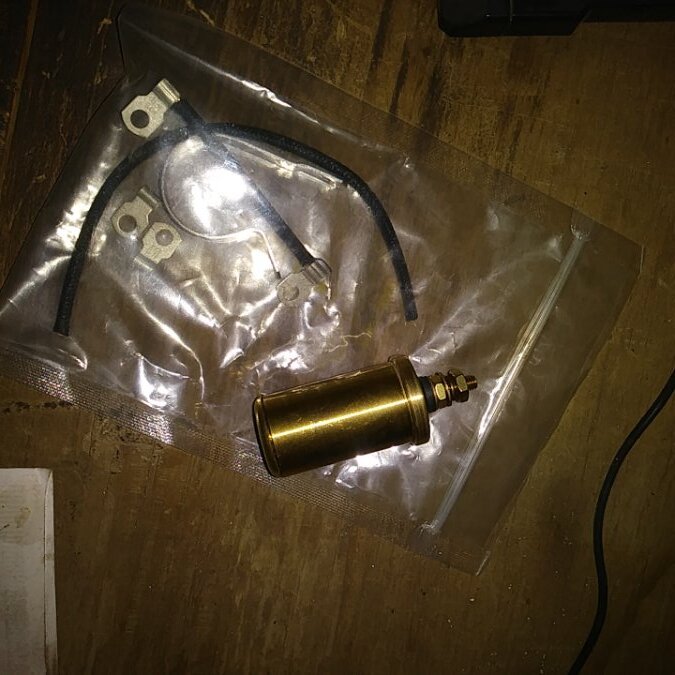
I just wonder if a person took on the project ... how many would buy it? .... Just saying I bought a homemade condenser It is kick ass! I just cant see love for a home built Voltage regulator. .... Could be done, is there a market for it? Just throwing it out there. .... I see it as a struggle to keep your car original 6 volt ... & good for you. Or swap it to 12 volt & get on with your daily chores.
-
I'm with you @Dave72dt I tested my generator & only got 2 or 3 volts out of it .... c'mon it sat in a field for 20 years .... I'm just not interested in fixing it. I am going straight to 12 volt with a older chebby 1 wire alternator. .... I need to replace every wire in my truck anyways. I understand the struggle to keep it 6 volt & work through the problems. .... I love the dedication .... Thats not me. I will drive mine everyday & just bypass the 6 volt system .... there is no right or wrong. We have what works. I would guess rebuilding a Generator at a reputable shop would not be less then $150 .... A new voltage regulator made over sea ... $30-$50 ??? A chebby 1 wire alternator is $45 ..... you pick your battles. I understand some want to restore it exactly as original. Thats great. Sometimes we need to ask ourselves what is the exact end goal.
-
When I was doing remodel work ... as lead carpenter I needed to be on the job site to direct the plumbers, electricians, granite installers, hardwood floors installers ... I was always whored out to the electrician to help along with the install. ...... Fluke was always the name brand tool to buy. Whats available to me locally is the GB, never heard of it before .... It is well built, weather resistant ... reads well .... does what I need. I also think of @Sniper as some sort of electrical genius. ... Just the thought of a "scopemeter" has me running for the hills. ???
-
I'm thinking you could just remove the wires from the generator then test it ... not sure what the manual says. We are talking 5 minutes & you can clean the connections while there. In my mind, That generator is the heart of the system .... I would want to know it was working exactly as it should. The voltage regulator is a very likely suspect for your problem .... Also is a item that wears out and eventually needs replaced. ..... I would not hesitate to order a new one and have it on hand or in a box in the trunk. .... Just like having a extra set of points/condenser available on a road trip. I'm just saying I would first test the generator to see you do not get the same goofy readings. Then automatically order a new voltage regulator & install it. One of those items that I would not mind having a known good one riding around in the trunk. That is not troubleshooting ... simply replacing known parts that wear out ... & todays parts coming from over seas, I would not mind having a known good spare. C'mon @Sniper you know you want a Gardner Bender
-

51 B3B build thread - after all these years
Los_Control replied to bkahler's topic in Mopar Flathead Truck Forum
I will say I have never installed my toe boards. Looking at that pivot point and it can be a optical illusion ... it does look like it is past the floor level. Could be a potential problem. .... That area looks close. Now I see @bkahler other post, raising the cab now is not really a issue because I thought he had the fenders on already. The only thing I could add, I would want to be sure I had plenty of clearance. In the future the rubber cab mounts may harden and shrink and you will be revisiting the same issue down the road. I'm just guessing, I think I would want at least 1/2" clearance ... maybe more. I would not be happy with a 1/4" clearance. With new mounts that may settle in time. BUUUTT, That would mead raising the cab at least a 1/2" now since you are already rubbing. That may be a issue when bolting on the fenders .... Maybe you actually need the front end bolted on now. You might find the cab wants to come up a 1/2" so everything lines up???? Deal with body alignment first. I'm guessing I would just ignore this problem at this time & assemble the rest of the body. I'm not sure if it is even possible to make things exactly like they were first produced, using aftermarket parts. Get your stump out, grind a little dish into it ... then hit your toe board with a hammer. You can take your time and create a 1/2" dent into the toe board that looks factory .... get on with your day. Fender, door, hood alignment is more important at this stage. -
I figure the doors are optional ... put them on first or last .... they are separate. The radiator support, then grill panel. Then outer fenders, then hood. The inner fenders are designed to be removed, for example to adjust the valves ... I figure they can go on last. Thats what I did anyways. Not sure about the bed though. I have seen where some build them then set them in place. I'm thinking to assemble mine in place .... right or wrong I dunno.
-

51 B3B build thread - after all these years
Los_Control replied to bkahler's topic in Mopar Flathead Truck Forum
I wonder if your linkage is the same as mine? I'm thinking I would be tempted to twist the bracket & point it down some? Pretty beefy bracket, with the right persuasion it will move Looking at mine, I may have a issue also, the pivot point appears to be higher then the floor. I dunno. I also wonder if new rubber motor mounts might change the height of the engine, or a combination of motor & cab mounts. If you change the cab height, that might mess with fender & hood alignment. Could be a simple project using shims .... or a can of worms. Removing the toe board then changing the angle on the bracket might be another option. -
I think the biggest issue would be putting pressure to the heater core. Should be able to find a 0 pressure radiator cap? I never have looked for one. Thinking this will be my next project, install the new to me aluminum radiator. I may have same problem. I have to dig it out of the attic .... but it does have a cool custom cap. So I do want to use it, I may try to gut it out or remove the spring that enables it to pressurize. That would be my first plan .... if needed.
-
All Canadians make us .... or leave us wanting, Any Canadian car was delivered with a 25" engine .... even if it was a usual 23" 218 .... The Canadian models were all 25" engines.

