-
Posts
4,686 -
Joined
-
Last visited
-
Days Won
35
Content Type
Links Directory
Profiles
Articles
Forums
Downloads
Store
Gallery
Blogs
Events
Everything posted by Los_Control
-
I think being retired & no schedule or job to report to everyday is not a bad thing .... If you have to worry about bills .... Not very relaxing. OTOH, if you building up a little nest egg .... your bills are paid, you have extra $$ to do the things you want ..... That is a very secure comfortable feeling that is hard to describe. I also found that living in a large or populated area, housing prices & property taxes goes higher ..... you pay for the convenience of living in a city. The further you move away from the city, the cheaper the real estate becomes ... fact of life .... no real job opportunities there .... but being retired it does not matter. Something to think about. I live 20 miles from the nearest town with a walmart, tractor supply, Napa .... North East or West 20 miles I get a bigger small town. If I drive 60 miles N, W, E, S, I get a city. ..... While I would like to live closer to a city, cost of living goes up. The further away from the city the real estate market is cheaper. So I'm right in the middle 60 miles from any city. If I moved 20 miles to the next town in any direction ..... The cost of living goes up. Choose what is comfortable for you. I chose the cheapest way possible because I retired at 48 not prepared. Some like to live in the middle of everything with fine dining, entertainment .... A lot of advantages to living in a city. ..... While others are more comfortable living 10-30 miles out of town. I'm just suggesting when you use Trulia to window shop real estate, check your comfort zone away from the nearest city to see prices .... some like to drive 20 miles to cars & coffee.
-
I'm probably not the one to offer financial advise or to say the best place for you to live. I can share what I did though. And remember I was medically retired when I was 48 years old, I was not financially prepared to retire. I had to battle the state for retirement for 5 years .... with no income and last 2 years ended up staying with the wife parents in Washington. We lost everything. So when my case finally went to court & I won it ..... I had a settlement coming and we had to decide where we would live. We had lived in New Mexico for the last 15 years and enjoyed the warmer weather. We looked at cost of living in surrounding states from WA, seriously it was all too high for us to live there. .... Idaho looked promising but we really prefer the warmer weather. We put together a short list of possible states we could afford to live in from my research of cost of living. Then I used this site here, https://www.trulia.com/ to search the real estate market in these states we were window shopping real estate from our home computer. New Mexico was leading for awhile then I started searching Texas & really did find some better real estate prices .... we could afford a better house for less money & cheap or reasonable cost of living .... We bought a house for cash in a small town, we pay our yearly property taxes and monthly utilities ... no mortgage. We don't have much money but we get by just fine during this crazy inflation .... that will probably get worse before it gets better .... On the other hand my brother in Washington retired a couple years ago, his employer talked him into working two extra years for a bonus + higher retirement pay. He sold his house for $240k had to pay off a medium mortgage .... he had a few acres he wanted to build his dream home on & lived in a 5th wheel while it was built. It has a big mortgage on it, he then paid 40k for a new John Deere tractor with a backhoe attachment .... He is retired living the dream. Then covid hit, then it was inflation .... his investments and 401k plan is losing money .... he no longer has the same assets this year as he had a few years ago but he still has the same bills he started with and they are increasing. ..... He no longer even wants to talk to people he is so pissed off, I have no idea how things are going he has become a hermit. I'm just suggesting to be smart, choose where you want to live, pick the best house you can afford but pay cash .... Just try to avoid debt. It is a nice feeling to have more income coming in then going out, you want to buy a different car .... save & pay cash .... new shop .... pay cash. These are crazy times we live in and it is not over yet.
-
My thoughts were what torque does the 4cyl produce? vrs the flathead. Neither one has much horsepower, it is the torque that does the work. So many times I have taught myself the lesson that free is not always cheap .... I just wish I would learn it. ..... Assuming you already have the 4cyl engine. I have heard of all sorts of engines stuffed into these old cars, big blocks, hemi, small block, 6 cyl ..... diesel ..... never a 4cyl .... hey who, is your car to do as you wish. I'm not even a purist .... I have a 350 sbc with a manual 5spd in my chebby truck, is a kick in the pants to drive it .... I would stuff it in a Dodge. Or possibly a Ford 300 strait 6, wonderful engine .... A Dakota V6 .... The only time I could think of installing a 4cyl is if in the aftermath of a nuclear war and just using whats available. .... My 2 cents.
-
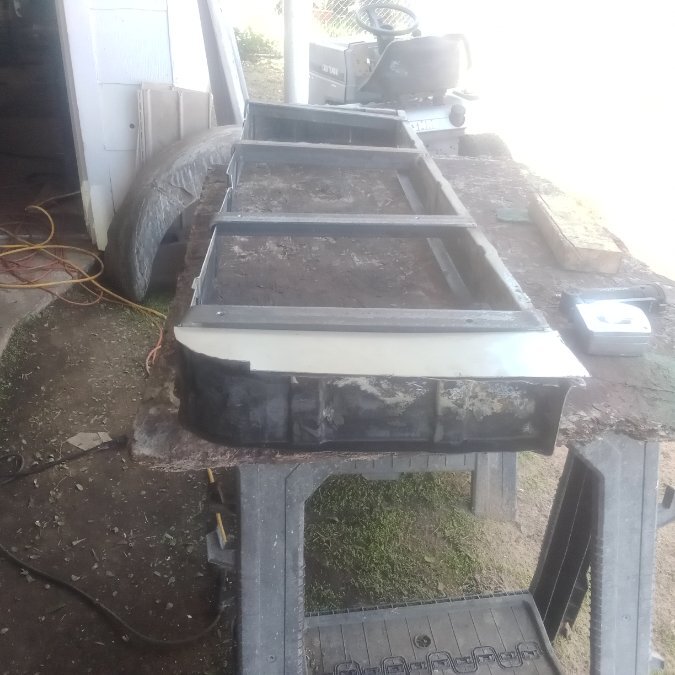
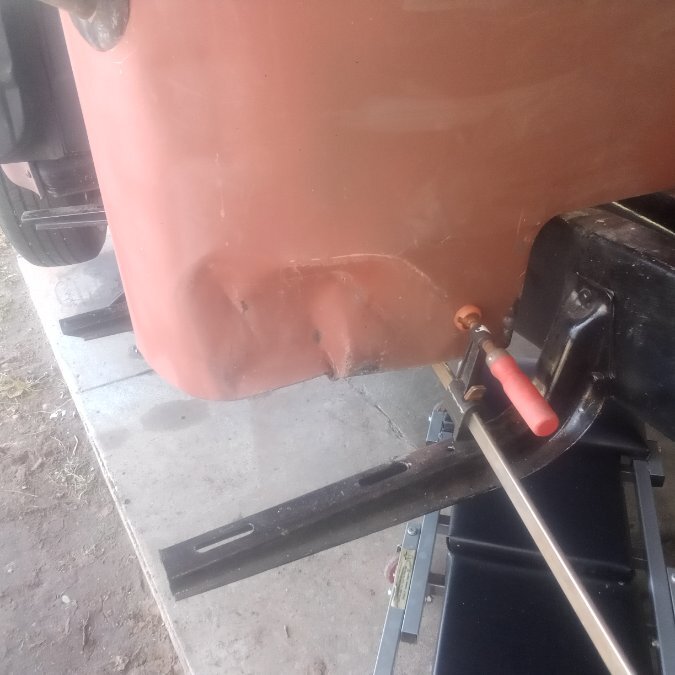
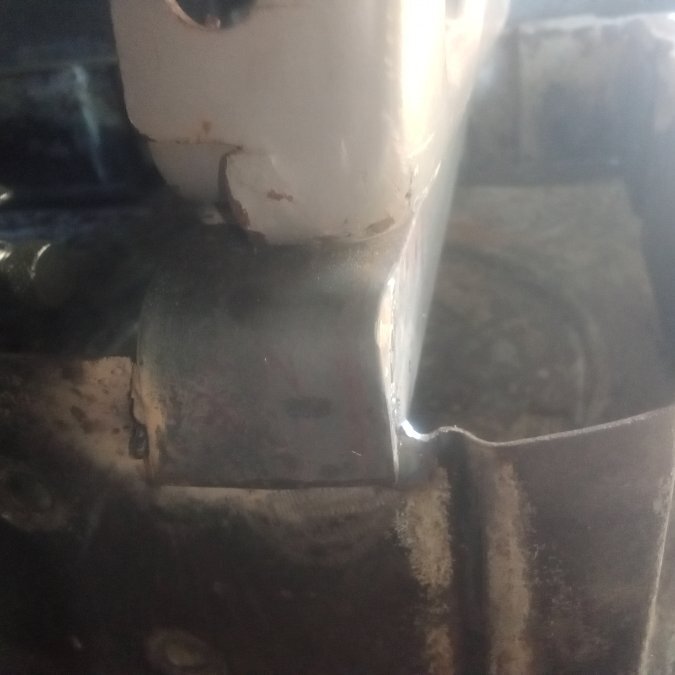
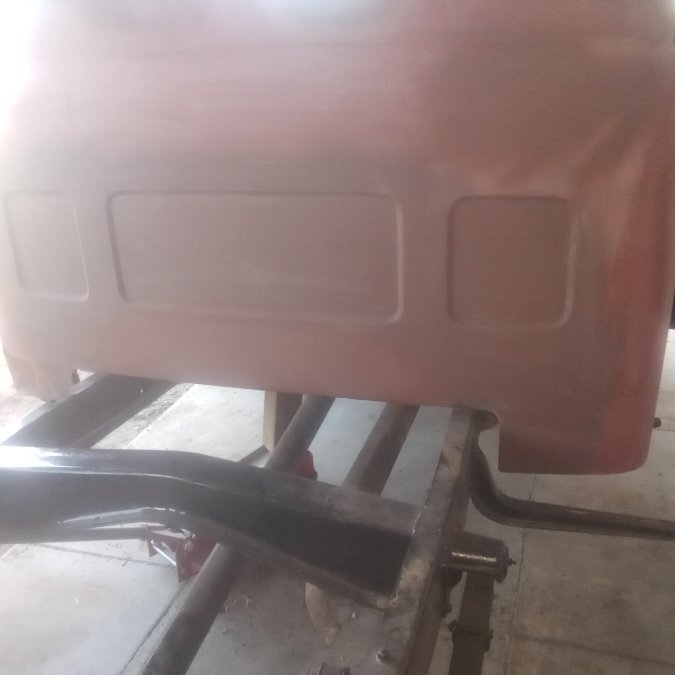
The sewing machine is a machine, the layout and seams is nothing but skill .... your skills certainly do task your tools. I love seeing your work .... It kinda in it's own ways sets a standard we can reach for .... Not saying I could ever match it ... just nice to have a goal to shoot for. I felt like I had to tackle this issue, so I pulled everything out of the truck and was thinking about rotating the base on the seats. I decided to just cut my welds out and do the job a 2nd time ..... all the while mumbling under my breath about learning to spot weld til certain you want to weld in place. So I cut 3/4" off the front, it is still 4" at front, 3.5" at the rear .... nothing is welded down yet but I was able to try it in the truck with the seat held down ... I sat in it, then I sat in my 1991 chebby and compared the wheel height from the lap ... my feet on the floor .... I'm really satisfied that was all I needed .... take 3/4" out of it and do the job twice. The shelf is rough cut oversized, needs to be spot welded into place ground to shape then painted ... perfect spot to mount a fire extinguisher. The other side I'm thinking a first aid kit. Still have a console going in between the seats and picked up enough iron to build the base ... Then tabs to bolt the base to the floor. .... Lots of work to do yet, I now know the seats are correct height. What I really wanted to do today is tackle this dent. Not going to be easy, with advice from others here on the forum I'm setting up to push it out with a bottle jack .... no Idea how close I will end up at, but willing to tackle it ...... Right now is the perfect weather for painting outside in the driveway. Everything else on the back of the cab & roof is finished .... except more sanding, primer then more sanding & paint .... I want to get this part done this fall. Sad my ADD kicks in, I had to work on the seat base, I worked on the brakes ... I started sewing the cloth on the seat .... I never got to taking out the dent ..... tomorrow thats all I want to work on.
-

51 B3B build thread - after all these years
Los_Control replied to bkahler's topic in Mopar Flathead Truck Forum
I sure hope you have better luck setting your priorities with your time then I did. When working it was simple, the job had first priority because we like to eat. When no longer working you get free reign to do what you think you want ..... do not forget your wife also has plans.... I also put my truck as first priority, I have lots of future projects ahead of me .... I just want to do them while driving a old beater truck .... Like driving to the hardware store while picking up materials to remodel my kitchen in my house that was built in 1948. In order to make this a reality, I had to teach myself to weld, do basic body work .... paint. Why I bought my project in 2018 and only got as far as I have ..... Now I'm confident I can do what needs to be done and get it done. ..... Mine will never look as good as yours while I'm alive though It is fun & a challenge to learn new things though. Only complaints I have come from my wife and her priorities ? -
Been a lot of years since seen them .... iirc they were used as a adapter for a large hole rim for a standard sized valve stem .... so the valve stem could not move around in the larger hole? .... I could be wrong, years since I've used them. https://www.amazon.com/Inner-Tube-Valve-Bushing-Adapters/dp/B081K73WKL/ref=sr_1_38?crid=3GLSN5182WNF5&keywords=valve+stem+adapter&qid=1695047837&sprefix=valve+stem+adapter%2Caps%2C215&sr=8-38
-

51 B3B build thread - after all these years
Los_Control replied to bkahler's topic in Mopar Flathead Truck Forum
What I see it is flush at the top and sticks out at the bottom .... the bottom needs to go in not up? The threaded plates the door hinge screws into will slide in and out and drop into the abyss if you let them. Typically the doors were adjusted when installed 70+ years ago and the hinges not moved since .... so they tend to rust and fuze together with the body. This tells me the plates did not drop down into the body and needed to spend a hour with a magnet fishing them out I had one that fell, then I fished it out, cleaned it up and added some grease to the face so it would slide easier. The other 3 after I had the hinge bolts started I broke them free and cleaned greased them in place the best I could. Now I could adjust them fairly easily. ..... I still waited to adjust them until I got my fenders on .... want to line them and the doors together. I'm guessing if the doors came off of the truck and worked ok before, you probably wont need to bend the hinges to make them fit again ..... you will need to get them to slide in and out though. -
LOL actually it is not a bad idea, usually one sets the seat where they want it and leaves it. Just not a big deal to have it where it is. Actually with bucket seats I just checked and could still operate them by reaching around the seat. What I like about the idea is, I can try it and see what that does for me. Not sure I would leave it that way, but I would know how it affected the situation and tell me what I need to do. First of all I did turn the base upside down, does not change the angle but it is wider at the top then the bottom from the factory ..... Now it is wider at the bottom and has more welding surface while it sits flatter on the floor for whatever reason. In the photo there is a jog in the base, I could cut the jog out all the way across the front then cut & grind my welds out to remove the metal from the angle iron & just re-weld them 1" lower. Now the base would be level and just the seats have the usual 1" rise. Or accomplish the same thing as @Young Ed idea with turning the seat base around. So I would know if it works before cutting & welding anything .... Doing your work over a 2nd time sucks, doing it 3 times would really suck.
-
Times like this can be tricky, I myself might write it off as $5 is a cheap lesson. I would now know not to deal with that person again .... although still trust others here. I have had good luck dealing with people here, I generally send the item and when I know exactly what it cost to ship I tell the other party my return address is on the package & send me a check for the amount owed. When they get it. ..... Might be backwards for some, but I have had good luck & faith in people. If someone did not pay, well then I learned something about that person .... I still treat others as usual. I feel bad about the last transaction, I sent a guy a brake spring. I purchased a small manila envelope for $1. My wife asked me to buy a book of stamps while I was at the post office ..... I asked the lady how many stamps would it take to mail the envelope. Since I had a book of stamps I could add what was needed, or she could figure out what was needed and add it to the bill. She asked if I wanted her to just process it .... sure go ahead. ..... I thought she would put 3 stamps on it and send it. She ran it just like a regular package with $100 insurance & a tracking number for $7. I just feel bad because I allowed her to ship it that way when it was not what I wanted ... what should have been $2-$3 was now $8. The gentleman promptly sent me $10 after getting my return address .... I feel guilty about taking it
-

51 B3B build thread - after all these years
Los_Control replied to bkahler's topic in Mopar Flathead Truck Forum
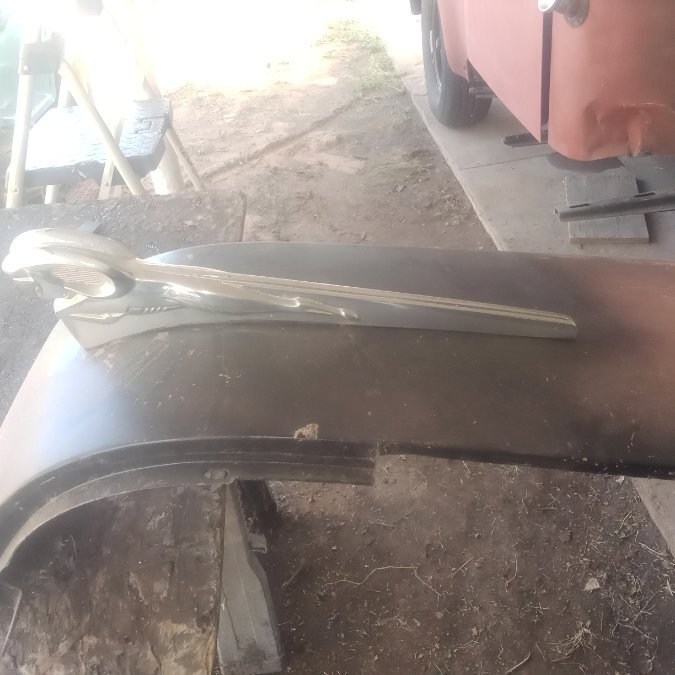
@ggdad1951 has a good point, you might be able to bolt that down with no issues .... just might have been better if done before paint .... since the painter is still on the project .... you might want to bolt it down now while he can still touch up if needed. My hood ornament when I got my truck was in really nice shape so I'm keeping it ... I have 2 spares. The hood of my truck had such a dent in it ...... The only way I can see the dent happening is if someone took a base ball bat and swung it as hard as they could on top of the rams head. .... Possible something heavy got dropped on it .... baseball bat sounds more realistic. This tells me the hood ornament was broken, the one I have is not original to the truck. The PO replaced it but left the dent. .... It was pretty easy to work the big dent out, it looks great and no bondo or filler added. Just a modification that should have been worked out before paint, since you still have a painter on the job it may be easier to touch up the paint IF NEEDED! ...... It may be fine .... then it is to send off for new chrome. -
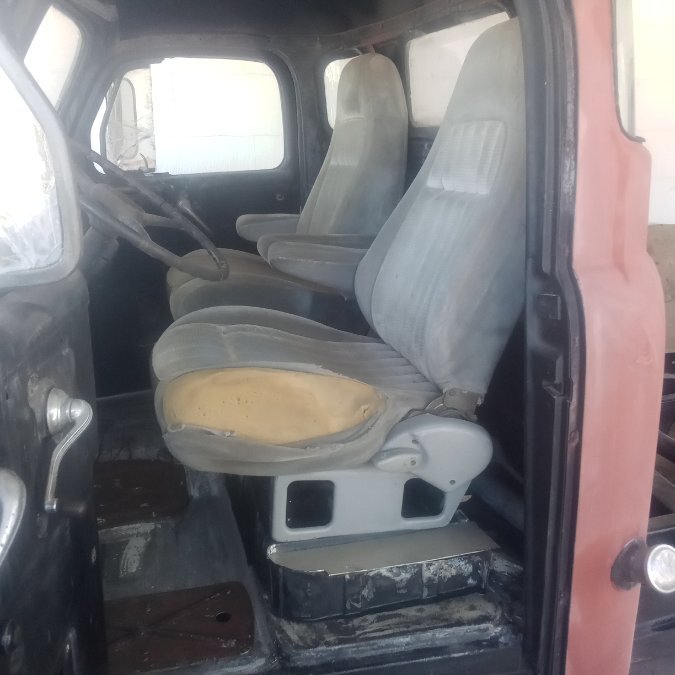
Well well well, what an eyesore this is ..... I have some issues to work through here. The tear on the seat along the seam looks bad. All the material is there .... I need to sew in some reinforcement on the cloth then pull up the side and sew it back together ..... and it will be a better looking pile of poo. Same time, these 1990's chebby seats has a million choices of custom fit seat covers available. I seen some leather seat covers for $200 .... plus I have the wife carpet shampooer with the furniture attachment I can clean them. ..... Thats a future Fred problem. Just the first time I have had seats installed that are close to fitting. So I have been sitting in it making vroom vroom noises, adjusting the mirrors pretending I'm driving ....??? Problem is the rake on the seats. The factory base on the truck has 1" from front to rear. The risers on the buckets also have 1" rake. The way I welded in my mounting support also adds 1/2" rake. So I have 2.5" of rake .... yeah I could get comfortable & sleep in them at a rest area .... almost too tall in the front for my legs to work the pedals. If I raise the rear of the seat 1" that would tilt the front down .... That might be all I need. I could cut the risers on the seat so they sit level, I have the metal to rebuild them ... more work but may be what I do. Very drive-able the way it is, still needs work though. I picked up enough angle iron so I can build the base for a console between the seats. I've also decided to make tabs & bolt the floor base down instead of welding it. I want it all removable for future needs. Knowing I have to crawl under the dash for a complete wiring job ..... I do not want to fight with the seats. Any ways, just one step closer to being able to take it for a test drive .... Sandpaper came in today, I think I have enough to really sand the cab / front end down for a 2nd coat of primer then paint. ... Even If I just paint the back of the cab & the front of the bed .... I can start assembling the bed. & then paint the rest all together. Tomorrow now the floor is basically finished besides paint, I need to get it back in the air on jack stands and modify/install the rod to the master cylinder. .... Then it is time to go through & adjust the brake shoes on all 4 corners ... There is just always something to do when trying to pull a truck from the grave & putting it back on the road.
-

51 B3B build thread - after all these years
Los_Control replied to bkahler's topic in Mopar Flathead Truck Forum
While I have never had any items re-chromed myself .... I remember this thread and it might answer your question. https://www.jalopyjournal.com/forum/threads/chrome-platers-in-midwest.1294699/#post-14894216 Thats about all the help I can offer on the subject. -
Same here on my truck ... NPT threads going into the tank. I installed a brass bung that converts the NPT threads to the compression fitting threads that will allow the metal line to connect to it. Like Sam I will need to convert to rubber at some point. I'm going to run a short piece of metal line & before the frame convert to rubber to install a fuel filter & possibly electric fuel pump, then back to hard line to the fuel pump. Just like connecting to the fuel pump they used a rubber line because the engine flexes different then the frame. The factory never installed a rubber line from the tank to the frame ...... I feel the body & frame also flex differently and could use a rubber line for the transition. It also is the perfect spot for a fuel filter.
-

51 B3B build thread - after all these years
Los_Control replied to bkahler's topic in Mopar Flathead Truck Forum
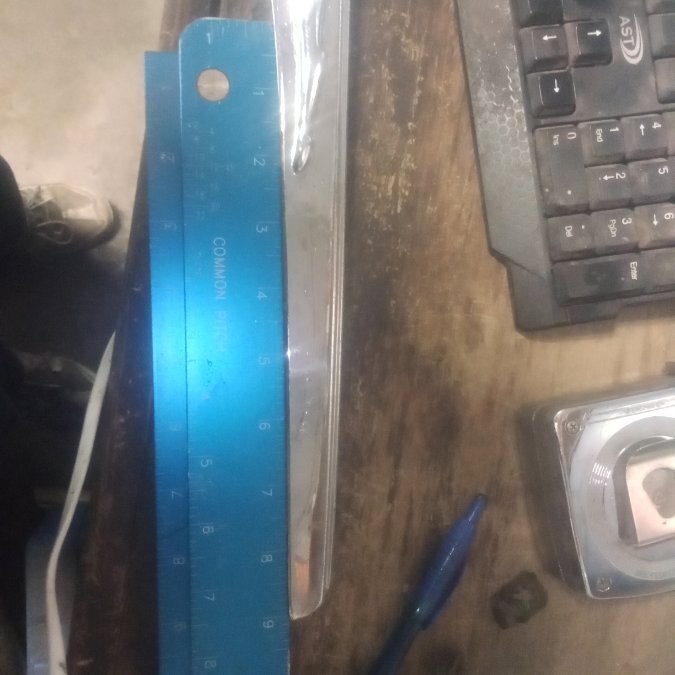
Making great progress, really looking good. Mine just sits flat on the hood, I have it installed to look at but the bolts are just finger tight. Looking at yours it could be a optical illusion .... kinda looks like your ornament curves up at the end. Here is a picture of one sitting next to a straight edge. .... once it gets past the curve it is flat. -
It really has gone up & a 3' stick at the local hardware store is ridiculous stupid high price. A 20' stick at the local steel yard was $38. They offered to cut it in 1/2 for me so I could haul it. I was fine with the price and the leftovers. I wanted to go to the machine & welding store for a 10' piece ... It was $21. I really wanted more info on their machine shop, they are a industrial shop & not setup for automotive engines Edit ... I just looked at the receipt, they charged $13.70 for material, $5 labor for cutting it. I try to grab all the scrap metal I can. I have some bed rails out in the pile. They are good for some things, you can cut & weld them ... but the metal is too hard to drill holes in it. Ideally you can use a torch & burn a hole in it, it just dulls drill bits. The only way I have found is using my air powered die grinder with a pointed carbide bit .... literally grind a hole in it. I replaced the side rails for the bed floor with it ..... I really regret it and wish I would have bought steel for it. I have to drill 7 holes on each side for mounting ..... not looking forward to it. OTOH, I used some to make my battery box .... all welded together and welded all thread to the sides for the hold down .... so no drilling & is fine. I went to the metal yard today because the weather report said no rain today ..... It poured all the way home .... wipers on high could barely keep up ?
-
I have no idea what to expect. I called a steel yard .... I'm thinking I want 3/16" angle iron 1.5" wide. And 8' would be plenty extra ..... they only sell it in 20' lengths ..... I have a short bed truck with a 6' bed. They did give me a hint on calling sweetwater machine & welding for shorter pieces. I talked to them on the phone and pretty sure can get what I need there ...... still excited to see if they actually do any machine shop work because of their name. Same time it has been raining for days here .... Just a hour here or there .... but still active rain. Moving here to west Texas from New Mexico ..... Some people wont drive in the snow? .... I dont drive in the rain. Suppose I'm always looking for a reason to stay home, thats as good as any ???
-
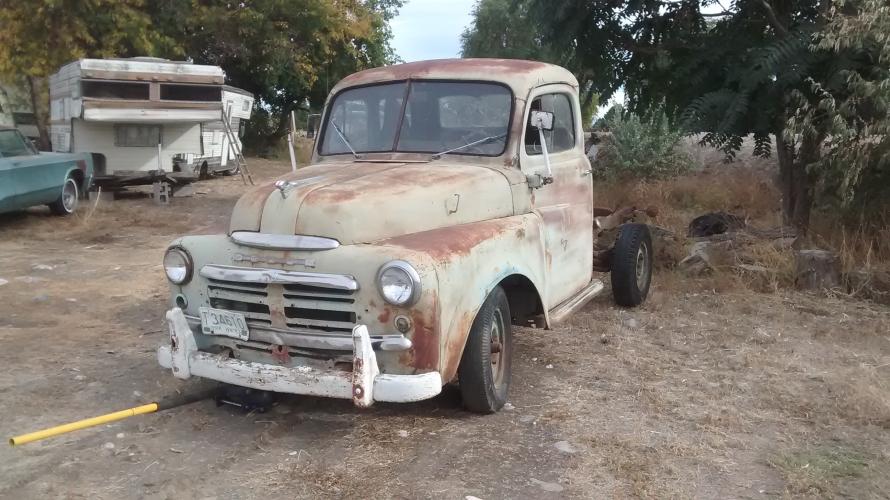
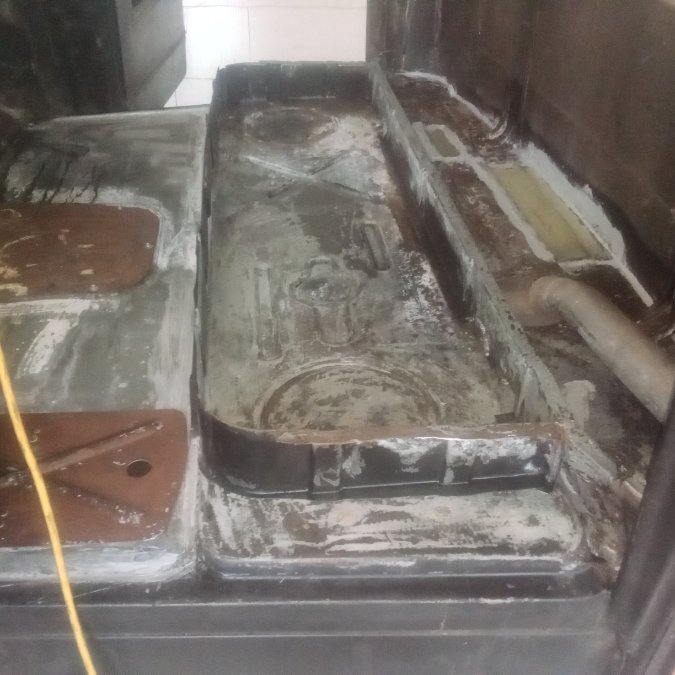
Time for a update ..... been awhile since I actually worked on Hound dog ..... I was welding in the floor then ran out of wire. I drove to town to get more wire & the clutch went out on my daily driver truck .... took almost a month to finish replacing it..... Then I sat back for 3 weeks recovering from installing the clutch .... This was July August where it was over 100F everyday .... Good times to stay cool & be lazy when retired. Now I have the floor totally welded in, seamed seal & ospho rust converter. The seat base is not welded in yet. The floor is ugly but it is all solid metal and good enough for a hound dog. I plan to paint it with a brush to get a heavy coat of paint on it for future protection. I have been trying to think of a way to install my bucket seats .... I do not have all the original seat to use .... the buckets are very comfortable. I decided that repairing/installing the original seat base then adding the braces needed to install the buckets is the way to go ..... Use what you have. I need to go to the metal yard tomorrow to get whats needed to finish the seat installation. So many things need to be done at the same time. While not finished 100% with the floor .... I feel like I should jump ahead & install the wiring under the dash while I have a clear floor to lay on. Also work on my wipers & cowl vent. .... I feel like my ADD is kicking in jumping all around before finishing one project .... just makes sense to me though. I admit to being disappointed on my first cut & butt panel repair. I so much wanted to do it with no bondo .... just a difficult area to reach. I could not hammer/dolly the welds & work it as I go ..... I finally gave in and put bondo on it .... after it was 100% welded in with no light shining through. The putty is only 1/8" thick at the deepest point ..... still sad when going for no bondo This phone camera sucks .... I need a new phone.
-
I think it depends on the fitting. If it has a flare on the male end, a seat on the female end .... no sealant. My new gas tank requires a 1/4" bushing to adapt it to the 5/16" fuel line .... that requires a sealant. I have a old school glass fuel filter in front of my carb. It has fittings on it for the fuel line to connect to ..... The fittings need sealant, the lines going to the fittings do not. Does that make sense? .... The bushing in the tank needs sealer .... the line going into the bushing does not. The fittings going into the fuel filter needs sealer, the fuel line going into the fitting does not. Sadly I had same issue on my brake lines. I had a 5/16" T that one end needed to be converted to 1/4" .... The bushing going into the T needed sealant .... the brake line going into the bushing did not. Just depends on the fittings you are working with. There is no answer one size fits all. I would only use sealer where it is needed on fuel or brake lines.
-
People have been using both metal & plastic gas cans since the automobile has been invented. Static electricity is certainly a possibility I'm 61 years old, never in my lifetime had I seen or heard of a gas can igniting from static electricity. Under normal use as a temporary fuel source on a vehicle. ...... I'm not saying it is impossible .... just not very likely. My plastic gas can is sitting on my front bumper, using metal tie wire ran through the grill to hold it steady. I watch a youtube channel JohnathanW ... His job is a tow company that hauls, does recovery for the state/county cleaning up accidents on the roads. Including semi trucks. He builds his own wreckers and has since he was a very young man decades ago. He has built Hot Rods from scratch owns many rare old cars. Last week I watched him start up a 55 Studebaker, he just put the motor back together no gas tank yet. .... He used a plastic can on the cowl. Youtube is a very tough crowd, if you do anything wrong someone will call you out on it and tell you the proper way .... Even if they are right or wrong. Almost entertaining just reading some of the comments after a video. ..... Nobody ever complains about using a plastic can on the cowl for a temporary fuel source. It is simply accepted practice by tradesmen. Cutting, grinding, welding on a gas tank is dangerous .... static spark from a tank is possible I suppose under certain circumstances ..... would it be enough to light the fuel? Probably not. .... If the spark was in just the right spot at the right time & was unusually large .... possible it would light the can. It's also possible a airplane will crash into my house killing me ..... about the same chances. Just my opinion on it ..... best not to make something out of nothing.
-
My view on the situation is it is a tough call. My personal opinion on it, the truck is very cool with a lot of work done to it ..... sad it is in the condition it is in .... Possibly owner got sick, old, passed away & it sat. While I would never care to actually own or drive the truck, I think it deserves to be restored as built. Since it is high school, possibly rebuilding the more simple engine/transmission will provide the most basic mechanical skills .... learn to crawl before you walk. You know your own skills and abilities, the time restraints, finances .... the abilities of the kids. .... The awards of success, the price of failure. The custom home made oil pan with the steering crossing through it will be a challenge. You will need to fabricate & weld motor / transmission mounts. Some sort of aftermarket wiring harness, probably replace all the existing gauges to work with the new harness. ...... I envision it going to the auction at the end of the year as a 1/2 finished project. While trouble shooting & repairing everything that is there, possibly pull the engine & freshen it up .... make a field trip on a Saturday and run it down the track. Take it back to class to evaluate & improve it ..... As a teacher I think you need to decide what will help the kids learn the most .... personally I think it is a cool truck but a poor choice for a high school project.
-
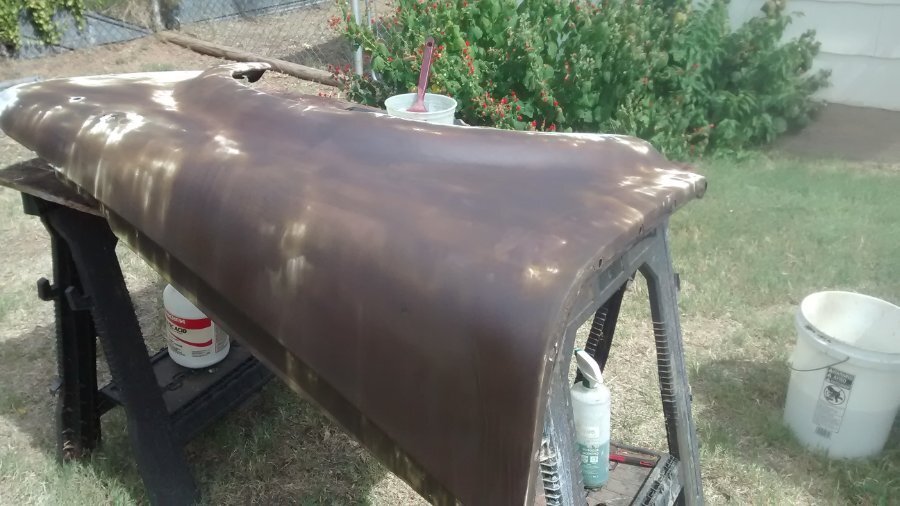
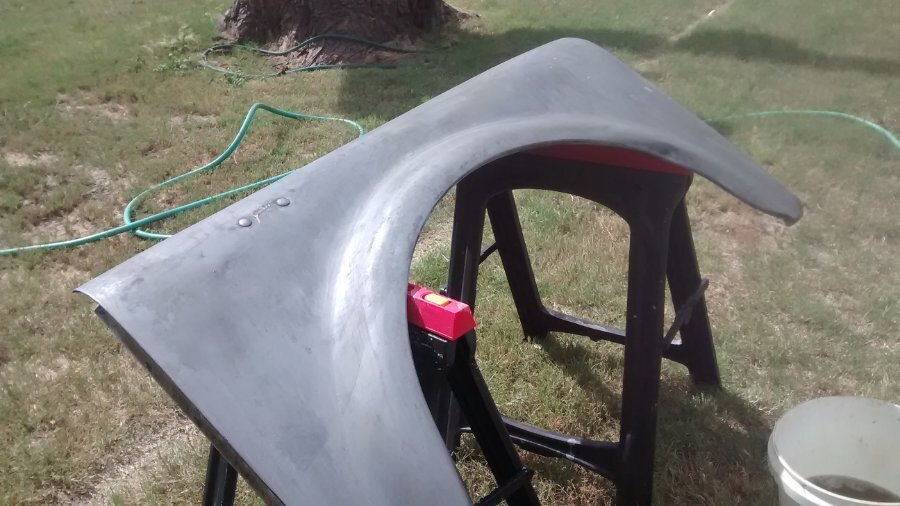
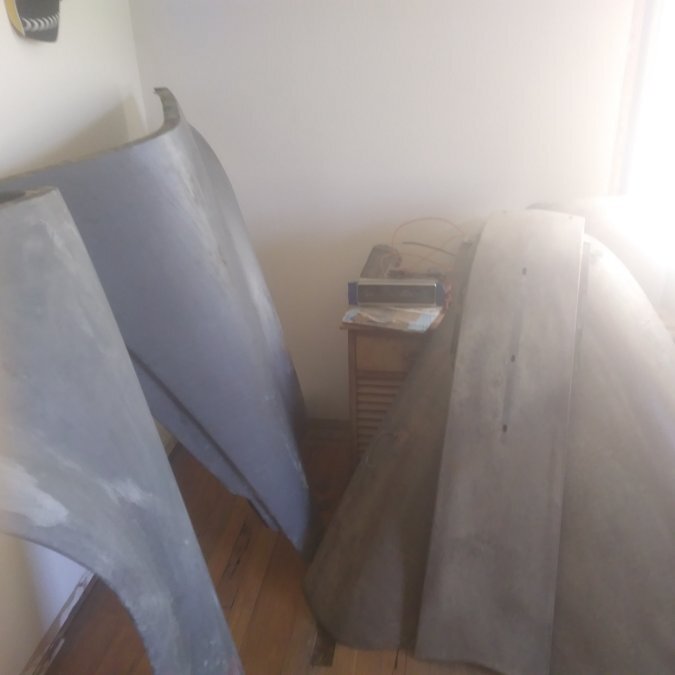
Muriatic acid is some fun stuff for sure. When I use it I I learned to use it in the back yard away from everything. If the item is attached to your vehicle when you use it, the fumes will cause rust on other parts of the vehicle that you never touched. If you use it in your garage, the fumes will rust your tools ..... btdt It does work good though. My truck you can see in my avatar it had no paint and baked on solid surface rust all over it. I cleaned all the individual body parts with it and stacked them away in the corner. The passenger fender was first in the corner so it was buried and never saw it til a year later. Then when I dug it out it looked like this. Is very important to get it neutralized properly. Now I wash thoroughly with clean water then kinda blow dry it with air then I brush on ospho and just leave it to dry & protect the fender til paint. That is the drivers fenders, sadly I do not have after photo for it .... here is the passenger fender after photo ....... muriatic acid works good What is it $15 a gallon? It is pretty cheap. I prefer ospho and phosphoric acids myself ..... muriatic is the big guns of acid, I use it when I need to as a last resort. And only when I can use it away from everything else.
-
All this talk about AF reminds me I need to take care of my truck also.
-
I would just keep it in ..... iirc I think it will say somewhere that it also offers corrosion protection? Besides if you used it for a few starts then drained it, you would be tempted to keep & store it .... why not just store it in the car?
-
This is another reason to add a electric fuel pump as a booster. If it sits for a couple months and todays gasoline evaporate .... you can use the electric to prime the system. If you do not drive this often & let it sit for a few months in between driving it, you may have to repeat the bottle feeding process to get it going again. If you add a electric pump in the system, you can just turn it on for 30 seconds to prime the system and run with the manual pump. Another advantage is if you are out driving around and experience vapor lock. You can turn on the electric pump and run off it until the problem passes. You may not experience these issues, it is a common problem for older carburated cars using modern fuel. Modern cars using electric fuel pumps do not have the problem. Just something to think about if in the future you have these problems, there is a cure for it.
-
Have you tried priming the carb? ... With the engine running the higher rpm will get the pump working. Or should. If you can start it and run off the carb for several seconds & pump still not working .... I would look for other issues like a hole in the line sucking in air.

