-
Posts
4,686 -
Joined
-
Last visited
-
Days Won
35
Content Type
Links Directory
Profiles
Articles
Forums
Downloads
Store
Gallery
Blogs
Events
Everything posted by Los_Control
-
I think it depends on the wheelbase. My 1/2 ton is 108" I had a 3/4 ton that was 116" then the 1 tons? I think a bed like ggdad would fit if you have the same wheelbase. And good luck finding one. Another option would be to find 2 beds & lengthen 1 of them to fit your truck, do the same with the running boards and extend yours to fit.
-
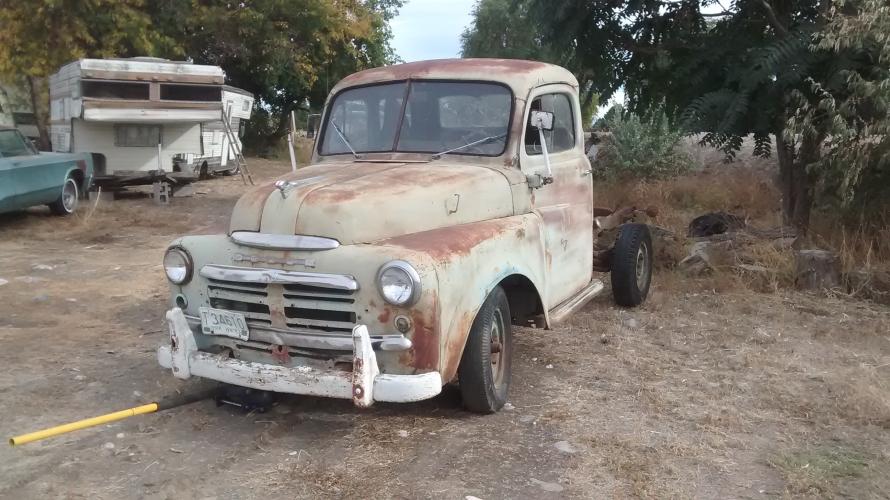
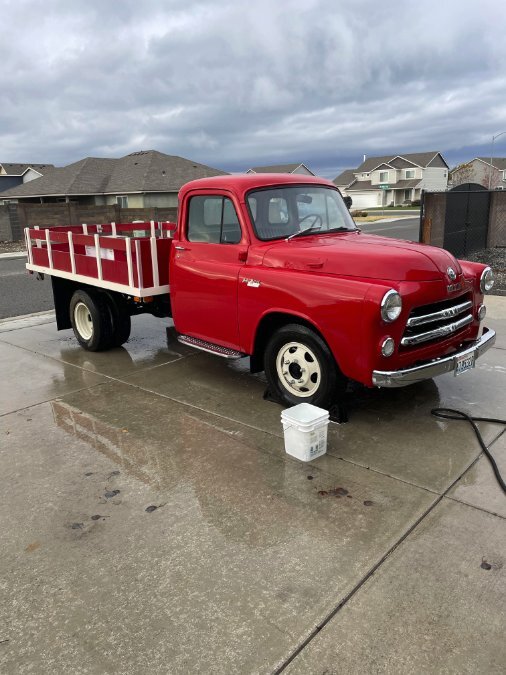
Oh my @Plymouthy Adams That reminds me of a favorite old truck of mine .... Paint it orange and will be perfect! @Malugood looking project, your truck came with either a flatbed or no bed. If you look at @Dodgeed truck it has running boards that go all the way to the rear fenders. Yours go to the end of the cab. While it may not be the original bed .... or it could be, it never had a pickup bed with rear fenders. .... Unless the running boards were also swapped out. Either way glad to see you aboard and hope to see more of it.
-
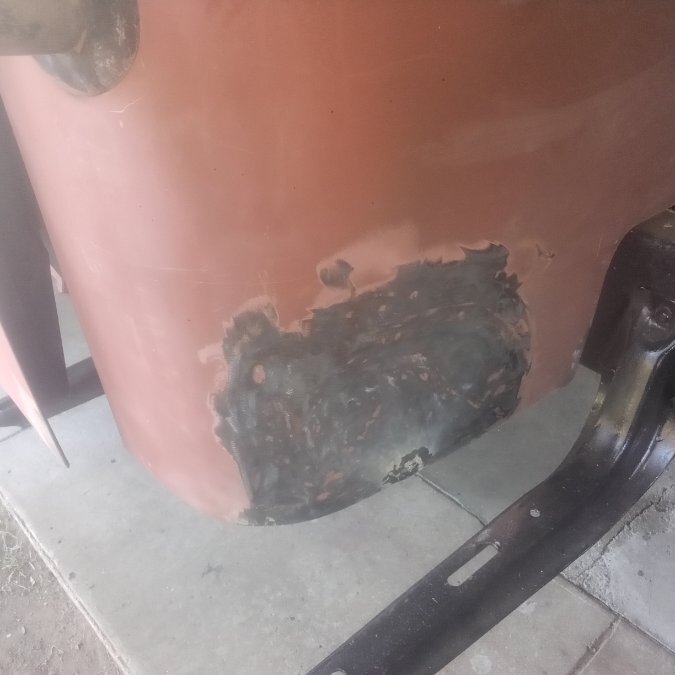
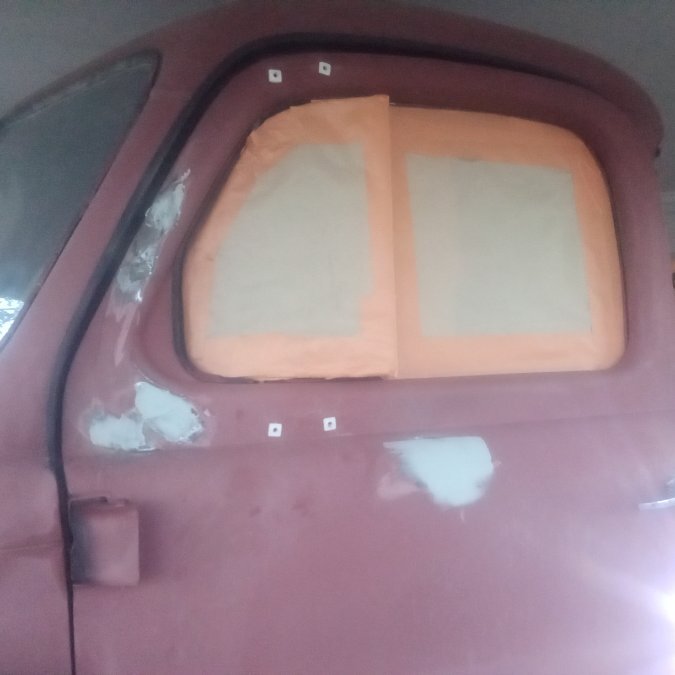
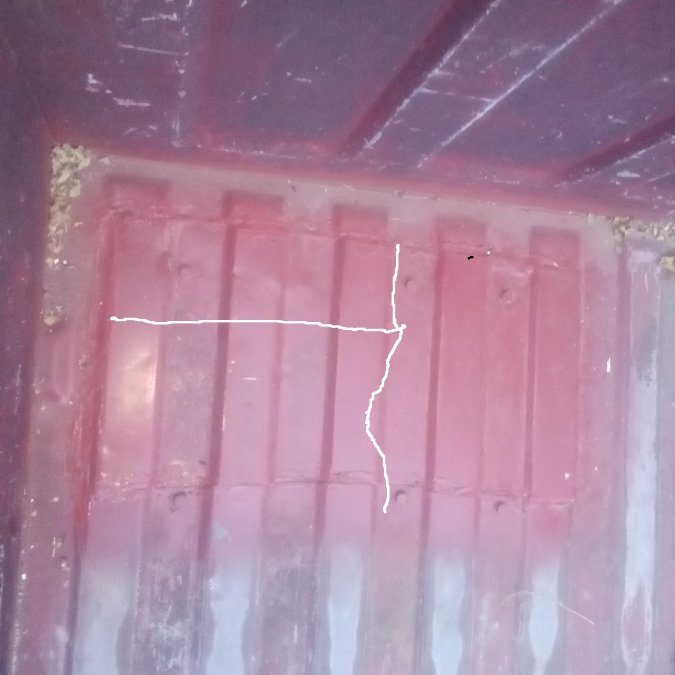
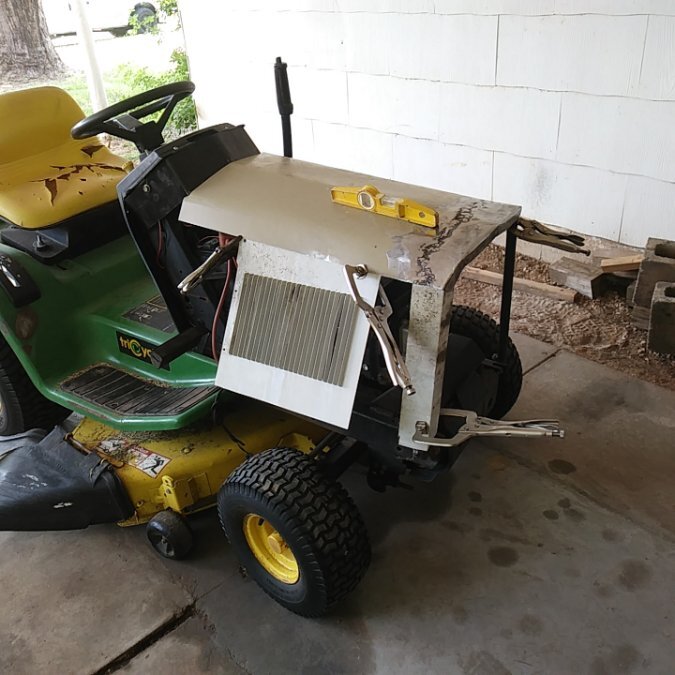
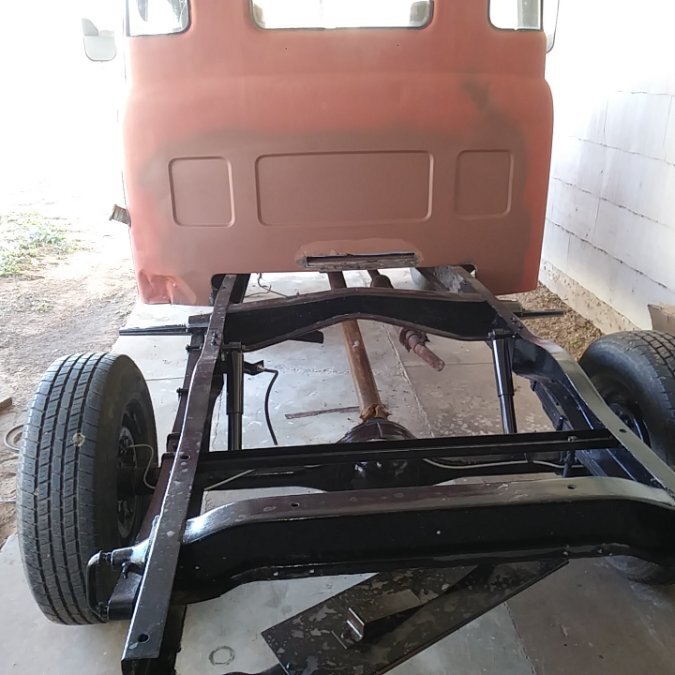
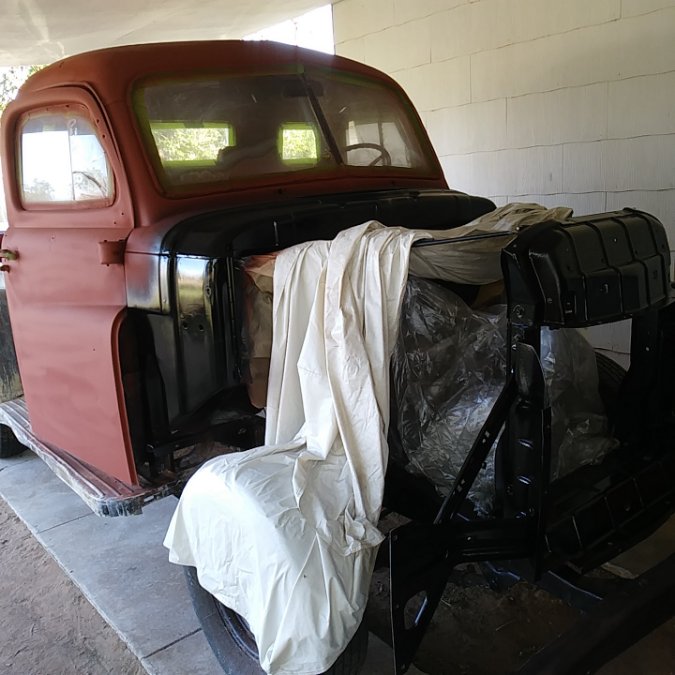
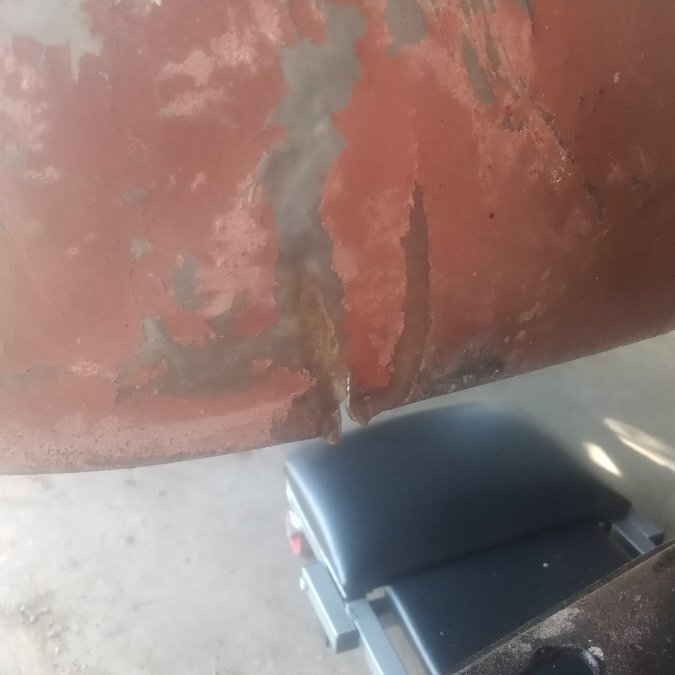
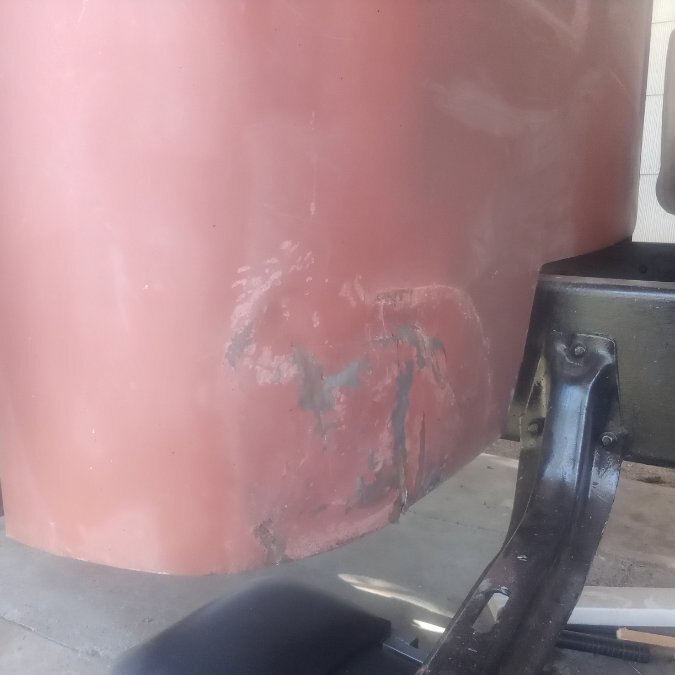
I appreciate the effort it took @Eneto-55to do the job they did .... I takes a lot of patience and time. I got to a point where the more I worked it the worse it seemed to get. I feel I got it pretty close. This dent had a lot of force to make it. The floor pan is in the top section of the dent. It had a long stress crack in it by the body mount I welded up awhile ago, then the spot welds from the cab to the A pillar were popped loose. It was hit hard enough the metal torn and I had to weld it back together. .... This metal was stretched thin. I think a experienced body man would have created a new cab corner then welded it in ..... I'm not that man. So I did the best I could. .... Honestly it came out better then I expected .... Time to put it to bed and apply putty. Just a rough first coat of putty 90% will be ground off tomorrow .... but it marks the end of a chapter in the book. No more pecking around with a hammer & dolly tomorrow ... I also took care of the drivers door while I was at it. It had a few different sets of mirrors on it in the past .... I swear they used a hammer & punch to make the holes to mount them. These areas are impossible to get to from behind .... Like a idiot I just went ahead and welded the holes closed, then kept going and filled in the divots around the holes with the welder also. ..... Nobody ever told me we could not do that. Still will require putty but less of it. I still need to do the passenger door tomorrow ..... then there are just a few cracks to take care of & 2 major patches left. The 2 patches on the fenders around the rivets .... They scare me, but I am getting braver. Been quiet for a week or so but been hammering away at it.
-
wonder if those battery testers at Autozone works on 6v batteries?
-
I'm pretty sure a shop will have to open it up & check it out for it's condition before deciding if it can be rebuilt. Not something they can tell you over the phone. There are a lot of these motors out there, they were sold in vehicles in the USA until 1959. They were still produced up til the mid 1970's for farm & industrial use as well as airport tugs. There are still a lot out there they are not made of unobtainable. No sense in looking for a replacement yet, first find out if yours can be rebuilt. I'm pretty fair with residential electricity ..... I suck at automotive wiring .... kinda the same but different. 30 minute sounds like a pretty heavy draw, not many things that could drain that fast .... I'm guessing headlights or amp gauge wiring. I dunno. Does this truck have the original cloth wiring or has it been replaced? If it is original cloth covered wire then it is probably time to replace it. The 70 year old cloth just falls off leaving exposed wire that can ground out somewhere. So if you find the bad spot you can cover it with black tape for now ... you bump the wire next to it and then it falls apart and needs work also .... You can nurse it along for awhile until ready to rewire it .... or just start replacing 1 wire at a time. If you want to keep the wiring stock also, you can purchase a quality cloth covered wiring harness for the truck and just install that. Will not be cheap. Maybe Grandpa already replaced it?
-
That is exactly why I'm not a fan of Napa. Of course we get the discount ..... Why are items not simply marked the price they sell for? Helping my Uncle out he loved Napa he would never go anywhere else. Once a year on a certain Friday Uncle would bring down 5 pizza and a couple cases of soda to feed the guys lunch .... he would call down for a price and tell dirty jokes for 15 minute on the phone to them ..... That was Uncle he would never shop anywhere else. He always bragged about the great discount they gave him. While going there with him and looking around, I could have used a air chuck to fill up tires that had a extension for dual wheel trucks. I looked at a basic one that should be about $20, they had a price of $50 ..... A slightly better one was marked $100 ..... This is not snap on quality, just basic bs sold at parts stores. I know when I take it to the counter to pay for it, they will decide what level of discount to give me. If any discount. .... Who decides what discount they will give you? I understand the need to give different discounts .... A commercial account that does a lot of business gets a set discount ..... but joe blow walking in off the street .... who decides his discount? While I'm not complaining about the prices as much as I'm complaining how they set the prices. Like Oprah Winfrey standing on stage, YOU GET A DISCOUNT, THEY GET A DISCOUNT, EVERYBODY GETS A DISCOUNT!
-
It is very possible the starter is not rebuild-able. They may need to find a used one and see if it works or send the used one to the shop as a core for rebuild while it is out. Not my budget to suggest what to do. ...... Either way it still has nothing to do with converting to 12 volts. They are different circuits and the starter does not care either way ....yet you still need a working starter. ..... If the charging system is working fine, there is no need to convert it. Just because you have a bad starter. One has nothing to do with the other ..... why I think the old gentleman was confusing the phone call thinking he was talking about a generator instead of a starter. A quick 1 minute google search for a 1954 Dodge truck 218 6v starter came up with this at the top of the list. https://www.amazon.com/Assembled-Meadowbrook-Plymouth-Belvedere-Cambridge/dp/B079QHQR7F $260 brand new & claims to be made in USA. But it is for a car and requires a solenoid & push button added to the truck. While Amazon is selling it, sometimes you can look through the add and find who is making it. Then call them directly to see if they would have a 6v truck starter. Or search longer to find the actual truck starter. .... Seems new starters are available .... is another 12v mini starter for $275 that would fit but require 12v conversion.
-
That is a beauty. Simple thing about wiring is 6v requires heavy wire because 6v draws more amps then a 12 v .... This is why you need heavy battery cables. 12v cables are not heavy enough. This is why you can use a 6v starter on a 12v system because it is built with heavier windings .... 12v does not bother a 6v starter. I think what ken has is a 12v starter for a 1956. I'm not sure it would work to install a 1956 12v starter without converting everything to 12v. I do not think it would hold up to a 6v battery. Looking at the truck, I imagine it was taken well care of. Possible the starter was just going out and needs rebuilt .... I expect close to $200 ... not cheap. This is also a positive ground vehicle .... making sure you are aware, the + cable from battery goes to the transmission for ground. The - cable goes to the starter and supplies the power to the vehicle ...... backwards from modern vehicles. This is why good grounds is so important. All vehicles it is important to have good grounds, but a + ground vehicle it is crucial .... you will notice any slightly questionable ground on this system. Thats why we are suggesting to get your starter rebuilt, you will need it even if you convert to 12v later or stay 6v. The starter does not figure into the cost of a 12v conversion. ..... you need the starter or you could locate a hand crank for it and start it that way. I want to be careful about what I say, there is always 2 sides to the story .... I was not there. When the old man told you it would be cheaper to convert to 12v ..... my first thought is that man is not qualified to change a light bulb .... let alone rebuild my starter. You might check other shops in your area if they are available ..... Or go in person, maybe the guy is just a telephone jockey and qualified people busy working ... I dunno Maybe he was confusing the starter with a generator ..... BINGO! That is a big reason why I'm switching to 12v. My generator needs rebuilt. Would cost me $200 to rebuild it, no idea if my VR is good I would want to replace it. I had to buy a complete wiring harness, 12v harness is cheaper. My project truck needs a complete new wiring system, going 12v is cheaper ...... I probably have $200 tied up in my new wiring system. $60 for a GM alternator $75 for a 12v wiring harness, lots of little incidentals .... I'm at least 1/2 the price of trying to stay all original 6v.
-
I agree with @TodFitch on this one ..... It would probably be cheaper to have your original starter rebuilt .... If the shop looks at it and says it cannot be rebuilt, too far gone. Then search for a used starter .... possibly may be some new ones available, I have not looked myself. I'm converting to 12 volt myself & using my original starter .... Will hold up fine to 12 volts and proven for decades from 100's of people who have done it. Often slow turning & running the battery dead is from bad grounds or improper size battery cables. A 6 volt system draws a lot of amps. They need .00 or .01 sized cables .... about the size of welding cables. The standard 12 volt cables at the auto parts store are too small. Or possibly your battery is simply getting old and weak, needs replaced. Then of course it could be the starter did need rebuilt in the first place. My truck starts fine on 6 volts I'm changing for other reasons. Converting to 12 volts can open a can of worms. Besides fixing the starter you will now need to buy a 12 volt generator or alternator, new voltage regulator, all new light bulbs. When you start messing with old original wiring you may end up having to replace it all if not in good condition .... if it is in good condition it will be fine. Then you have the heater motor, gas gauge, wipers? ..... This is all extra besides just fixing your starter & existing problems. .... Possibly costing 3 times more.
-
In town I have 2 parts stores, they are both family owned but one is a parts+ the other is a carquest. parts+ is good service by knowledgeable people, they are really limited by what they can get .... I have left several times empty handed. For example brake lines, the warehouse does not stock them and Charlie cant order them ... go kick rocks. carquest is good service and they seem to have a better selection. Rockauto is my usual go to place.
-

Dan's 1953 B4B 1/2 Ton Restoration Project has started
Los_Control replied to Dan693's topic in Mopar Flathead Truck Forum
I'm just saying most people would not guess where it was welded back together ... It is not the quality of the machine .... It is what can you do with it? Learn one process at a time .... you do not need to add tig into it. -

Dan's 1953 B4B 1/2 Ton Restoration Project has started
Los_Control replied to Dan693's topic in Mopar Flathead Truck Forum
Thanks for the explanation. I hear ya on the tig welder ...... the best way to go. ...... If you know what you are doing. I'm only suggesting your welder will be fine when you run a few miles of wire through it and get used to it. I did say I had to teach myself how to weld. I think it is important you spend time with your welder ..... make up project to weld together and learn how to use your welder. I have a multi process welder, it will do fluxcore, mig, tig, stick ..... What a mind puzzle for someone trying to learn ...... Do not make it complicated. Do not expect to be a pro .... work on things that do not matter. Does this make sense? This is one of my early projects .... my goal to teach myself to weld. It served a very good purpose the electronic ignition on the motor now stays dry & not cut out while running in the rain. Nothing I really cared about, just a chore that needed to be done. I was still messing around between mig & fluxcore at this time. ..... I learned a lot from this mess. When I bought my daily driver truck, someone in the past cut a access hole to get to the fuel pump .... normal job is to lift the bed off the frame to get access. I just feel lucky they saved the pieces they took out when they cut a access hole to the fuel pump. While I certainly care about the truck, I tried to weld it together 5 years ago when I first bought it .... I failed and kept burning through the metal. So a couple months ago I decided it was time to take on this project and this is the result. This panel appeared to be cut out with maybe a cold chisel? If you follow the curve of the bottom line .... Sometimes a zip disk .... It was 3 separate pieces & I welded it back to 1 piece then fabricated mounts so I can remove it in the future if I need a new fuel pump. You might think the obvious weld was from the left corner in ..... that is simply damage I never cared to remove & left it .....3 pieces of metal welded together there and zero bondo .... spray can paint job to protect it. My only point is, your welder is just fine as it is .... you need to learn to read it and respond to it. I got tired of messing with gas .... I have a 1/2 bottle in the back room if I need it ..... So I just run fluxcore. No professional body man does that. You will be fine just learning to use mig and getting really comfortable with it. Do not blame your welder, blame your skills on using your welder & step up your game. -

Dan's 1953 B4B 1/2 Ton Restoration Project has started
Los_Control replied to Dan693's topic in Mopar Flathead Truck Forum
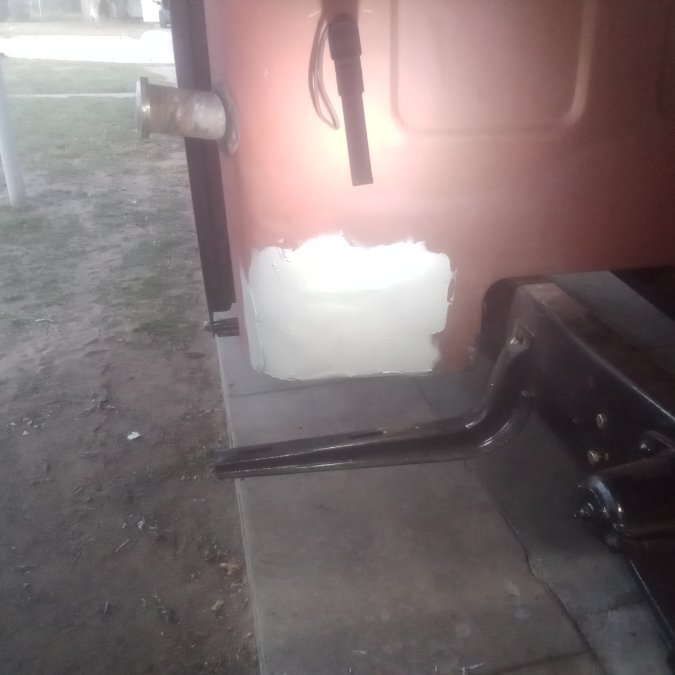
It sounds great, is it really 2 pedal (gas / brake) automatic transmission? Sounds great, I'm in the same boat my truck had issues but was in pretty decent mechanical shape when retired to a field. My shoes & drums all look like brand new ... 1 drum shows slight wear but very good condition. ..... While I want the rear end swap for better gearing, just cheaper to keep it as is now and worry about that later. The fenders is a common issue they all rust there .... just a poor design. Weld in a patch and use carriage bolts to imitate the rivets you grind out .... I will be doing this soon. Same with the back of the cab .... water gets inside and puddles up in that area and they rust out. I just finished this a couple weeks ago ..... My welding sucks I'm in the process of teaching myself. ..... Not so sure I would do it the same way next time. I kept the patch as small as I could .... just wanted good metal to weld to. .... I would have loved to completed the patch with no bondo ..... I'm just not good enough. Problem is, you need to be able to hammer dolly your seams as you go. Such a area you just cant reach both arms around .... either one side or the other but not both. After fighting it several times I finally gave in and I hammered the seam low & mudded it in. Looks fine now, but I will always know there is 1/8" bondo there. All welded solid with no pin holes and is covered with seam seal on the inside .... it will be fine. ..... Currently working on the dent in the cab corner .... there will be mud there also. It is great you have the engine out and can inspect it ... find much sludge in the pan? Mine took little work to get it running, Most issues it has should disappear with a nice long drive ..... I expect to pull it out in the future. I just want to get some shake down miles on it then make a list of all that is needed. ..... I simply will not be comfortable driving it without pulling the pan to check for sludge. -
does automotive coil have oil There's oil inside many round ignition coils, used as an insulator. If the coil is overheated, the case can rupture, allowing the insulating oil to leak out. That then allows to coil to overheat faster next time until it separates an electrical winding and stops providing a spark. Thats just from a quick google search & first hit. I remember in decades ago hearing about them leaking but was not sure. ..... Seems modern coils do not?
-

Dan's 1953 B4B 1/2 Ton Restoration Project has started
Los_Control replied to Dan693's topic in Mopar Flathead Truck Forum
Good luck with your project, is a big job to take something completely disassembled by someone else and you put it back together. Sounds like you have a solid plan though. Truck-0-matic sounds cool as heck ? I had a friend long ago that had a 1957 chebby truck with factory 6 cyl/automatic .... it was no speed demon would be slow getting to 55 mph but would cruise just fine when it got there .... it was just a really fun truck .... I have never seen another factory truck like it. I have heard of some dodge trucks with a fluid drive .... I have never heard of the Truck-0-matic before. Since you want to go to a dual MC, I'm thinking you want drive-ability over 100 point show restoration. One of the "gotcha" that Dodge truck owners run into is brake drums. If you have good drums you are golden .... need new drums? I have only found replacements on E-bay for $400 each .... so over $800 + shipping for the 2 brake drums. You still need new hydraulics & shoes ...... At this point several choose to upgrade the rear end. Several more advantages to a modern rear end ..... If you need new drums it would be cheaper to do a rear end swap ..... The sooner in the build you figure out what you will do the better. ....... I'm cheap, my drums are good so staying stock .... In the future I will swap. The Toyota master cylinder works really well for us, some good information in this thread. That is what I installed. nicop or nickle copper brake line seems to be the go to line today. Easy to work with and should not rust out, reasonable on cost. -
While I could be wrong, I think that is the lower core support to hold the radiator. Basically the whole front sheet metal bolts to it, then it bolts to the frame .... A important piece. I'm only suggesting you want it. Just saying you do not show the sides only the bottom .... It is important.
-

New Fuel Pump Failed Almost Immediately
Los_Control replied to Jocko_51_B3B's topic in Mopar Flathead Truck Forum
I'm going to guess the ball acts as a check ball ... so fuel can flow one direction as needed but not the opposite direction. So I'm sure there is a reason for it. The old carter B&B carbs use two check balls and different sizes, for different sized passages. .... It is feasible that in order to create suction it needs the ball to close the passage. The carb as a example just pointing out it was a common thing at the time .... probably transmissions also. Seems having the correct size ball is equally important. .... When I rebuilt my carb I accidentally put the small ball in the large hole. I knew it was wrong and try to get it back out. It actually lodged itself in the passage. I had to turn the carb upside down then heat it with a butane torch to get it out. .... Correct size is important. I have heard from a youtube video that these ball bearings can be found at Ace hardware. Around here they have a really large selection of "help me" stuff in the bolt section. Seems like a possibility for a replacement, also tractor supply has a fair selection. .... possible you can bring your part & try several different sizes to find one that fits. I'm going to guess yes. If it is to small it may not seal the passage ..... But where did it go? ..... Is it possible it is stuck in the passage? If so I doubt the pump would work even with correct ball. .... Will the ball from your old fit in the new? Something that I think is interesting. ..... I bought a pump from Napa in 2018 when I bought my truck. Think it was $35-$45 .... I never even tried to start my truck with the old pump I just replaced it. ..... Threw the old one in the box & put it on the shelf ..... I pulled it out to see where it was built. The box simply says engineered by Carter. So we know they did not build it. What I find interesting though, seems the pump itself was replaced and they used the original top. I have never heard of anyone doing this before .... no idea why they would. Is it possible to combine your new pump with your old one and make it work? ..... Clearly the top & bottom do not match in age. -
Good advice. The way it is right now it has a heavy eyebrow over the top of the low spot. I found by using the dolly behind low spot and working the eyebrow, the low spot is coming up and the eyebrow is going down. .... Then when you tap it just right, you can feel the metal start popping into place. .... They say metal has a memory. The bottom edge is the same way, heavy bulge on the bottom edge then a low spot. .... The heavy crease is coming out but it was torn & pinched so thin .... hoping to weld it back together, I may end up having to put in a patch ....
-
I have to admit the dent is/was kicking my butt. I was not able to use the jack to push it out. ... I figured out I could use my long pry bar & push out the bottom of the cab. This took out most of the bounce and was able to start moving the metal with a hammer. I worked on it off & on for a couple days, then life got in the way for a few days. Learning to read metal knowing where to to work it .... like reading a book written in a foreign language. Anyways am back at it today, this is where I'm starting at. Not sure how close I can get it. Now it is responding to a hammer/dolly really well and starting to move back into shape.
-
Do not take me wrong @Cooper40 I love reading your post and want to help where I can. I also realize winter is coming on, nobody in New Hampshire wants to add water to their vehicle. 5 years from now you might say well I think it sat for 30 years ..... you will never know the truth. During the next 5 years working on it you will have a opinion ..... you will never know the exact date with the information you have. But a good idea. I'm only suggesting to move on, not worry how long it sat.
-
Just lay the tissue paper flat on the hole.... do not apply pressure to it .... when it moves is because of compression from the cylinder. That is what you are looking for ..... some just put a finger over it to feel the air movement .... is difficult to tell with low compression & calloused fingers. Light & fluffy tissue paper works every time .... as long as the wind is not blowing. Installing a geared distributor in my past experience. I want the rotor to point at 7 O'clock when done. To make this happen I need to rotate the rotor pass the 6 O'clock position. Then as I lower it ends up at 7 position. Sometimes I do not get it right the first time so I need to pull it back out and try again starting with the distributor rotated more ... Might take 2 or 3 tries to get it exactly right. Our distributors are slotted and run off the oil pump ... So it is either right or 180 out. The oil pump is geared like a distributor .... So you follow the manual, you install the oil pump with much caution ... just stupid easy to get it 1 tooth off. Many people do .... thats why my #1 is at 6 O'Clock instead of 7 O'Clock like the manual suggest. I screwed with it for a week or so trying to figure it out .... Was not til I removed the timing plug, set #6 on TDC compression ... set the wires .... the engine started almost instantly. Some mechanics just dropped in the oil pump & #1 ends up at 3 O'clock position ... They still run the same wired correctly .... you need to learn this. No book in the world would tell me how the last mechanic installed my oil pump .... I had to use the timing plug provided to find this out myself .... you need to do the same. I'm just saying your engine is different or unique ... It may follow the manual or it may not .... many do not ... you can not look at pictures and assume they work on your engine.
-
@Plymouthy Adams I will not argue with you one bit on this matter ... yes there was mention of a old oil filter. Who cares? .... I understand many do, I tried to guess the year my truck was parked ... In the end it is all guesses. As I worked on it I came up with my own opinion. Still a guess and no definite answer. I feel our young friend @Cooper40is trying to learn more about his car ...... I would love to help point them on the correct path. I feel making WAG about date codes on old tires that will not even hold air is not a good way to help this young man. I want to see some coolant put into the engine, then if it does not have a cracked block lets get it to run .... In my way I would just like to move their focus from things that do not matter to things that do. I care about the man & the project ... I give zero shoots about the 30 year old tire.
-
I understand totally I'm the one that suggested to check the date code on the tires on the other thread. Then later I researched the date code and found it was changed in 2000 from 3 digit to 4 digit. I copied & pasted the article to show the change. Just saying I'm well aware of the change because I posted the article on it in another thread. .... Thats why I'm confused. Another poster did suggest some companies did adopt the 4 digit date code earlier then others before 2000 .... I'm kinda leaning in this direction right now. Uniroyal was a major player at the time .... I think that might be the correct answer. Personally IDGAF, car has been sitting a long time ... engine had rust in strange places and locked up .... A 1993 tire is still 30 years old .... Who cares? I want to know if the block is not cracked and holds coolant. .... Just because they got it freed up now .... we need to know more. Way too much time has been spent talking about 30 year old tires.
-
Here is a set of u-joints for a 59 Desoto .... $190 for the pair. I guess I'm just a cheap old fart, and I need to be to live on my retirement wages. When I started messing around with my B1C I quickly figured out a rear end swap was cheaper then doing a brake job with drums at $425 + shipping .... My drums were not available at that time ... not sure they are to day 11" drums. Here is the typical car u-joint says 33-54 on cars, 33-45 on trucks $105 each to rebuild 1 u-joint .... plus labor if you're paying a mechanic ... another $95 if you need a new housing. ..... I wonder how many modern mechanics even know how to rebuild this style? Mopars had crazy stuff back then they do work fine ..... cost a fortune to replace. Very few people re-create them and priced accordingly. And thats all I'm going to say. Modern brakes are safer, self adjusting you can have a real emergency brake. A nice driving experience with the 3:73 gears, seals that do not leak ... parts readily available. .... Changing the u-joints eliminates a future problem .... The driving experience does not change .... still a bouncy old straight axle truck with a flathead 6 and a 3 on the tree ..... You just upgraded the rear end, brakes & u-joints and IMHO the value of the truck ..... any future issues will be easy peasy to deal with. And the upgrade is actually cheaper then fixing what you have. ....
-
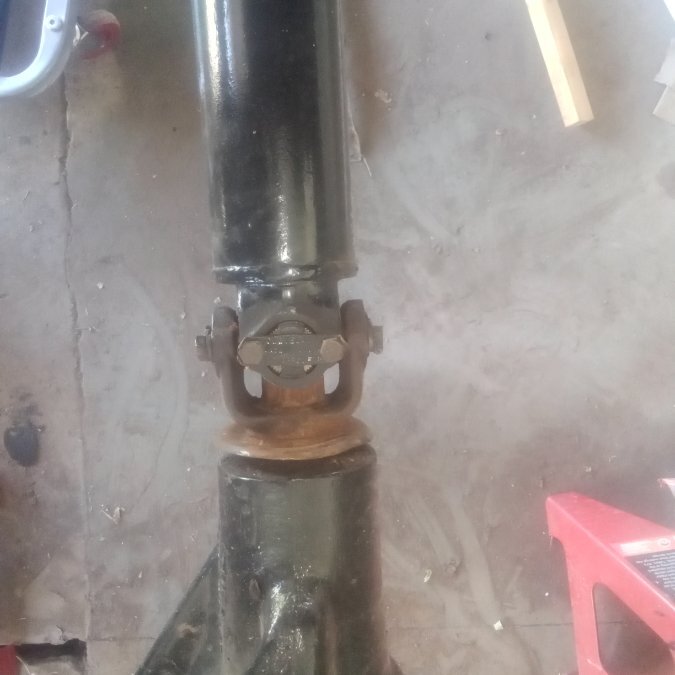
I'm sure it would work .... problem is that there was already a rear end change done on the vehicle. Without pictures we are all only guessing what was done for the swap. ...... Did they change yokes on the rear end and run the Cleveland style u-joint? Or did they change yokes on the drive line and run a different style u-joint? Here is a photo of the 1950 Cleveland u-joint .... It has straps and bolts that hold the cups in place. I think the 39-47 would use the same style. A modern u-joint uses a C clip or a snap ring to hold the caps in place. ..... I have no idea what u-joint the 57-62 Desoto used .... I doubt it was the Cleveland because only seen them on trucks not cars. .... Did they use a modern style u-joint in 57-62? I have no idea ..... Why I feel this question could get better answers on the car side not the truck side of forum ...... They may have a well know source for these drums. Something with the u-joint was modified to make it work in the truck, could be the yoke on the rear end, or the yoke on the drive line .... If we are talking about a rear end swap that would be important to know.

