
Los_Control
-
Posts
4,975 -
Joined
-
Last visited
-
Days Won
42
Content Type
Links Directory
Profiles
Articles
Forums
Downloads
Store
Gallery
Blogs
Events
Everything posted by Los_Control
-

Rims and tire conversion for 1940 FARGO pickup.
Los_Control replied to Windsor assembly's topic in Technical Archives
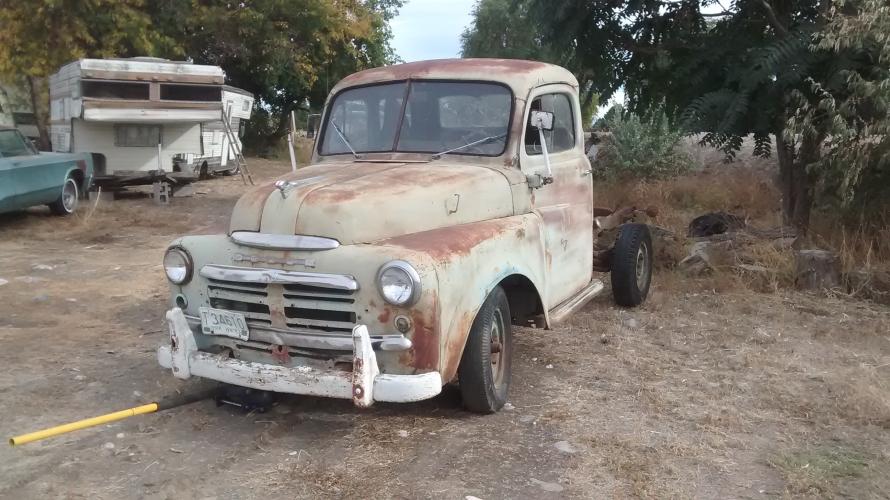
My opinion is any steel wheel that does not require special lug nuts will work. ...... A problem you will have is .... your stock truck hubs will have a locating pin for the factory wheels. You will have to smash it with a hammer and chisel to remove the pin for modern wheels to fit it. Because your truck has lug bolts, not wheel studs with nuts ..... The locating pin is simply there to help hold the wheel while starting the bolts in place. So it is up to you if you want to keep the pin or not. ...... Mine were removed long before I bought the truck. Here is a photo of a 1960's Dodge truck, you can see the holes in the wheel between the lug nuts for the pin. .... So later model wheels do have them ..... still not cheap or easy to find. So a Jeep Cherokee or that style, Ford Explorer, Dodge trucks with the 5 on 4.5" bolt pattern will fit. ..... probably many fords .... Crown Victoria? you need to measure the center hole to be sure it is same or larger then your existing wheels. -
I thought also the turn signal indicators on top of the fenders were mopar.
-
Only thing I will add .... STOMP STARTERS RULE! Sounds like maybe your mechanic is learning ..... Lets give them credit for being honest .... working on 75 year old technology is not something everyone does. Just the fact he said I do not know .... instead of filling you with BS .... deserves some credit. These old cars today offer a learning experience, either working on the car yourself or choosing a proper mechanic to work on it for you. While it may be disappointing to learn you paid money and the desired outcome was not reached. ..... You learned something from it. A:, the mechanic was honest and asked you to bring the item back. Lets see what comes from bringing it back to them. B:, You will be better equipped with knowledge and what to ask the next time you hire someone to help you. Life itself is one big learning experience, how we deal with it is up to us.
-
That is a great combination. If the marine grade plywood is available I would use it. The glues that hold it together is designed for wet locations. I admit I've never searched for it, I have not seen it on local lumber yard shelf's. And in the middle of the desert not many boat yards to choose from. ..... Treated plywood for me. Still not sure what to use for a cap to cover the end. Plenty of options at the hardware store for aluminum or SS .... piece of small angle iron? I think I want to make something simple out of 18 Gage steel & paint it to match the painted shovel strips. I chose a off the wall color for stain, Is there a reason why nobody else chooses it? I figure the darker color will go fine with the black painted strips & end cap .... body color. Also if I did spill some oil on it or some other product, will not be so obvious with the darker color. I was surprised that the wet treated wood sucked up a full quart of stain for color. Now I'm trying to get the oil finish on it and it is slow to suck it up and dry. It will dry eventually and I can put on multiple coats ..... cold, wet & rainy winter weather ..... will take time but it is protected now. Upon closer inspection, there is a provision for drainage built into the front rail. Has holes and is embossed to create drainage. Nothing gets bolted there using those holes. I guess the trick is, if that area gets clogged up with dirt and water does not drain .... need to clean it out so the water will drain again. I set the wood to have ~1/8" gap between the front panel .... then if I back cut the front edge of the plywood, it will keep the 1/8" gap at top but be a 1/4" gap or so at the bottom ... making it harder to plug up. At least that is my plan.
-
I'm not aware of any that used a hinge (cars in this era) As Todd states, is the ball studs that is normal. Mine was in pretty poor condition and should have just replaced it. I had a small 3" hinge and welded it to the pedal then attached the big foot to it. You can cobble something together that works ..... or just buy a new pedal.

-
1946 WD15 rear end swap...and full replumb of brakes
Los_Control replied to lostviking's topic in Mopar Flathead Truck Forum
I had problems with that conversion also .... My first failed attempt I used a 3/16" adapter. The threads were a little sloppy going into the 10mm .... once it bottomed out it was tight. It is the shape of the bottom where it seals ....... possibly you can use thread tape and seal the threads .... proper fittings you should not need tape to seal. I wrapped thread tape on them, tightened it all good and bled them out fine .... later it started leaking. Now I just ordered 10mm male to 3/16" female adapters from amazon .... everything went together just fine, I expect no problems from the fittings again. ..... I'm working on other things and have the toe boards out so I have not yet bled them out again. Think I got it .... feel confident I got it ... just not tested yet. -
Good points @kencombs The older wood is more stable because it came from large old growth trees with really tight growth rings on them. I'm guessing most of the lumber we get today is from tree farms that were planted 20 years ago and barley large enough to be profitable to cut. .... Simply is not very stable. While 100 years ago they could cut 12" wide boards and be very stable. I'm guilty of calling spf pine myself .... while they are different species, because of the age the trees were cut down the results are the same. If a guy was replacing the strips on the bed sides also, they could raise them 3/4" higher. Now they could use 2"x6" - 2"x10" etc ... for the floor. ..... I did replace mine without thinking of the option, just put the new strips back where original was. On FB I found a company fairly close selling decking for trailers. While it was obvious they sold large quantities of it to trailer builders (looking at their inventory) They also catered to the public with custom orders. All their lumber was treated with creosote and a nice golden orangey look ..... it looked ok and what you see on new trailers. ..... would have a better chance of it not needing to be replaced at a early time. Just one more option available.
-
When you look at an H it is the shift pattern for your car, the 2 vertical lines represents the shift rails and the horizontal line is what the gearshift lever uses for a pathway between the rails. You have one gearshift selector in the car, 2 shift linkages connecting it to the transmission. One linkage selects the gears by moving the gearshift lever forward or backwards. The other linkage simply selects what shift rail you are on. Working normally, when in neutral you lift up on the gearshift to get to the reverse/1rst shift rail. Pulling it back into neutral, there is a internal spring inside the transmission that pulls it back to the other shift rail. This is all one linkage does, when you lift up on the gearshift & let it go back with the spring ... that is the full function of that linkage. Moves from one rail to the other. the 2nd linkage simply goes forwards & backwards selecting the gears depending what rail you are on. The tricky part is, Both the arms on the transmission have 3 positions. forward, middle, back. They both move together. If one arm gets moved out of sync with the other .... you need to manually put them back into sync. Or it will not work. IIRC, you should be able to correct this from under the hood, just by looking at your shift linkage and aligning them. Take one shift linkage and push it all the way down, then move it up one click. to the middle position. Then do the same thing with the other linkage ..... you should now be in sync and working again. ...... Might be easier to crawl under it and do it from there. I dunno. This only happens when you mess with the linkage, or if you have worn out improperly adjusted linkage .... it is a common thing though. Riding with a buddy years ago in his 68 camaro 4spd we got ran off the road and bottomed out in a ditch .... moved his linkage out of sync, had to crawl under it and fix it. Nothing unusual to see here and a simple fix.
-
I think this plywood will hold up well. When we bought our house 5 years ago, There was a wheelchair ramp at the front door .... 4' wide & 16' long, made from the same treated exterior plywood. It never had paint or any treatment on it to preserve it. I know it was at least 6-10 years old. Was in very good condition and I used it to make the work benches in the garage. Good idea @Veemoney I was looking at the fit yesterday .... nice and tight. Boy I could caulk that tight little seam and make a swimming pool ? ...... I need to do something here for drainage, I like your idea. Those strips look great @billrigsby Is a great work around. Is a bonus that they are aluminum and need no special treatment or maintenance. I possibly may look for them myself. My strips are pretty rough, 2 will need patches welded in, then they need cleaned and painted .... and periodically repainted. ..... Actually I do have a spare bed with some real good strips in it. I store my scrap metal in it and would have to unload it to get to them. ... quicker and easier to just fix what I have. Unless I use what you will During my working career, I have some experience with different types of board wood & plywood. imho, 3/4" pine boards would be sketchy, if you have enough cross rails properly spaced and enough screws ... Maybe. I think you will need 2 bolts on each cross rail all the way down the board. It's very difficult to keep 3/4" pine from twisting. Plywood will de-laminate and become unusable over time depending on conditions. I have used ACX plywood that is smooth on one side and looks pretty good, it is not treated but it does hold up well. Would last a long time for a pickup bed. I have used oak plywood for the same project as I used the ACX on ..... It only lasted a few years and was a poor choice. I'm on my 3rd version of the portable tool now and back to ACX, I suspect it will last the rest of my life with as much use as it gets. I feel the ACX & treated plywood are built the same, just one is treated and intended for outdoor use, and will last longer.
-
I was fooling around with my shift lever before .... removed it from the column to pull the steering wheel off. I changed my mind and decided to wait til a better time to pull the wheel and put the shift lever back on the column. Now I could not get it into neutral and could only go forward or reverse ... no neutral. While fussing with the shift lever I had knocked the shift linkage on the transmission out of sync. I had to move both the arms on the transmission back to neutral and then the shift lever now worked properly and all gears worked again. It was easy for me since I had the old floor cut out and could just reach down and fix it ..... took a few minute to figure out what was wrong though. It sounds weird but makes sense, 2 shift arms one moves back and forth to reverse/1rst .... then in neutral the 2nd arm you push down to change rails .... now the 1rst arm is switching between 2nd/3rd ...... neutral is 1/2 way between rails. So if the arms are not in sync, you will either get reverse/1rst or 2nd/3rd ... depending what rail you are stuck on ..... no neutral. Just put the shift lever in the neutral position,then get under the car and line the arms up into the middle position ..... chances are it is as simple as that.
-
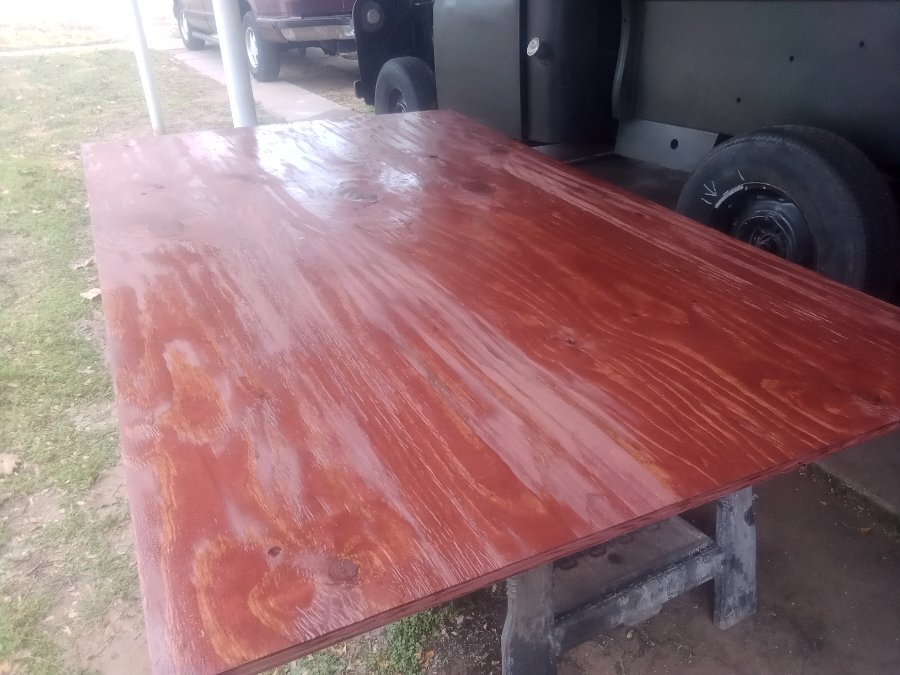
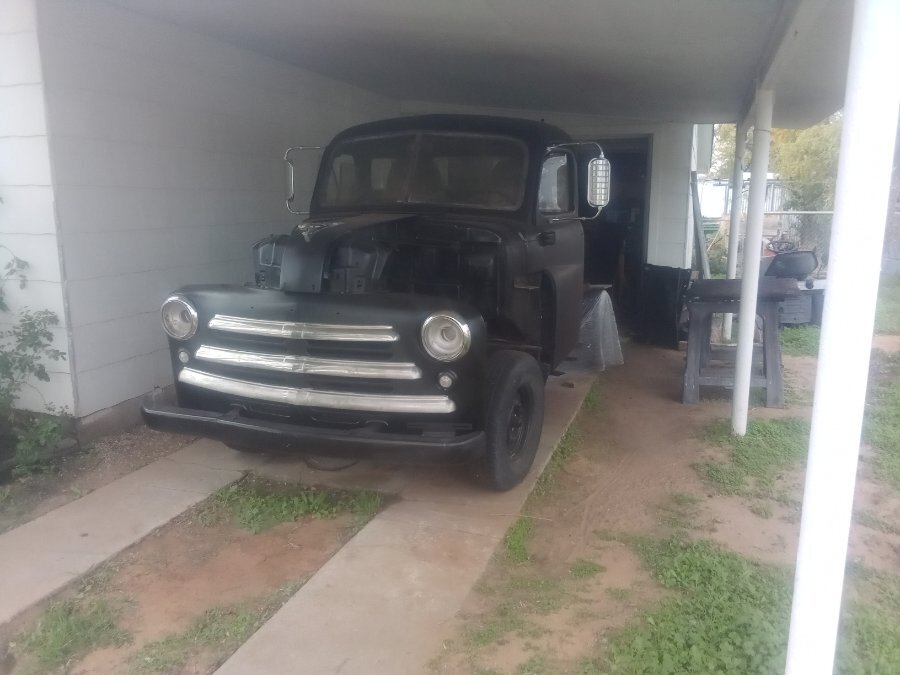
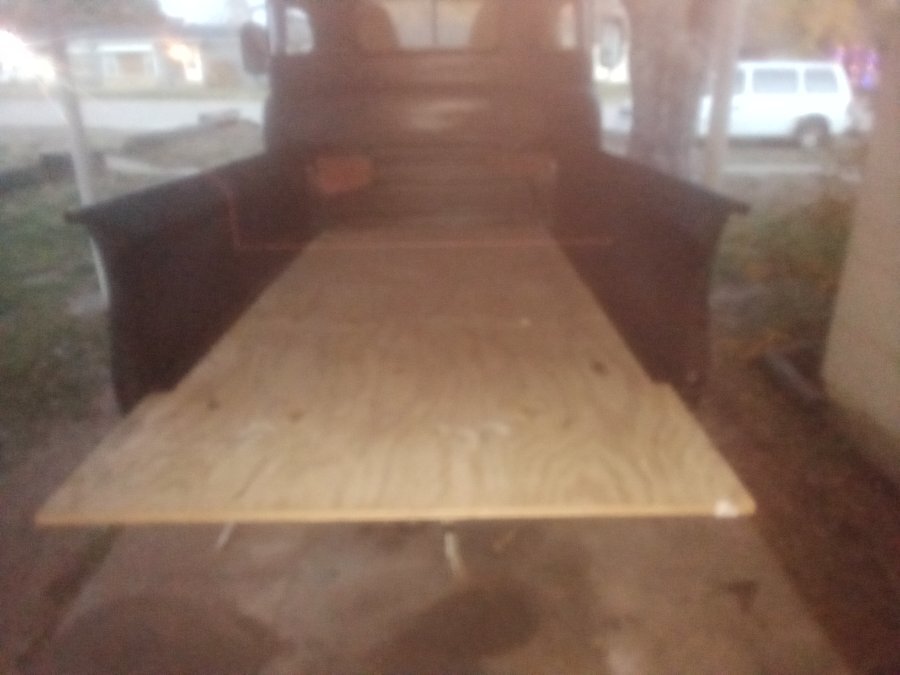
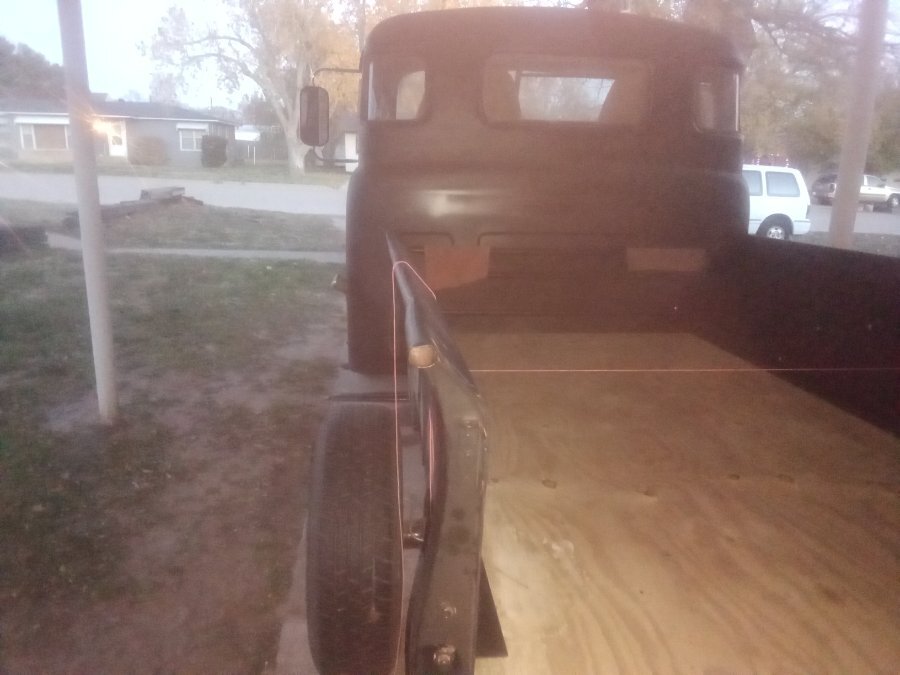
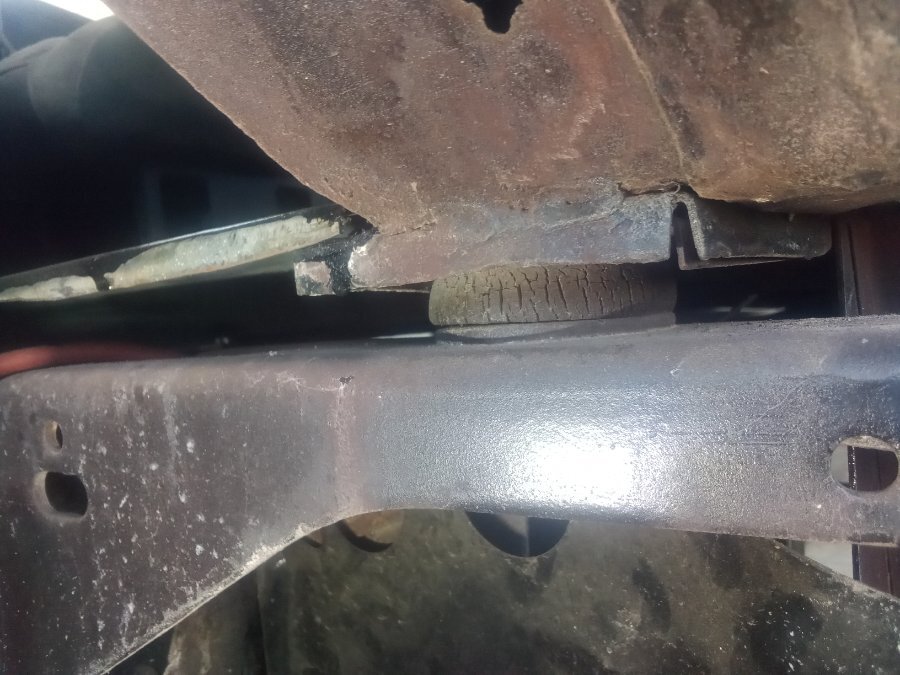
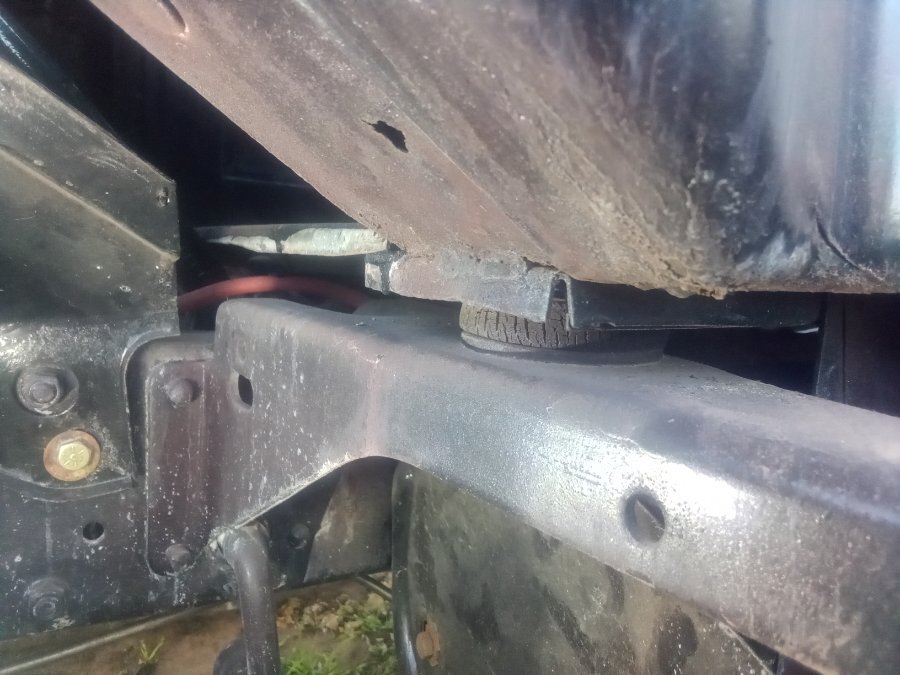
Been awhile since I reported any progress, I have been real busy with life and just not a lot of time to work on it. Besides I did want the paint to sit and cure for a bit before fussing with it, I did finally get the heater painted and installed and I put a new water pump on. The old one leaked a little bit and I'm sure it just needed grease. I fussed with it a couple times and put a new zirk fitting on it and still could not get it to take grease. I bought the new water pump a couple years ago so I just went ahead and put it on. Now the coolant system is complete, flushed out and added antifreeze .... It is done. Been putting some things back on it, gets me interested and wanting to complete it Best photo I have now, I have added more but no photo and it's dark. I'm thinking I may need to paint the bumper silver? Today I was working on the bed. After I ran the tail light wiring. I know it is not the way the manual suggest it. Right now just test fitting it to mark it for length before cutting it. It is 4'x8'x3/4" exterior treated plywood. Meaning it is soaked in some chemicals and very heavy I will put a darker stain on it then treat it with penofin oil, just like you would with a outdoor wood deck on your house. I will paint the shovel strips and install them. First of all, there is no lumber stores near me that carry hardwood planks. I thought about how I would like to do it right ... I am a retired carpenter and have all the tools to do it right. Realistically it just would not be practical. I could have bought cabinet grade oak plywood for close to the same money and made it look real nice. .... The first time I threw a greasy old engine in the back it would then look bad. 1/2 nice & 1/2 bad. This treated plywood will last a long time, if I gouge it up ... just add a little more stain & oil and it will look the same as it always did .... I can abuse it and will be fine. This bedside always bothered me. We can see the obvious kink in it ....... How well will the tailgate close? I know the proper way would be to replace the top rail ..... Maybe someday, I'm not good enough for that yet. If the tail gate operates fine, I'm happy, will just call it character. I have some ideas how I might make a jig and pull off of a tree .... if I can move it a 1/4"-1/2" so the gate closes ... I'm fine. ..... Will not stop it from being a driving project. But I have been slowly making some progress on it.
-
I would guess there will be a possible noticeable difference in noise .... quieter gears with modern tooth cutting. Less play on the yoke. Better brakes. I know Lockheed brakes are superior if adjusted properly. ..... Takes lots of maintenance to keep them up .... modern self adjusting brakes that possibly are larger then the original will be quite good. Far easier to maintain with available parts ..... Same story with using modern u-joints ..... It is a improvement in my opinion, unless you are going for a 100 point restoration. You have not changed the suspension so your ride will not change.
-
I agree with @Dodgeb4ya ... it will be all manual cleaning with various different tools. I would think that possibly compressed air & a vacuum cleaner would be very helpful. Also solvents such as brake clean or acetone to loosen the crud, only a petroleum based product. then quality brushes that will not fall apart during use. Bailing wire to probe the galleys, screw drivers, picks & probes ..... All manual work. I would be scared to use any water inside the engine, to much chance to cause rust issues on any machined surfaces .... may end up with a bigger issue then you are fighting now. Even though you can wipe down & oil the obvious places, will be hidden places you wont see or be able to reach. Once you get the inside and nice and clean then ready for paint, here is a decent video showing preparing a engine for paint. Possible using the map gas torch may be a useful tool in cleaning your block? His block is also fresh out of a machine shop and looks cleaner then yours. I imagine different states have different regulations on what products can be used in a dip tank. Also your engine is 50 years older then his, has seen more years of wear & tear. You may never get it that clean. Get what you can and remember it is cleaner then it was before.
-
Could always temporarily run power to the heater motor .... will just turn really fast And if it does work put a voltage reducer inline?
-
Mopar Deluxe Model 36 Heater Ducting Routing
Los_Control replied to jwolf's topic in Mopar Flathead Truck Forum
Just curious if you have measured yours? Mine measure 1-5/8 od .... Rock auto sells it .... probably many local parts stores also. Seems like 1-1/2" is standard size ..... no idea if it will stretch over my 1-5/8" vents. https://www.rockauto.com/en/tools/hoses/lines+&+clamps,defroster+hose,defroster+hose,308 -
I would think the dog that came with it is the heater? Great looking car I love it ..... cant help you with the heater, I have a truck with a different system ..... for us it was a option you had to order. I would think the cars came with a heater, but had options of which heater you would order. Some came with a fresh air option ..... some came with a extra heater under the drivers seat or in the rear of the vehicle. ..... Lots of options when you ordered a car back in this time period. Pictures of the area and what you have already will help to figure out what you are missing & need.
-
Howdy, a jeep cherokee or a Ford explorer is the correct width and have the 5 on 4.5" bolt pattern to use the stock wheels. Readily available in wrecking yards. They come in a variety of gear choices ...... 3:73 seems to be the sweet spot for a stock engine/transmission. While others claim a 3:55 works great ..... they usually have some high performance mods or maybe a T-5 transmission swap also .... 3:73 is a very safe choice if you have some hills in your normal driving. .... Or of course a 4.10 gear like the original will work fine. You will need to cut off the spring perches and weld on new ones to match your factory springs. Not to bad of a job if you have a welder .... you do want to set the pinion angle also while at it. Also you may need to modify the u-joints on your drive line .... original would have had Cleveland u-joints .... your photo is a standard u-joint .... I assume your drive line already has been modified. Over all it is not a difficult swap and done a million times. Check the years on the donor vehicles, older ones will have drum brakes while newer have gone to disk brake rear end. .... Choose what you want. Also a good idea if you can grab all the E-brake cables & brackets you can from the donor vehicle, can modify and connect to your e-brake handle .... If you do a transmission swap down the road, you will need these parts to get a working e-brake ..... thinking ahead can save future headaches.
-
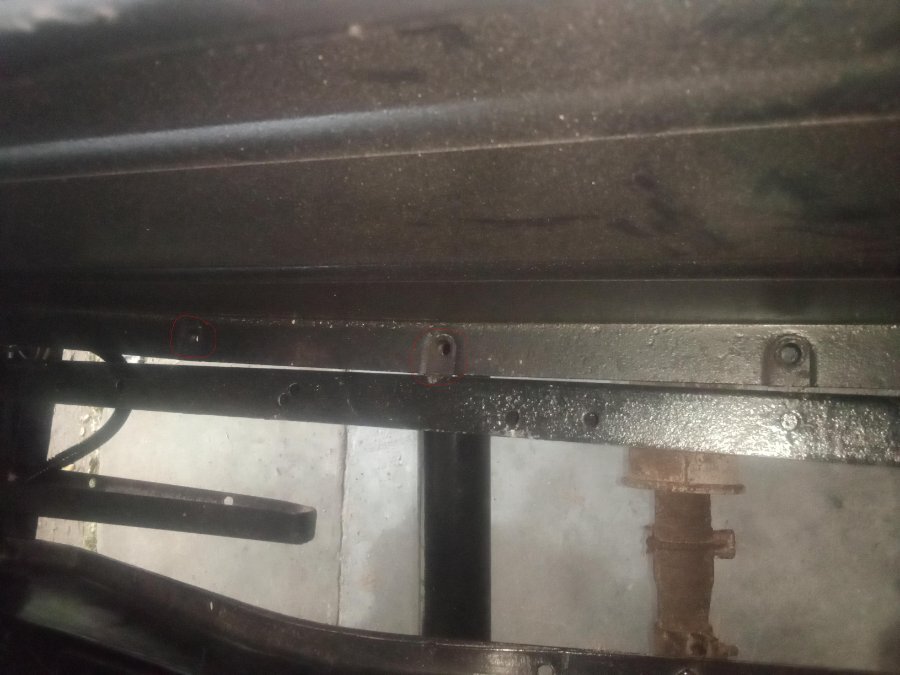
Not a great picture.... You can get the general idea. Basically just a flat plate .... maybe 16 gauge? Has the ends folded over to ad rigidity. And welded to the floor pan. I figure you can get the measurements of where to put it from your truck ...... If you need measurements let me know.
-
4X4 conversion of W series truck
Los_Control replied to lostviking's topic in Mopar Flathead Truck Forum
Not sure if you have seen this thread ..... A lot of good info here. https://www.jalopyjournal.com/forum/threads/tech-ultimate-t-5-article.171291/ -
While I don't do football....I have had to punt...
Los_Control replied to Plymouthy Adams's topic in Off Topic (OT)
I'm just learning this .... I keep telling myself I want to build one truck then I'm done. .... I want to play carpenter for awhile after my truck is on the road. A wise man once said, never build a classic vehicle in a hurry .... buy one to drive, while you build yours. ..... You will make too many short cuts in the process. I agree with them as I know when I take short cuts .... I also know I keep collecting parts for a future build when the parts come available .... Hoping I do better on the next build .... even though I say I do not want to build another. Tim this is obviously not your first build, you have been through this a few times ...... Currently I'm stuck with what turn signals to use on my truck. I know the average person just adds a dual element in the front parking lights and calls it a day. For me it just is not what I want. Others have used cowl lights for turn signals ..... looks great .... for them. I'm thinking for my build I want something on top of the fender .... I want something vintage .... Not too big, not too small .... maybe some vintage cab lights to match the cab lights I'm using. I keep searching but just not found what I want yet. ........ I know you did the same with your mirrors, it is a tough choice to find something that really works for what you are doing. I'm just learning this as I go through my first build .... and poking some fun at the true master while at it -
Glad you got it ..... seems like there is always a little tinkering that needs to be done with these old cars. I noticed with my old truck that is not driving on the road yet ..... after working on it for a few years preparing it for the road. I noticed that when I first start it up the other day, it is not running on all 6 cylinders ... Seems after it warms up it is running on all 6. It could be a bad plug or a wire .... Not worried about it. I just know it wants some attention. And it is telling me it wants some love & care. They have ways of talking to you.
-
While I don't do football....I have had to punt...
Los_Control replied to Plymouthy Adams's topic in Off Topic (OT)
To be Honest I love the older Fords, I've driven all of them from 1969 to 1987 during my working career .... I never had a complaint with their mirrors. Someone like myself just notices it ...... while most never will ... I do not care what you use as long as you are happy .... They are good looking functional mirrors. I had to think about it Toyota trucks also used a very similar mirror .... I have owned 4 of those ? Wonder how many other vehicles used the same? You may always wonder though if you should have went with the Chevrolet mirrors with red wheels -
While I don't do football....I have had to punt...
Los_Control replied to Plymouthy Adams's topic in Off Topic (OT)
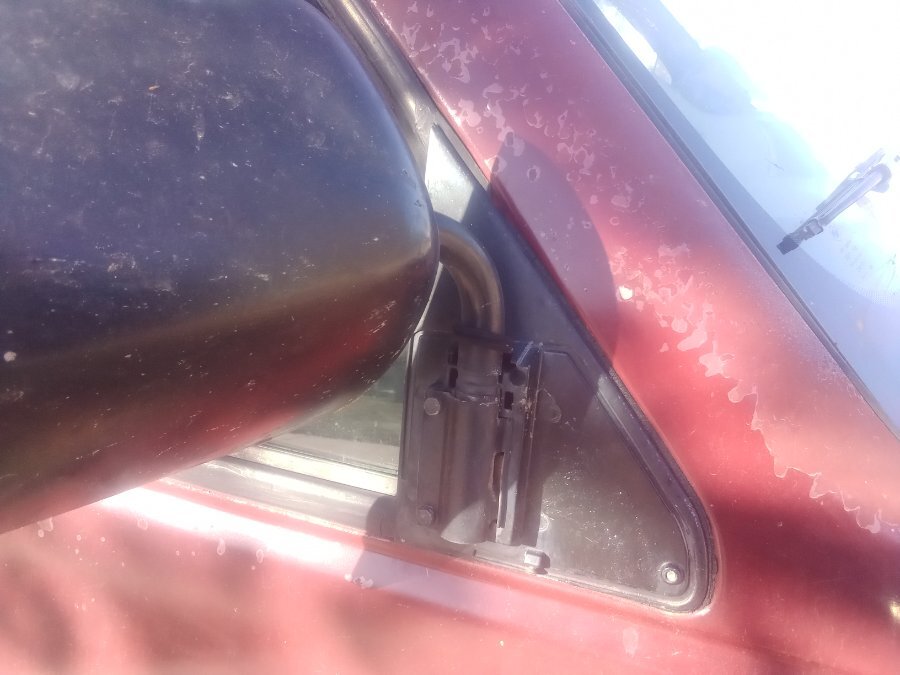
Just for you I went out and snapped a photo ...... My first thought here is the mirror head is large enough to give you a decent view. Excuse the bug splatters .... truly were freshly painted last summer While the mounting covering fits this truck ...... I thought ...... Without all the chebby plastic on them ..... they do have a very small foot print. A wise man like yourself could possibly fabricate mounts & a cover that would fit your vans profile. The only complaint I have with these mirrors on my truck .... is you can see there is 2 small screws that pinch the mirror solid in place. When I pass a on coming semi truck on a 2 lane road at 75 mph, the wind draft will move the mirror adjustment on the drivers side. ..... Not often, just when circumstances are right. So I roll down the window and push it back out .... I did tighten the screws and it helped a lot ...... basically I just need to add a little shim in the adjustment to make it fit tighter. This truck does have 435K miles on it ..... I assume original mirrors.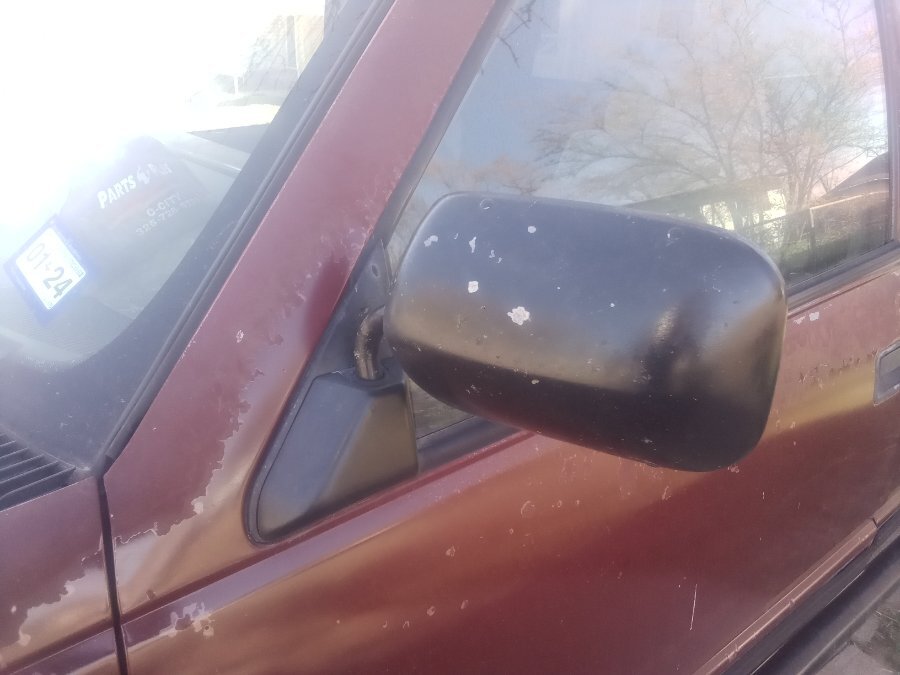
-
While I don't do football....I have had to punt...
Los_Control replied to Plymouthy Adams's topic in Off Topic (OT)
? ..... KK I'm wondering ..... what mirrors did you go with? I saw one picture where you tested Ford mirrors on it .... better then original ..... I thought about posting a pic of my chebby mirrors .... They look a little more sporty then the Ford ..... I know how much you appreciate chebbies ....... I do not see what mirrors you ended up using in final pics? -
4X4 conversion of W series truck
Los_Control replied to lostviking's topic in Mopar Flathead Truck Forum
I thought about this myself .... I really was unsure to share my view point. I actually had a 1972 CJ5 jeep that had a mild build headers, 4 bbl, cam, 2" lift .... It was fun when you are 25 years old. It simply had too much power and I always broke things with it. ... I loved the way the V8 sounded when I opened it up .... When I should have been crawling on the trail, I would whap the throttle and end up sliding off the trail and bent the rockers on the body. I loved to do wheelies over beer cans in the parking lot on Friday night .... On my honeymoon we were pulled over at a machine shop replacing the bearings in my rear end in the parking lot .... while on our way to a cabin on the beach we reserved. The stories go on & on about my jeep .... I just loved the way the engine sounded and liked to hear it. In my 30's I bought a 1979 Toyota 4X4 pickup, a little 4 cylinder and I had so much fun with that truck ... I drove it for several years, I never broke anything or had to be towed home. It simply never had enough horse power to break things. ..... It was not exciting if I stepped on the throttle to hear it roar. So I'm not a big fan of nice sounding V8's in a 4X4 .... I'm older now but not sure I could trust myself. .... I love the way my sbc sounds when rowing through the gears to get on the freeway .... I'm not sure I will ever grow up ..... while others have more restraint then me. A mellow sounding 4.0 would probably have just as much HP as a nasty V8 ....... but not nearly as tempting to open it up .... That's my story & I'm sticking to it.