-
Posts
152 -
Joined
-
Last visited
Everything posted by westaus29
-
Just remembered we have gone metric and dowel would be 19 mm not 3/4 inch. Difference of .05 mm not a problem. True Oak is hard to get here, we have "Tasmanian Oak" which is actually a native eucalypt, and in WA we have Jarrah which is a prized dark red very hard eucalypt. Thanks for documenting the bearing numbers. I'll add it to my files. Jim
-
Yes 3/4 inch as bought from hardware store. Have just corrected reverse idler shaft length, had some extra bits in toolbox and picked the wrong one. Just took the top off my spare box and confirmed length is 1-1/16 inch. By the way, a bit of slop in bearings is to be expected as they are simple ball bearings. The input and mainshafts are steadied at both ends by bearings and arent going to move far.
-
Hi Keith, I am a bit late joining this conversation but as I have just recently overhauled my 38 Plymouth gearbox I will pass on my learnings. I had previously done my 29 gearbox which is a bit simpler. I stripped the gearbox mainly because it was out and accessible and I am trying to do a thorough restoration. It had always shifted fine and sounded fine. When I stripped it, I found missing and broken needle rollers inside the input shaft where the mainshaft slots in, but no apparent damage. So am very glad I did strip it. My bearings were ok and gears were in decent shape with light damage to first and reverse so I kept them. Before going further I ordered a small parts kit. These are available from Andy Bernbaum for $65 and include all needles, thrust washers and circlips. I bought mine thru eBay from Mopar-Direct because of postage issues to Aus and am happy with the quality. First and most important is a couple of lengths of 3/4 inch hardwood dowel, one exactly 6-1/2 inches long for cluster gear and one 1-1/16 inch long for reverse idler, see pic below. The lengths of these match the overall assembled length of each gear including thrust washers and make assembly quick and easy. Secondly I found it much easier to work on the gearbox by bolting it upright using a simple L bracket mounted in the vice as per pics below. It helped to have a swivel vice. I was unable to remove the input shaft as a first step. It fouled the cluster gear and I dont like the idea of hammering the bearing as a way of getting that clearance, especially as my bearings were fine. So for me first step was to start at the back and remove the mainshaft complete with clutch assembly, taking care to hold the assembly together. Next I removed the countershaft, replacing it with the dowel, and let the cluster gear drop into the bottom of the box. This allowed me to remove the input shaft complete with bearing and circlip, then lift out the cluster gear assembly, then tap out the reverse idler shaft and likewise remove it ( cant quite remember if had to remove the reverse idler gear first???). Assembly is the reverse. The dowels make it easy to insert the needles in the reverse idler and cluster gear, and position the thrust washers at each side. for the cluster gear, the steel thrust washers go next to the gear and needles, the bronze washers go on the outside. Note there are 31 needles to each bearing and I found they fit like a glove. Pic Z1 shows needles being installed using dowel to hold them in place Z2 shows thrust washers about to be installed and Z3 shows the cluster assembly with thrust washers ready to go back in the box. To insert the larger needles in the input shaft recess is not quite so easy, The last one feels like it wont go in but a bit of pressure from a wooden dowel and it should pop in. They fit so tight they wont fall out while you assemble them into the box. See pic Z4 Next install the cluster gear assembly and the reverse idler assembly, leaving the cluster gear in the bottom of the box. Install the input shaft, then lift the cluster gear into place and install the countershaft. Make sure countershaft and reverse idler shaft rear slots line up for the retainer plate. Then replace the mainshaft. If you decide to pull the clutch gear apart you are in for some fun. I have some pics somewhere of a tool I used to reassemble it. As I recall it was a tin can of appropriate diameter. I could find it if you want.
-
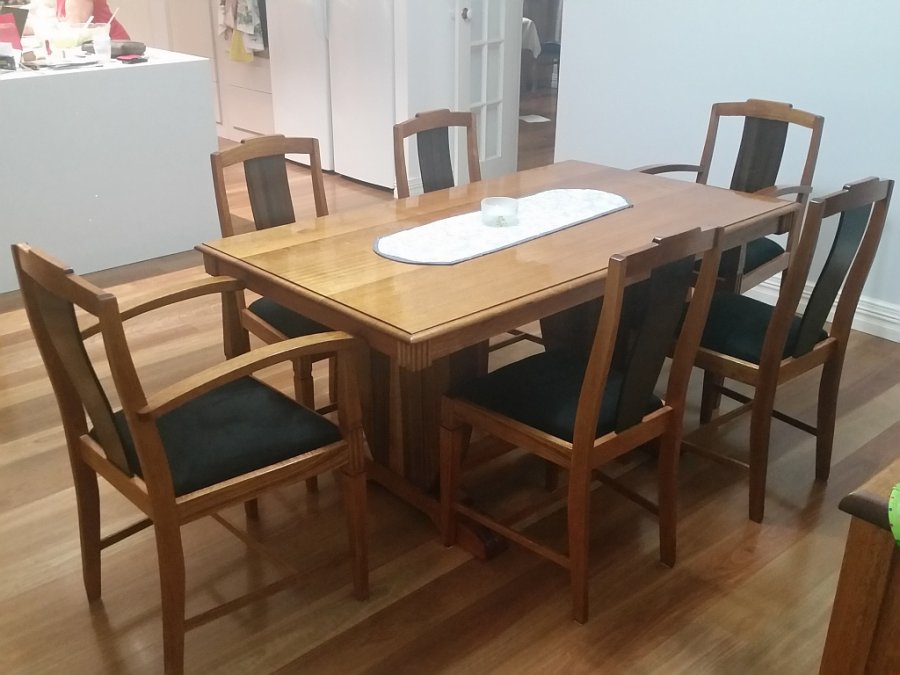
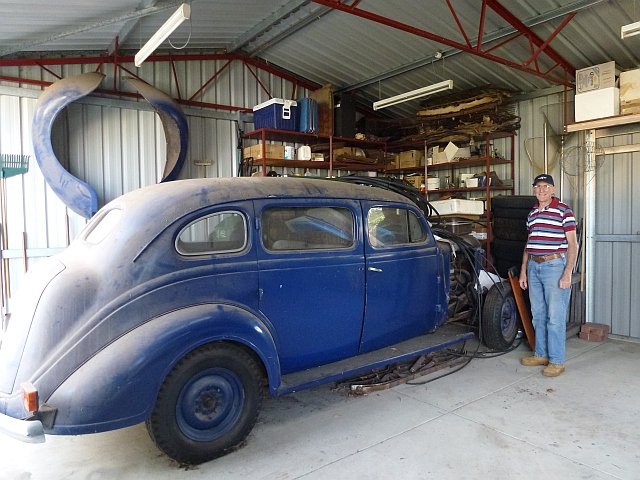
The first time I restored this car back in 1982, it was just a freshen up, a temporary engine, a bit of rust removal and a coat of paint. This time I decided to do a full back to bare metal resto as it is a fairly rare model and has suffered badly over the years. It is the first time I have done a car of this size and vintage, and I dont think I really understood what a BIG job it would be. First problem was the length of the vehicle. I needed to free up 2 bays of the shed, one for chassis and one for body. AS you can see below even with bumpers and front guards removed, it was parked up against my spares shelving. So all the spares had to go on the floor and the shelves were shifted to the end of the shed where I used to keep the garden gear. Next step was to unload the junk out of temporary storage in the 38 body. This included two broken chairs from our vintage kitchen set, which we had bought when we first moved to Mandurah after years of temporary living in mining towns. This was old by Aus standards, a simple design made of solid Tasmanian Oak with Walnut veneer hilites and the decision was made to restore and keep it. It turned out pretty well after I managed to get some more Walnut veneer from an artisan in the Perth hills. Sorry, a bit off topic I know. Then the real work started, stripping doors, seats, guards, bonnet and boot lid, lights, radiator etc. Note the jump seats which are specific to the 7 passenger. Now the problem was where to put all the bits? I hung as much as I could from the roof trusses. But that left a lot of big items like seats, running boards, glass, dash, bumpers and gas tank. So down to the salvage hardware to get the material to fabricate a mezzanine loft. At last I have room to start! Two and a half months to get to this stage.
-
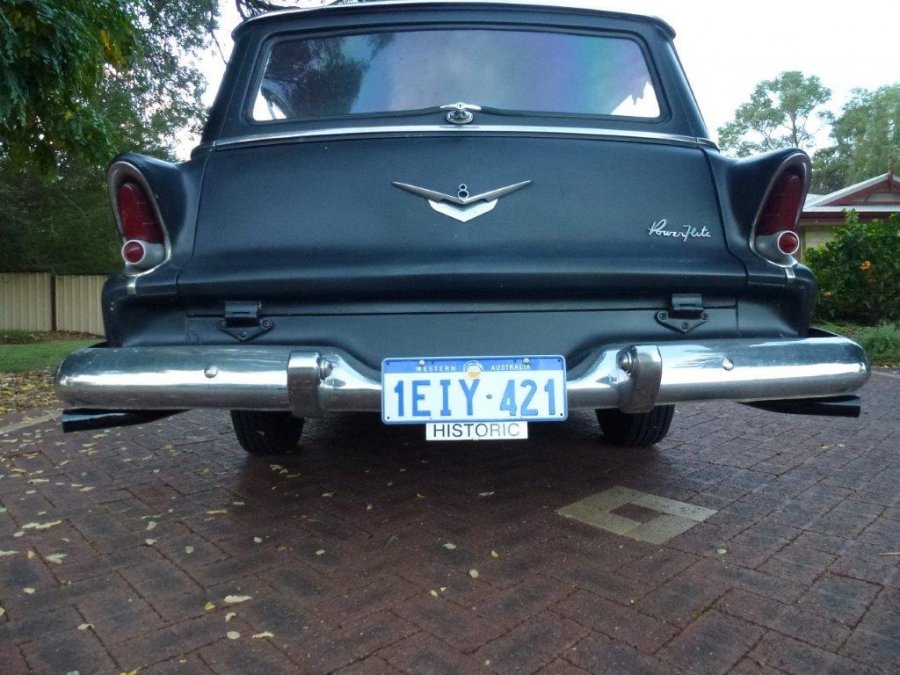
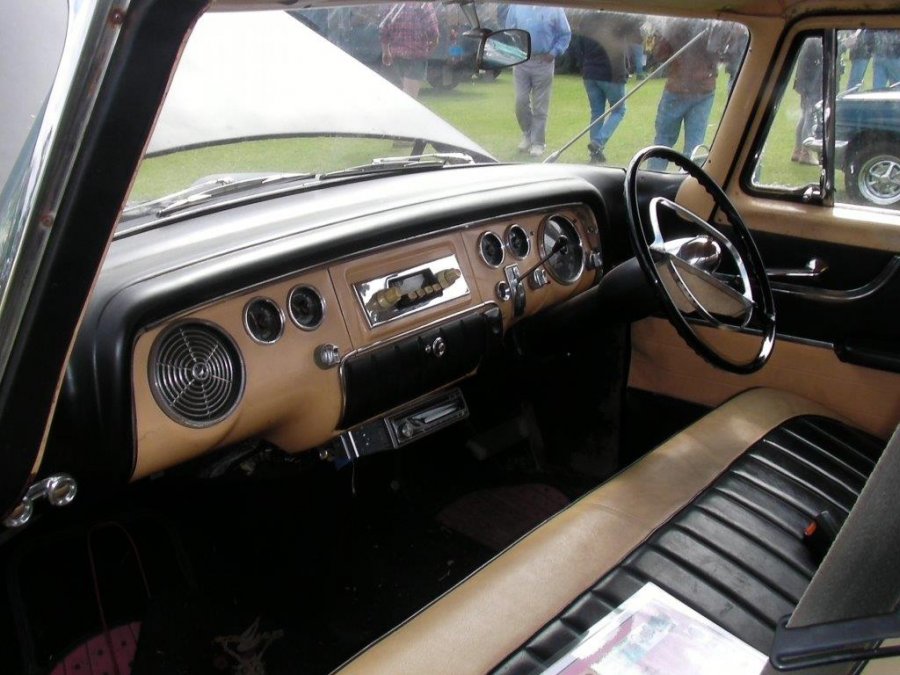
Some pics of my right hand drive 55 Plymouth Belvedere Suburban wagon, 259 poly with 2 speed powerflite, original colour Pompano Peach and Cypress Brown. I bought it complete, registered and running but needed lots of work on brakes, tyres, rims and steering to make it roadworthy. Rocker panels, front guards, floor derusted but needs more work at back and probably roof. Now on club license as cant afford $800 rego.. Currently working on 38 Plymouth 7 passenger.
-
Here is a pic of a spare switch with the knob off, showing the slot in the knob and the tool that I made from an old tyre pressure gauge stem to unscrew the ferrule. You can gently bent the tangs and disassemble the switch to clean the contacts
-
From what I remember the knob was pulled off by pressing a jewellers screwdriver into a small hole at its base. I then made a tool to unscrew the chrome ferrule using some small aluminum tubing (soft so does not scratch), filing the end to create two dogs to fit the ferrule. The switch is held in by the chrome ferrule. You can then disassemble the switch and clean the contacts. I have since seen quite a few switches on ebay at reasonable price, however the conversion to Aus dollars plus ebay/paypal charges plus postage ex US makes it way to expensive for me.
-

Engine stumble off idle, tuning problems: fixed
westaus29 replied to chrysleritis's topic in P15-D24 Forum
Andy Bernbaum shows a picture of the coil bracket for firewall mounting on his electrical parts page but there is no listing for the part. If you google andy bernbaum coil bracket you will see a few parts listed .. I bought one from andy a few years ago so not sure why no longer listed, have sent them an email. Alternatively try this link https://dcmclassics.com/electrical/576-le-183-coil-mounting-bracket-firewall-style.html -
Whoops a daisy ....... I have two of those orange and white ones still in use. They were a gift and always thought they were indestructible.
-
I had to hand crank my 29 Plymouth a couple of weeeks ago ........... pushed it out onto the lawn so I could do some serious welding and grinding on the 38 Plymouth, then couldnt get it back up the hump into the shed. Luckily it started after a bit of grunting. The battery collapsed after letting it go flat ....... wasted no time replacing it! I love electric start. One feature the older cars had is an advance / retard lever or knob. You retard before trying to start and that prevents kick back. My first car as a student was a Renault 750 that I was always having to hand crank, and it didn't have that feature. Luckily my girlfriend's dad taught me how to hold the handle, 'cause one day it backfired and tore the lugs off the starter handle but didn't hurt me. I wouldn't want to hand crank the 38. The crank is about three feet long and comes in two pieces, and doubles up as a wheel brace. Jim
-
With the fuel tank out, it was obvious that there was still lots of solids in it and there was a baffle rattling around loose inside. So I decided to fix it up using the same process I used for my 1929 Plymouth tank which is still ok after 20 years. - removed the fuel level sender and blanked off the hole - washed the tank out with water as far as possible then rinsed it with a pint of denatured alcohol and dried it with compressed air - removed one end of the tank by gently heating the solder joint with an LPG torch while tapping to make the solder run out and prising the joint open - with the end off I was able to clean out the rest of the solids and see that the tank was in good shape with only light surface rust - removed the fuel suction pipe by melting the solder and drilling out rivets, so as to get access to remove and repair the baffle - cleaned out the rust with 10% muriatic acid using rubber gloves and safety goggles ( quick but I dont usually recommend using it on fragile items) - prepared the inside surface with 10% phosphoric acid which coats the bare steel with an iron phosphate which resists rust, then rinsed and dried thoroughly - soldered the baffle and the suction pipe back in the tank then soldered the end back on the tank - poured in a quart of POR15 fuel tank sealer, sloshed it around then drained excess out and left it to dry This process is very similar to what you would do if you buy a full POR15 tank sealer kit, but much cheaper. See pics below
-
the retainer goes over the leather and the "spikes" punch thru and are bent to clip into the housing. I have two original 37-38 Plymouth seals and that is how they are.
-
Another possibility is an air leak at intake manifold or gasket. I also suggest advancing the timing about 5 deg or until it pings to take advantage of modern gas Jim
-
I havent seen Les's Imperial in the flesh, but gave him a bunch of parts many years ago to help with his restoration, as I had picked up a short wheelbase 38 Imperial in Perth which had been savaged by an amateur restorerer who removed all the chrome including dash instruments with hammer and screwdriver, and lost half the engine parts including camshaft and lifters. I bought the wreck for $50 and Les drove over 3000 km west to pick up the bits and insisted on paying the $50!! I have since bought a few parts from his extensive stock ex Halvorsens.
-
First step in the Plymouth teardown was to drain the fuel tank, put some fresh gas in and prove to my youngest 31 yr old daughter that it still runs. Out came a trickle of oily red liquid, took about an hour to drain as kept blocking with something like red sugar. So we fed the carby by gravity and fired up the old girl for a few minutes, and it ran ok. Next step was to pull the fuel tank to clean it. The pics show the red liquid and solids that came out. I have never seen anything like it before.
-
To answer Andy's questions, I got the tape out and my 7 passenger Plymouth wheelbase is 132 inch, same as US model. Serial number is 10548068 which means the chassis was built in Detroit about middle of production year, based on data in parts manual, and is original RHD. It has a TJ Richards body number of TJR 71563, and a stamping of P6-S7-4 on the firewall and inside top of trunk lid (which I discovered only while working on the lid recently) presumably because they were semi hand built to match. The front doors are longer than sedan and have three hinges, I believe same as coupe. The rear doors are longer than standard, made by cutting a standard door and welding an extension in the middle. The roof is a standard roof with insert to extend it and there is a big mismatch in contours so lots of lead was used to 'bog' it. The floor also has an insert with twin wells for the two pop-up seats. Many of the mechanical components are different to the sedan. It has 11 inch brakes compared to 10 inch standard, diff ratio is 4.3, and rear axles are beefier as I found when I changed diff to 4.1 .. an expensive exercise as had to swap axles and replace wheel bearings. The front axle is stamped S7 but dont know how it is different from standard. The prop shaft is two piece with a steady bearing in the middle. All over pretty lucky as all major components are present and in good shape. I was told by the previous owner it was a taxi and I found lots of confetti behind the upholstery. The spring hangers and brake and clutch pedals were all badly worn and showed signs of having been repaired by brazing in the past. A friend in nearby Bunbury who has since passed had an identical low mileage car in excellent condition which was formerly a funeral car. He also had a 1938 Chrysler 7 passenger in similar condition. I dont know where they have gone.
-
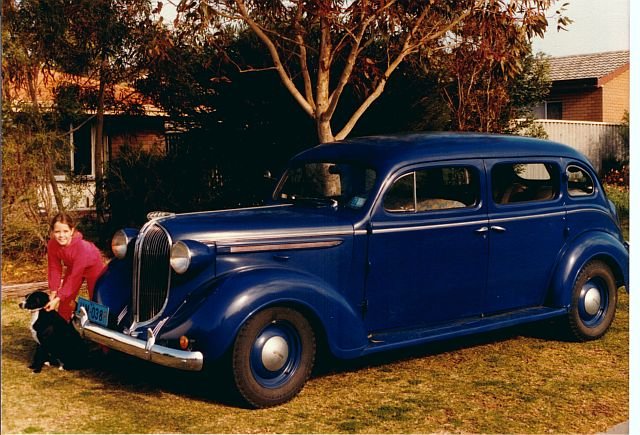
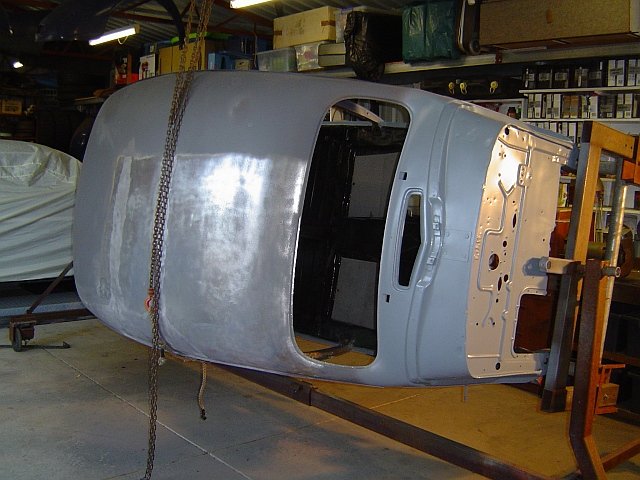
I have visited this site a few times in the past but recently started again and have been impressed with the activity, the assistance offered and the relevance to my interests. I currently have a 1929 Plymouth tourer with body by Holden Australia restored on club licence since 1999, a 1955 Plymouth Belvedere Suburban RHD built in Detroit with 259 V8 and 2 speed auto also on club licence, and a 1938 7 passenger Plymouth with Aussie Richards body, in a million pieces. This my first attempt at a post with pics so hope it works. I purchased the '38 running and licensed in Feb 1981 with the plan of having a car I could use for club events while I slowly rebuilt my 1929 Plymouth from a wreck. It was painted black, the engine barely ran and the leather upholstery was falling apart, but we drove it onto the trailer under its own steam. I cant find any pictures of it as bought but I must have been dazzled by the fact it was a 7 passenger and had all its chrome and fittings. There was no water in the radiator and It turned out the engine had a hole in the head above No 1 cylinder, every pot had broken rings, and water had corroded the bearings, crank and camshaft. The bottom of each centre door post was rusted out, and there was rust in the boot (trunk) area. By July 1982 I had it on the road with new paint (Ford Neptune Blue), new tyres and a temporary engine out of a 1936 Dodge utility (pickup) that we found abandoned up in the hills, and sheets tacked over rebuilt seat frames. My daughter in the pic below is now 41! In the next couple of years I fixed oil leaks, replaced spring bushings, brakes and wheel bearings and changed the diff from original 7 passenger 4.3 to standard 4.1 ratio as we tend to travel longish distances. By 1984 I was ready to replace the interior with upholstery in original blue leather. When I stripped the hood lining I discovered I had serious rust issues under the lead used in large quantities on the roof, which was fabricated from a standard roof cut in half with a central insert about 18 inches wide. The repairs were completed by Nov 1985 and the car was back on the road, however the upholstery guy was no longer available. In 1988 we had a surprise addition to the family, a baby girl after 17 year drought! The upholstery money went on adding a bedroom. In the meantime the car was used as a daily driver by my wife on the school run - rule was "no running in the car"! By 1995 the brake lines had rusted thru, the radiator had collapsed for the second time, the exhaust was shot, valves keep sticking and to cap it off I backed it into our Falcon wagon and badly dented the boot. I deregistered it in disgust as by that time I was making progress on the 29. Fast forward to 2012 and we have changed address, I now have 1/2 acre and a 5 bay shed. However to fit the 7 passenger in it I had to remove the front clip. The car is now a mobile storage unit for surfboards, wetsuits and a couple of broken chairs. But it still runs! I plan to post an outline of the rebuild process which started in 2012, but here is a recent pic of the body on a home made rotisserie - stripping back roof to bare metal after a VERY bad sand blast and prime job. Jim
- 83 replies
-
- 10
-

-
I had a top break off a piston in my 29 Plymouth 4 cyl flathead at 54 mph back in the days when 3 kids were at college and funds were low. Stopped and had it towed home. Similar story, a bit of a rattle and no damage to the bore, so found an oversize second hand piston, had it machined to fit , honed the bore with crank covered then gave the crank a good wash with kerosine in a squirt bottle and put it all together and took it quietly for a while. did quite a few thousand miles with no issues. As stated by others above, part rebuilds were common in the old days. Of course if you plan to drive it hard, you need a total rebuild!
-

No restistance at the brake pedal: Master cylinder worn?
westaus29 replied to 50s-coronet's topic in P15-D24 Forum
You are right, I forgot vinegar. It is slower and gentler than lemon juice but for me lemon juice is free as have a tree that is always laden. At one stage diluted molasses from a stock feed outlet was in vogue, but I found it also is agressive to the metal and the smell got the no vote. I would always recommend a final rinsing with methylated spirits (you call it denatured alcohol, available in hardware stores?) before brake fluid as it dissolves any remaining water then quickly evaporates. I always have a squirt bottle of it handy for brake work as it also washes off brake fluid. -

No restistance at the brake pedal: Master cylinder worn?
westaus29 replied to 50s-coronet's topic in P15-D24 Forum
JSabah - keithb7 is correct. The ring seal goes infront of the valve. The groove in the push rod is for the boot. I recently helped a friend where the ring seal was in the wrong place AFTER the valve. For some reason it had worked ok until he changed rubbers on the rear wheel cylinders, then he could not get the master cylinder to pump to bleed the brakes. Do NOT use muriatic acid on car parts (exception maybe a very clogged block for rebuild). This acid is way too strong, attacks the metal faster than the rust and will penetrate into the metal and is very hard to neutralise. I recently used it on a rusty manifold and it is still sweating rusty acid - a lesson learned, be patient!. Dilute phosphoric acid is better as it coats the metal with ferric phosphate which passivates it. It is the main agent in most rust removal preps that you can get from a hardware store. Citric acid is more gentle (lemon juice) but a bit slow. If you can find an acid based radiator cleaner that is labelled as sulfamic acid (looks like sugar), it is very gentle and fast and I believe contains an inhibitor so it doesnt attack the metal. I have used that on instrument mechanisms without damage. Not easy to find. Flush with water then methylated spirits (not sure what you call it - methyl alcohol as sold at hardware) Jim -
Your uni joint is not mopar ball and trunnion. Its a type I havent seen before. Is the rear axle and diff mopar? I cant see from the photo. It may have been modified in which case you will need help from a repair shop that specialises in that area. Jim
-
If you plan on fitting new shoes I recommend they should be machined to fit the drums as if diameters dont match you can seriously lose braking efficiency. Old drums are usually worn larger in diameter and would not match up to new standard shoes. I personally take old shoes and drums to a brake specialist who renews the linings (with oversize if necessary) and machines all to fit for a very reasonable price. They also can check that wear is within specs. Jim
-
To remove and replace the field coil screws you need a large screwdriver bit with 1/2 inch drive that fits PROPERLY, and ideally a cheapie impact driver. Not hard just be careful not to damage the screws. In my experience 6v field coils are built like a brick sh!thouse and most times the problem is a broken joint or missing insulation. Joints can be resoldered with a big iron and missing insulation can be repaired. In 1999 I repaired a starter that had been thru a fire by peeling off the burnt field coil insulation, painting with epoxy varnish, wrapping with cotton tape from the wife's mending kit, then painting again with epoxy varnish and baking in the oven when she was out. It still works fine.
-
I agree with Andy - after looking at alternative radials for my 5 inch rims, and unable to find wider rims locally, I chose 205-75-15 as the max I would be game to use and have had no problems except ride is perceptibly harder, especially from front end. These are on a later Plymouth - 1955 Suburban ( I also have a '38 Plymouth under restoration but that will have original type tyres) regards Jim
-
To align the clutch assembly, I suggest you use a 6 inch length of 3/4 hardwood dowelling, which should be a good fit inside the clutch plate splines and also into the pilot bushing. Fit it thru the pressure plate and clutch plate, then insert it into the pilot bushing, then do up the bolts sequentially a turn at a time, then remove the dowell. Alternatively, use a spare gearbox input shaft if you have one. No fancy tools needed. That works for my 29 and 38 Plymouths and should be same for yours, tho you should ckeck before you start


