-
Posts
152 -
Joined
-
Last visited
Everything posted by westaus29
-
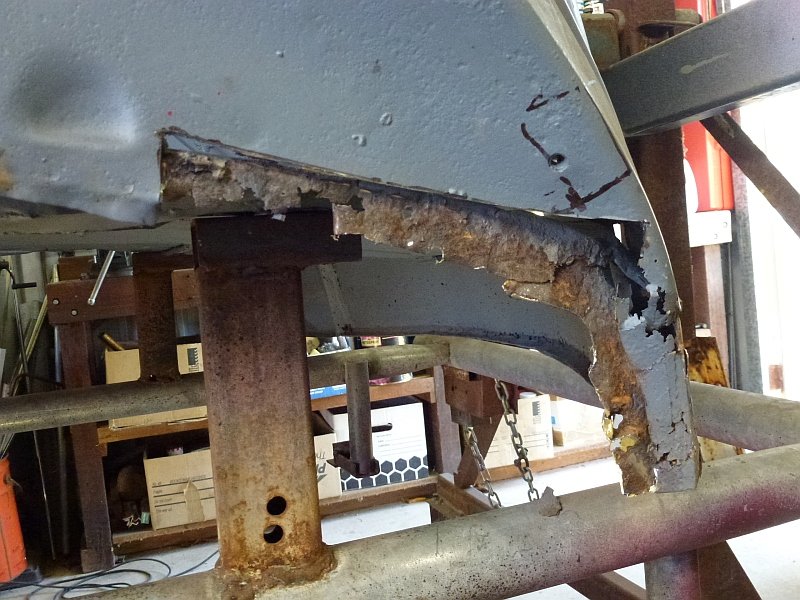
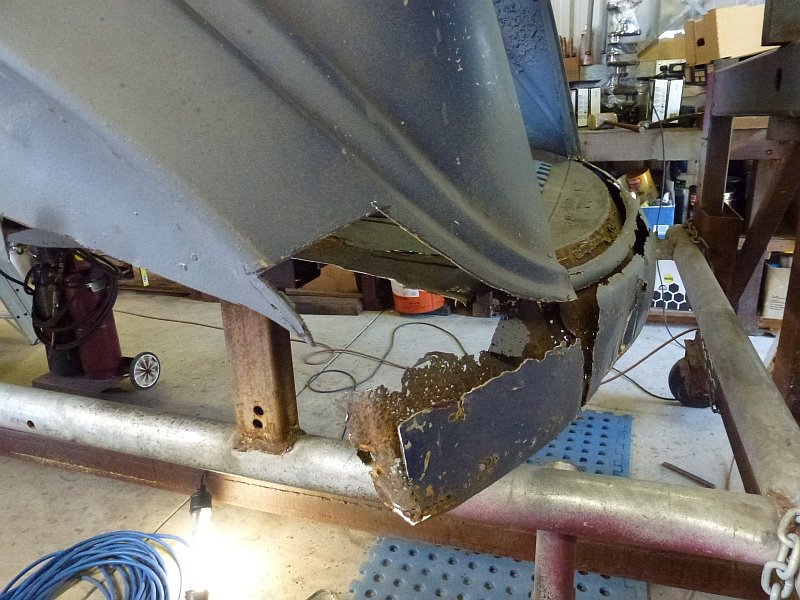
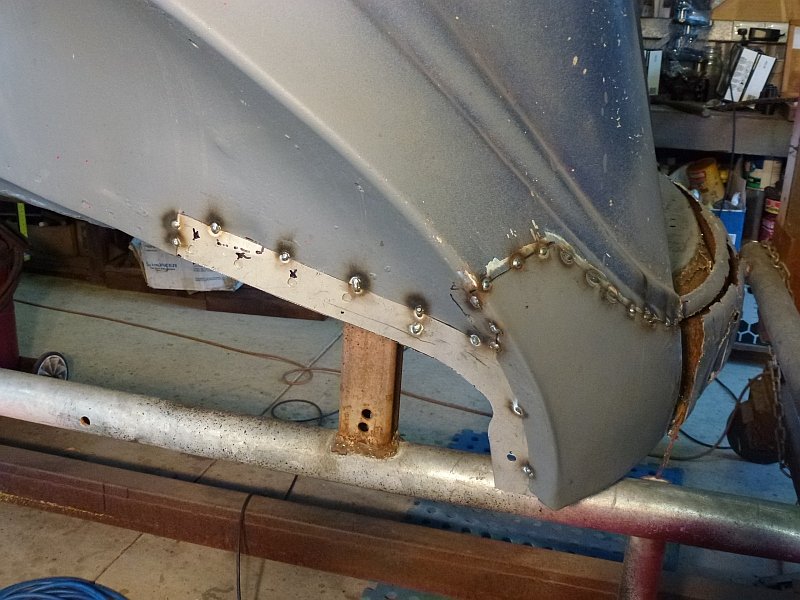
In starting the rust repairs at rear of body, I ended up a bit out of my depth in part due to taking up mig welding for the first time, also despite not looking bad, there was very little usable metal left to hold things together. The pic below shows what I started with. The beaver panel was shot with both inner and outer 50% gone. Both rear corners were toast and the boot floor was full of holes and buckled from numerous rear enders. I managed to buy a replacement outer beaver panel which included corners on USA ePay. The centre panel was close to same profile as the Aussie body but the corners turned out to be too narrow. I also had a boot floor panel fabricated up with the original ribbing pattern - more about that later. Next we did a one day mig workshop with one of our experienced club members. Then I started on the left side and discovered that the rust extended thru 3 layers, including the edge of the boot floor. I cut out the rust and tacked in the layers one at a time, had to use guesswork with the boot floor section as it was badly dented and buckled. All ok so far, love the mig. Moved to the right side which looked in better shape, but found rust behind the inner re-inforcing that extended right up to the edge of the mudguard. The further I went the more rust I found. And then the mig went to SH#$%, and I was very unhappy with the result so I stopped to regroup. Took a 4 year break .. ??? Moved to kitchen renovation, then rust repairs on my 55 Plymouth (which went well, by the way), then 38 chassis and engine, before returning to tackle the body. Turned out the problem with the mig was the wire spool had come loose as a result of a missing clamp .. fixed with a cable tie. Not a pretty look, that right corner.
-
Try moparmall, may be others. They list different years with pics
-
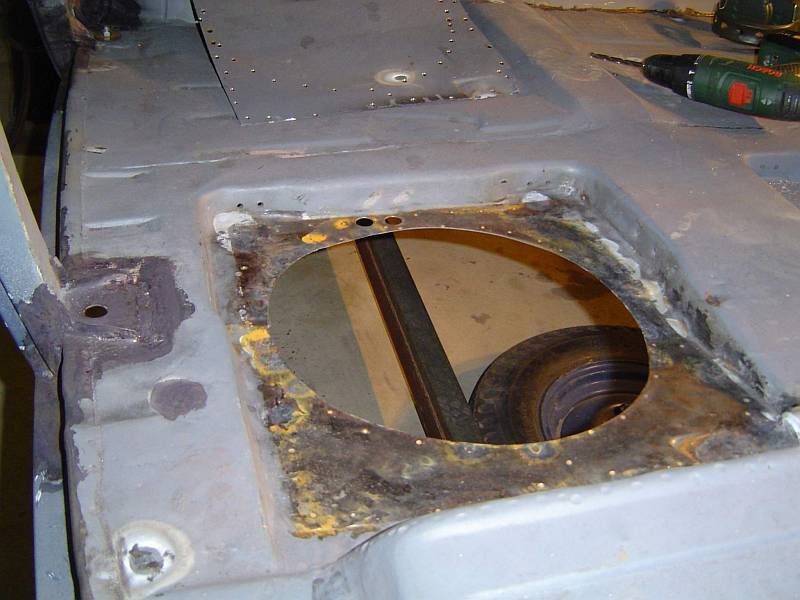
Yes the circular hole was ex factory, spot welded around the circle as well as floor edges, and I repaired it more or less to original. I did seal it both sides, just didnt show all the pics. I dont believe there was any sealing ex factory, only an underbody bitumen coating about 3mm thick. There was lots of rust under the floor plate. Obviously the seat wells were a moisture trap, and seeing as the roof leaked due to the way the stretch body was built, it is a wonder the rust wasnt worse.
-
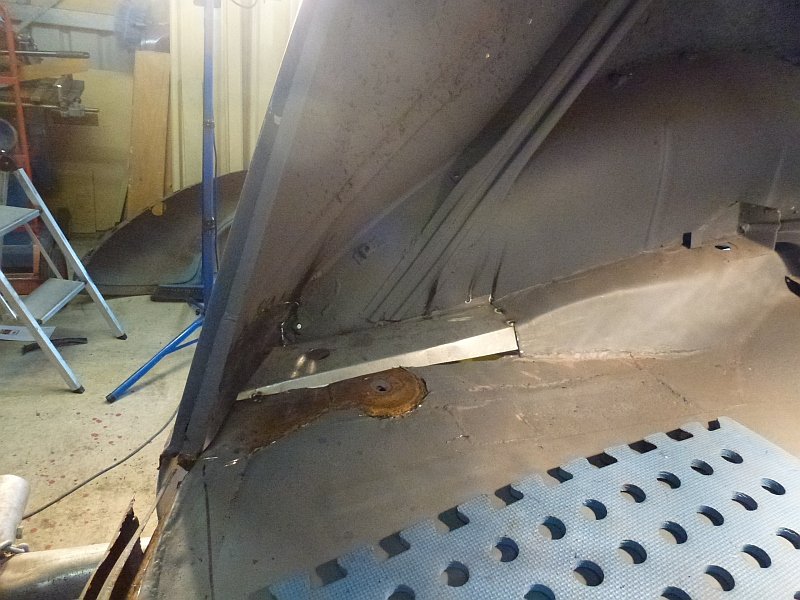
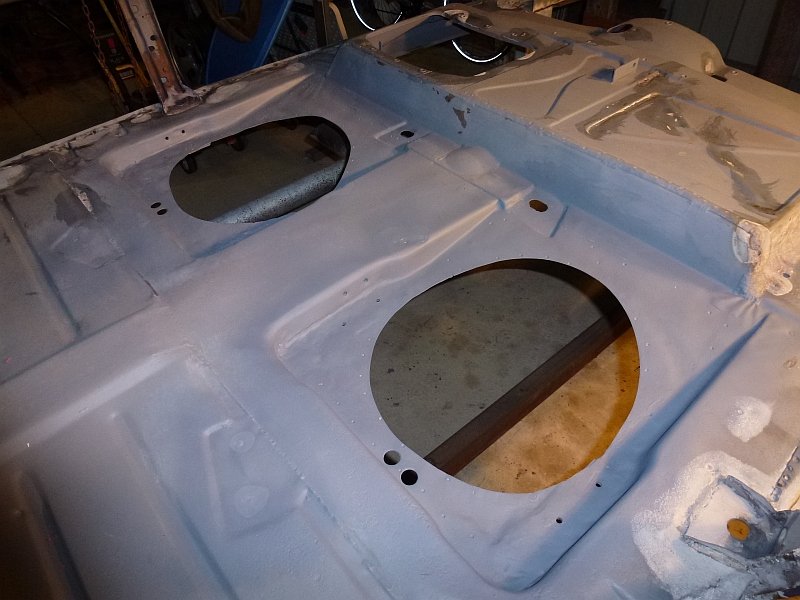
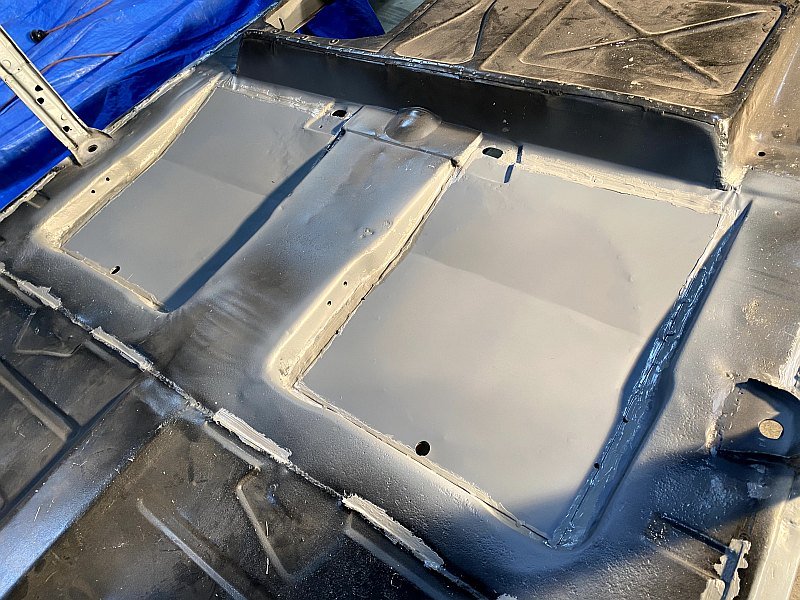
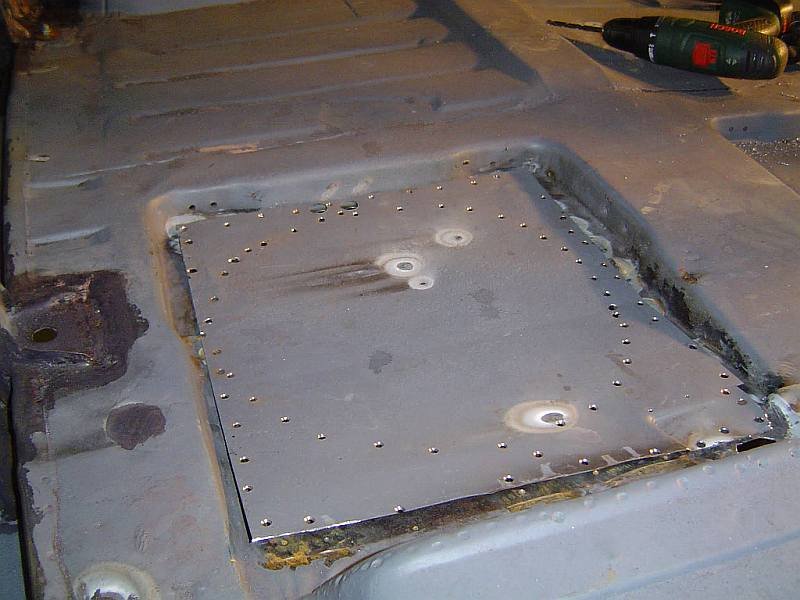
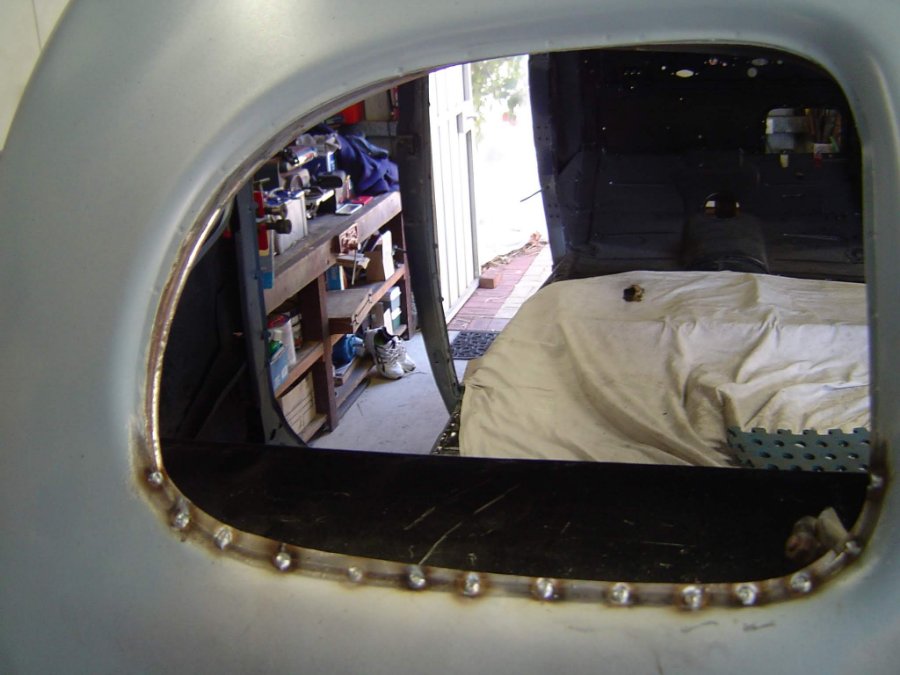
Next job on the saga of restoring the 7 passenger was to repair the jump seat floors which were inserts. They didn't look too bad but had bad pitting and pinholes. The rest of the floor was in good condition so decided to remove and replace them. I put it off for a long time as could not work out how to weld the new floors in, but eventually used a hydraulic jack and length of timber braced against the roof to hold them in place, and plug welded with the mig boosted pretty high. Spot welds to drill out every two inches over and under This exposed the rust underneath which was sandblasted and etch primed Then plug welded new floors and sealed edges with mastic
-

Well I did it again...1938 Chrysler Businessman Coupe
westaus29 replied to keithb7's topic in P15-D24 Forum
Hi Keith, that is a great find! Unobtanium over here so I can't be envious. You are obviously enjoying the process of debugging and road testing it, so much more productive than a total strip down project. -
Only just saw your post 1938 Duds, I would have thought I would get an email notification. Great to see another one! A big job ahead of you. I would strongly recommend you pick up a std sedan in decent shape for spares as your car will be worth it in the end. I was tempted several times to pick up someone's abandoned project but here in WA am too far from the action.
-
I finally completed the hinge rebuilding last week. Purchased a smaller 5/16 to 11/32 reamer and silver soldered a 1/4" extension to it so it was long enough to go all the way thru the door hinge half. That also meant I could mount it in my trusty little Bosch drill, with an extra long extension so I could reach the middle hinges on the front doors.. Bought an 8.5mm drill to rough out the hinge holes to about 0.334" then used the reamer in the Bosch to ream out to about 0.340", hand held at low speed with torque set near minimum so that I did not destroy the reamer each time it grabbed. Very slow but got there in the end (the hinge plates are bent to form the hole for the pin, with the result that there is a slot in each hole which grabs the reamer). Thanks MikeMalibu for hints!
-
I would not risk taking it apart. I would try mild chemical cleaning plus a mini wire brush to remove the rust deposits, followed by a rust stabliser, primer and paint. The simplest would be to get some phosphoric acid based rust remover and paint it on the steel strips, several coats, each followed by wire brush or stainless steel wool.. It attacks the rust and puts a phosphate coating on the steel, while it wont hurt the stainless if you take care. Use rubber gloves and safety specs. Dont drop it in a bath and leave for a week, anything could happen. Another mild cleaner is phosphamic acid which is sold as a radiator cleaner, looks like sugar and mild on steel. Diluted molasses or lemon juice may also be used but they both attack the steel and have to be watched carefully. A final option is a caustic bath, about 4oz caustic per gal of water, immerse part and connect to -ve terminal of battery charger, positive to a steel bar immersed in the bath, full safety gear needed as caustic is nasty to skin and eyes.
-
Your rubber mounts look quite different to mine and the "flat" washer looks larger. They do not look like they came from Moparmall. I have 4 types of mount and spent a long time looking at the old rubbers to try and figure out where they went. At most fixing points the body sits on a moulded one like yours and has a flat rubber washer with "ears" under the chassis mounting bracket. Just in front of the front seat there are holes in the top chassis rail and I concluded that a rubber washer like your flat one locates on top of the rail with a fatter flat washer under the rail. Behind the rear seat are the studs. I am not so sure about this but decided a fatter flat washer sits on top of the rail and a rubber washer like yours locates in a hole on top of the body. At all points the chassis is sandwiched in rubber and the body is sandwiched between metal washers, except behind the rear seat where the body is sandwiched in rubber. All an educated guess, I could be wrong.
-
Yes very expensive, plus I had to order more for the 7 passenger. The rubbers all go under the body with a metal washer above, except at the rear studs where there is a rubber sandwich. It might be worth doing some research as I think I read recently there are some cheaper GM mounts can be used.
-
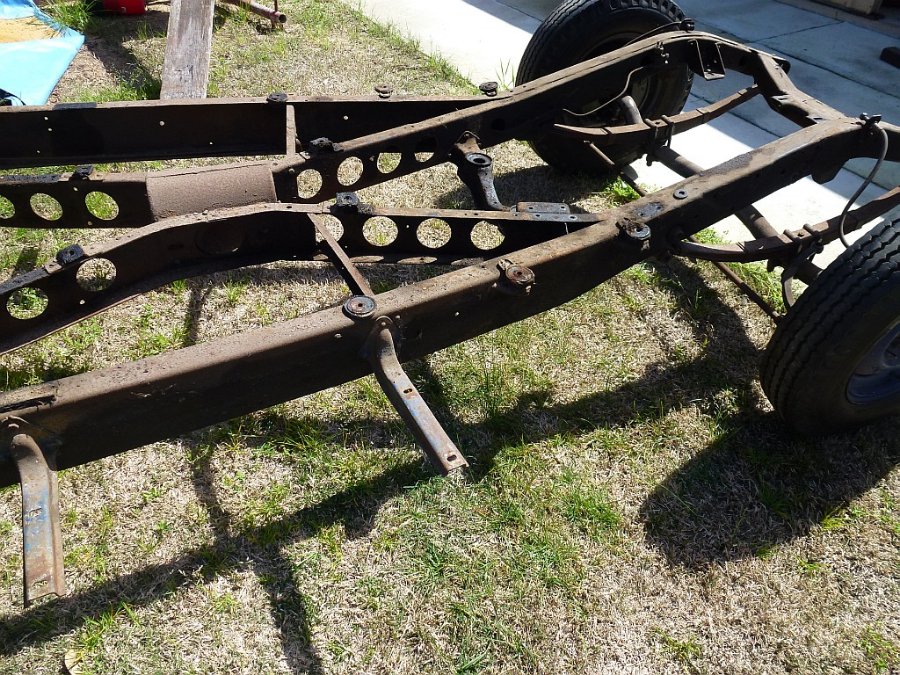
Here are some photos of my chassis with mounts still in place. The studs go over the rear axle, I had trouble figuring out how to re-install them. I got my rubber as a set from Atlas Obsolete, now moparmall My chassis is for a 7 passenger but the principle is the same
-
I have disassembled 4 or 5 mopar flatheads and those two studs are often VERY hard to remove but will come out in the end. They are rusted into the manifold and into the block. I once tried drilling one out but very hard steel and could not keep drill straight, damaged the manifold. The studs do not protrude far which makes it worse. The location makes it impossible to get heat where it is needed. Maybe you could get a hacksaw blade in next to block and saw thru the stud but that risks damage to faces. I think the safest would be to soak with penetrating oil for several days then weld a nut onto the stud and use repeated impact in both directions using a six sided socket, maybe with an adjustable torque rattle gun but not too hard. Even when they start to move they are still hard. You can get new manifold fasteners from mopar suppliers.
-
Same problem in Australia. Ordered gaskets from US supplier via eBay and Global shipping program. They travelled about 100 miles then dropped off the tracking radar. The supplier eventually sent a replacement but no apology from eBay. Eventually got them after 3 months. Global shipping costs to here are similar, a total ripoff. I now put the effort into local source or make my own.
-
You might double check the seal, as I discovered my box is out of 41-42 model, according to manual (Aussie manual covered 36-42 in one book). I believe they are same except for sector shaft adjusting nut which was hidden under a cover on mine.
-
Hi Keith, merry Christmas to you and your family! Amazing how the job scope keeps expanding, but hopefully you will be back on the road soon. The aim should be to keep it on the road. You are on the right track with your steering. I recently installed my box in the chassis and topped up the oil as it was quite dry. Next day there was a pool on the floor. Out it came again and replaced the seal. I took the old seal to my local auto supply store and they had one on the shelf. Not one of those stores where they ask you what car is it for, then say sorry its not in our catalogue. It was a National 352560, 1.125x1.562x0.25, price $A14. I have also seen them on ePay for stupid prices. Nifty puller you used for the wheel. I made one out of blocks of wood, steel plate, a couple of bolts and the centre of my puller
-
Thanks for your sound advice. The Bernbaum pins are listed for 28-48 bodies. I bought my 11/32 pins on eBay, now nil stock but these look like the same https://www.millsupply.com/auto-body-rust-repair-panels/chevrolet/blazer/1973-1991/73-91-chevrolet-blazer-hinge-pin-98759p.php The advantage is they are cheap compared to many pins. They are designed to go with bushes and you can buy kits that include bushes but I intended using them without, as per original. The pin dia is 0.338 inch compared to 11/32 which is 0.344 inch. I did buy a reamer but unfortunately it is adjustable 3/8 to 11/32 so is no use. I played with it a bit in a 21/64 drill hole which is a tad over 0.328 inch. It is a bitch to use, ended up mounting in drill press and turning by hand to get a decent result. I think I will order a smaller reamer and persevere as I can't see an affordable alternative and I need to restore the passenger side hinges. I am pretty sure my Plymouth was a taxi for much of its life which would account for the hinge wear pattern.
-
According to "Standard Catalog of Chrysler 2nd ed" the 1927 models were: 50 - 170 ci four, 60 - 180 ci six, 3 bore x 4-1/4 stroke, engine nos H-21001 to H-72800 70 - 218 ci six, 3-1/8 bore x 4-3/4 stroke, engine nos G-142301 to G-151600 80 - 288 ci six, 3-1/2 bore x 5 stroke, engine nos not stated but possibly E-******** if similar numbering convention So you may be able to tell difference by engine number or stroke.
-
My 38 7 passenger Plymouth has 5/16 pins about 2 -3/4 inch length, drivers side no wear, passenger side lots of slop. I sourced GM pins advertised as 11/32 but when they arrived they are undersized and sloppy fit in 11/32 drill hole. Asked Andy Bernbaum about their pins, they are way too small at 17/64 and 2 inch length. Thinking of buying 5/16 hi tensile bolts and hand finishing them, can always upgrade the passenger side later.
-
They are not hard to rebuild yourself. Brushes and bearings are readily available. Front pulley can be a bit hard to get off and bearing needs a small puller. Find someone with a lathe to face the commutator if needed. You may need a soldering iron with decent heat input and some slip-on insulation sleeve to replace ant dodgy bits. There are lots of posts with helpful info.
-
Reading the comments above gives me a better understanding of why so many people have problems with Mopar Lockheed brakes. Despite living in an outpost of civilisation in West Oz, we are blessed with Perth Brake Service that has been there over 40 years, offers advice, a choice of lining material, reliable bonding service, drum refinishing and matches shoes to drums. They also resleeve cylinders and source rubber parts. First used them for my 29 Plymouth in 1979, have done lots of brake jobs for kids, and two more Mopars (38 and 55) since with zero issues, even did a Pommy Daimler with hydraulic front and mechanical rear for a friend. It is a 100 mile round trip times two to get there but well worth it. For reliable results in such a critical area you really have to find a way to cover all those bases.
-
I picked up a 37 Plymouth engine/gearbox unit and it had rear mounts way different to my 38. There are some on eBay that look like them https://www.ebay.com/itm/3-pc-Set-of-Engine-Mounts-for-1935-1937-Plymouth-Dodge-/321093119888
-

Help Me Further Understand Top End Engine Wear
westaus29 replied to keithb7's topic in P15-D24 Forum
My experience is that worn valve guides (or worn seals in an ohv engine) show up most often as a puff of white smoke when first start, or when pull away from lights after idling a while, or when decelerating. So I support your comments. I had a 6 cyl Falcon that had done over 300,000 km that did that. I eventually had to take head off to decoke and there was no appreciable wear on bores, you could still see the original machining cross hatching on the non thrust side of the bores. So I have always figured a bit of oil at startup is a good thing for wear! When I had my 29 flathead rebuilt, I foolishly asked them to re-bush the valve guides. I soon had major loss of compression and I found they had split all the exhaust guides which caused valves not to seat. So VERY bad wear can do that but would not normally expect it. Valve guides are cheap and relatively available from all normal sources. I changed mine using a suitable high tensile bolt, short lengths of tubing and heavy washers. That rust is strange and I dont think it is related to valve guides. You have a lot of wear in top of cylinders. Maybe high humidity and cold weather could combine to cause condensation when stored. I have never seen it in a running engine, just in lots of decrepit ones! -
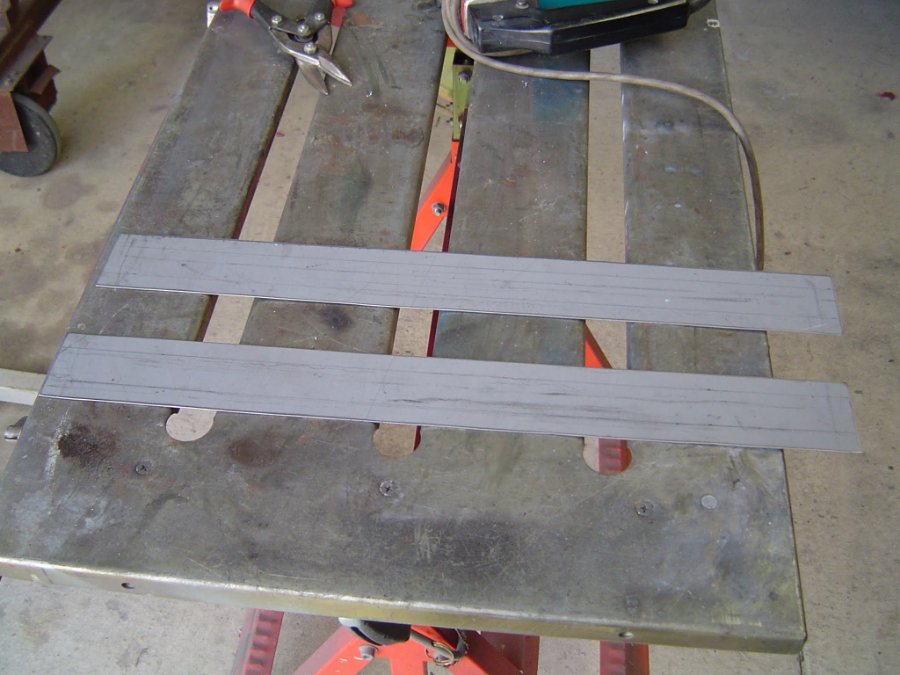
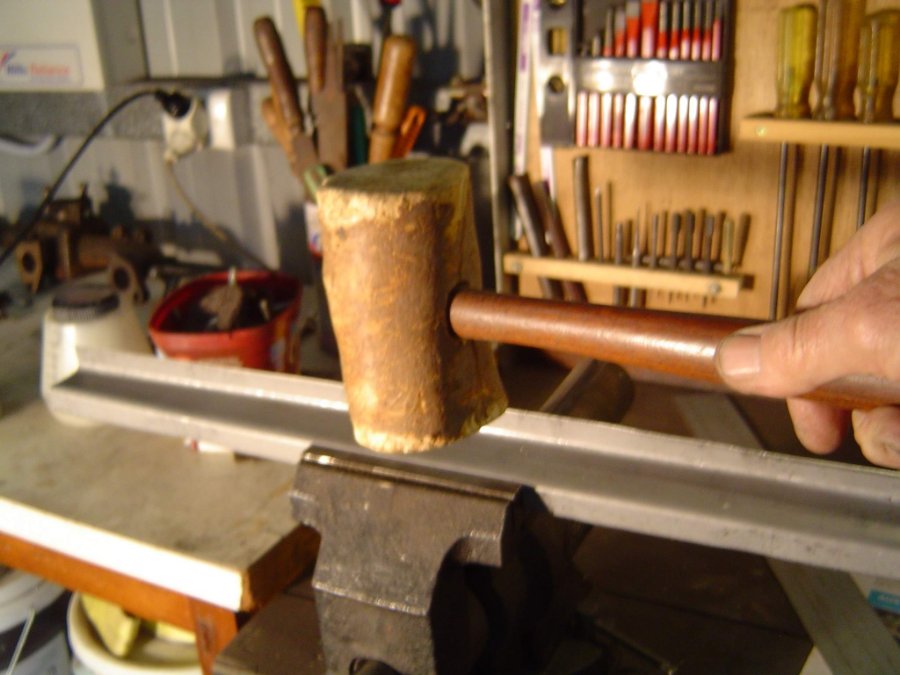
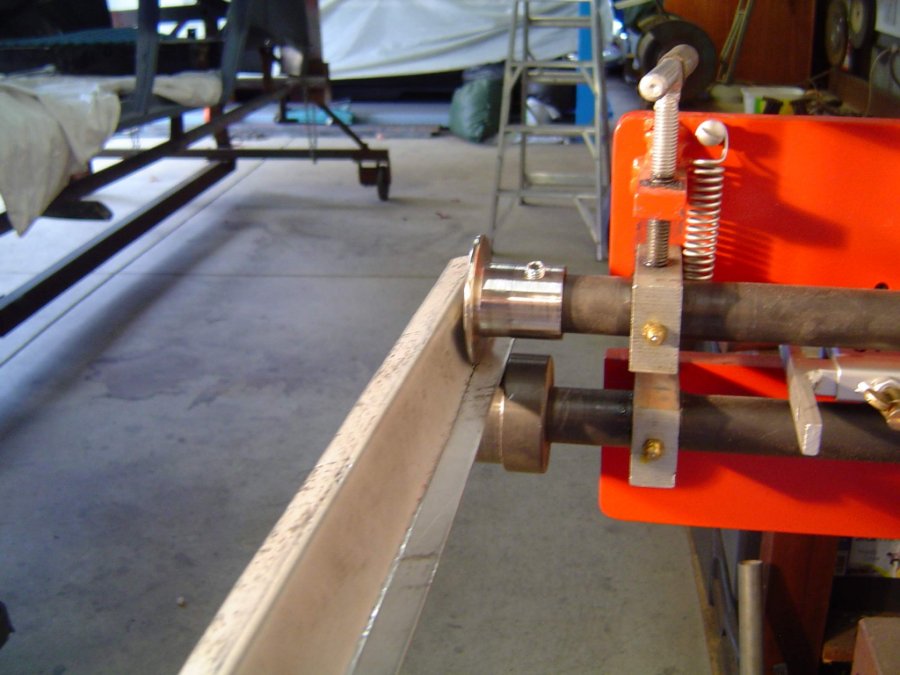
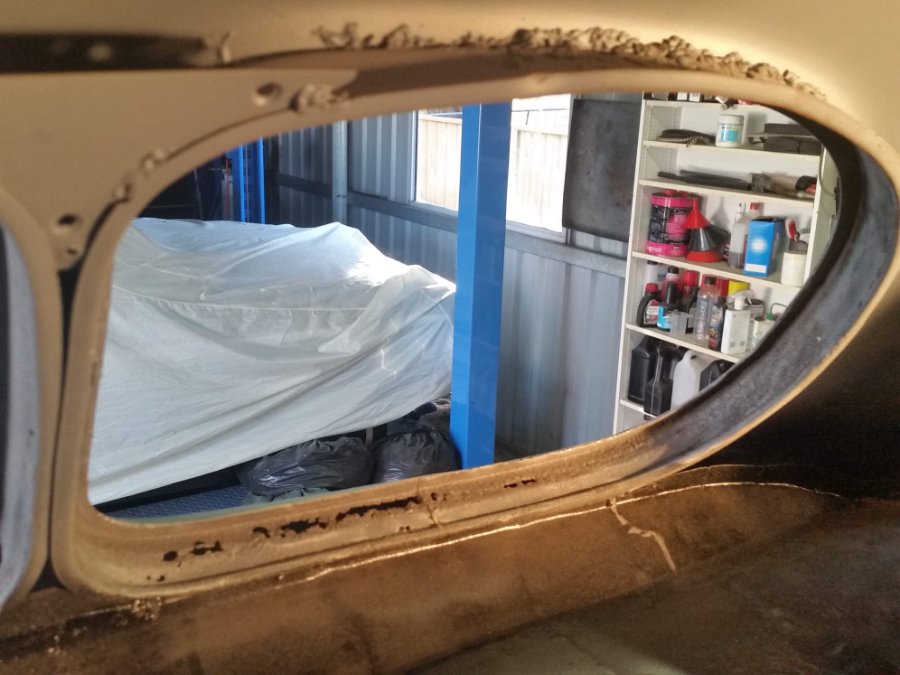
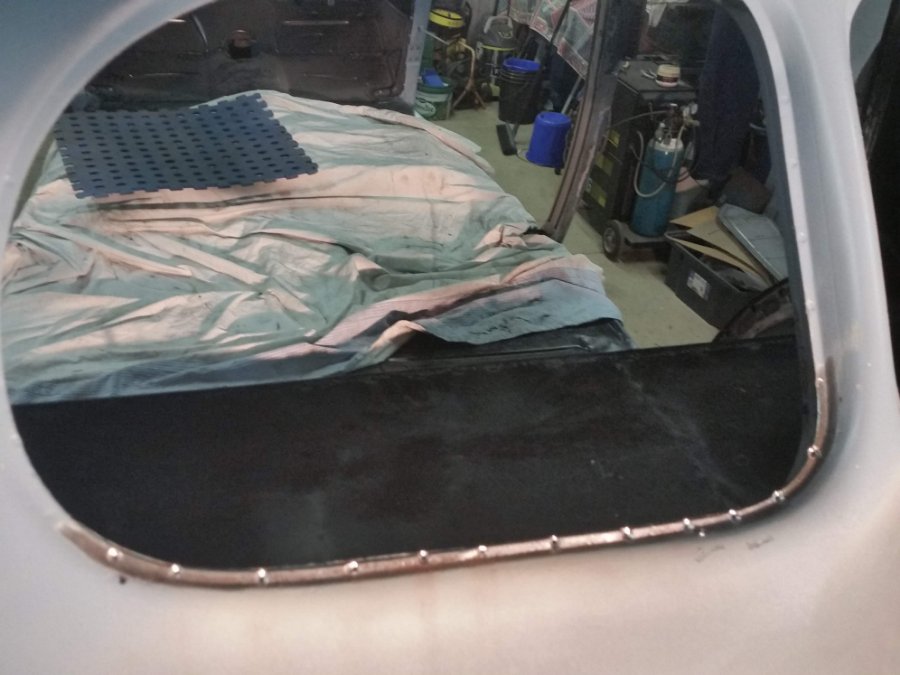
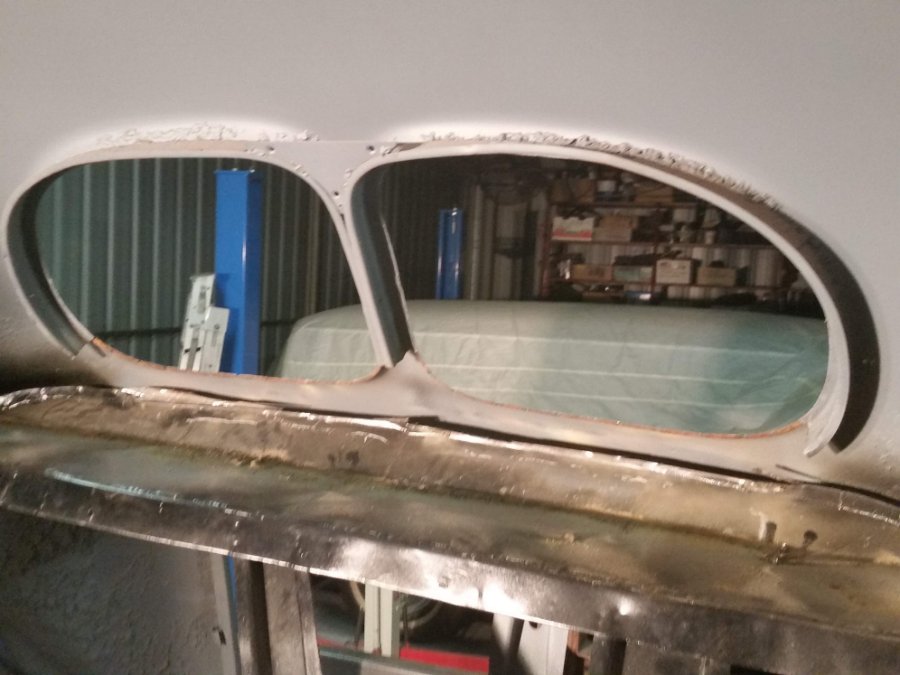
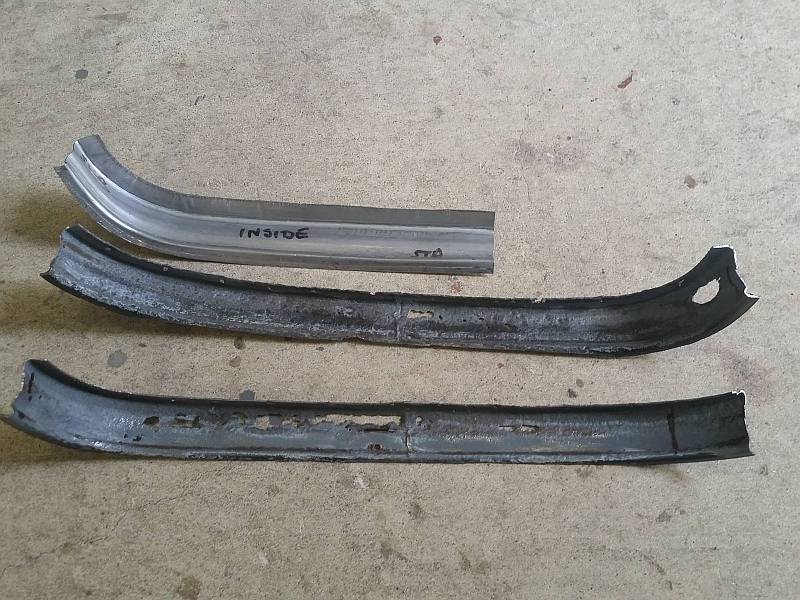
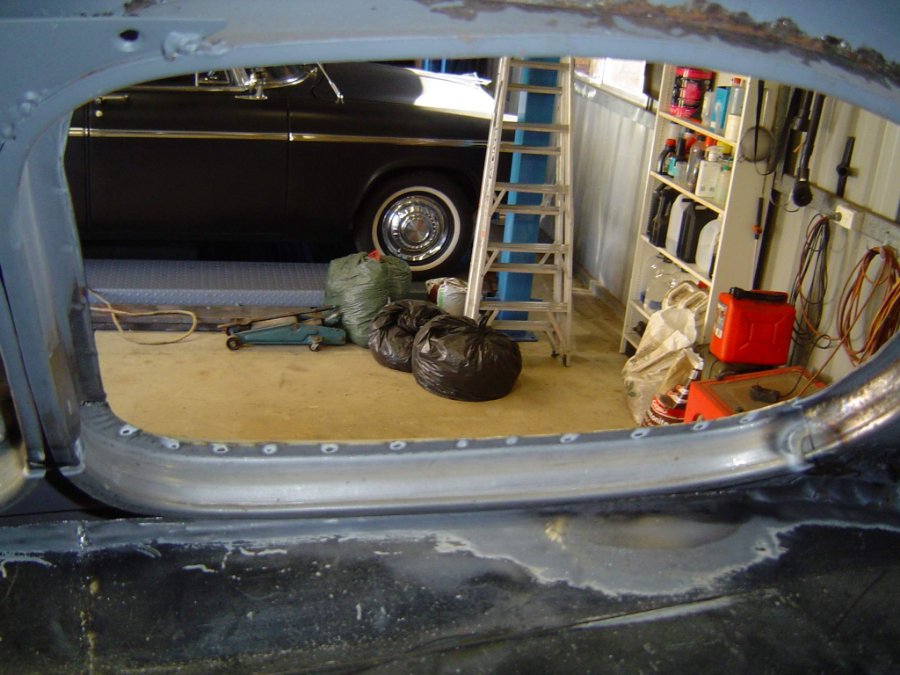
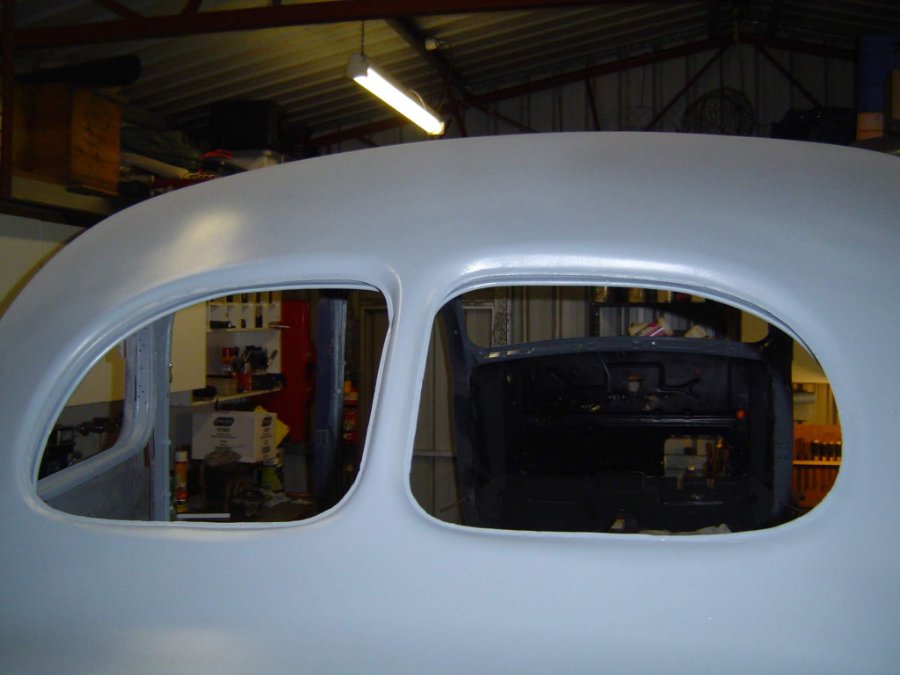
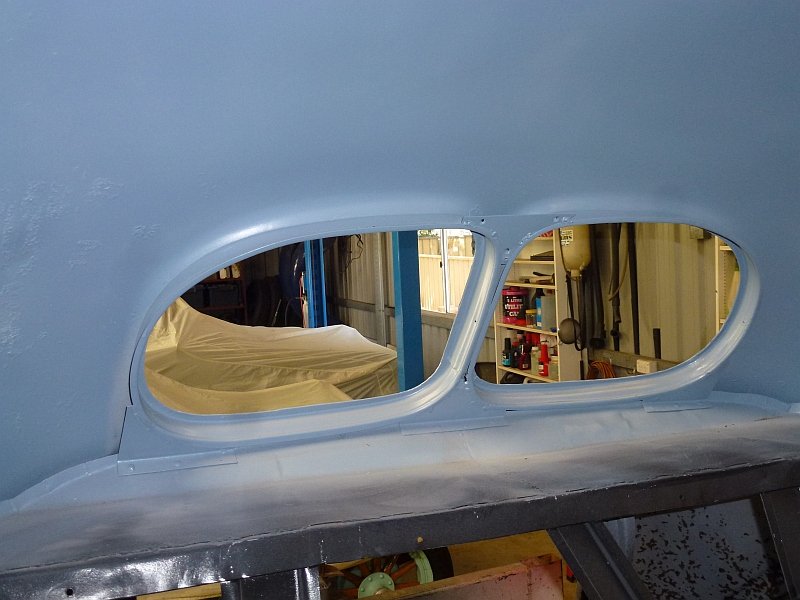
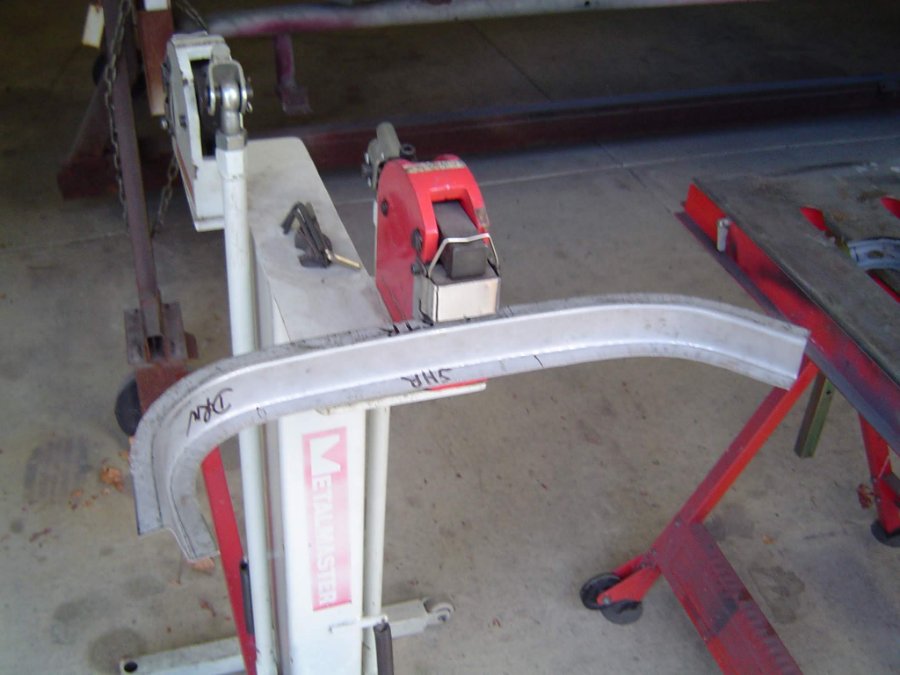
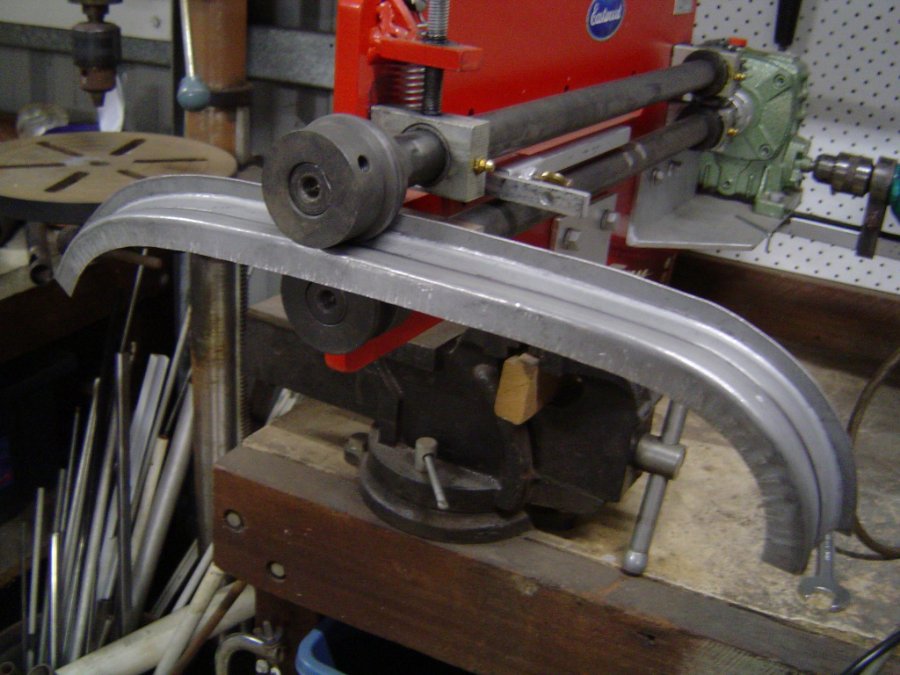
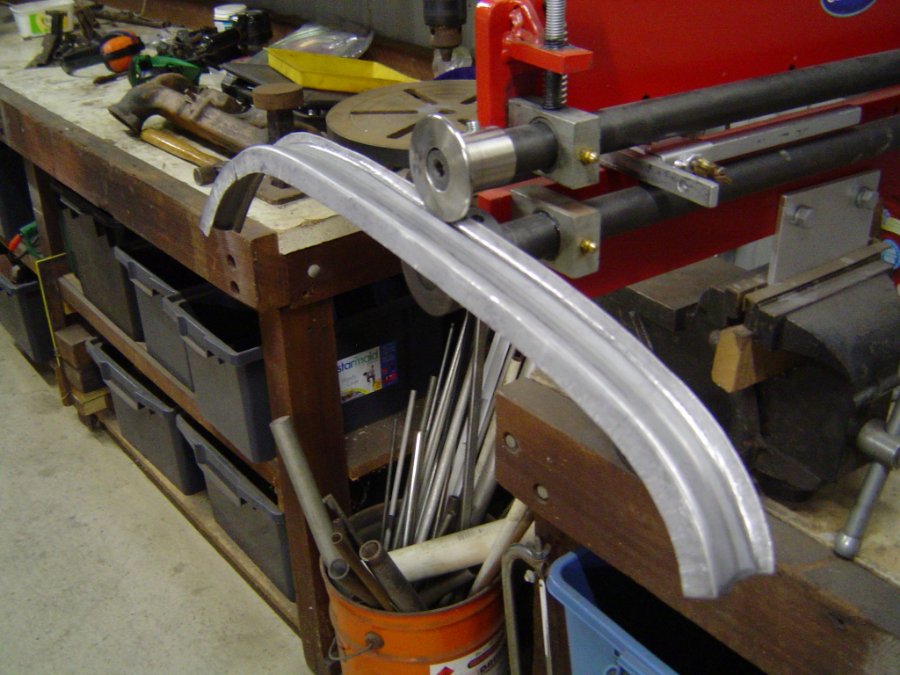
Sand blasting exposed holes in the rear window sills. I drilled out the spot welds and removed the damaged sections. I first made a couple of test sections using 0.6mm sheet which is easier to work with than the 1mm I usually use. That helped sort out the steps I needed to take. I cut two blanks from 1mm sheet and made initial folds using vice and wooden mallet, as I don't have a panbrake (have since found a local trailer repair business that is very helpful). Next passed them thru my bead roller to sharpen up the bends. From there to the shrinker - stretcher to match the window sill shape, then twice more thru the bead roller to create the proper profile. Finally mig welded in place, added gussets to support rear of parcel shelf, etch primed, and a sealer coat to prevent rust.
-

Brakes staying pressurized on 1953 Chrysler New Yorker
westaus29 replied to Darryl Keirstead's topic in P15-D24 Forum
I got a set of three usa made hoses for my 38 from Brake Hoses Unlimited, excellent price and service and included retainer clips and copper washers -
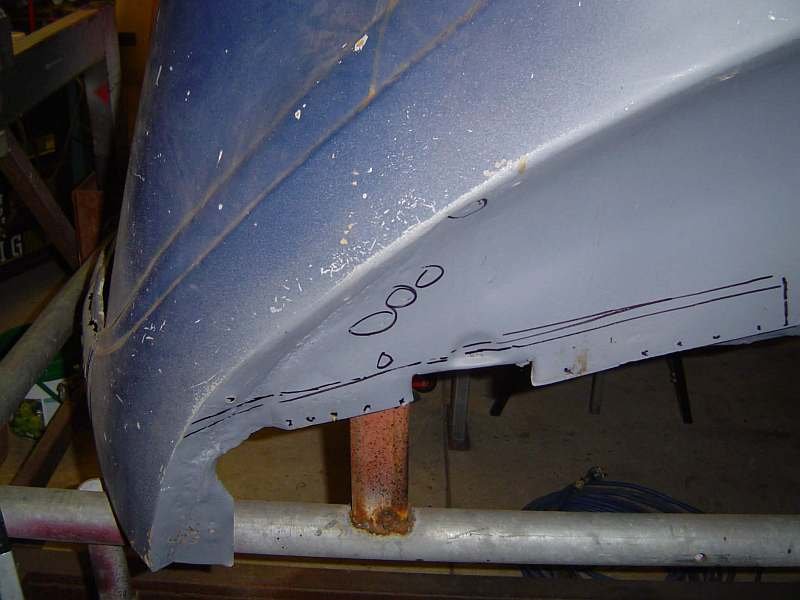
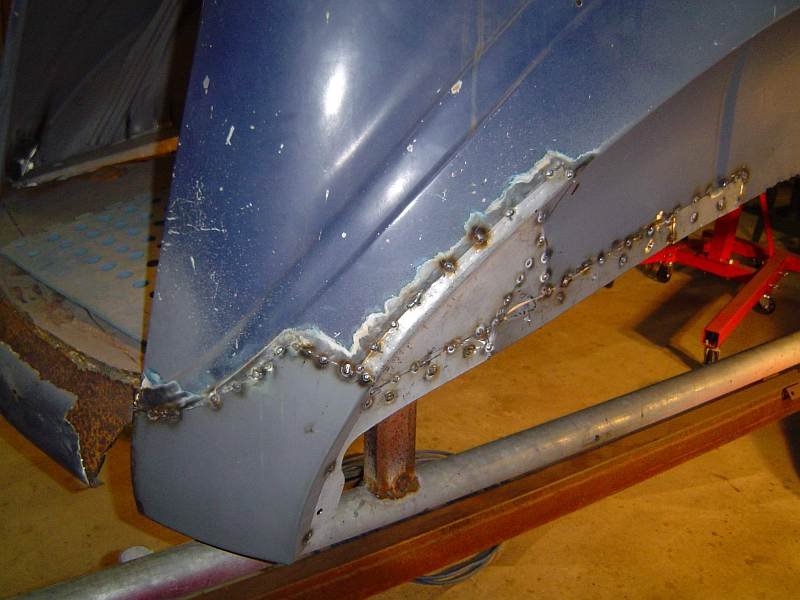
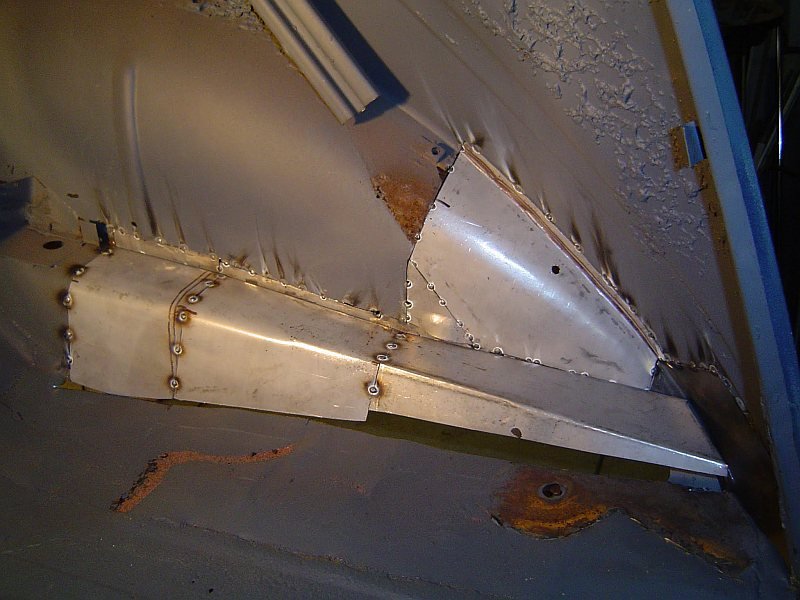
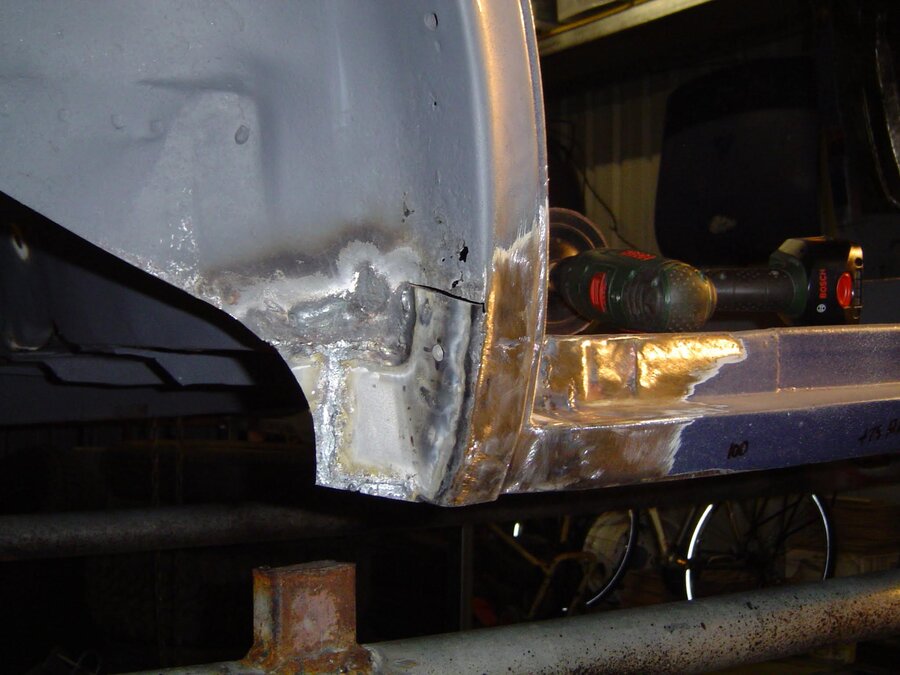
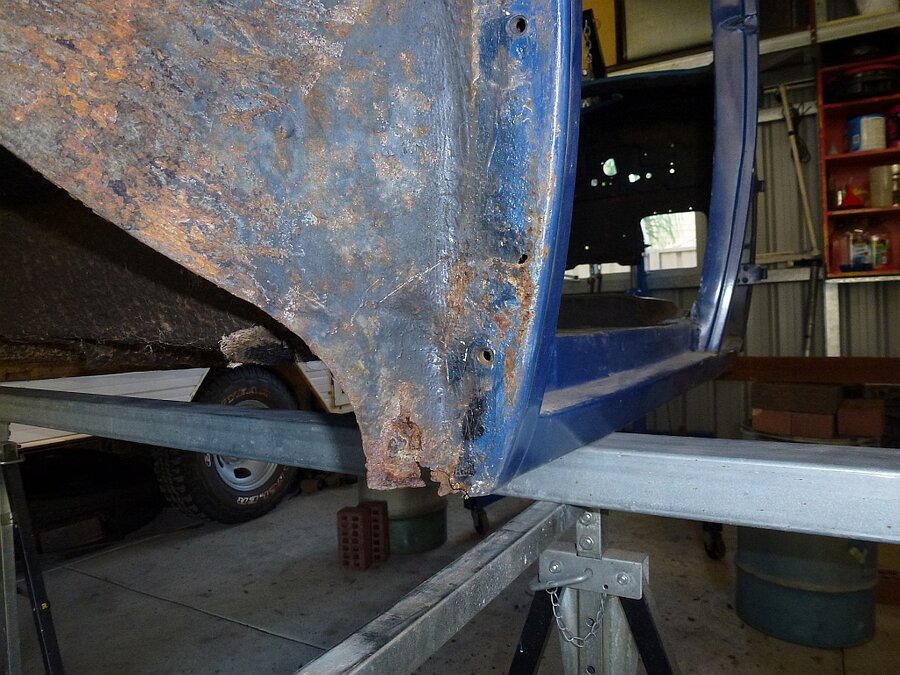
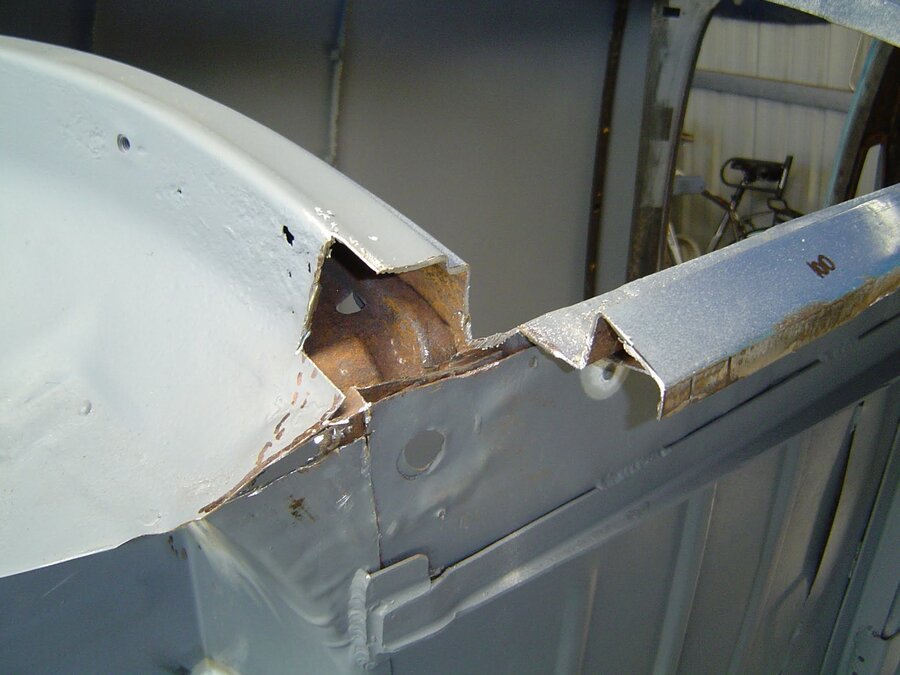
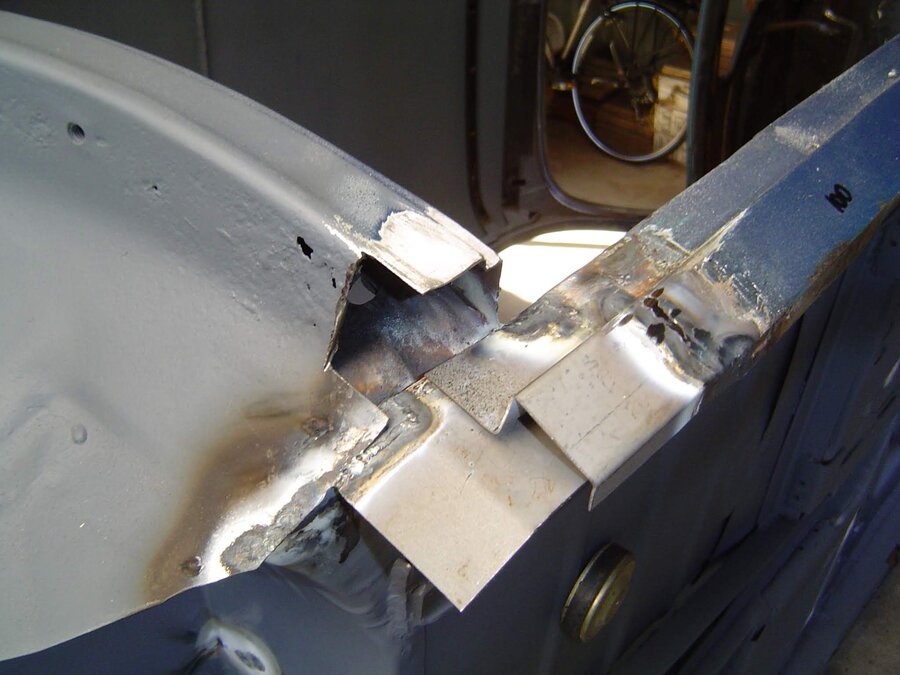
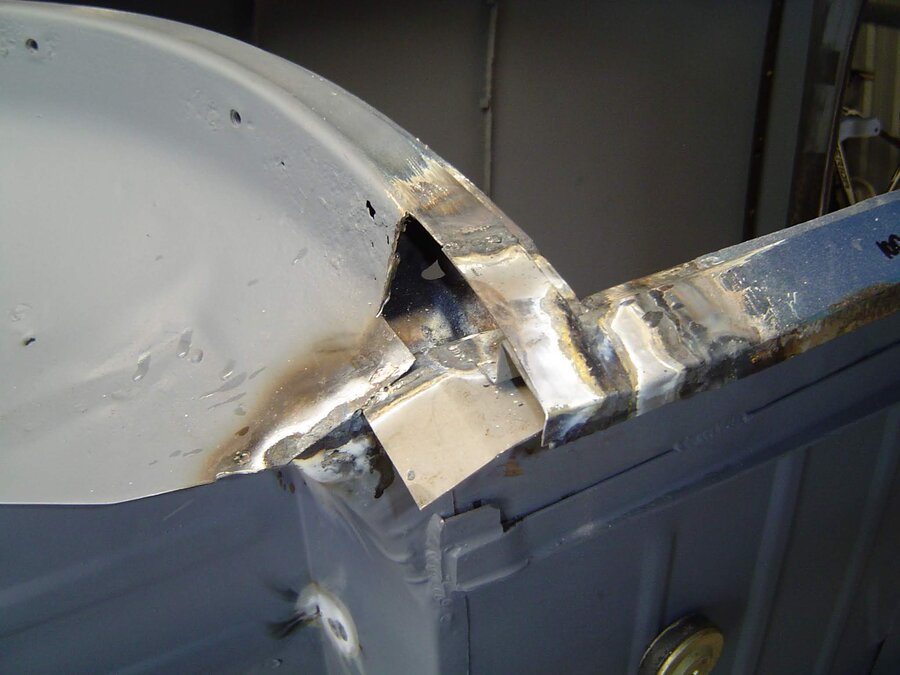
Continuing on with the 1938 rust repairs, the rear door dog legs appeared to have minor surface panel rust but when I cut into them I found that the rust extended into three layers and was much more than I thought. I bent up repair panels and oxy welded them in, layer by layer. The pics show RHS only, LHS was similar. The sill area had been heavily filled with lead presumably at the factory - the 30's equivalent of bog - this had to be completely removed from the repair area before welding


