

westaus29
-
Posts
136 -
Joined
-
Last visited
Content Type
Links Directory
Profiles
Articles
Forums
Downloads
Store
Gallery
Blogs
Events
Classifieds
Everything posted by westaus29
-
DonaldSmith posted a good summary above of what would interchange with the standard bodies, including front doors from coupes. Things that I have found different are heavier door hinges, front and rear suspension heavier, drive shaft in 2 parts, larger wheel rims and brakes, lower ratio diff with different axles, but standard will fit with change of bearing sizes. I ended up buying a cheap Harbor Freight bead roller and upgrading it for making repair panels, eg around rear windows. The Plymouth Doctor used to be a good source of repair panels if you were lucky enough to live in USA, but I believe it has closed due to death of owner. SRPM Street Rods makes repair panels, may help. There may be others. I ended up making a lot of my own due to being isolated in Western Australia. Had to learn oxy, then mig welding skills, thinking about tig for next project as mig welds are HARD.
-
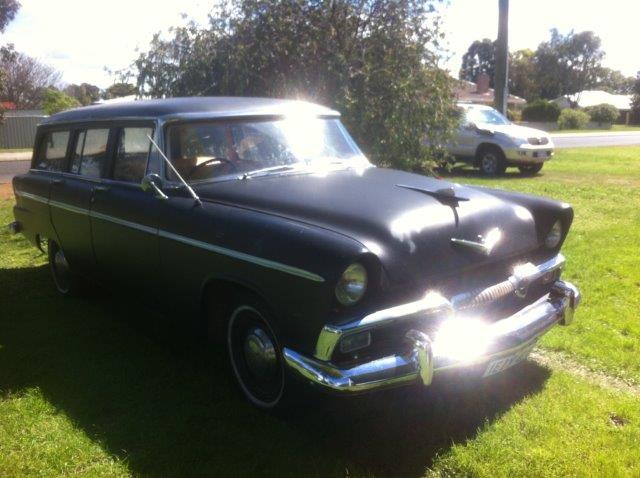
That is a great project, lots of panel repairs needed. I am still working on mine in 2024 tho the body is done, see my post
-
Great info on this thread! I never thought these parts might be available and was lucky enough to find enough s/h bits for my 38 from my parts collection. Now I know better. Thanks all.
-
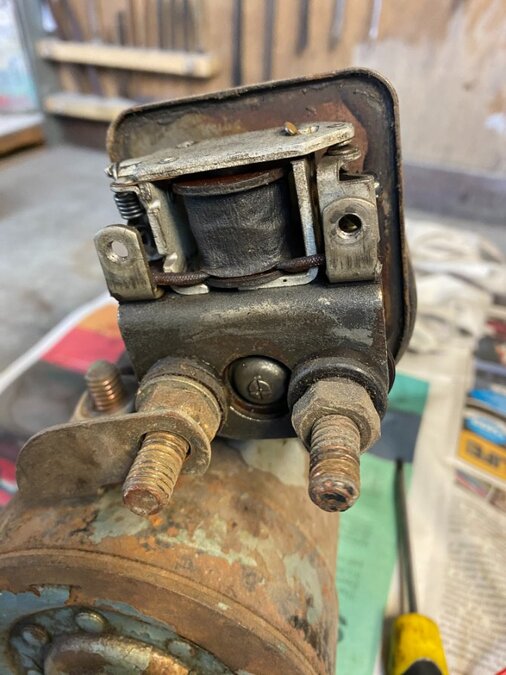
The large left terminal is connected to the starter coils and is insulated from the starter body by insulating washers. The other end of the starter coils is connected to earth inside the starter body, and this completes the starter circuit.
-
John, I didn't take a photo of the starter wiring before I removed it but I labelled the old wiring and kept it. I now have a new loom to install and thought I should double check things. I have a spare starter so took the solenoid front cover off to see how it works. The two top terminals are fully insulated and connect to a relay which switches power to the solenoid. I checked my old wiring, There is a long wire labelled starter which goes to switch on dash, and a short wire labelled earth. It doesn't matter which terminal goes to battery positive, the relay still works. I suggest the right terminal should go to battery, the left to earth. It doesn't matter whether the battery is set to positive or negative earth, it still works as intended. I also checked that the solenoid worked ok no matter whether positive or negative earth. I would just say again that your setup is standard for RHD cars because driver on right could not reach a manual switch on floor like LHD cars have, so we got an upgrade to button on dash, one up on our American friends! To test, first disconnect heavy cable to starter from battery. Earth left top terminal then touch power to top right. You should hear a soft click from the relay. Now connect the battery cable and try again. You should get a loud thump from the solenoid which has two functions. It operates a heavy duty switch for power to the starter, and at same time pulls starter pinion into mesh with ring gear. If it doesn't work as intended try touching battery cable direct to left hand lower terminal to see if starter runs, if yes you have a relay or solenoid problem. If not, a starter problem.
-
My Aussie 38 Plymouth is rhd and has the same starter and solenoid as yours. Mine worked fine in an earlier life but is currently going back together after major restoration. I haven't wired mine up yet but tested fine by connecting earth to left terminal. Connect right to battery and you should hear a loud click as solenoid activates. This then connects the heavy battery lead to the starter and it should turn over. I just checked the Aussie workshop manual elec diagram and lo it doesn't show the solenoid at all! Mine is positive to earth by the way.
-
I had bad scrubbing of a front tyre and it turned out to be too much play in the tie rod joints. Read the manual and tightened them up then backed off a whisker, solved the problem.
-
Another good facebook group to ask for parts is https://www.facebook.com/groups/POCNational, the Plymouth Owners Club. You don't have to be a club member, just join the group. For members there is access to a bulletin which has lots of parts ads. I also belong to an active Aussie site which has some international members, https://www.facebook.com/groups/1435811830045161 1930-1950 Dodge/Plymouth in Australia (Early Mopar Only)
-
I have a couple of probably irrelevant comments. Firstly, your Rhino Ramp problem. That was caused by the right ramp sliding forward as you drove onto them, while the left stayed put. The left wheel went up and over. I have had that almost happen to me, heard the screech of the sliding ramp and stopped in time. Second, the wheel nuts. Many years ago my daughter rang up saying "dad the front left wheel is making funny noises". I was busy so told her to bring it home so I could check. She drove 80 km home, arrived saying " over 100 km/h the noise stops". Checked front left wheel, only one nut remaining, holes in rim badly chewed. A lesson for us both!
-

Where does this transmission clip/washer go?
westaus29 replied to rrunnertexas's topic in P15-D24 Forum
Not sure, from pic in manual it looks like it goes next to input bearing c clip -
Worn valve guides in-car fix... R&R or sleeve?
westaus29 replied to bamfordsgarage's topic in P15-D24 Forum
I had to do the exhaust guides on my 29U Plymouth which is essentially same as the later sixes. The engine rebuilder sleeved the guides in brass but when it started to run rough and lose compression I took the head off and found the cast iron exhaust guides had split at the top, causing the valves to no longer seat. I pulled the guides using a high tensile bolt for traction, and an assortment of washers and pipe offcuts, similar to how you change a spring bush. Three came out easily but the one next to the firewall was a struggle as it was hard to get access. I used second hand guides as I live in Western Australia but new ones are readily available in USA. I didn't take an action photo unfortunately. -
I have had a 29 Plymouth with babbit bearings since 1998. I initially refreshed the engine with cleanout, hone and re-ring, valve grind. Checked the bearing clearances with plastigauge and re-installed them using shims where needed, max clearance was 2 thou which I figured was ok. Ran fine, good oil pressure and did about 10,000m ok until oil pump shaft broke in 2012 and send bits thru side of block, bent one rod. Found another block, re-used old crank and mains and three of rods. Picked another rod to replace the bent one, matched weight as well as I could, new pistons and rings from Egge, checked and adjusted bearing clearances, that is back in and still running ok tho oil pressure is a bit low, probably due to camshaft bearings (does not have any). So the advice is babbit bearings are very forgiving and are best left alone unless you have real issues in which case you have to find an expert rebuilder (I do have a mate, a retired plumber who re-babitted his own 1927 Chrysler 4 and hand scraped them to fit but not for the faint hearted). But if you plan to push the Desoto hard and unleash that 6 cyl you may need to rethink. I recently sent a couple of axle shafts to a mate who managed to snap his Desoto axle, luckily the same part on Plymouth and I had 8 spares, not likely I will ever need them.
-
Hi Keith, just wondering if you have played with advancing timing a little to compensate for today's higher octane fuel? Retarded timing generates more waste heat. My 38 7 passenger never had a temperature issue despite having put a smaller standard 38 radiator in it. And we have a long haul up into the Darling Range from Pinjarra to Dwellingup that tested its ability to hold speed in top gear. But it managed ok. Of course our hills are not like yours, only 300m climb!
-
this works http://www.dpmotorparts.com/index.cfm
-
They are not removable. I am on my 3rd Mopar and the process I follow is to clean up backing plate, pressure clean behind cam, paint, then apply a small amount of penetrating oil to the cam on both sides of the backing plate and a spot of lube under the brake clip, then work the cam back and forth until it frees up a bit. it should still be hard to turn as you don't want it to shift in use.
-
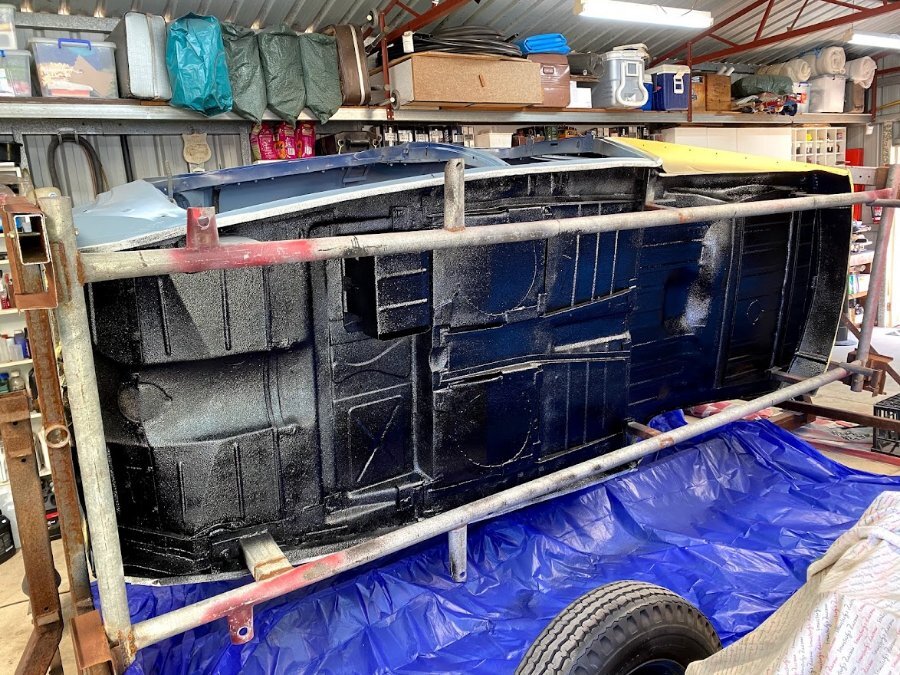
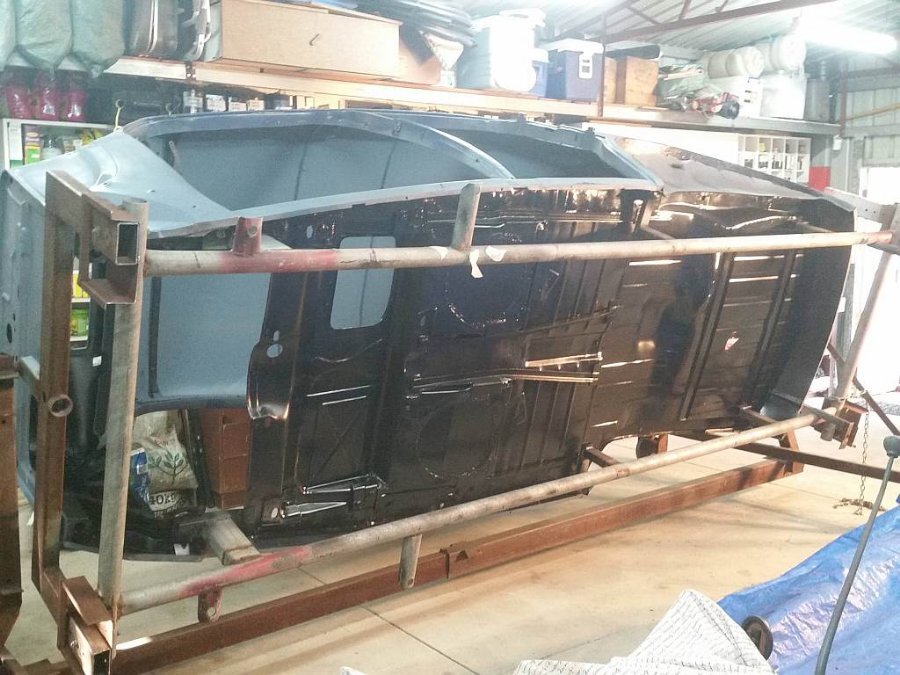
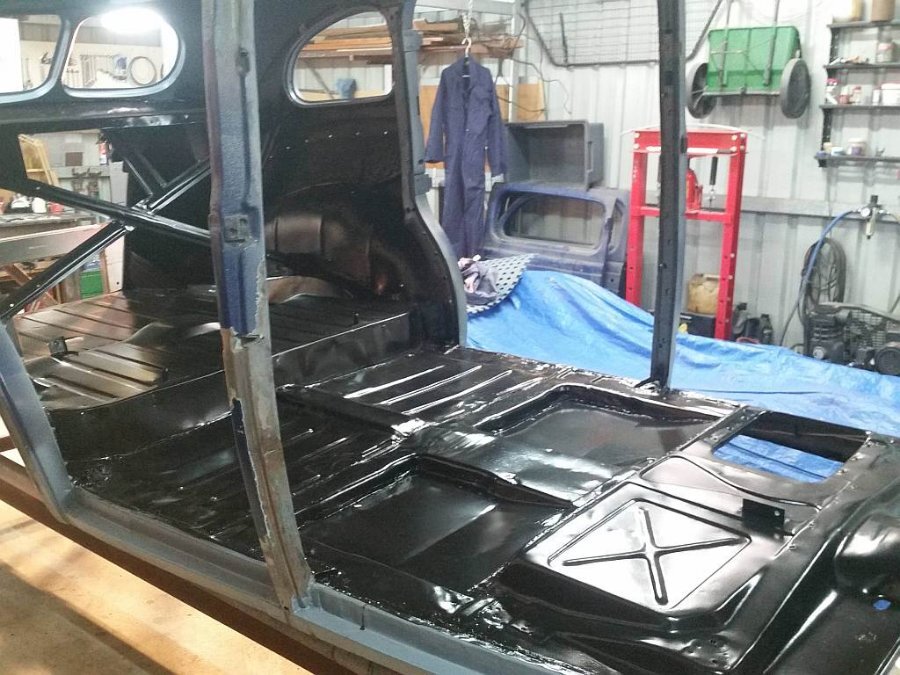
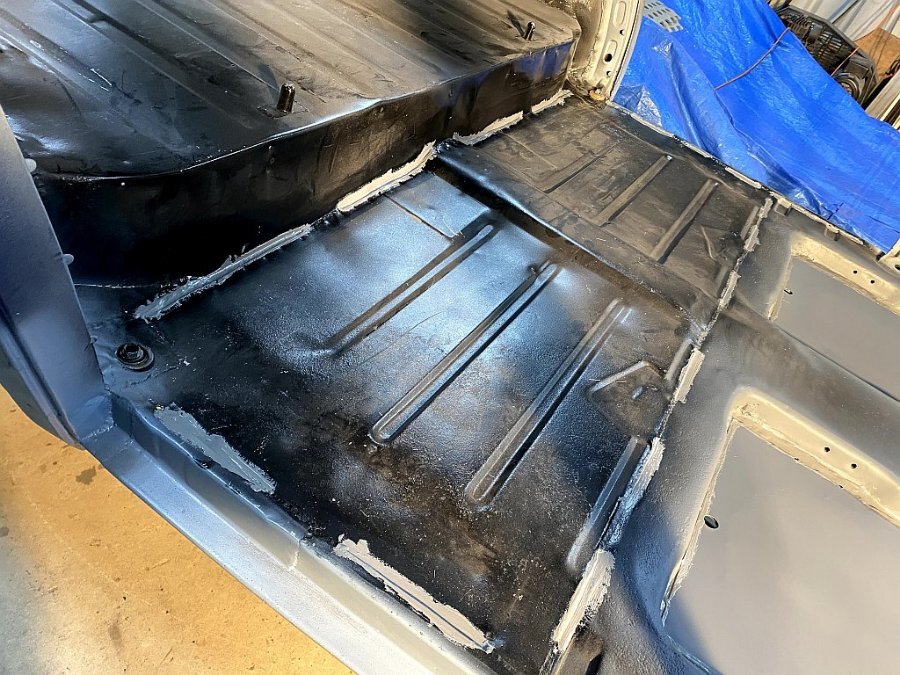
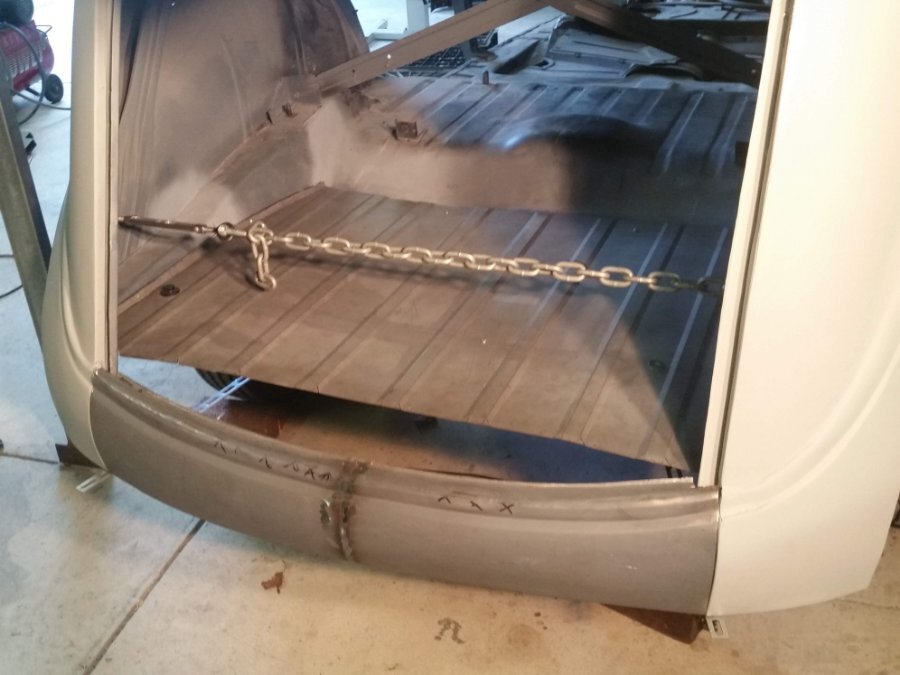
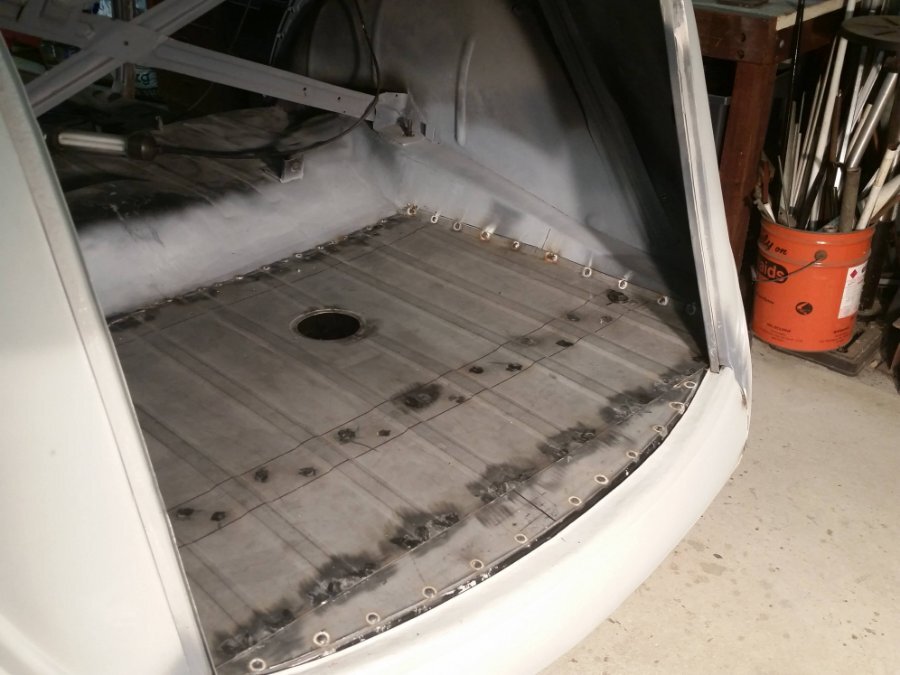
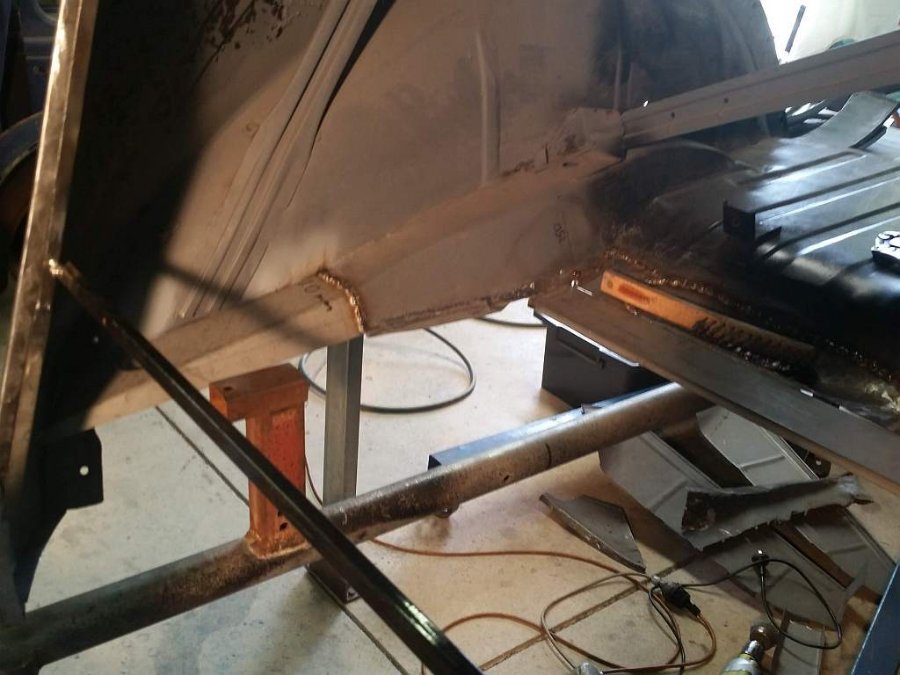
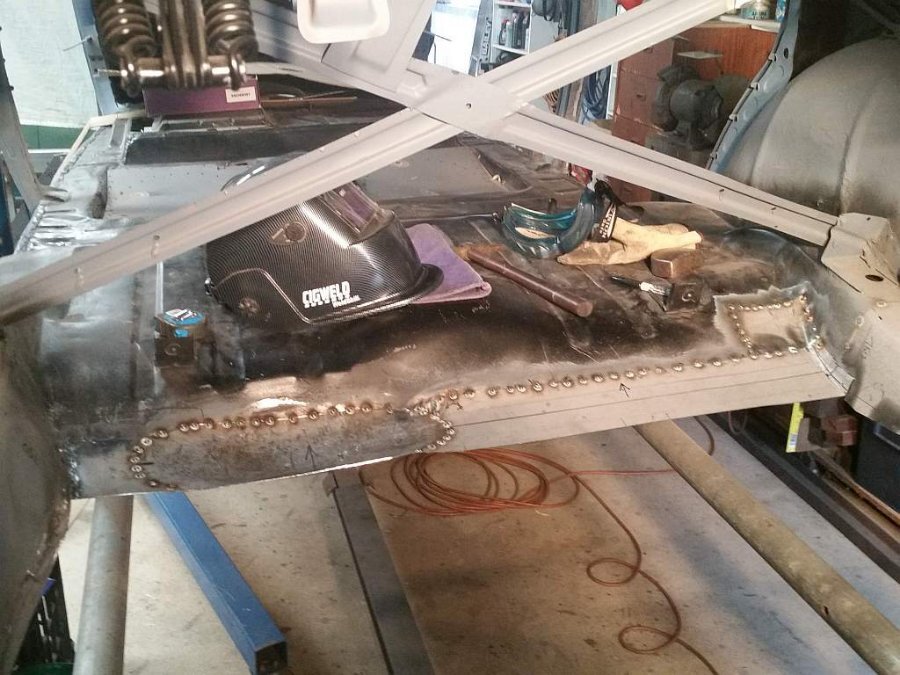
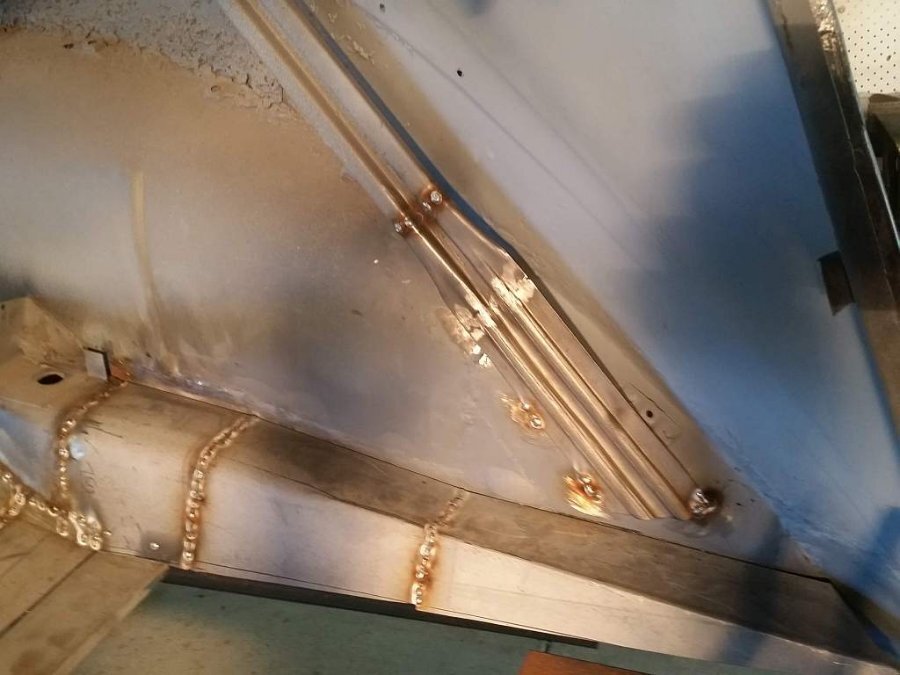
With welding completed inside the boot, the body went back on the rotisserie to finish welding underneath, grinding off and preparing for undercoat. After etch priming, exposed joints were sealed. Then the floor was painted black, followed by a coat of underbody sealant to the underside

-
Hi James, you have set me thinking about diffs again. I have a 55 Plymouth which needs a ratio change and investigation so far reveals that some earlier Plymouths shared some of the same parts. I need to go back and confirm what I did to change the 38, and if any of the parts are common.
-
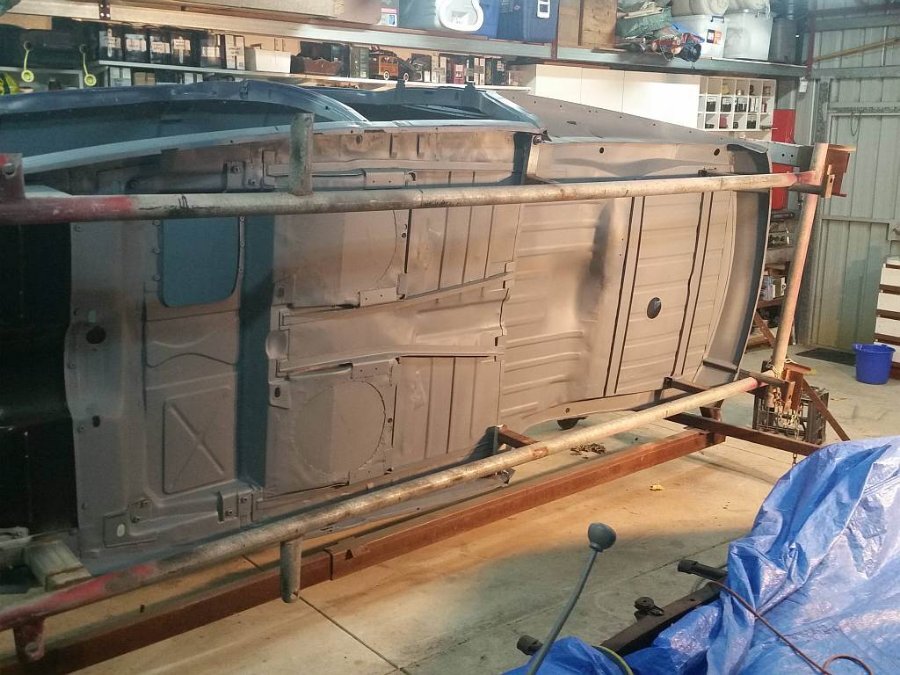
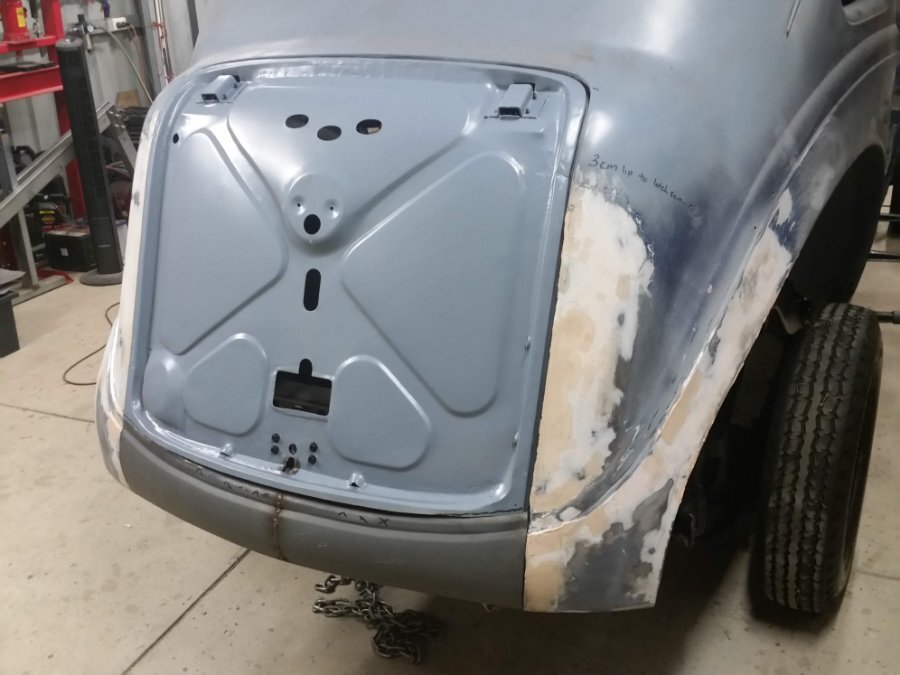
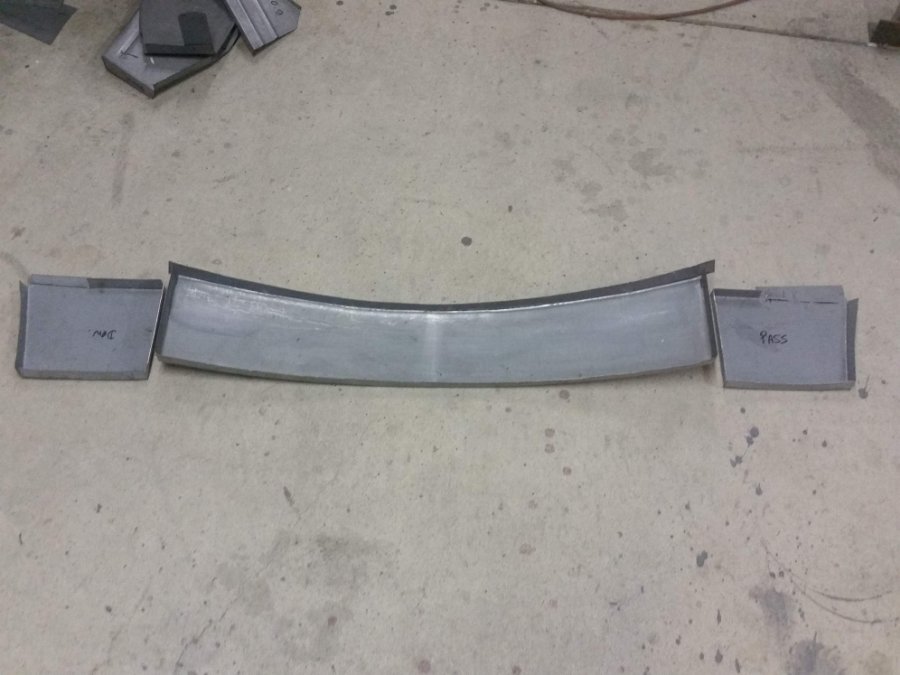
Thanks Andy, mine was all there but badly rusted, dented and distorted by previous patching attempts in my earlier efforts in 1980's. It is a great help having the rotisserie courtesy of a mate who built it for his 55 Buick restoration, and the mig courtesy of another mate who I have pooled resources with. The side panels were made using an Eastman bead roller which I modified extensively based on a youtube post.
-
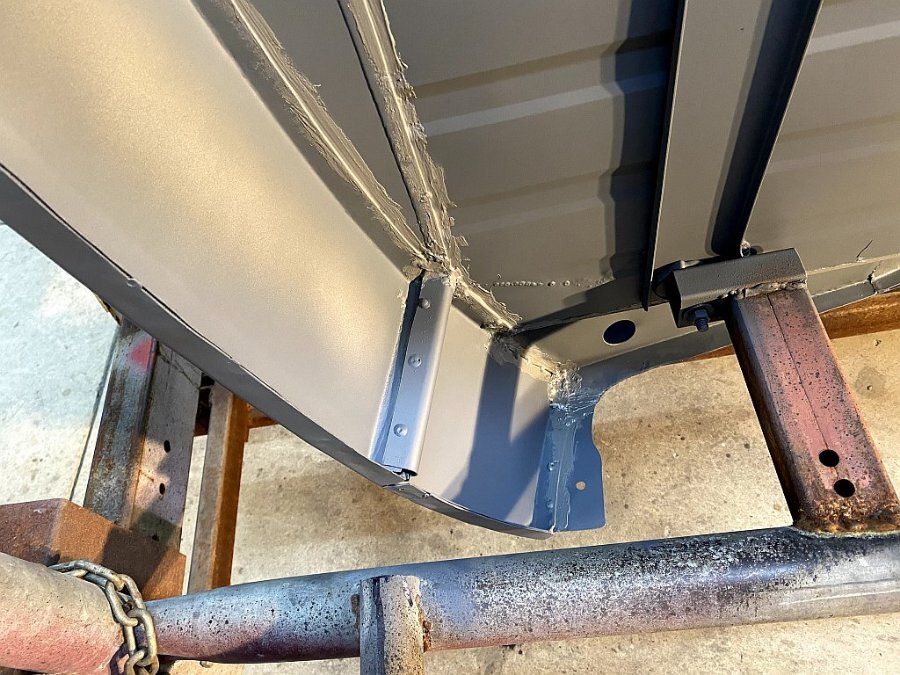
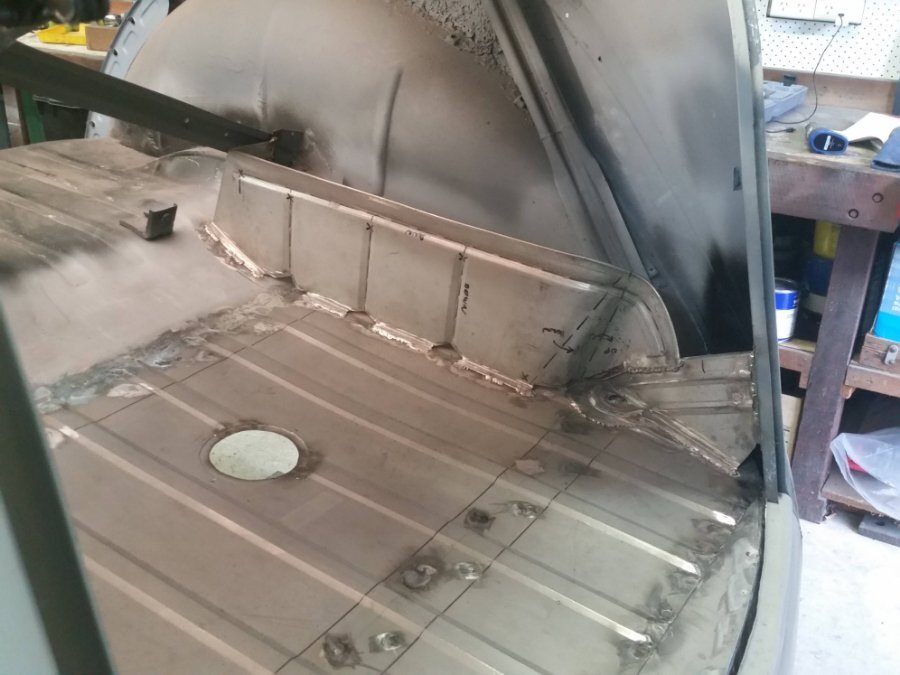
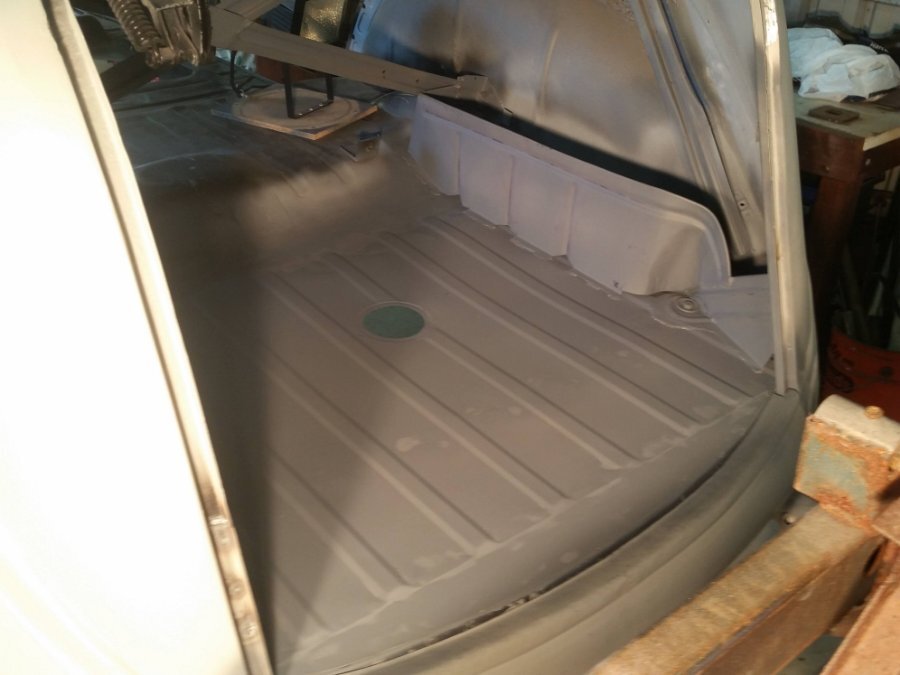
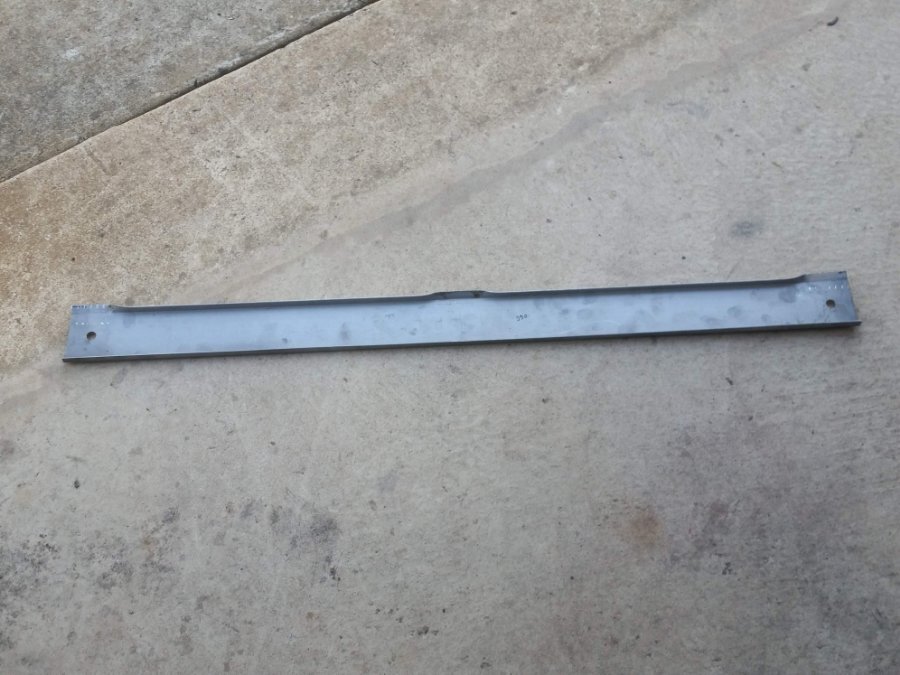
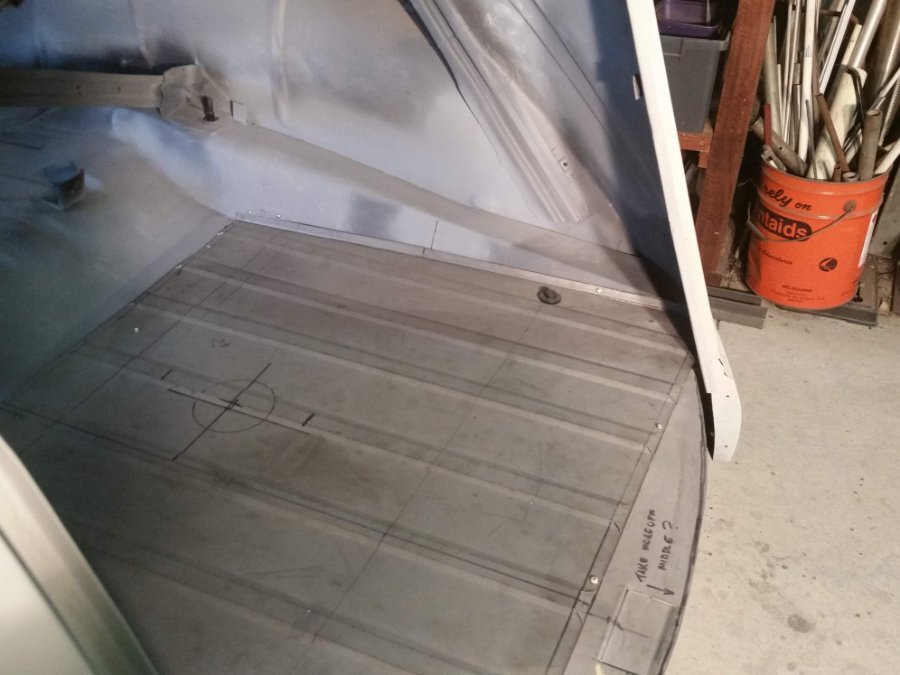
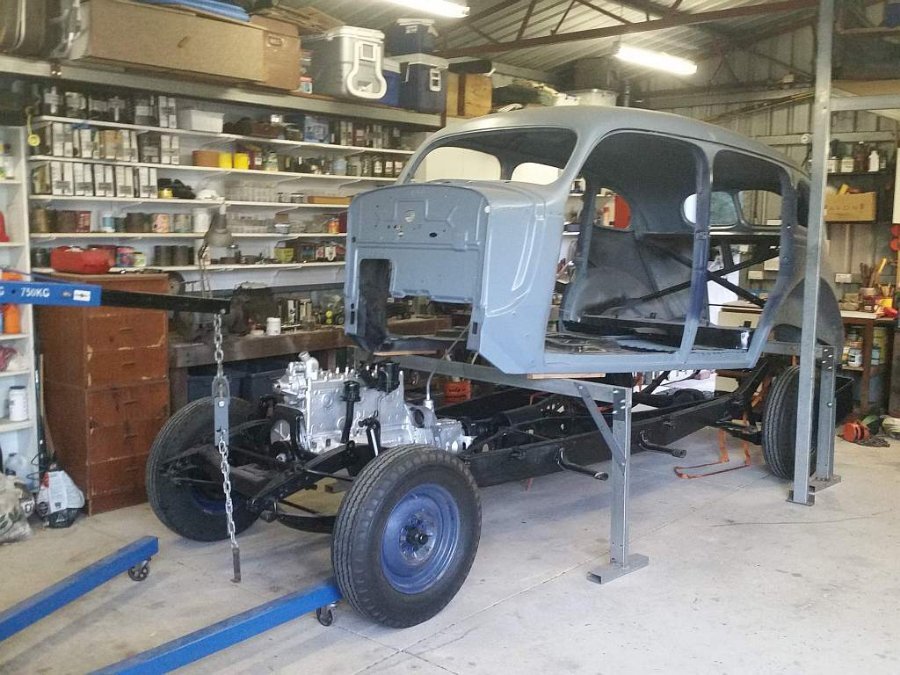
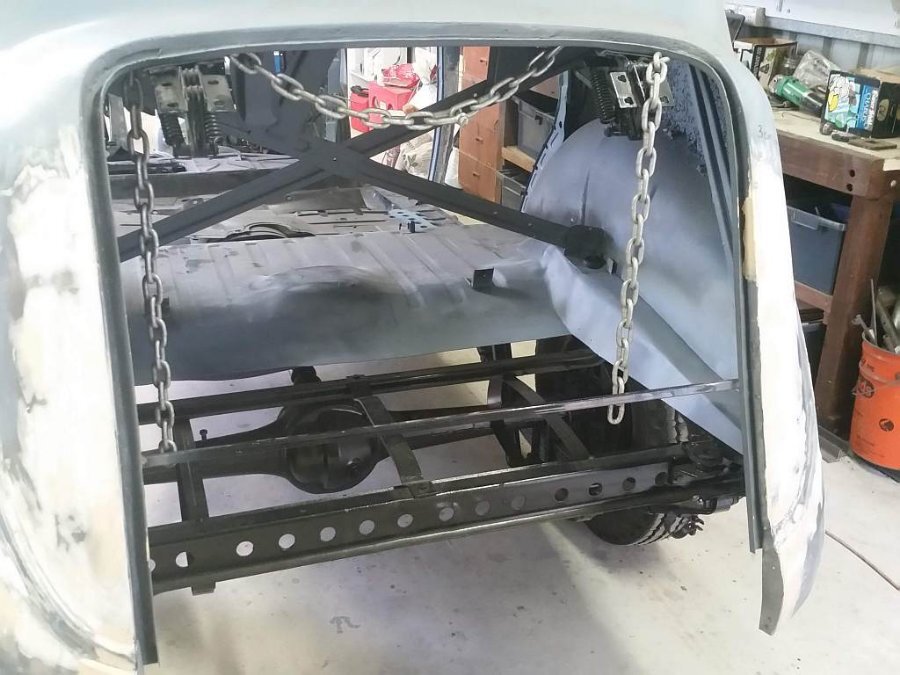
Once I had the body back on the chassis, I had two 2mm floor supports fabricated at the local trailer shop, one to replace the original floor to chassis brace and the other to provide extra support under the floor near the spare tyre, as the floor panel was 0.9mm which is a bit light. I trial fitted the boot lid and the floor Then braced the rear body, welded the beaver panel and its inside skin in place, then welded the floor in Next I fabricated and added the floor side braces and the right side tool dividing panel
-
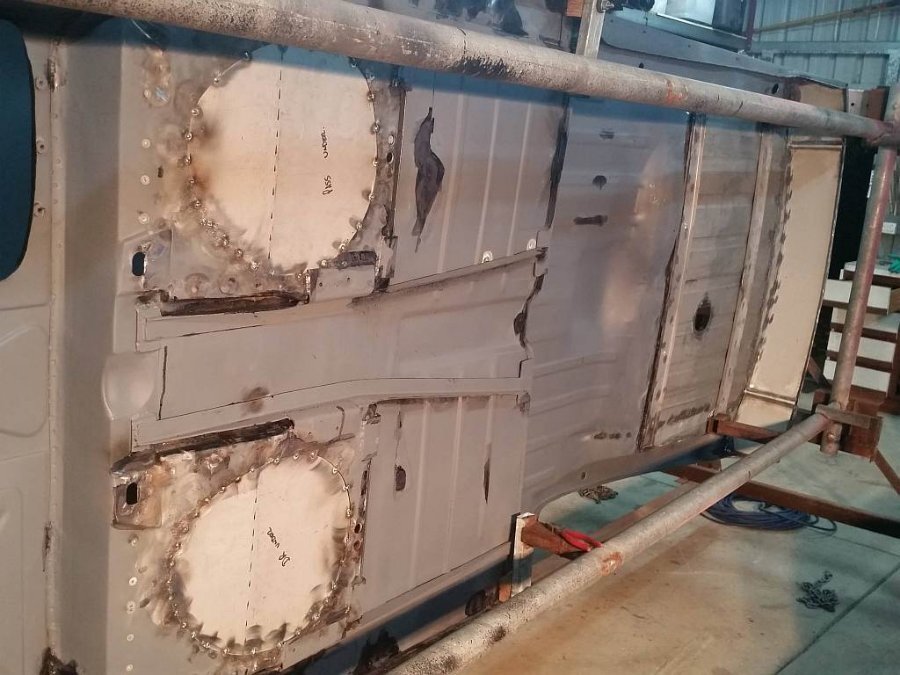
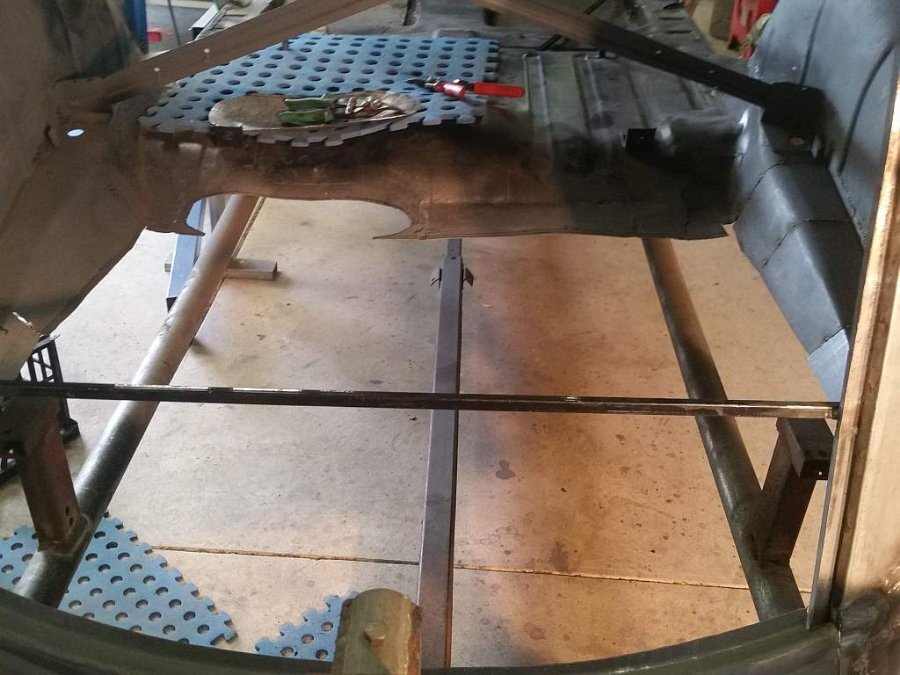
Before taking the body off the rotisserie repairs were needed to the boot floor sides, which needed access from below so I cut the floor out. The previous right side repairs did not meet the new floor so were rebuilt. The rusted section of the seat brace was also replaced The rusted edge next to the rear seat was rebuilt The left side was repaired Undercoated then lifted the body onto the chassis

-
Impact gun is the cleanest solution if you can beg/borrow one. It does not rely on the crank being wedged and works AMAZINGLY well. Otherwise, wedge the flywheel ring gear teeth with some soft steel and get a solid breaker bar, not one with a uni joint in it, apply force and start tapping. I use an old cheapie torque wrench that I have welded up solid, and slide a pipe over the handle for extra leverage.
-
1938 Chrysler Royal overdrive has stopped engaging
westaus29 replied to westaus29's topic in P15-D24 Forum
This one is a RHD 7 passenger assembled in Australia and it may have had OD added later as I recall the restorer (who is no longer with us) had one on the shelf that I admired. I think it is manually activated, will have to check. -
A friend has a 38 Chrysler royal. Been started regularly but not driven lately due to bad weather. Took her yesterday for a spin and noticed she didn't drop into overdrive when cruising on the highway. This is a problem and how to fix. Any ideas appreciated
-
Welcome to the forum! One of my Plymouths is a 29 which is very similar to yours except it has a four cylinder engine and 20 inch wheels. Your wheels look in good shape! My wooden wheels were pretty tired but came up A1 with some care. I stripped off remaining paint then applied many coats of a 50:50 mix of linseed oil and mineral turpentine which absorbed in to restore the timber. Allowed it to dry a few weeks then applied marine varnish. Most of these cars had painted spokes but to show the wood is a very popular feature that gets wows from viewers. If you have loose spokes you can carefully disassemble and insert thin sheet metal washers between end of spokes and rim. I coated them with epoxy for an extra strong result and they are still good over 20 years later. You should get lots of specialist advice from the Desoto club.
-
Ask if they will send USPS First Class International instead

