Veemoney
-
Posts
523 -
Joined
-
Last visited
-
Days Won
2
Content Type
Links Directory
Profiles
Articles
Forums
Downloads
Store
Gallery
Blogs
Events
Everything posted by Veemoney
-
The wood is in beautiful condition. Nice find
-
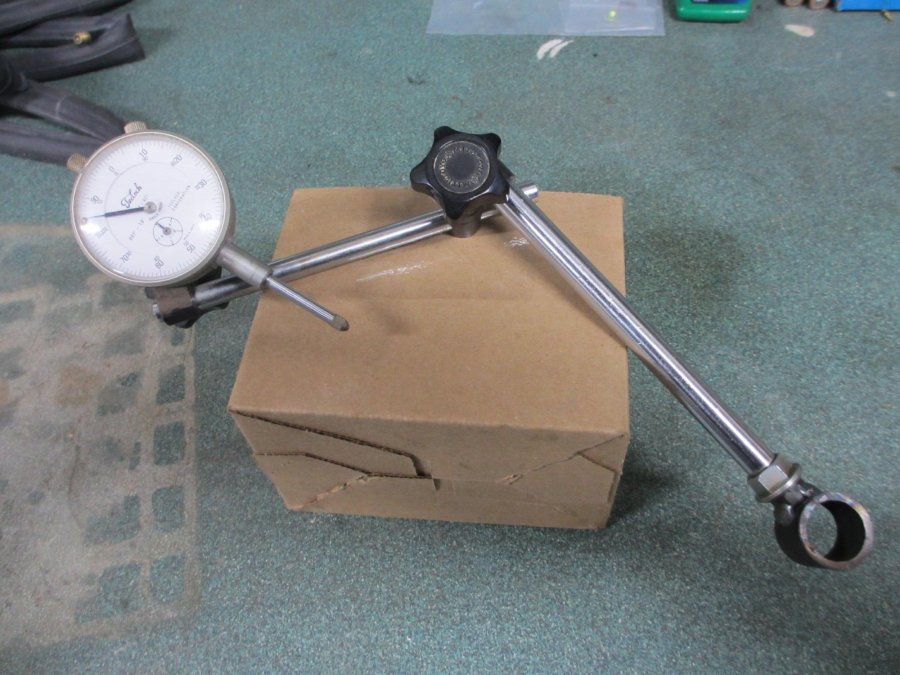
Here is a work-around I used for setting my brakes without the Amoco tool. You will need a good 12" scale, O.D. spring caliper, 12" Dial caliper or Vernier A magnetic indicator base set-up with ideally a 1" travel indicator and to fabricate a collar with a nut as shown below. I just welded a nut to a collar made from pipe so I could screw the Magnetic base components to it. Below is how I do my brakes and depending on if you have a truck or car you will have some variances so review your manual but here are my basics and your ability to measure accurately will determine your success with this method. A manual gives the detail you need and some info for presets on cam arrows but that type of detail needs to come from the manual. Here are the basics and concept with this tool Measure the drum ID. A good machinist should be able to get within .015 with a scale but the preferred method as we are dealing in thousands of an inch here so to be right on the money use a Vernier or dial caliper, I.D. mic etc. Install the indicator setup on the axle and use washers as need and the axle nut to secure indicator so it will not rotate. You want to rotate the axle only for these adjustments and measuring. The collar is not centered on the axle perfectly so it needs to not move once tightened down and all indicator readings are done by rotating the axle to rotate the collar. The idea is to set the brake shoes concentric and to .012" less than the drum ID. That is .006" less at each shoe for .012" total (for my application). Use the spring calipers to measure diameter of the pads so you don't have to compensate for the axle. Use the indicator to get the shoes concentric. When going from shoe to shoe I use my finger to prevent the indicator from springing. This may take a couple adjustments back and forth as moving one adjustment will have some effect on the other. Once you have the shoes concentric and -.012 less than the ID of the drum all the way around I move the toe of each shoe in toward the axle another .006" using the toe cam (minor adjuster/s) Button things up if you like a little drag on the wheel as I do adjust the toe cam (minor adjuster/s) If you have someone that can do some machining you can make a pin to go in the indicator collar and a pointer (extending perpendicular to the shaft) for the other end of the collar shaft. It makes it easy to rough things in and set the radius (half the drum I.D. minus .006"). Plenty of variations on this approach to make it simpler. Hope this helps some folks as those brake tools are not readily available.
-
From what I have always understood the piston rides on the rings at the top and that is why the piston is smaller at the top by the piston grooves. It does allow for expansion but the rings maintain the compression barrier. The lower portion of the piston barrel 90 degrees out from the piston pin towards the bottom is where you should measure diameter for bore size as some pistons are barrel cut and may give a smaller measurement at the bottom of the skirt when measuring inline with the pin. Hope this helps and makes sense.
-
Below is roughly how I do it using an adjustable painter's pole as a "Go/No Go" gauge technic. No scale required Jack up and loosen the tie rods if you don't think you will have room with it on the ground during measuring Make sure ground is level and you have the same amount of air in each tire. Roll vehicle forward to load the frontend with forward movement(all frontends have some slop and you want to remove it before measuring) Position 2-bys as shown below. I recommend using 2 longer 2-bys that span the measuring area and they actually stay in place better but for the purpose of the sketch I used 4 short ones. This gets you measuring at the same elevation at the front and back and allow you to complete the measurements by yourself. Snug up the adjustment on the painter's pole so it is firm but will allow adjustment. Position 1(front) - Set the adjustable pole on top of the 2-bys with the side away from you in the center of the tire or the highpoint of the convex surface. Now set the adjustable pole length by moving the pole back and forth (side away from you is pivot point, side closest to you only gets moved) to find the highpoint on the tire closest to you and tighten the pole. Double check that the pole in position 1 is just barely toughing at the high spot. Move to position 2 (back) - With the pole set from position 1 check moving back and forth to find the high spot. If you were heavy handed at position 1 it should feel the same or touch slightly less than that at position 2 You are looking for zero to 1/16th gap max at position 2. (Please double check the spec for your truck) If you need to adjust I leave the pole in position and adjust half the amount required. Example- if I have 1/4" gap in the back I would adjust to take the gap showing to 1/8th for zero toe Adjust as required and remember after the adjustment roll vehicle to load the frontend correctly again before measuring and confirming correct toe adjustment and then tighten up the tie rods.

-
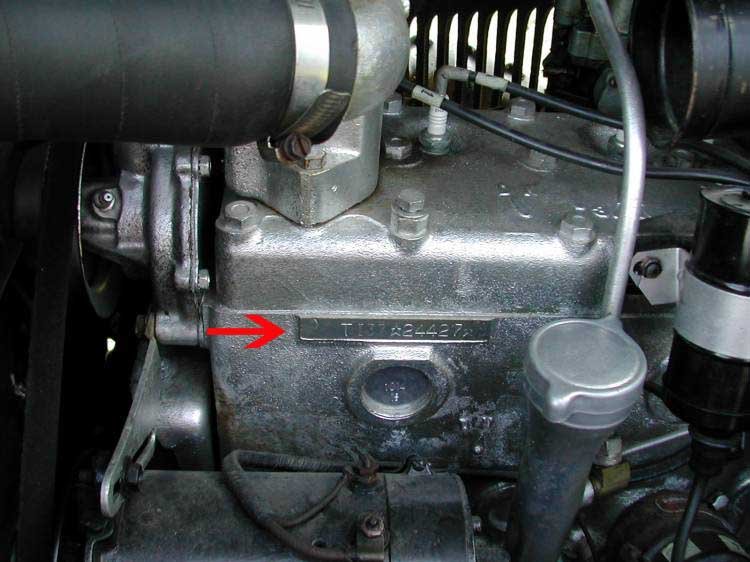
What I can tell you: My 34 Plymouth PD is titled using the Serial Number for the VIN on the title. That Serial Number Tag is on the passenger side door opening upright closest to the rear tire. My 41 Bus. coupe is titled using the Serial Number for the VIN on the title. That Serial Number Tag is located on the passenger side door opening upright closest to the front tire. You have already located your tag for the Serial Number so just check to se if it matches the number in the VIN on your paperwork. My 47 WC pick-up was titled using the Engine Number for the VIN as located on the engine pictured below. It will be either the Serial Number or the Engine Number that is shown on your paperwork when you purchased the car. One or the other typically and when purchasing any registered vehicle you should check the paperwork you are being provided with the numbers on the vehicle to make sure they match upfront as good practice. If neither of these 2 numbers match your paperwork It is possible your engine was changed out at some point and next I would look at the frame as Casper50 provided the picture with location. If you cannot find a matching number in the 3 locations mentioned I would say a prayer before going to see the DMV, light a candle, rub a rabbits foot and anything else that brings you luck since P. Adams has identified the PA DMV as tough to deal with. Good Luck
-
Not sure if PA provides titles or just registration paperwork. I would look at the number currently identified on the paperwork you received with the vehicle and provide that number # etching.
-
You don't realize how much a limb weighs till one falls asleep or goes AWOL. If you put in the work the body will make the magic happen.?
-
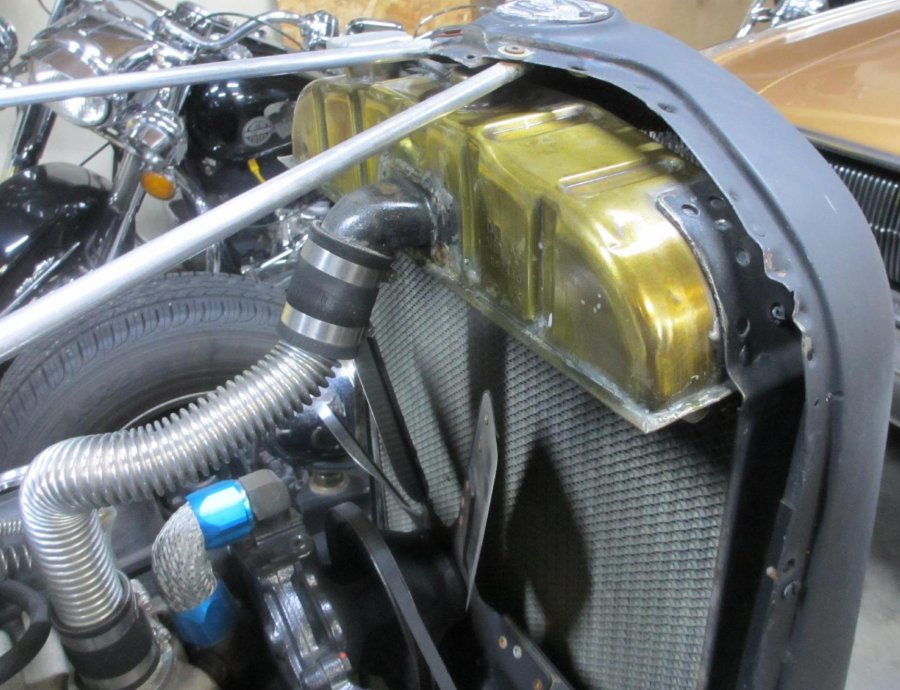
Woodrow, Those radiators look great polished up. I did the same to mine about 14 years ago, a year or so later I used some high heat engine clear over the brass section so I would not have to keep polishing it. It has just recently started to yellow but still not bad.

-
Tie-wrap crimp, interesting but no duct tape WTF.
-
Sorry no info on adapters but sure would like to see a picture of the interior with the current set-up
-
Stay strong and gods speed to better healthier days. I always enjoy reading your posts for the information and humor.
-
'47' rear bench, storage drawer done
Veemoney replied to kendall's topic in Mopar Flathead Truck Forum
I saw your truck in another thread before you added the rear bench. It is wild and extreme with great workmanship on both the truck and the bike. Seems we have similar taste in vehicles also. I have the 47WC in my avatar and purchased the only new bike I ever owned a 1998 Heritage Springer on August 21, 1997. The next 4 months I spent on Hutchinson Island, FL and my spokes along with some chrome parts started peeling like bananas. Not sure if you have had any problems with salt and corrosion living in Florida? -
For "A" Bodies Only
-
I used the link over to the HAMB and your car looks amazing. Super interior and detail all over. The front DeSoto bumper really accentuates the front of the Plymouth. I am looking for the trim that runs down the side of the hood and body line if you have any leads on where to find some.
-
Flatie, Glad to know you made it there and sounds like it was all positive , I like Merle still have it on my list. Merle, Thanks for posting the pictures, good stuff. Barber looks like an awesome place as well. I am located up by the WIS/IL border so no short trip. Below is one of mine, a basketcase I purchased from out by Davenport at least 20 years ago. Need to drive it more often.

-
And as promised the link for those interested with more pictures of the traditional "American Made Motorcycle" as it would have come from the factory. https://www.bonhams.com/auctions/23804/lot/223/ If you read through the article they mention Mr. Jim Gallagher and his bike #22. Jim was a friend and fellow collector who pass just a few years back short of Centurion status who loved restoring and driving the old 30s cars and motorcycles. "Wheels Through Time Museum" purchased most of his bikes.
-
Going with the original title here I will add a cool bike that is not mine but one I always considered one of the coolest. I removed the name from the tank in the picture but if you would like to read about it I will attached a link to provide the info.

-
Not a drop of oil under any of them? ?
-
Attached a Word file with the info you need for your truck. I pulled this from another site for my truck and did not author the write-up but it seems to provide enough information to build the wood components for 39-47 Mopar trucks. Good Luck. _BedWoodDimensions (1).rtf
-
Steering Box for 46 Plymouth Special Deluxe
Veemoney replied to shedhouselife's topic in P15-D24 Forum
Sorry all, I agree with rhelm 1953, Looks like straight shaft with no flexible coupler so it has to be a steering box issue if the pitman does not turn when the steering wheel does. The only exception would be at the steering wheel itself if it has a key or spline that is loose or worn. -
Steering Box for 46 Plymouth Special Deluxe
Veemoney replied to shedhouselife's topic in P15-D24 Forum
There should also be a knuckle or rubber coupler between the steering column and the steering box that could fail and create a problem as you described. It is worth a check -
My experience with an old 67 charger with the A100 axle set-up was plenty of bump steer and no power steering so a bear to parallel park. Those front axles sure look cool though.
-
I had issues in the past similar to yours (truck jerking and having to reduce speed to get it to stop jerking on my 47 WC. It was fine idling and taking off from the light but would start the jerking in 4th. I am thinking fuel starved after warmed up. I say this because you have not mentioned any backfiring at all. I would expect some misfire if the ignition was at fault while you were running. The fuel pumps pump at low pressure and it doesn't take much to restrict them. Below are my thoughts in the order I would check them for the fuel system If you have a fuel filter inline confirm you can easily blow through it manually. I could see gas in mine while running in the driveway but when I removed it and blew into it I could feel it was restricted and replacing it resolved my issues. I see you rebuilt your fuel pump but the issue could still be there. My truck is running a 6volt fuel pump now but 12v are also pretty inexpensive. you can bypass your pump and see if that resolves your issue. Did you check the float adjustment in either of the carbs or the needle valves. You did not mention if these were rebuilt or checked so if not confirm this. Good luck
-
The heat transfer benefits of sodium valves used on our flatheads is IMO the best way to go for our low rev motors used on the street if that is the way they are set-up. Just some FYI below. Some Chrysler hemi motors came with sodium exhaust valves. The sodium valves have a larger diameter stem and require a larger diameter valve guide and weigh more. For those power hungry builds on the hemi motors reducing the weight of the valve helps reduce valve float at high rpms. Reducing the diameters of the components projecting into the ports increases head flow.
-
Can't go wrong with the Optima. Now just enjoy that new ride.